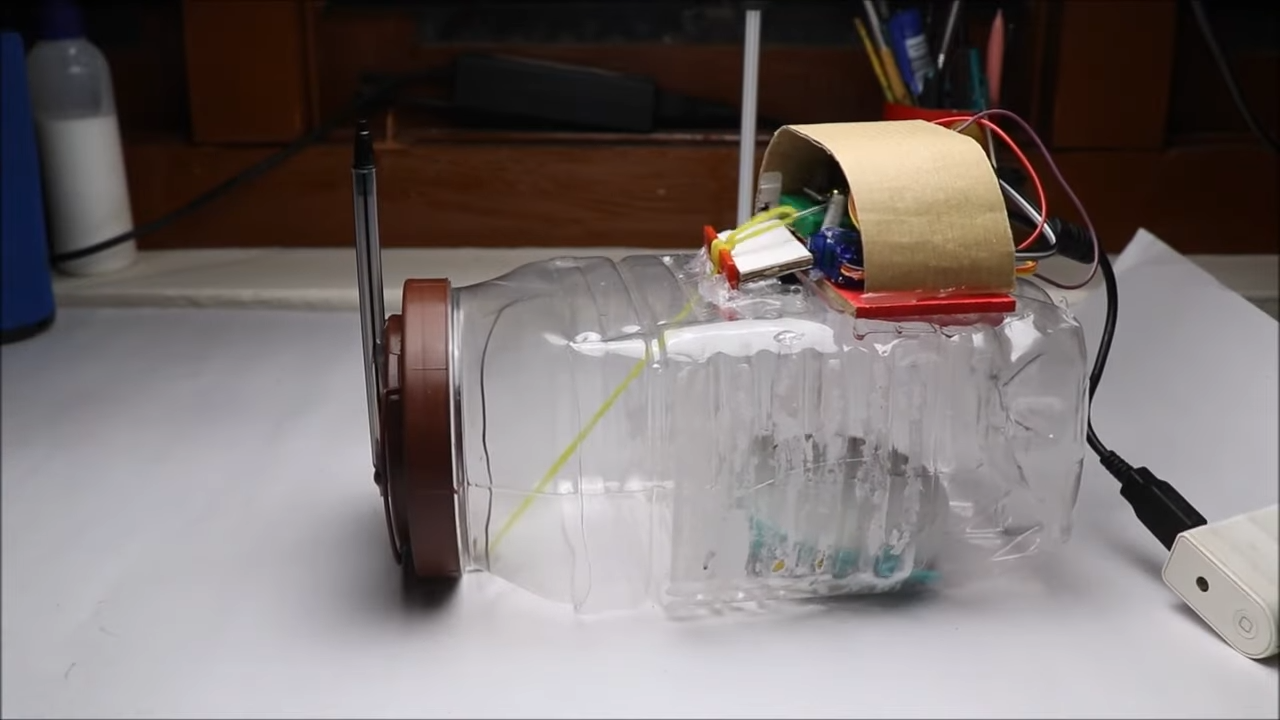
An Arduino-powered trap sounds like something invented after a homeowner lost one too many battles with a suspiciously athletic mouse. One day, you see a nibble mark on a cereal box. The next, you are standing in your kitchen at midnight, whispering, “I know you’re in here,” while holding a flashlight like a detective in a very small crime drama. That is exactly where the idea of a smart mouse trap starts to make sense.
Instead of relying only on a spring-loaded snap, sticky board, or plain box trap, a DIY Arduino mouse trap uses simple electronics to detect movement, trigger a door, record activity, or even alert the owner. It brings together maker culture, pest control, and a tiny bit of “mouse versus machine” comedy. But the goal is not just to build a gadget for the sake of blinking LEDs. A good Arduino-powered mouse trap should be practical, safe, humane when designed that way, and part of a bigger prevention plan.
This article explores how an Arduino-powered trap hopes to catch mice, what parts are commonly used, how the system works, what can go wrong, and why no electronic trap can replace sealing holes, removing food sources, and keeping your home less attractive than the all-you-can-eat buffet behind the stove.
What Is an Arduino-Powered Mouse Trap?
An Arduino-powered mouse trap is a do-it-yourself rodent trap controlled by an Arduino microcontroller. The Arduino acts as the brain. Sensors act as the eyes. A servo motor, solenoid, or other actuator acts as the hand that closes the door. In some versions, the trap is designed as a catch-and-release box. In others, it may simply monitor rodent activity or improve the reliability of a mechanical trap.
The basic idea is simple: a mouse enters the trap to reach bait, a sensor detects that movement or presence, and the Arduino triggers a mechanism. The mechanism might lower a door, rotate a latch, sound an alarm, or send a notification. Compared with a traditional trap, the Arduino version can be more flexible. It can log the time of entry, avoid firing too early, reset certain mechanisms, or make the trap easier to monitor.
Of course, the mouse does not care that your project includes elegant code and a tidy breadboard. It cares about peanut butter. That is why the best smart trap still follows old-fashioned rodent-control wisdom: place the trap where mice actually travel, use attractive bait, reduce competing food sources, and check the trap regularly.
Why Makers Are Building Smart Mouse Traps
The appeal of an Arduino mouse trap is not only pest control. It is also a learning project. It teaches sensing, programming, mechanical design, power management, and real-world testing. Unlike a desk-only project, a mouse trap has to work in a dusty, awkward, low-light environment where the “user” is fast, cautious, and definitely not reading the instruction manual.
For Arduino beginners, this kind of project can be more exciting than blinking an LED. It combines common components such as ultrasonic sensors, infrared break-beam sensors, light sensors, load cells, limit switches, and hobby servos. It also forces the builder to think about timing: Should the trap close as soon as the sensor sees movement, or wait until the mouse is fully inside? Should the door lock after closing? Should the system ignore false triggers from shadows, crumbs, or a curious cat named Chairman Meow?
That practical challenge is what makes the project fun. It is not enough to make the servo move once on a workbench. The trap has to work at 2:13 a.m., when the mouse finally arrives like a tiny burglar with whiskers.
How an Arduino-Powered Trap Works
1. The Bait Brings the Mouse Inside
Most mouse traps begin with bait. Peanut butter is popular because it has a strong smell and sticks to surfaces, making it harder for a mouse to grab and run. Chocolate, seeds, dried fruit, bacon, and nesting material such as cotton can also attract mice depending on the situation. The bait should be placed deep enough inside the trap so the mouse must fully enter before the door is triggered.
This is where many DIY traps fail. If the bait sits too close to the entrance, the mouse may lean in, snack, and leave without triggering anything. In that case, you have not built a trap. You have built a very small restaurant with questionable customer service.
2. A Sensor Detects the Mouse
An Arduino-powered trap can use several types of sensors. An infrared break-beam sensor can detect when a mouse crosses an invisible beam. An ultrasonic sensor can measure distance and notice when an object appears inside the trap. A phototransistor and LED pair can detect interruption of light. A pressure sensor or load cell can sense weight on a platform. A PIR motion sensor may detect movement, although it can be less precise in a small enclosure.
For a mouse trap, precision matters. The sensor should be placed so it detects the mouse only after it has entered far enough for the door to close behind it safely. If the trap is designed for live capture, the mechanism should avoid striking the animal. A sliding or rotating door is usually better than a fast, heavy drop.
3. The Arduino Decides When to Trigger
The Arduino receives sensor data and runs a simple decision-making program. For example, the code might say: if the sensor beam is broken for more than 500 milliseconds, rotate the servo to close the door. That short delay can reduce false triggers. The code can also require two conditions, such as detecting movement and confirming that the door is open.
A stronger design may include a debounce routine, a status LED, and a limit switch that confirms whether the door actually closed. This is where a smart trap becomes smarter than a plain gadget. It does not just react; it verifies.
4. A Servo or Latch Closes the Door
Many Arduino trap designs use a hobby servo because it is affordable, easy to control, and capable of rotating to a specific angle. A servo can pull a pin, turn a latch, or swing a lightweight door. Other builds may use a solenoid, small DC motor, or magnetic lock. The best choice depends on the trap body, door weight, and power source.
For a live-capture trap, the door should close securely but not violently. The mechanism should also prevent escape. Mice can squeeze through tiny gaps and chew soft materials, so cardboard-only prototypes may work for testing but often need reinforcement with wood, acrylic, metal mesh, or sturdy plastic.
Key Components in a DIY Arduino Mouse Trap
A typical Arduino-powered trap may include:
- Arduino board: An Arduino Uno, Nano, or compatible board can run the control logic.
- Sensor: Infrared, ultrasonic, light-based, pressure, or motion sensors can detect entry.
- Servo motor: Used to close or lock the trap door.
- Power supply: A USB power adapter, battery pack, or rechargeable battery can power the system.
- Trap enclosure: A box, tunnel, or chamber that guides the mouse toward the bait.
- Door or latch: The mechanical piece that closes after detection.
- Optional alert module: A buzzer, LED, Wi-Fi module, or Bluetooth module can notify the owner.
The electronics are only half the story. The enclosure design matters just as much. Mice prefer edges, walls, corners, and covered routes. A trap that feels too open may be ignored. A narrow tunnel-like entrance often works better because it matches how mice naturally move along protected paths.
Humane Design: Catching Without Cruelty
Many Arduino-powered trap projects focus on catch-and-release designs. The idea is to trap the mouse alive inside a box so it can be removed from the home. A humane design should prioritize ventilation, quick checking, low-stress handling, and a door mechanism that does not injure the animal.
However, live trapping is not automatically humane if the trap is ignored. A mouse left for too long without food, water, or temperature protection can suffer. That is why a smart alert system can be useful. A buzzer may be enough in a small apartment, but a Wi-Fi notification or LED indicator can help remind the owner to check the trap promptly.
Relocation also requires thought. Releasing a mouse a few steps from the back door may result in the same mouse returning, possibly with the confidence of someone who has already beaten your security system once. But releasing mice into unfamiliar habitat can also create survival problems. Local rules and best practices vary, so homeowners should check local wildlife guidance and consider professional pest control when infestations are large or recurring.
Why Smart Traps Still Need Old-School Pest Control
An Arduino trap can catch a mouse, but it cannot solve the reason mice entered in the first place. That is where integrated pest management, or IPM, becomes important. IPM focuses on prevention first, then monitoring and targeted control. In plain English: stop inviting mice to the party, then deal with the ones already dancing behind the refrigerator.
The most effective rodent-control plan includes sealing entry points, removing food sources, reducing clutter, placing traps along walls, and checking for droppings or gnaw marks. Mice can enter through very small openings, especially around utility lines, vents, doors, foundations, and gaps near garages. Steel wool, copper mesh, caulk, hardware cloth, and proper repairs can help close those routes.
Sanitation also matters. Pet food, bird seed, open pantry goods, crumbs, trash, and stored grains can all attract mice. A smart trap beside an open bag of dog food is like installing a security camera in front of a bank vault while leaving the vault door open.
Best Places to Put an Arduino Mouse Trap
Placement can decide whether the trap succeeds or becomes an expensive decoration. Mice usually travel close to walls because they have poor eyesight but strong senses of touch and smell. Good trap locations include behind appliances, along baseboards, inside cabinets, near pantry corners, around garage walls, and near suspected entry points.
Place the entrance parallel to the wall or directly along the mouse’s travel route. Avoid open spaces in the middle of the room. If you see droppings, gnaw marks, shredded paper, or greasy rub marks, those are clues. The mouse has already left you a map, which is polite, considering the circumstances.
Using more than one trap can improve results. Even a clever Arduino-powered trap may not catch every mouse if it is placed in the wrong spot. For a larger infestation, multiple traps and a broader control strategy are more realistic than expecting one gadget to become the superhero of the pantry.
Common Problems With Arduino-Powered Mouse Traps
False Triggers
A sensor may react to vibration, a shifting wire, changing light, dust, or a pet walking nearby. Adding a delay, using a more focused sensor, shielding the electronics, and testing the trap in the actual location can reduce false triggers.
Weak Door Mechanism
If the servo is too weak or the door is too heavy, the trap may close halfway and create an escape gap. A lightweight door, smooth hinge, and latch confirmation switch can help. The door should move reliably for many cycles, not just once while you proudly film it for your friends.
Poor Power Management
Battery-powered traps need careful planning. Servos can draw more current than expected, especially when stalled. A separate power supply for the servo may be necessary. If the battery dies, the trap becomes a box with dreams.
Mouse Avoidance
Mice are cautious around new objects. Sometimes it helps to leave a trap unset for a night with bait inside so the mouse becomes comfortable entering. Once the bait is taken, the trap can be armed. This tactic is old-school, but it pairs nicely with high-tech hardware.
Safety Considerations for Homes With Kids and Pets
Any trap, smart or not, should be kept away from children and pets. Wires, batteries, moving doors, bait, and small parts can create hazards. If the trap uses a high-force mechanism, it needs a protective housing. If it uses a live-capture design, the captured mouse should not be accessible to a dog, cat, or curious toddler.
Avoid glue traps. They are widely criticized because they can cause prolonged suffering and increase contact with urine or droppings. Rodenticides should also be used cautiously, especially around children, pets, and wildlife. If poison is considered, it should be used according to label directions and preferably with professional guidance.
Example Build Concept: The Servo Door Trap
Imagine a rectangular wooden or acrylic box with a small entrance at one end. At the far end sits a dab of peanut butter in a removable bait cup. Halfway inside the box, an infrared break-beam sensor stretches across the tunnel. A lightweight sliding door is held open by a pin connected to a micro servo.
When the mouse enters and crosses the beam, the Arduino waits briefly to make sure the mouse is fully inside. Then it rotates the servo, pulls the pin, and the door slides down. A limit switch confirms the door has closed. A red LED turns on outside the box. If the builder adds a Wi-Fi module, the system can send a phone alert saying, in effect, “Congratulations, your tiny roommate has checked in.”
This design is simple enough for hobbyists but practical enough to teach real engineering lessons. The builder must think about sensor placement, animal safety, latch strength, cleaning access, ventilation, and how to reset the trap without turning the process into a circus.
Experience Notes: What Real Testing Teaches You
Adding experience to an Arduino-powered mouse trap project changes the way you think about both electronics and pest control. On paper, the circuit is calm and obedient. The sensor reads a value, the code makes a decision, and the servo rotates. In real life, the trap sits under a cabinet where dust gathers, the floor is uneven, the bait smell competes with yesterday’s pizza box, and a mouse may investigate the entrance three times before committing. That gap between theory and reality is where the learning happens.
One of the biggest lessons is that mechanical reliability beats clever code. A beautiful program cannot rescue a sticky hinge. Before adding notifications, data logging, or dramatic LED effects, the door must close smoothly every time. Test it twenty, fifty, even one hundred times. Open it, trigger it, reset it, and watch for friction. If the servo buzzes, stalls, or struggles, the design needs less weight or better leverage. A trap that works nine times out of ten is still a trap that may fail on the one night the mouse finally shows up wearing its imaginary sunglasses.
Another practical lesson is that sensor placement matters more than sensor price. An ultrasonic sensor can work well in some builds, but it may bounce readings around inside a small box. A light beam can be more precise, but it needs alignment. A pressure sensor may avoid false triggers, but tiny mice are light. Testing with a small object, such as a toy mouse, battery, or rolled sock, can help simulate movement, but real mice are cautious and flexible. The best setup usually detects the animal after it has moved deep into the trap, not while it is still deciding whether the entrance smells suspicious.
Bait is also an experience-driven detail. Too much bait can let the mouse nibble from a distance. Too little bait may not attract attention. Sticky bait placed behind the trigger zone often works better than loose bait near the door. Peanut butter is popular because it smells strong and stays put, but cleanliness matters. Old bait dries out, collects dust, and becomes less appealing. A removable bait tray makes cleaning easier and keeps the electronics away from crumbs and oils.
Power is another sneaky issue. A trap powered by USB is easy to test, but not every good trap location has an outlet nearby. Batteries make placement flexible, but servos can drain weak battery packs quickly. During testing, it helps to measure how long the trap can remain armed. If the system sleeps between sensor checks, battery life improves. If the servo holds tension constantly, battery life suffers. A mechanical latch that does not require continuous servo power is usually the better design.
Finally, the experience of using a smart trap reminds you that catching one mouse is only part of the job. After a successful capture, the real question is: how did it get in? Look for gaps near pipes, doors, vents, garage corners, and foundation lines. Store food in sealed containers. Clean droppings safely. Keep checking for signs of activity. The Arduino-powered trap may win the headline, but prevention wins the season.
Final Thoughts
An Arduino-powered trap hopes to catch mice by combining simple sensors, a microcontroller, and a reliable closing mechanism. It is a clever project for makers, a useful experiment in home automation, and a reminder that technology can improve even the humble mousetrap. But the best version is not just flashy. It is safe, cleanable, humane if designed for live capture, and integrated into a complete rodent-prevention plan.
In other words, build the smart trap. Enjoy the blinking lights. Celebrate the servo. But also seal the holes, clean the crumbs, store the cereal properly, and keep traps where mice actually travel. The mouse may be small, but it is not foolish. Your trap needs good engineering, good placement, and a little patience. And if it works, you can finally stop whispering at the pantry at midnight.