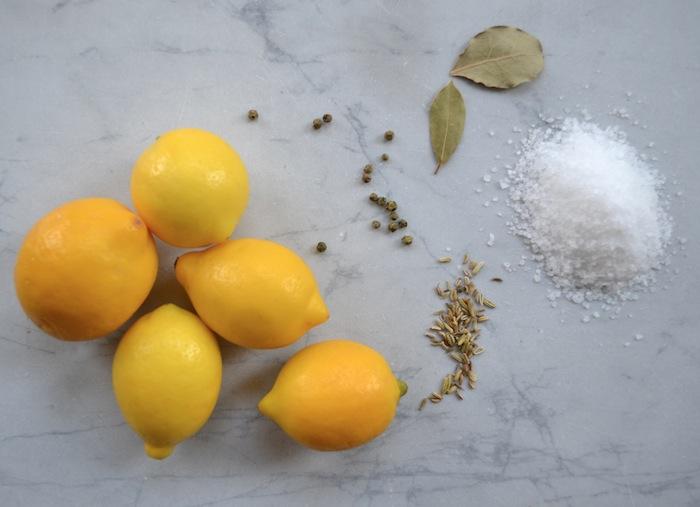
Fresh lemons are bright, sharp, and cheerful. Moroccan preserved lemons are what happens when those same lemons spend several weeks in a jar, develop a mysterious personality, and return as a salty, fragrant flavor bomb.
With nothing more complicated than lemons, kosher salt, fresh lemon juice, and patience, you can create a traditional North African pantry ingredient that transforms chicken, fish, grains, salads, vegetables, dips, and sauces. The preparation takes about 20 minutes. The difficult part is walking past the jar for several weeks without opening it every afternoon to ask, “Are you ready yet?”
This guide explains how to make Moroccan preserved lemons safely in the refrigerator, how to recognize when they are ready, what can go wrong, and how to use them without accidentally turning dinner into a salt lick.
What Are Moroccan Preserved Lemons?
Preserved lemons are whole or quartered lemons packed with salt and submerged in their own juice. Over several weeks, the salt draws moisture from the fruit, the rind softens, and the lemon’s aggressive sourness becomes mellow, savory, floral, and pleasantly funky.
The transformation is impressive because the part normally treated as kitchen waste becomes the star. Fresh lemon pith can taste unpleasantly bitter, but curing softens both the peel and pith until they become tender and edible. Many cooks discard the salty pulp and use only the rind, while others blend the entire fruit into preserved lemon paste.
Preserved lemons are closely associated with Moroccan cooking, where they frequently appear in tagines, braised chicken, lamb dishes, salads, sauces, and preparations containing olives, saffron, ginger, cilantro, or parsley. Similar salt-preserved citrus traditions also appear throughout North African, Middle Eastern, Mediterranean, and South Asian cuisines.
How Do They Taste?
Imagine fresh lemon zest, pickle brine, sea salt, and a hint of fermentation-related savoriness sharing a small apartment. The flavor is citrusy but not simply sour. It is salty, aromatic, slightly bitter, and rich in a way that fresh lemon juice cannot reproduce.
A small amount can brighten a slow-cooked stew, balance fatty meat, sharpen a creamy dressing, or make roasted vegetables considerably more interesting. Preserved lemon is powerful, so begin with a teaspoon or two of finely chopped rind. You can always add more; removing it from a finished soup requires technology not yet available to home cooks.
Ingredients and Equipment
Ingredients
- 5 to 6 medium lemons for preserving
- 3 to 4 additional lemons for fresh juice, as needed
- 1/2 cup kosher salt, plus more if needed
- 1 bay leaf, optional
- 1 small cinnamon stick, optional
- 1 teaspoon black peppercorns, optional
- 1 teaspoon coriander seeds, optional
- 1 small dried chile, optional
Equipment
- One clean 1-quart glass jar with a tight-fitting lid
- A sharp knife and clean cutting board
- A citrus juicer
- A clean spoon or small measuring spoon
- A glass fermentation weight or small food-safe weight, optional
Choose lemons that feel heavy for their size and have firm, unblemished skins. Thin-skinned lemons soften more quickly, but ordinary Eureka or Lisbon lemons from an American supermarket work well. Meyer lemons produce a sweeter, more floral result, although their flavor is less assertively tart.
Because you will eat the peel, unwaxed or organic lemons are convenient. Conventional lemons are also usable. Scrub them thoroughly under cool running water with a clean produce brush, then dry them. Do not wash produce with dish soap.
Why Kosher Salt Works Best
Kosher salt is easy to distribute over the cut surfaces and generally lacks iodine, which can affect color or flavor in some preserved foods. Pickling salt is another good choice. Fine table salt can be used by weight, but volume measurements become unreliable because salt crystals vary dramatically in size.
The salt is not merely seasoning. It draws juice from the lemons, changes their texture, encourages desirable preservation conditions, and discourages spoilage organisms. This is not the moment to improvise a “low-sodium” version. You can rinse the finished lemon and reduce salt elsewhere in the final dish.
How to Make Moroccan Preserved Lemons
Step 1: Clean the Jar
Wash the jar and lid in hot, soapy water, rinse thoroughly, and allow them to air-dry on a clean towel. The jar does not need to undergo pressure canning because the lemons will remain refrigerated, but cleanliness matters.
Inspect the jar for cracks and the lid for rust or damage. A wide-mouth jar makes packing and retrieving the lemons easier, especially when your hands are slippery and the lemons are behaving like tiny yellow escape artists.
Step 2: Prepare the Lemons
Trim the small stem tip from each lemon without cutting deeply into the fruit. Stand one lemon upright and cut downward lengthwise as though quartering it, but stop approximately 1/2 inch before reaching the bottom. Rotate the lemon and make a second cut, creating four connected sections that open like a flower.
Leaving the base attached makes the lemons easier to pack and keeps the salt against the interior surfaces. Fully quartered lemons also work and may soften slightly faster, so use that method when your jar has a narrow opening.
Step 3: Salt Generously
Spread one or two tablespoons of kosher salt across the bottom of the jar. Open the first lemon gently and sprinkle approximately one tablespoon of salt inside, coating the exposed flesh. Close the lemon and place it in the jar.
Repeat with the remaining lemons, sprinkling additional salt between layers. Press each lemon firmly with a clean spoon or tamper to release juice and eliminate large air pockets. Pack the jar tightly without smashing the fruit into pulp.
Step 4: Add Optional Aromatics
For a classic, highly versatile batch, use only lemons and salt. A plain preserved lemon can travel from a Moroccan tagine to pasta, vinaigrette, hummus, or roasted potatoes without dragging a cinnamon stick into every destination.
For a more aromatic batch, tuck in a bay leaf, peppercorns, coriander seeds, a small cinnamon stick, or a dried chile. Avoid adding fresh garlic or large quantities of fresh herbs unless you are following a tested refrigerated recipe designed for those ingredients.
Step 5: Cover Completely With Lemon Juice
Squeeze the additional lemons and pour enough fresh juice into the jar to cover the packed fruit. Press the lemons down again and release trapped air bubbles with a clean utensil. The lemon juice should rise above the fruit.
If the lemons float, add a clean glass fermentation weight. You can also use a small food-safe insert that fits inside the jar. Keeping the fruit beneath the liquid reduces its exposure to oxygen and helps prevent surface spoilage.
Use fresh lemon juice rather than water when topping up the jar. Water dilutes the acidity and the flavor, while extra lemon juice strengthens both.
Step 6: Refrigerate and Wait
Seal the jar, label it with the preparation date, and place it in the refrigerator. Turn or gently shake the jar once a day during the first week to redistribute the salt. After that, turn it every few days.
The lemons usually need three to four weeks to soften. In a particularly cold refrigerator or with thick-skinned fruit, the process may take five or six weeks. They are ready when the rind bends easily, looks slightly translucent, and can be cut without resistance.
How to Use Preserved Lemons
Remove a lemon with a clean fork or tongs. Rinse it briefly under cool water to remove excess surface salt. Separate the quarters, remove the seeds, and decide whether you want the peel, pulp, or both.
For most recipes, scrape away the pulp and finely chop the soft rind and pith. The pulp is edible but extremely salty, so use it sparingly in soups, braises, marinades, or sauces where it can dissolve into a larger quantity of food.
Start With These Easy Ideas
- Chicken tagine: Add thin strips of rind to braised chicken with onions, green olives, ginger, turmeric, saffron, cilantro, and parsley.
- Salad dressing: Whisk one tablespoon of minced preserved lemon with olive oil, fresh lemon juice, honey, mustard, and black pepper.
- Roasted vegetables: Toss chopped preserved lemon with roasted carrots, cauliflower, potatoes, squash, or Brussels sprouts.
- Grain bowls: Mix it into couscous, quinoa, farro, or rice with herbs, chickpeas, toasted nuts, and dried fruit.
- Fish and seafood: Blend the rind into softened butter, olive oil, or chermoula and spoon it over grilled fish or shrimp.
- Dips: Stir a teaspoon into hummus, labneh, whipped feta, yogurt sauce, or white bean dip.
- Pasta: Sauté minced preserved lemon with garlic, olive oil, chile flakes, parsley, and anchovies before tossing with hot pasta.
- Beans and lentils: Add it at the end of cooking to wake up earthy stews and soups.
Make Preserved Lemon Paste
Remove the seeds from one or two preserved lemons and blend the fruit until smooth. Add a splash of fresh lemon juice or olive oil if needed to help the blades move. Store the paste in a clean covered container in the refrigerator.
A teaspoon of preserved lemon paste can disappear effortlessly into mayonnaise, marinades, dressings, pan sauces, compound butter, tomato sauce, or tuna salad. Because the paste is salty, taste the finished dish before adding more salt.
Troubleshooting Common Problems
The Lemons Are Not Covered
Press the fruit down and add freshly squeezed lemon juice until it is submerged. Do not allow exposed pieces to sit above the brine for extended periods. Check the jar periodically because the fruit may shift as it softens.
The Rinds Are Still Tough
They probably need more time. Thick-skinned lemons can remain firm after four weeks, especially when curing in a cold refrigerator. Continue curing for another one or two weeks and check again.
The Brine Looks Cloudy
Slight cloudiness, sediment, dissolved salt, or color changes can occur during curing and do not automatically indicate spoilage. Salt brands containing anti-caking agents may create a cloudier liquid.
However, discard the entire batch if you see fuzzy mold, unusual colored growth, severe sliminess, leaking caused by pressure, or a distinctly rotten or putrid odor. Do not taste a suspicious batch to investigate. Your tongue is not a certified food-safety laboratory.
The Lemons Taste Too Salty
Preserved lemons are supposed to be salty, but rinsing makes a major difference. For an especially salty lemon, soak the rind in cool water for five to ten minutes, then drain and taste it again.
Also reduce or delay the salt in the dish receiving the lemon. Olives, capers, feta, anchovies, broth, and preserved lemon can create a delicious combination, but together they can also create the culinary equivalent of swallowing the ocean.
The Flavor Is Too Bitter
Bitterness usually mellows with additional curing time. Meyer lemons and thin-skinned varieties tend to be less bitter. When using a more assertive batch, mince the rind finely and combine it with rich, sweet, or earthy ingredients such as olive oil, roasted carrots, onions, chickpeas, dates, or honey.
Storage and Food-Safety Tips
Once the rind has softened, keep the jar refrigerated and make sure the lemons remain covered with juice. Always use a clean utensil rather than reaching into the jar with your fingers.
For conservative home storage, use the lemons within six months for best quality. Some traditional and published recipes keep refrigerated preserved lemons much longer, but flavor, texture, handling, temperature, and sanitation vary from kitchen to kitchen. When uncertain, make smaller batches more frequently.
Preserved lemons contain a substantial amount of sodium. Rinsing removes some surface salt but does not make them low-sodium. Anyone following a medically prescribed sodium restriction should consider portion size and discuss suitable limits with a qualified health professional.
Why This Simple DIY Project Works So Well
Making Moroccan preserved lemons delivers an unusually generous return for such a small amount of effort. The process requires no specialized canning machine, fermentation crock, starter culture, or advanced culinary technique. You wash, cut, salt, squeeze, pack, and wait.
The real payoff is not merely a longer-lasting lemon. Curing creates a new ingredient with a deeper flavor and a softer texture. Fresh juice supplies acidity, fresh zest supplies aroma, and preserved lemon supplies saltiness, fragrance, savoriness, and complexity at the same time.
It is also a practical way to use a seasonal citrus surplus. When lemons are plentiful or inexpensive, one jar can capture their character for months. The project produces very little waste because the peel, pith, pulp, and brine can all be used selectively.
Kitchen Experience Notes: What Home Cooks Learn After a Few Batches
The first surprise is how physical the recipe feels. At the beginning, the lemons appear far too large for the jar. After salting and pressing, they surrender dramatically, releasing enough juice to make the whole arrangement seem possible. Packing them becomes a small puzzle: rotate one lemon, tuck another beside it, press again, and suddenly there is room for one more.
The second lesson is that a smaller jar is often better than a larger one. Too much empty space makes it harder to keep the fruit beneath the juice. A jar that is filled tightly creates its own pressure, encourages the lemons to release more liquid, and limits the amount of air surrounding them. Home cooks frequently discover that matching the jar to the batch matters almost as much as choosing good fruit.
Patience is another recurring theme. After one week, the jar smells wonderful, but the peel is usually still too firm. After two weeks, the lemons look promising enough to inspire premature confidence. Around the fourth week, the rind finally develops the soft, flexible texture that distinguishes a proper preserved lemon from an aggressively salted fresh one. Cutting it should feel closer to slicing tender fruit leather than sawing through citrus armor.
Many first batches also teach restraint. A heaping tablespoon of preserved lemon may sound reasonable until it takes control of the entire meal. Beginning with a teaspoon of finely chopped rind is wiser. Once mixed with olive oil, herbs, grains, or a braising liquid, its flavor expands. It is easier to add a second teaspoon than to persuade a salty stew to forget the first three.
Plain batches tend to disappear fastest. A heavily spiced jar can be delicious, but cinnamon, chile, or clove may limit where the lemons fit. Lemons preserved only with salt can move easily from chicken tagine to pasta, roasted cauliflower, yogurt dip, vinaigrette, or tuna salad. After learning the basic flavor, separate experimental jars become more useful: one with bay and peppercorns, another with coriander and chile, and perhaps a Meyer lemon batch for dressings and desserts.
The brine eventually becomes almost as valuable as the fruit. A small spoonful can enliven a salad dressing, marinade, bean soup, or pan sauce. It should be treated like concentrated seasoning rather than ordinary lemon juice. Adding it slowly prevents the enthusiastic mistake of making an otherwise elegant vinaigrette taste like it was prepared aboard a fishing vessel during rough weather.
Finally, preserved lemons change how many home cooks season food. Instead of thinking separately about salt and acidity, they begin searching for balance: richness against brightness, sweetness against bitterness, and earthy flavors against aromatic citrus. A jar of lemons becomes more than a condiment. It becomes a quick way to rescue bland leftovers, sharpen a slow-cooked dish, and make an ordinary tray of roasted vegetables taste deliberately composed.
That is the most rewarding part of the experience. The recipe is ancient, the ingredients are humble, and the method is almost comically easy. Yet opening the finished jar feels like discovering a new spice. Make one batch, and the main question will probably not be how long it keeps. It will be how soon you should start the next one.
Conclusion: A Jar Worth Waiting For
DIY Moroccan preserved lemons prove that time can be one of the most useful ingredients in a kitchen. Salt and lemon juice soften the rind, mellow harsh bitterness, and create a condiment that is citrusy, savory, floral, and intensely versatile.
Begin with clean equipment, firm lemons, plenty of kosher salt, and enough fresh juice to keep the fruit submerged. Refrigerate the jar, turn it periodically, and allow at least three to four weeks for the rind to soften. Once ready, rinse the lemon, chop the peel finely, and use it in small amounts.
Whether folded into a traditional chicken tagine, whisked into vinaigrette, blended into hummus, or scattered over roasted potatoes, preserved lemon can make a familiar dish taste completely new. Not bad for a project whose most demanding instruction is essentially, “Put lemons in a jar and leave them alone.”