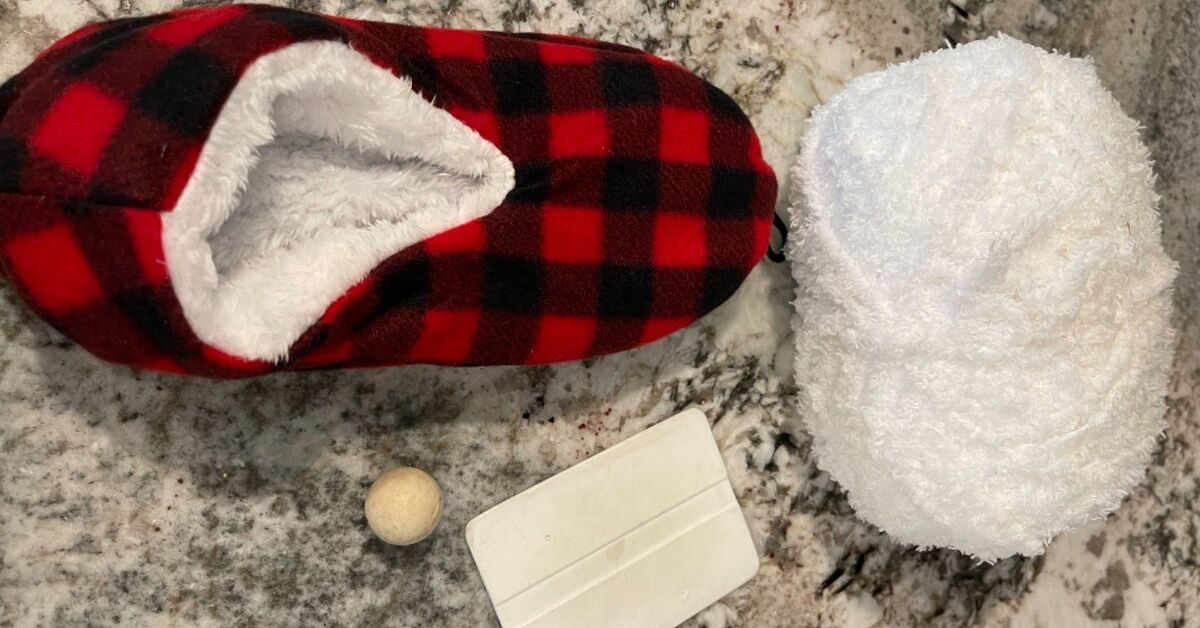
If you have one lonely slipper sitting in a closet like it lost custody of its matching half, congratulations: you are already halfway to a charming DIY project. Making a gnome using a slipper is one of those crafts that feels almost suspiciously easy. It is inexpensive, beginner-friendly, adorably weird, and perfect for anyone who wants cute seasonal decor without committing to a full-blown glitter emergency.
This project works because a slipper already has most of the personality built in. It is soft, shaped, cozy, and usually a little floppy in the best possible way. That means less cutting, less sewing, and less time standing in the craft aisle wondering why you now own seven kinds of glue but still can’t find the one you need. With a few basic supplies, you can turn a simple slipper into a whimsical gnome for Christmas, winter decor, gift toppers, wreaths, tiered trays, or a shelf that needs a tiny guardian with strong beard energy.
Below, you will learn how to make a slipper gnome step by step, what materials work best, how to avoid the most common mistakes, and how to customize the finished piece so it looks more “boutique craft fair treasure” and less “I hot-glued a shoe and hoped for the best.”
Why a Slipper Makes Such a Great Gnome Base
A slipper is almost unfairly helpful in a gnome project. It already has structure, texture, and shape. Many fuzzy slippers also come with lining or trim that can double as the beard, which is a huge win for lazy geniuses everywhere. Instead of building the body from scratch, you are repurposing something that already feels soft and decorative.
That is why this craft is popular with beginners. You can skip complicated sewing patterns, cardboard templates, and elaborate stuffing methods. In many cases, all you really need to do is fold, stuff, glue, and decorate. If the slipper has faux sherpa, fleece, or fur trim, even better. That texture can become the most eye-catching feature of the gnome in seconds.
It is also a smart upcycling craft. Old slippers, dollar-store slippers, fuzzy slipper socks, and even holiday-themed house shoes can all become cute handmade decor. One slipper can make a small shelf gnome, while a large fuzzy slipper can become a fuller, chunkier version with a dramatic hat. Yes, apparently even gnomes have silhouettes now.
Supplies You’ll Need
One reason this slipper gnome craft is so appealing is that the supply list is short and flexible. You do not need exact brand-name materials. Use what you have, then pretend you planned it that way all along.
Basic materials
- 1 slipper or slipper sock
- Rice, poly beads, dried beans, or stuffing for weight and shape
- Faux fur, yarn, or the slipper’s own fuzzy trim for the beard
- 1 wood bead, pom-pom, or painted round ball for the nose
- Hot glue gun and glue sticks
- Scissors or craft knife
- Rubber band, twine, or floral wire if needed to secure stuffing
- Optional embellishments such as ribbon, bells, greenery, mini ornaments, felt shapes, or pom-poms
Helpful extras
- Polyfill to soften the body if rice alone feels too dense
- Cardboard cone or foam insert if you want a more upright hat
- Fabric glue for trim details
- Paint for the nose if you want a natural skin-tone or wood finish
- Small weights or pellets if the gnome needs to sit more securely on a shelf
How to Make a Gnome Using a Slipper
Now for the fun part: turning that slipper into a tiny woodland roommate.
Step 1: Choose the right slipper
Start with a clean slipper that has good texture and a soft body. Fuzzy house slippers work beautifully because they already look cozy and whimsical. A pointed or rounded toe can become part of the hat shape, while a cuffed opening can help define the beard area. Holiday slippers in red, gray, cream, green, or plaid are especially useful if you want a Christmas gnome or winter gnome.
If the slipper is too floppy, do not worry. You can fix that with stuffing or a simple insert. If it is too stiff, that can actually help the finished gnome keep its shape. You are looking for a slipper that feels soft but not collapsed into complete existential despair.
Step 2: Decide what part becomes the hat
Most slipper gnomes use the upper portion of the slipper as the hat. If the slipper has a fuzzy cuff, fold or flip part of it to create contrast between the hat and beard. In many easy versions, the slipper’s fluffy lining becomes the beard simply by folding the heel or lower edge under. This is one of the easiest ways to get that classic gnome look without cutting extra fur.
If your slipper does not have built-in fuzzy trim, you can glue a beard piece to the front later. A slipper with a tall ankle or sock-like top gives you extra room to create a long, floppy hat, which is exactly the kind of drama a good gnome deserves.
Step 3: Form the body
Fill the slipper with rice, poly beads, dried beans, stuffing, or a mix of those materials. Rice gives the gnome a nice weighted bottom so it sits well on a shelf. Polyfill keeps the upper part soft and rounded. A combination of both usually works best: weight on the bottom, fluff on top.
Pack the filling firmly enough to create shape, but do not overstuff it until the slipper looks like it is about to file a complaint. You want the body to feel stable and plump, not stretched and distorted. If needed, secure the top area with a rubber band or twine before arranging the hat.
Step 4: Add the beard
If the slipper’s lining is fuzzy and visible, you may already have a beard. Lucky you. If not, cut a small triangle or rounded beard shape from faux fur, yarn fringe, or another fluffy material. Glue it to the front center of the slipper body.
For the neatest finish, cut faux fur from the back with a craft knife instead of chopping through the fibers with scissors. That helps the beard stay fluffy instead of looking like it lost a bar fight. A good beard should cover the front of the body and taper naturally toward the bottom.
Step 5: Attach the nose
The nose is what makes the whole thing undeniably gnome-like. Glue a wood bead, pom-pom, or small round ball just above the beard and slightly under the hat line. Nestle it into the fur so it looks tucked in rather than stuck on as an afterthought.
If you are using a very lightweight nose, hot glue is usually enough. For a heavier wood bead, let the glue set completely before moving the gnome. A crooked nose can look charming. A sliding nose looks like your gnome had a rough weekend.
Step 6: Style the hat
Pull the upper part of the slipper up or over to make a tall hat. You can leave it floppy, bend it to one side, tie the top with twine, or top it with a pom-pom. If you want a more upright pointed hat, slip a cone of cardstock or foam inside the top section before shaping it.
This is where you can really personalize the craft. Add ribbon, mini bells, greenery, snowflakes, plaid trim, or a jingle bell at the tip. For a rustic farmhouse style, keep the embellishments minimal and stick to neutrals. For a cheerful holiday look, go brighter and bolder.
Step 7: Finish and display
Check that the gnome sits flat. If it tips over, add more weight to the base or flatten the bottom with your hands. Trim the beard if needed. Smooth down stray glue strings, which are the glitter’s clingy cousin. Then place your slipper gnome on a shelf, tray, mantel, entry table, wreath, or gift package.
You can also make a pair for symmetry, a trio for a centerpiece, or a whole little gnome family if you enjoy projects that begin with “just one” and somehow end with an army.
Best Design Ideas for a Slipper Gnome
Classic Christmas gnome
Use a red or gray slipper, white beard, wood bead nose, and a little greenery on the hat. This style looks great on mantels and by the tree.
Rustic winter gnome
Choose cream, tan, or plaid slippers and add twine, burlap, and neutral trims. This version blends beautifully with farmhouse or cabin decor.
Dollar-store ornament gnome
Use a mini slipper or slipper sock, keep the filling light, and add a loop for hanging. These make cute DIY ornaments or package toppers.
Whimsical gift gnome
Add a tag, ribbon, or candy cane and use the finished gnome as part of a wrapped holiday gift. It feels handmade without looking overly homemade.
Common Mistakes to Avoid
Using too little weight
If the base is too light, the gnome will topple over every time someone breathes near it. Add more rice or beads to the bottom.
Making the nose too large
A huge nose can overpower the face and make the gnome look less charming. Choose a bead that fits the scale of the slipper.
Over-decorating the hat
A few embellishments are cute. Twelve random items hot-glued onto one tiny hat can start to look like a holiday yard sale. Pick one or two accents and stop while you are winning.
Cutting faux fur the wrong way
Cutting through the front of faux fur with scissors can leave harsh edges and loose fibers everywhere. Whenever possible, cut only the backing from the reverse side.
Why This Craft Works for SEO-Friendly DIY Content
From a content perspective, “easy to make gnome using slipper” is the kind of topic readers love because it hits several strong search intents at once. It is seasonal, inexpensive, beginner-friendly, giftable, and tied to upcycling. People searching for DIY gnome crafts often want something cute but not complicated, and slipper gnomes deliver exactly that.
It also gives you room to naturally include related keyword phrases such as DIY slipper gnome, no-sew gnome craft, Dollar Tree slipper gnome, how to make a gnome with a slipper, handmade holiday gnome, and easy Christmas craft with slippers. The key is to use these terms naturally in useful content instead of scattering them everywhere like confetti at a marketing meeting.
Final Thoughts
Making a gnome using a slipper is one of the easiest crafts to try when you want fast results and maximum charm. It is affordable, approachable, and forgiving, which is perfect if you are new to DIY decor or simply do not have the patience for a project that requires seventeen identical cuts and “light hand stitching.” The slipper does most of the heavy lifting, and you get to enjoy the creative part: shaping, styling, and adding personality.
Best of all, no two slipper gnomes come out exactly alike. One may look polished and rustic, another may look delightfully mischievous, and a third may appear to be silently judging your glue choices. That is part of the fun. A little asymmetry often makes handmade decor feel warmer and more interesting.
So the next time you spot a single fuzzy slipper, do not toss it. Turn it into a gnome. It is cheaper than buying new decor, cuter than leaving random footwear in a drawer, and far more satisfying than pretending you were definitely going to find the missing match someday.
Experiences Related to Making an Easy Slipper Gnome
The experience of making a slipper gnome is usually what wins people over, even more than the finished craft. It is one of those rare projects that feels low-pressure from the start. You do not need advanced skills, special equipment, or a full afternoon blocked off on your calendar. Most people begin with curiosity, a leftover slipper, and the thought, “This might either be adorable or completely ridiculous.” Conveniently, it often becomes both.
One of the nicest parts of this craft is how quickly it turns from random supplies into something with personality. At first, you are just holding a slipper, a bead, and a bit of faux fur. Ten minutes later, somehow, there is a tiny character sitting on your table looking like it pays taxes in peppermint bark. That fast transformation makes the craft satisfying for beginners, kids with supervision, and adults who want a creative project without a huge learning curve.
Another common experience is surprise at how flexible the design can be. Some people start with a holiday slipper and end up with a Christmas gnome. Others use a neutral slipper and create winter decor that stays out long after the tree is packed away. If the first gnome turns out cute, that usually becomes the gateway moment. Suddenly, one gnome becomes three, then a matching set, then a themed batch with different hats, trims, and beards. This is how craft projects quietly become collections.
Many crafters also mention that slipper gnomes are forgiving in a way that more technical DIY projects are not. If the hat leans, it looks whimsical. If the beard is slightly uneven, it looks handmade. If the nose sits a little off-center, people assume the gnome is quirky and move on. That kind of flexibility takes away the fear of getting it wrong, which is why this is such a good project for relaxing craft nights, holiday gatherings, or beginner workshops.
There is also a practical satisfaction in using something inexpensive or mismatched. Turning a dollar-store slipper or an orphaned house shoe into decor feels clever. It gives the project a small upcycled victory that people genuinely enjoy. Instead of throwing something away, you make it useful and charming. That “I made this from almost nothing” feeling is a big part of why slipper gnomes are so memorable.
Finally, the finished gnome often gets more attention than expected. Guests notice it. Kids name it. Someone inevitably asks where you bought it, which is the highest compliment a handmade decor project can receive. And when you get to say, “It used to be a slipper,” the reaction is usually half disbelief, half admiration. That little moment alone makes the experience worth repeating.