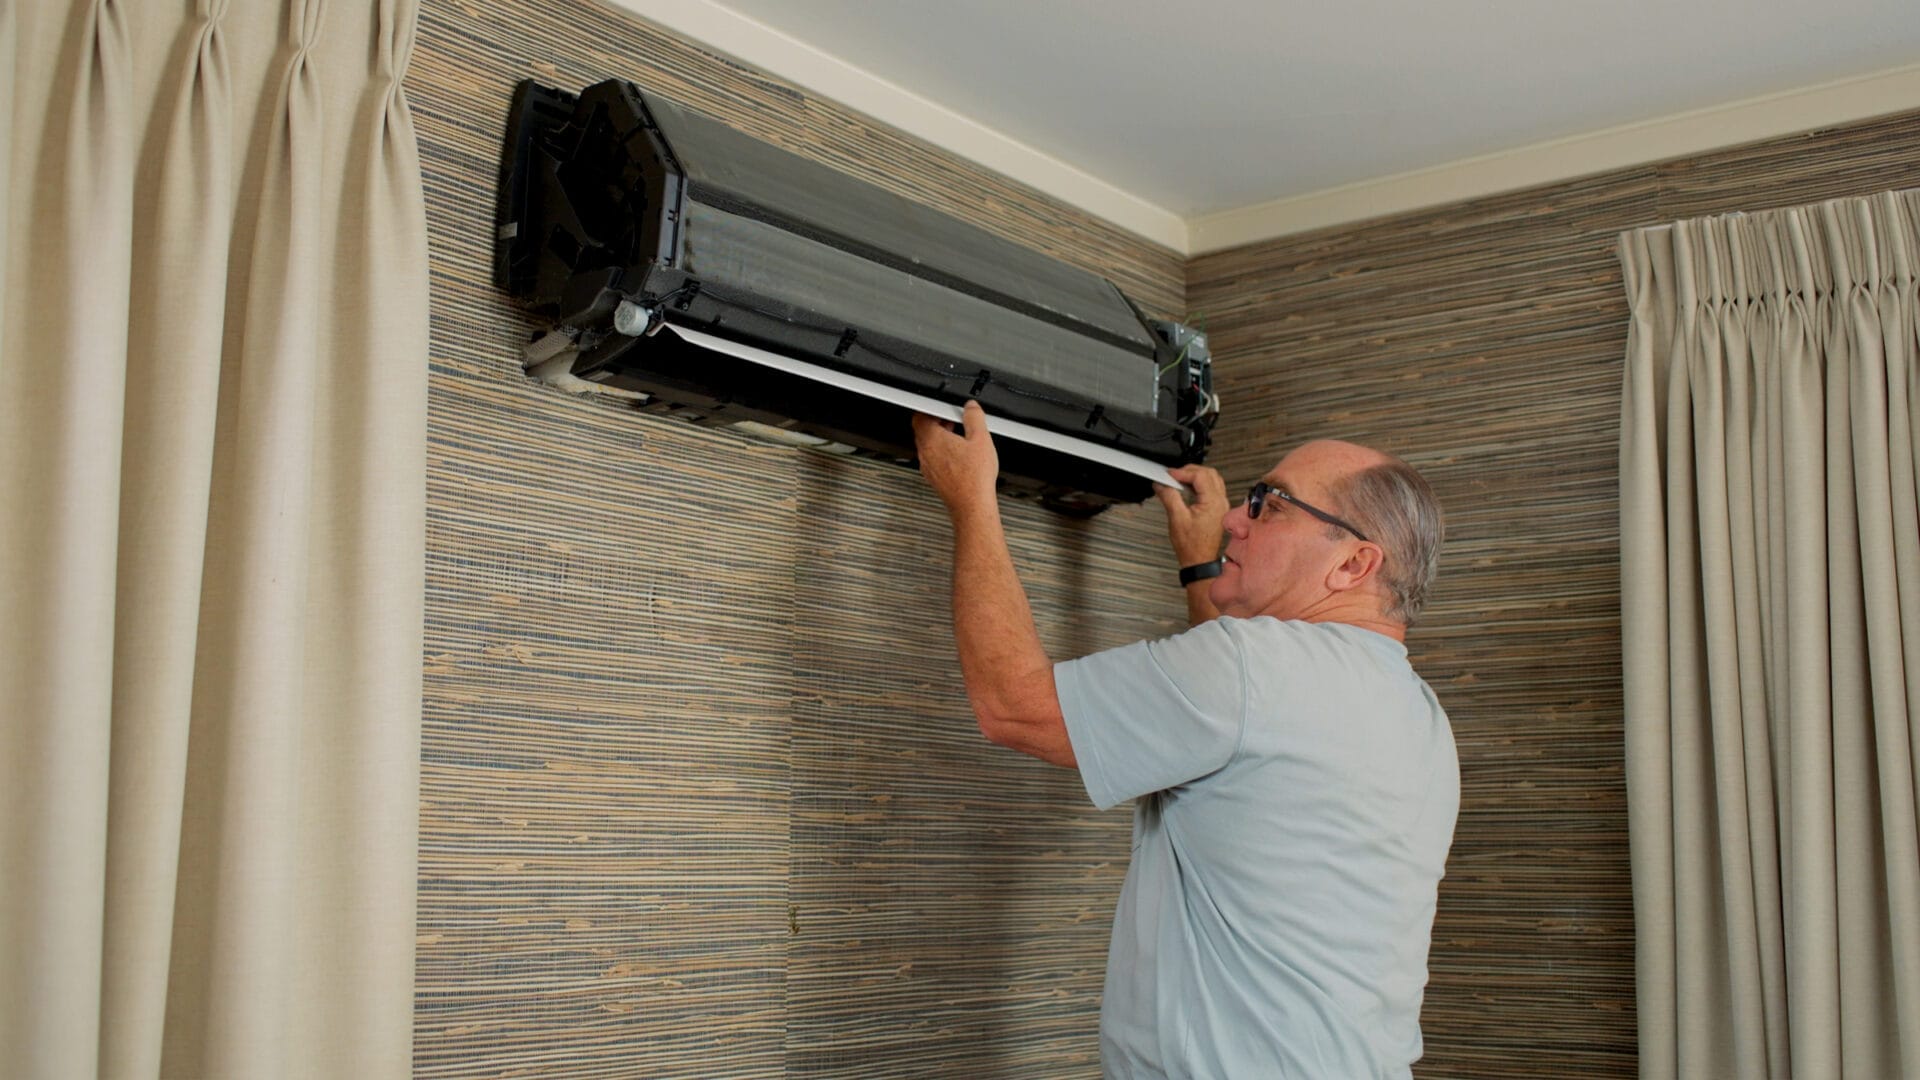
A mini split is one of the most quietly brilliant appliances in the house. It cools, heats, dehumidifies, and usually does it without hogging half the ceiling like old-school ductwork. But like any hardworking comfort machine, it has one small request: please do not let it inhale a sweater made of dust.
Learning how to clean and maintain your mini split is not just about keeping the indoor unit looking pretty on the wall. It helps protect airflow, energy efficiency, indoor air quality, comfort, and the life of the system. A neglected ductless mini split can start acting dramatic: weak airflow, musty smells, water leaks, ice buildup, weird noises, and power bills that look like they were written by a villain.
The good news? Most basic mini split maintenance is simple. You do not need to be an HVAC wizard with a tool belt and a mysterious van. You need a careful routine, a few gentle cleaning supplies, and the wisdom to know when a professional should take over.
What Is a Mini Split and Why Does It Need Maintenance?
A mini split, also called a ductless mini split or ductless heat pump, usually has two main parts: an indoor air-handling unit and an outdoor condenser or heat pump unit. Refrigerant lines connect the two, allowing the system to move heat in or out of your home. In cooling mode, the indoor unit pulls warm room air across a cold coil, removes heat and moisture, and sends cooler air back into the room. In heating mode, a heat pump reverses that process.
Because mini splits move air through compact indoor units, they depend heavily on clean filters, clean coils, open louvers, and proper drainage. When dust blocks airflow, the system has to work harder. When the outdoor unit is buried under leaves or lawn clippings, heat exchange suffers. When the condensate drain clogs, water may end up where nobody invited it: on your wall, floor, or furniture.
Mini Split Maintenance Schedule: How Often Should You Clean It?
The right schedule depends on usage, pets, dust, humidity, cooking habits, and whether your mini split runs daily or only during extreme weather. Still, a practical maintenance rhythm looks like this:
Every 2 to 4 Weeks During Heavy Use
Check the indoor air filters. If you use the mini split every day, have pets, live near construction, cook often, or keep windows open, the filters may need cleaning more frequently. A filter can look innocent from across the room and still be packed with enough dust to start its own tiny civilization.
Every Month
Wipe the indoor unit exterior, check that air inlets and outlets are clear, look for moisture or stains around the unit, and inspect the outdoor unit for leaves, grass clippings, and debris.
Every Season
Give the system a more careful inspection before cooling season and heating season. Clean filters, check the condensate drain, gently clean around the outdoor coil, and make sure nothing blocks airflow around either unit.
Once or Twice a Year
Schedule professional mini split service. Annual maintenance is the minimum for many homes. If your ductless heat pump runs year-round for both heating and cooling, a spring and fall tune-up is even better. A technician can safely check refrigerant charge, electrical components, coil condition, blower wheel buildup, condensate drainage, sensors, and system performance.
Tools and Supplies You Need
You do not need a garage full of specialized equipment for basic mini split cleaning. For homeowner maintenance, gather:
- Microfiber cloths
- A vacuum with a soft brush attachment
- Mild dish soap
- Lukewarm water
- A soft brush
- A spray bottle for light rinsing
- A garden hose for the outdoor unit
- A fin comb, if outdoor fins are slightly bent
- A flashlight
- Gloves
- Your owner’s manual
Avoid harsh chemicals, bleach, abrasive pads, pressure washers, and mystery cleaners from the back of the cabinet labeled “probably fine.” Mini splits have delicate fins, sensors, plastics, electronics, and coatings. Gentle cleaning is the name of the game.
Safety First: Before You Touch the Mini Split
Before cleaning your mini split, turn the system off. For deeper cleaning, turn off power at the disconnect or breaker according to your owner’s manual. Never spray water into electronics, control boards, motors, or wiring areas. Do not open sealed refrigerant lines. Do not try to “top off” refrigerant. Refrigerant work requires licensed equipment and training.
Also, use a stable step stool if the indoor unit is mounted high. Mini split maintenance is useful; falling off a chair while holding a dusty filter is not the heroic origin story anyone needs.
How to Clean Mini Split Air Filters
The air filter is the first line of defense against dust, lint, pet hair, and airborne debris. It is also the easiest maintenance task and one of the most important.
Step 1: Turn Off the Unit
Use the remote to turn the unit off. For extra safety, especially if you are doing more than a quick filter check, shut off power according to the manufacturer’s instructions.
Step 2: Open the Front Panel
Most wall-mounted mini split indoor units have a front cover that lifts upward. Move gently. If it resists, do not yank it like you are opening a treasure chest. Check the manual for the exact panel position.
Step 3: Remove the Filters
Slide or lift the filters out carefully. Some units also have small deodorizing, enzyme, carbon, or allergen filters attached. These may have different cleaning or replacement instructions, so treat them separately.
Step 4: Vacuum or Rinse
If the filters are lightly dusty, vacuum them with a soft brush attachment. If they are dirty, rinse them with lukewarm water and mild soap if allowed by your manual. Spray from the clean side toward the dirty side when possible so debris comes out instead of being pushed deeper into the mesh.
Step 5: Dry Completely
Let filters air-dry fully in the shade before reinstalling. Do not use a hair dryer, oven, direct sunlight, or the “it looks dry enough” method. A damp filter can encourage odors and microbial growth.
Step 6: Reinstall Correctly
Slide the filters back into place, close the panel, restore power, and run the unit. If the filter light or maintenance reminder is on, reset it according to the manual.
How to Clean the Indoor Mini Split Unit
After the filters are clean, give the indoor unit some attention. This helps prevent dust from being pulled back into the system.
Wipe the Exterior
Use a dry or slightly damp microfiber cloth to wipe the front panel, top intake area, sides, and louvers. Do not soak the unit. Water and electronics are not best friends; they are awkward coworkers at most.
Clean the Louvers Carefully
The louvers direct airflow. Dust can collect on their edges, especially in bedrooms, kitchens, and rooms with pets. Wipe them gently. Avoid forcing motorized louvers by hand unless the manual says it is safe.
Inspect the Coil
With the filters removed, use a flashlight to look at the evaporator coil. If you see light dust, a professional cleaning may not be urgent. If the coil is matted with grime, smells musty, or has visible buildup, call an HVAC technician. Deep coil cleaning often requires special covers, cleaning agents, pump sprayers, and careful water control.
Check the Blower Wheel
The blower wheel is the fan that pushes conditioned air into the room. Over time, it can collect dust and biofilm, especially in humid climates. Signs of a dirty blower wheel include reduced airflow, black specks near the outlet, musty odors, or uneven air movement. This is usually a professional cleaning job because disassembly can be tricky.
How to Maintain the Condensate Drain
When your mini split cools or dehumidifies, it removes moisture from indoor air. That water exits through a condensate drain line. If the drain clogs, water may back up into the indoor unit and leak down the wall. That is the kind of indoor waterfall nobody pins on Pinterest.
During cooling season, check the outdoor end of the drain line. You should see water dripping when the unit has been cooling for a while. If the indoor unit smells musty, gurgles, shuts down, or leaks, the drain may be clogged. Some homeowners use a wet-dry vacuum at the drain outlet to clear minor blockages, but be careful and follow your system design. If the drain is hidden, pumped, or repeatedly clogged, call a technician.
To help prevent drain problems, keep filters clean, maintain good airflow, and schedule professional service. A technician can flush the line, inspect the drain pan, check slope, and clean microbial buildup safely.
How to Clean the Outdoor Mini Split Unit
The outdoor unit releases or absorbs heat depending on the season. It needs room to breathe. If it is surrounded by leaves, weeds, mulch, snow, or a decorative fence built with the airflow sensitivity of a brick wall, performance will drop.
Step 1: Turn Off Power
Turn the system off and shut off power at the outdoor disconnect or breaker before cleaning around the condenser.
Step 2: Clear Debris
Remove leaves, grass clippings, twigs, pollen mats, and trash from around the unit. Trim nearby shrubs and vegetation. Follow your manufacturer’s clearance requirements; many systems need at least 12 to 24 inches of open space around the sides and more space above for proper airflow.
Step 3: Rinse Gently
Use a regular garden hose with gentle water pressure to rinse dust and debris from the coil. Do not use a pressure washer. The aluminum fins bend easily, and bent fins reduce airflow. A pressure washer can turn a good condenser into an expensive metal comb-over.
Step 4: Straighten Bent Fins Carefully
If fins are slightly bent, a fin comb can help restore airflow. Work slowly and gently. If the coil is heavily damaged, corroded, oily, or packed with debris, call a professional.
Step 5: Keep the Base Clear
Make sure the unit sits level and drains properly. In winter climates, keep snow and ice from smothering the outdoor unit. Do not chip ice off coils with sharp tools. If ice buildup seems abnormal, schedule service.
Mini Split Maintenance Mistakes to Avoid
Running the System With Dirty Filters
Dirty filters restrict airflow, reduce comfort, and make the system work harder. If your mini split is blowing weak air, the filter should be your first suspect. It is usually guilty and covered in fuzz.
Reinstalling Wet Filters
Filters must be fully dry before they go back into the unit. Damp filters can cause odors and may send moisture where it does not belong.
Using Harsh Cleaners
Strong chemicals can damage plastic, coatings, and coil surfaces. Use mild soap and water for basic filter cleaning unless the manufacturer says otherwise.
Ignoring the Outdoor Unit
Many homeowners clean the indoor unit and forget the outdoor condenser exists. Meanwhile, it is outside wearing a leafy hat and gasping for airflow. Clear it regularly.
Skipping Professional Service
DIY maintenance is important, but it does not replace professional service. Technicians check components homeowners cannot safely or accurately inspect, including refrigerant charge, electrical connections, sensors, motors, and deeper coil contamination.
Signs Your Mini Split Needs Professional Cleaning or Repair
Call an HVAC professional if you notice any of these warning signs:
- Water leaking from the indoor unit
- Musty or sour odors that return after filter cleaning
- Ice forming on the indoor or outdoor coil
- Weak airflow even with clean filters
- Grinding, buzzing, rattling, or clicking noises
- Error codes on the display or remote
- Short cycling or frequent shutdowns
- Uneven heating or cooling
- Rising energy bills without a clear reason
- Outdoor unit fan not spinning
These symptoms can point to clogged drains, dirty coils, failing motors, electrical issues, refrigerant leaks, sensor problems, or installation defects. Guessing can get expensive. A trained technician can diagnose the real cause instead of playing HVAC bingo.
How Maintenance Improves Energy Efficiency
A clean mini split moves air freely and transfers heat efficiently. That means the system can reach the set temperature with less strain. When filters are clogged, coils are dirty, or airflow is blocked, the compressor and fan may run longer. Longer run times mean higher energy use and more wear.
Good maintenance also helps the inverter technology in many mini splits do what it was designed to do: ramp up and down smoothly instead of constantly fighting restrictions. The result is steadier comfort, quieter operation, and better humidity control.
Indoor Air Quality Benefits
Mini split maintenance is not the same as whole-home air purification, but it does affect indoor air quality. Clean filters help capture larger dust particles. Clean surfaces reduce the chance of stale odors. Proper drainage helps prevent moisture from sitting inside the unit.
If someone in the home is sensitive to dust, pollen, or pet dander, filter cleaning becomes even more important. Some mini splits include advanced filtration accessories, but those parts may need replacement rather than washing. Always follow the manual for specialty filters.
Seasonal Mini Split Checklist
Spring Cooling Prep
- Clean indoor filters.
- Wipe the indoor unit and louvers.
- Check the condensate drain for flow.
- Clear the outdoor unit of leaves and spring debris.
- Test cooling mode before the first heat wave.
- Schedule professional service if airflow, odor, or temperature seems off.
Fall Heating Prep
- Clean filters again after summer use.
- Check the outdoor unit clearance before leaves pile up.
- Make sure furniture does not block indoor airflow.
- Test heating mode before the first cold snap.
- Book a heat pump tune-up if the system runs year-round.
After Storms or Yard Work
- Inspect the outdoor unit for branches, leaves, and grass clippings.
- Make sure mulch has not shifted against the base.
- Confirm that airflow openings are clear.
- Look for visible damage to refrigerant line covers or insulation.
Real-World Experience: What Actually Helps Mini Splits Last Longer
In everyday use, mini split maintenance is less about dramatic repairs and more about small habits that prevent drama in the first place. The cleanest, longest-lasting systems are usually owned by people who do boring things consistently. They check filters before they look disgusting. They keep plants away from the outdoor unit. They notice small changes in sound or airflow before the system starts waving a white flag.
One common experience is the “mystery weak airflow” problem. A homeowner may assume the mini split is low on refrigerant or that the compressor is failing. Then the front panel opens, and the filter looks like it has been collecting evidence since the previous presidential administration. After a careful rinse and full drying time, airflow improves immediately. Not always, of course, but often enough that checking the filter should be step one.
Another lesson comes from musty smells. A mini split in a humid bedroom or basement may smell fine in spring but develop a damp odor during heavy summer cooling. The cause is often a mix of moisture, dust, and limited drying time inside the indoor unit. Cleaning filters helps, but if the blower wheel or coil is dirty, the odor can return quickly. In those cases, professional deep cleaning is worth it. It is not glamorous, but neither is explaining to guests that the guest room smells like an old gym towel because “the air conditioner has a personality.”
Outdoor units tell their own stories. Many systems struggle not because of mechanical failure, but because airflow is blocked. Grass clippings stick to coil fins. Leaves gather behind the cabinet. Shrubs slowly grow closer until the condenser is basically living inside a hedge. After clearing the area and gently rinsing the coil, performance can improve noticeably. The system does not need luxury; it needs breathing room.
Pet owners often learn that the standard filter schedule is only a starting point. A home with two dogs, a cat, and a mini split in the living room may need filter checks every two weeks during peak season. Pet hair floats, gathers, and somehow appears in places physics cannot fully explain. Regular vacuuming around the indoor unit and cleaning filters more often can prevent airflow problems.
Vacation homes and rarely used rooms have a different issue. People assume that low usage means no maintenance. But dust still settles, insects still explore, drains can still clog, and outdoor units still collect debris. Before restarting a mini split after months of inactivity, clean the filters, inspect both units, check the drain, and run the system while you are present. That way, if something leaks or sounds wrong, you catch it early.
The most valuable experience-based rule is simple: do not wait for a breakdown to care about maintenance. Mini splits are efficient, quiet, and reliable when they are clean and correctly serviced. Treat filter cleaning like brushing your teeth. Treat professional tune-ups like annual checkups. And treat strange noises, leaks, ice, or smells as messages, not quirks. Your mini split may be small, but it is not shy about asking for help.
Conclusion
Cleaning and maintaining your mini split is one of the easiest ways to protect comfort, efficiency, and indoor air quality. Start with the basics: clean the filters regularly, wipe the indoor unit, keep the outdoor unit clear, check drainage, and pay attention to changes in performance. Use gentle methods, avoid harsh chemicals and high-pressure water, and always follow your owner’s manual.
Most homeowners can handle routine mini split cleaning, but professional service still matters. A trained HVAC technician can deep-clean coils and blower components, inspect electrical parts, verify refrigerant performance, clear drain issues, and catch small problems before they become expensive repairs.
In other words, your mini split does not need pampering. It just needs regular attention. Give it clean filters, open airflow, and a seasonal checkup, and it will keep doing what it does best: making your room comfortable while pretending it is not working very hard.