Adding bots to a Discord server is one of the fastest ways to turn a quiet little chat room into a useful, organized, and slightly more magical community. A good Discord bot can welcome new members, block spam, assign roles, play games, log moderator actions, run polls, post reminders, manage events, and politely do the repetitive tasks nobody wants to touch. Think of it as hiring a tiny digital assistant that never asks for coffee breaks.
But here is the catch: bots are powerful. Add the right one and your server feels smoother than a freshly updated app. Add the wrong one with every permission under the sun, and your server may start feeling like a raccoon got into the control room. This complete guide explains how to add bots to your Discord server safely, how permissions work, what to do after installation, and how to troubleshoot common problems.
What Is a Discord Bot?
A Discord bot is an automated application that joins your server and performs specific tasks. Some bots focus on moderation, while others handle music, leveling, economy systems, reaction roles, giveaways, support tickets, event scheduling, translation, memes, or analytics. Modern Discord bots are usually part of a broader “app” system, which means they may include slash commands, context menu actions, dashboards, and server integrations.
For example, a moderation bot can automatically delete spammy messages, warn members, mute troublemakers, and keep logs for your staff team. A role bot can let users choose interests like “Minecraft,” “Anime,” or “Study Group” by clicking buttons. A utility bot can create polls, reminders, or server stats. The goal is simple: let the bot handle the boring stuff so humans can focus on building a better community.
Before You Add a Bot: Check These Requirements
1. You Need the Right Server Permission
To add bots or apps to a Discord server, you generally need to be the server owner or have the Manage Server permission. If you do not see your server in the invite dropdown, this is usually the reason. Being a friendly, charming, beloved member does not count. Discord wants actual permissions, not vibes.
2. Choose a Trusted Bot
Use reputable sources when searching for Discord bots. The official Discord App Directory, well-known bot directories, and established bot websites are safer places to start. Look for clear documentation, active support, a real website, recent updates, transparent permissions, and user reviews. Avoid random invite links from strangers, especially if the bot asks for Administrator permission before it even says hello.
3. Understand What the Bot Will Do
Before adding a bot, decide what problem you want it to solve. Do you need moderation? Welcome messages? Reaction roles? Music? Ticket support? Giveaways? Server analytics? Installing too many bots can make your server messy, slow to manage, and confusing for members. A server with twelve bots all trying to greet new users is not welcoming; it is a robot chorus.
How to Add Bots to Your Discord Server
Step 1: Find the Bot You Want
Start by finding a bot that matches your server’s needs. You can browse Discord’s App Directory from within Discord, search trusted bot directories, or visit the official website of a known bot. Popular categories include moderation bots, utility bots, leveling bots, role management bots, economy bots, gaming bots, and event bots.
When comparing bots, read the feature list carefully. A bot that says “all-in-one” may be convenient, but it may also request more permissions than a focused tool. For a small friend server, you may only need a simple poll or role bot. For a large public community, you may need moderation logs, anti-spam rules, verification, and ticket support.
Step 2: Click Invite, Add, or Install
Most bot pages include a button labeled Invite, Add to Server, or Install. Clicking it opens Discord’s authorization screen. If you are not logged in, Discord will ask you to sign in first. Make sure you are using the correct Discord account, especially if you manage multiple communities.
Step 3: Select Your Server
On the authorization screen, choose the server where you want to add the bot. If the server does not appear, check whether you have Manage Server permission. You may also need to ask the server owner to add the bot or temporarily grant you the necessary permission.
Step 4: Review the Requested Permissions
This is the most important step. Discord will show the permissions the bot is requesting. Common permissions include View Channels, Send Messages, Manage Messages, Manage Roles, Kick Members, Ban Members, Read Message History, Use Slash Commands, Embed Links, Attach Files, and Add Reactions.
Do not blindly approve every permission. A moderation bot may need Manage Messages, timeout tools, and logging access. A giveaway bot probably does not need to ban members. A role bot may need Manage Roles, but its role must sit high enough in the role list to manage the roles below it. If a simple meme bot asks for Administrator, raise one eyebrow and investigate.
Step 5: Authorize the Bot
After reviewing permissions, click Authorize. Discord may ask you to complete a verification check. Once approved, the bot should appear in your server’s member list. In many cases, it will also create a new role with the bot’s name.
Step 6: Configure the Bot
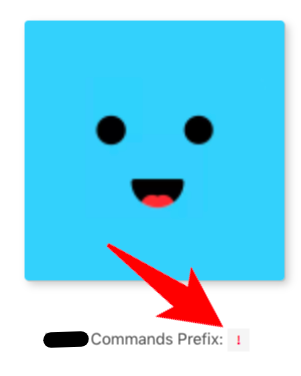
Adding the bot is only half the job. Most bots need setup. Some use slash commands inside Discord, while others use a web dashboard. Visit the bot’s official setup page and configure channels, prefixes if still supported, command permissions, logging, moderation settings, welcome messages, role menus, or whatever features you installed it for.
For example, if you add a moderation bot, create a private staff channel for logs. If you add a welcome bot, choose the welcome channel and write a friendly message. If you add a reaction role bot, create the roles first, then build the role menu. Do not expect the bot to read your mind. Bots are smart, but they are not your aunt who somehow knows you are hungry before you do.
How to Add Bots from the Discord App Directory
Discord’s App Directory is one of the easiest ways to discover and add apps directly inside Discord. Open your server, go to Server Settings, and look for the App Directory option. From there, you can browse apps by category, review their features, and install them to your server if you have the required permissions.
This method is especially helpful because it keeps the process inside Discord’s own interface. You can search for productivity tools, moderation apps, games, social features, and community utilities without bouncing between random websites. It is still wise to review permissions, ratings, descriptions, and support information before adding anything.
How to Add Your Own Discord Bot
If you are building a custom bot, the process is a little different. You will create an application in the Discord Developer Portal, add a bot user, configure installation settings, generate an OAuth2 invite link, and select the correct scopes and permissions.
Important Scopes for Custom Bots
For most custom Discord bots, the invite URL should include the bot scope. If your bot uses slash commands, it should also include applications.commands. Without the right scopes, your bot may join the server but commands may not work correctly.
Keep Your Bot Token Secret
Your bot token is like the bot’s password. Never post it online, share it in screenshots, upload it to a public code repository, or paste it into a random “free bot hosting” website. If the token is exposed, reset it in the Developer Portal immediately. A leaked token can let someone control your bot, and that is how a helpful assistant becomes a gremlin with admin powers.
Discord Bot Permissions Explained
Permissions decide what a bot can and cannot do in your server. Discord uses a role-based permission system, which means a bot’s abilities depend on both the permissions granted during authorization and the position of its role in the server role hierarchy.
Administrator Permission
The Administrator permission gives a bot broad access across the server. Some large, trusted bots request it for convenience, but it is not always necessary. The safer approach is to grant only the permissions the bot needs. This is called the principle of least privilege, which is a fancy way of saying, “Do not give the toaster keys to the whole house.”
Manage Roles and Role Hierarchy
If a bot assigns or removes roles, its role must be above the roles it manages. A bot cannot manage roles higher than its own highest role. For example, if you want a bot to assign a “Member” role, place the bot’s role above “Member.” However, keep the bot below owner, admin, and senior staff roles unless there is a very specific reason.
Channel Permissions
Even if a bot has server-level permissions, channel overrides can block it from working in specific channels. If your bot cannot send messages, read commands, or post logs, check the channel permissions. Make sure the bot can view the channel, send messages, embed links, attach files, or manage messages where needed.
Best Bots to Add by Server Type
For Gaming Servers
Gaming communities often benefit from bots that manage roles, schedule events, track stats, create polls, and post patch notes. A good setup might include a moderation bot, an event bot, and a role menu bot so members can choose their favorite games or platforms.
For Study Servers
Study servers usually need reminder bots, Pomodoro timers, resource channels, role assignment, and moderation tools. Keep the setup simple. Too many entertainment bots can turn “quiet study hour” into “meme Olympics.”
For Creator Communities
Creators may want bots for announcements, social media alerts, member roles, support tickets, and community events. If you run a fan community, use bots that can organize members without overwhelming them with pings.
For Large Public Servers
Large servers should prioritize safety and structure. Use AutoMod, a reliable moderation bot, logging, verification, anti-spam settings, and clear role permissions. Public communities attract more members, which also means more chaos potential. Prepare the umbrellas before the spam storm.
What to Do After Adding a Bot
Once the bot is installed, test it in a private channel before unleashing it on the entire server. Run a basic command, check whether slash commands appear, confirm that logs go to the right place, and make sure regular members cannot use staff-only commands.
Next, organize your bot roles. Create a dedicated “Bots” section in your role list if needed, but remember that role order matters. Keep powerful bots high enough to do their jobs but not higher than trusted human administrators. Then update your server rules or staff guide so moderators know what the bot does and how to use it.
Common Problems and How to Fix Them
The Bot Does Not Appear in My Server List
You probably do not have Manage Server permission in that server. Ask the owner to add the bot or grant the permission temporarily.
The Bot Joined but Commands Do Not Work
Check whether the bot uses slash commands and whether the correct command scope was authorized. Also check if the bot is online, whether it has permission to view the channel, and whether commands are limited to certain roles.
The Bot Cannot Assign Roles
Move the bot’s role above the roles it needs to assign. Also confirm that the bot has Manage Roles permission. If the target role is above the bot, Discord will block the action.
The Bot Cannot Delete Messages
Make sure it has Manage Messages permission in the relevant channel. Channel-specific overrides may be preventing the bot from acting.
The Bot Is Offline
If a third-party bot is offline, check the bot’s support server or status page. If it is your own bot, check your hosting, code errors, token, gateway intents, and API connection.
Safety Tips Before You Trust a Bot
Only add bots from sources you trust. Review requested permissions every time. Avoid giving Administrator permission unless the bot is well-known, actively maintained, and truly needs it. Remove bots you no longer use. Keep a private moderation log channel. Limit who can add apps to the server. And never install a bot just because someone in chat says, “Trust me bro.” That phrase has caused more digital disasters than expired passwords.
Also remember that Discord includes built-in safety tools, including AutoMod and server safety settings. Bots are useful, but they should support your moderation system, not replace it entirely. The best setup combines Discord’s native tools, carefully chosen bots, clear rules, and active human moderators.
How to Remove a Bot from Your Discord Server
If a bot is no longer useful, remove it. Right-click the bot in the member list and choose Kick, or manage it through your server’s app or integration settings when available. After removal, delete unused roles, clean up old bot channels, and review permissions. This keeps your server tidy and reduces unnecessary security risk.
Real-World Experience: What Adding Discord Bots Teaches You
After working with Discord servers, one lesson becomes clear very quickly: the easiest part is inviting the bot. The real skill is knowing why the bot is there, what it should touch, and what it should absolutely not touch. The first time you add a bot, it feels exciting. You click Authorize, the bot appears, and suddenly your server looks more professional. Then reality taps you on the shoulder and asks, “Great, where should the logs go?”
A practical example: imagine you run a gaming server with 300 members. At first, you add a moderation bot to stop spam. Then you add a role bot so people can choose games. Then someone requests music, someone else wants giveaways, and a moderator wants ticket support. Before long, your member list looks like a robot convention. The server may still function, but members may feel confused by too many commands, too many automated messages, and too many bots posting at once.
The better approach is to build slowly. Start with one core bot for moderation and logs. Configure it properly. Test it. Train your moderators. Then add one bot for roles or community engagement if your members actually need it. This avoids clutter and makes troubleshooting much easier. When something breaks, you know which bot to check instead of interrogating six innocent-looking icons.
Another experience many server owners share is permission regret. It is tempting to grant Administrator because it makes setup easier. The bot works instantly, everyone cheers, and nobody has to think about channel overrides. But convenience can become risk. If the bot account is compromised or the bot developer changes direction, broad permissions can create serious problems. Taking five extra minutes to grant only the needed permissions is worth it.
Role hierarchy is another classic “learn it the hard way” topic. Many owners wonder why their role bot cannot assign roles even though Manage Roles is enabled. The answer is usually simple: the bot’s role is too low. Once you move the bot role above the roles it manages, everything works. It feels like magic, except the magic is actually Discord enforcing a security rule.
The best Discord bot setups feel almost invisible. New members get welcomed, spam gets filtered, roles are assigned smoothly, moderators receive logs, and the server keeps moving. Nobody says, “Wow, what a beautifully configured permission structure,” but they do notice that the community feels clean, organized, and easy to use. That is the real win.
Conclusion
Learning how to add bots to your Discord server is simple once you understand the flow: choose a trusted bot, invite it, select your server, review permissions, authorize it, and configure it carefully. The bigger lesson is safety. Bots can improve moderation, engagement, organization, and fun, but they should be added with a clear purpose and limited permissions.
Start small, test everything, watch your role hierarchy, and remove bots you no longer need. A well-managed Discord server does not need a thousand bots. It needs the right tools, the right permissions, and a human owner who does not panic-click Administrator every time a setup screen appears.