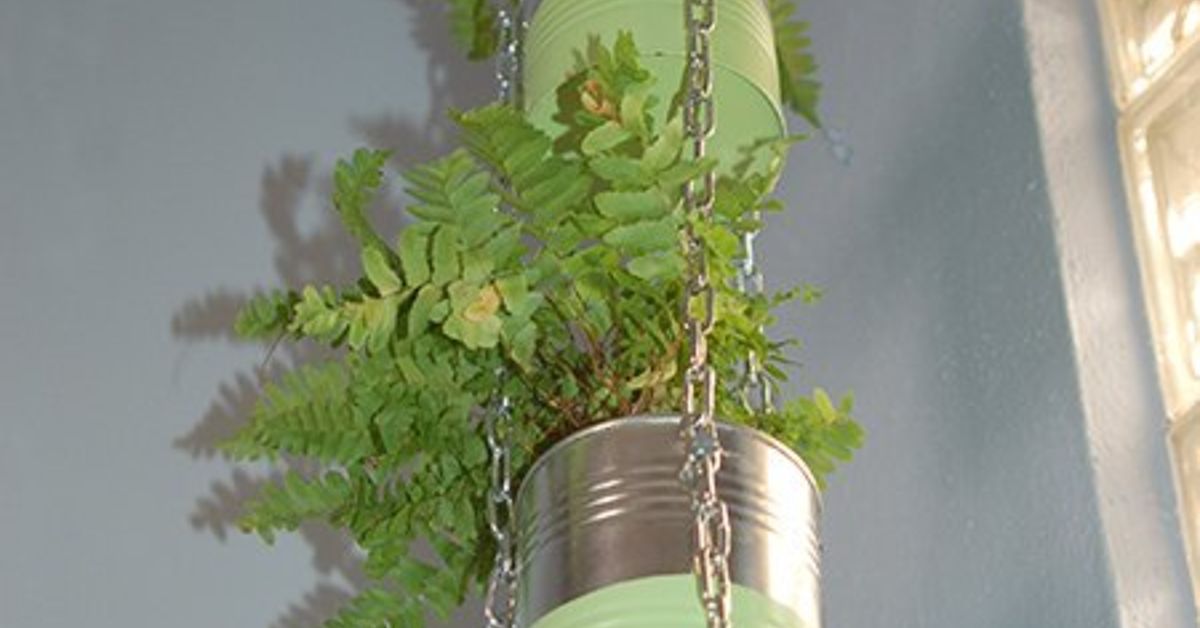
That lonely soup can in your recycling bin? It’s not trashit’s a future home for a pothos cutting, a mini herb garden, or a succulent that thrives on neglect (same, honestly). A recycled can plant holder is one of the easiest ways to upcycle something you already have into decor that looks intentional, not “I panicked at a craft fair.”
In this guide, you’ll learn how to turn everyday cans into sturdy, stylish planterswithout waterlogging roots, slicing fingers on sharp edges, or accidentally creating a rust science experiment. We’ll cover the basics, smarter upgrades, hanging and wall-mounted options, plant pairings, and the little details that make your project look boutique instead of “middle school art class.”
Why a Recycled Can Plant Holder Works So Well
Cans are basically ready-made plant containers: they’re rigid, lightweight, and come in a range of sizesfrom petite tomato paste cans (perfect for propagation) to coffee cans (big enough for herbs). Upcycling them into planters also checks multiple boxes:
- Eco-friendly décor: you reuse what you already have instead of buying new plastic pots.
- Budget-friendly: the container is “free,” which is the best price category.
- Space-smart: cans are great for windowsills, balconies, desks, and vertical gardens.
- Customizable: paint it, wrap it, label it, hang it, mount ityour vibe, your rules.
Safety First: The “Don’t Bleed for Aesthetic” Checklist
Before you start crafting your upcycled tin can planter, do a quick safety pass. Most cans have sharp rims or sneaky jagged edgesespecially if opened with older-style can openers.
Quick prep checklist
- Wash and dry thoroughly: remove all food residue and odors (plants do not want eau de chili).
- Remove labels and glue: soak in warm soapy water; scrub sticky spots with baking soda paste.
- Deburr edges: use sandpaper (medium grit) or a metal file on the rim and any cut edges.
- Protect your hands and eyes: gloves for sanding; safety glasses for drilling.
Pro tip: If you want a smoother rim, slip on a silicone edge trim (or even a thin bead of hot glue, then paint over it) for a soft finish.
Drainage: The Difference Between “Plant Holder” and “Plant Funeral”
If your can doesn’t have drainage, water will pool at the bottom and suffocate roots. Yes, even hardy plants eventually protest. The solution is simple: add drainage holes and a basic setup that keeps soil from escaping.
How many drainage holes do you need?
For most small to medium cans, aim for 3–6 holes on the bottom. For larger cans, add a few more. Holes don’t need to be hugejust enough for excess water to escape.
Three easy ways to make drainage holes
- Nail + hammer method (no power tools): place the can upside down on scrap wood; tap a nail through the bottom to punch holes. Twist slightly to widen them.
- Drill method (cleanest): use a metal drill bit and go slow. Start with a small pilot hole, then widen if needed.
- Awl or screwdriver method: press and twist to puncture, then widen carefully. Great for thinner cans; take your time.
Keeping soil in (without stuffing rocks in)
Skip the old myth of filling the bottom with rocks. It doesn’t improve drainage as much as people think, and it reduces soil volume. Instead:
- Lay a coffee filter, a small square of mesh, or a piece of paper towel over the holes.
- Use a good potting mix (not heavy garden soil), so water moves through evenly.
Rust, Moisture, and Longevity: Keeping Your Can Planter Looking Sharp
Metal + water = rust, eventually. That doesn’t mean you can’t use cansit just means you should choose the right finish for where the planter will live. Indoor planters typically last much longer; outdoor planters need extra protection.
Best strategies to prevent rust
- Use a plastic nursery pot insert: keep the plant in a thin plastic pot and slide it inside your decorative can.
- Seal the interior: apply a clear waterproof sealer or a liner (especially for outdoor use).
- Prime and paint the exterior: a rust-inhibiting primer plus exterior paint helps a lot.
- Elevate the can: keep it from sitting in a puddleuse pot feet, a saucer, or a small stand.
Best-of-both-worlds move: Make it a “plant holder” (decorative outer can) and keep the plant in a removable inner pot. You get style, easy watering, and less rust drama.
Step-by-Step: Classic Recycled Can Plant Holder (Looks Good, Works Better)
Materials
- Clean can (soup, beans, coffee, or beverage canchoose your size)
- Sandpaper or metal file
- Nail + hammer or drill + metal bit
- Primer (optional but recommended)
- Paint (acrylic for indoor; exterior paint for outdoor)
- Clear sealer (optional)
- Coffee filter or mesh
- Potting mix
- Plant (or cuttings)
- Saucer (for indoor use)
Instructions
- Prep the can: remove labels, wash, dry, and sand any sharp edges.
- Add drainage holes: punch or drill 3–6 holes in the bottom.
- Prime (optional): if painting, a primer helps paint stick and reduces chipping.
- Paint and decorate: do thin coats. Let it fully dry between coats.
- Seal (optional): especially helpful if the planter will get frequent water exposure.
- Line the bottom: add a coffee filter or mesh to keep soil from escaping.
- Fill and plant: add potting mix, plant your pick, and water lightly.
- Add a saucer: indoors, always use a tray to catch drips (your windowsill deserves peace).
Design Ideas That Don’t Look Like “Recycling Bin Chic”
If you want your DIY can planter to look elevated, the trick is consistent styling. Pick one theme, repeat it across several cans, and suddenly it looks like a curated collection instead of a random can family reunion.
1) Minimal modern
- Matte paint in neutral tones (white, black, clay, sage)
- Simple label: plant name in a clean font (or handwriting that tries its best)
- Uniform can sizes for a tidy shelf line-up
2) Rustic + cozy
- Wrap cans with jute twine or burlap
- Add a small tag label (chalkboard tag or cardstock)
- Perfect for herb planters in a kitchen window
3) Color-pop set
- Bright colors, geometric tape patterns, or playful stripes
- Great for kids’ rooms or balcony container gardens
4) “I swear I bought these” farmhouse metal look
- Light sanding over dark paint for a distressed finish
- Stenciled herb names: “BASIL,” “MINT,” “THYME”
Hanging and Wall-Mounted Can Planters (Vertical Garden Energy)
Want more plants without losing counter space? A hanging can planter or wall-mounted can garden turns empty vertical space into a living display. Bonus: it makes your home look like you have your life together.
Hanging can planter (simple version)
- Drill two small holes near the rim on opposite sides.
- Thread sturdy wire, twine, or cord through the holes and tie off securely.
- Balance the length so the can hangs level.
- Use a lightweight plant (pothos cuttings, string of hearts, small ferns).
Important: If you hang it indoors, water the plant at the sink and let it drain fully before rehanging.
Wall-mounted can “plant holder” on a board
- Attach cans to a wooden board using pipe clamps or sturdy metal straps.
- Keep plants in inner nursery pots so you can lift them out to water.
- Arrange in a grid for symmetry or stagger for a casual look.
Best Plants for a Recycled Can Plant Holder
Cans are small containers, so match plants to the available root space. Think compact, slow-growing, or happy in tighter quarters.
Great picks
- Succulents: need excellent drainage and light wateringperfect for small cans.
- Herbs (small varieties): chives, thyme, oregano, parsley (keep them trimmed so they don’t outgrow the can).
- Pothos or philodendron cuttings: ideal for propagation in mini cans (use a small inner pot or water-prop jar inside).
- Spider plant babies: easy, forgiving, and great for a row of matching cans.
- Microgreens: quick turnaround and satisfying resultsjust keep moisture consistent.
Plants that struggle in small cans
- Large herbs like full rosemary (eventually wants more space)
- Anything with deep roots (tomatoes, peppers) unless you’re using a large can and truly committing
- Thirsty plants in tiny cans (they’ll dry out fast and judge you for it)
Smart Upgrades: Make It Easier to Maintain (and Harder to Kill)
Use a removable inner pot
This is the single best upgrade: place your plant in a thin nursery pot (with drainage), then set it inside the decorated can. You get the look of a recycled can plant holder with easy watering and less rust.
Add a “hidden saucer” setup
If your can sits on furniture, use a saucer under it. For a cleaner look, choose a saucer that matches the can or tuck the saucer into a shallow tray that holds multiple planters together.
Label like a grown-up
It sounds small, but labeling herbs or plant varieties instantly upgrades the look. Paint a rectangle as a label zone, use a chalk marker, or attach a tiny tag.
FAQ: Recycled Can Planters, Answered Like a Friend (Not a Bot)
Can I grow edible herbs in a can planter?
You can, but for maximum peace of mind, treat the can as a decorative outer sleeve and keep herbs in a food-safe inner pot. That also makes watering and cleanup easier, which is a win even if you’re not anxious about anything ever.
Do I really need drainage holes?
If there’s soil in the can, yes. If you’re using it as a holder for a nursery pot that already drains, then the can itself doesn’t need holesjust don’t let water pool in the bottom.
What’s the easiest way to make a set look “designed”?
Pick one color palette and repeat it. Same paint finish, similar labels, and matching plant types (like all succulents or all herbs) makes it look intentional.
Conclusion: Small Project, Big Payoff
A recycled can plant holder is one of those rare DIY projects that’s easy, practical, and actually cute. Once you nail drainage and choose the right finishing approach (especially if moisture is involved), you can make planters that look polished, save space, and turn everyday “trash” into home décor.
Start with one can. Then you’ll blink and suddenly have a coordinated mini jungle. This is not a warning. It’s a forecast.
Extra: Common DIYer Experiences With Recycled Can Plant Holders (The Stuff You Learn the Fun Way)
If you make a few upcycled can planters, you’ll quickly discover there are two phases: “This is so easy!” and “Why is my windowsill wet?” Here are the most common real-world lessons people run intoso you can skip the messy parts (or at least be ready with a paper towel and a sense of humor).
First, labels are sneakier than they look. Some peel off in one satisfying sheet like a skincare ad. Others leave behind a glue layer that could survive a mild apocalypse. The easiest workaround is patience: soak the can, rub off residue with baking soda paste, and accept that your arm workout is free today. If you’re painting anyway, a little leftover stickiness isn’t the end of the worldjust sand it smooth so your paint doesn’t bubble.
Next, drainage holes feel optional right up until they aren’t. Plenty of first-time can-planter makers try to “just water carefully,” and sometimes it works… until a busy week happens. The best habit is to build drainage into the system: holes + coffee filter + airy potting mix. Even better, use the can as a decorative sleeve for a nursery pot. That one tweak solves about 80% of planter problems, including overwatering, rust, and accidental “swamp-core” aesthetics.
Another common discovery: tiny containers dry out fast. That adorable little tomato paste can on a sunny windowsill? It’s basically a botanical toaster oven. Succulents may love the setup, but thirstier plants might need more frequent checks. DIYers often end up grouping small can planters together on a tray because it’s easier to monitor moisture (and it looks intentionallike you meant to do that all along).
Then there’s the “I made it perfect, and then… rust.” Outdoor setups are the biggest culprit. Even with paint, moisture finds edges and seams. The most successful long-term outdoor can planters usually do one of these: (1) use a removable inner pot so the can stays drier, (2) seal the interior, (3) keep the can under cover, or (4) embrace a little patina as part of the look. Indoors, rust is typically minor if you avoid leaving standing water in the bottom.
People also learn that weight matters with hanging can planters. A can full of wet soil gets heavier than expected, and twine that looked “rustic” can turn into “unplanned gravity experiment.” The fix is simple: use sturdy cord or wire, tie secure knots, and hang from a hook that’s actually anchorednot the kind that peels off when it’s humid. Many DIYers end up watering hanging planters at the sink, letting them drain, then rehangingbecause indoor drip surprises are only funny the first time.
Finally, the best experience most people report is that sets beat singles. One can planter is cute; three to five in a coordinated style looks like décor. If you want that “boutique shelf” effect, pick a consistent theme (same paint finish, same label style, similar plants) and repeat. It’s the easiest way to make recycled materials look elevatedlike you planned it, not like you rescued it from Tuesday night dinner.
The bottom line? Your first recycled can plant holder teaches you the basics. Your second teaches you shortcuts. By the third, you’ll be casually saving cans like they’re limited-edition collectiblesand honestly, at that point, welcome to the club.