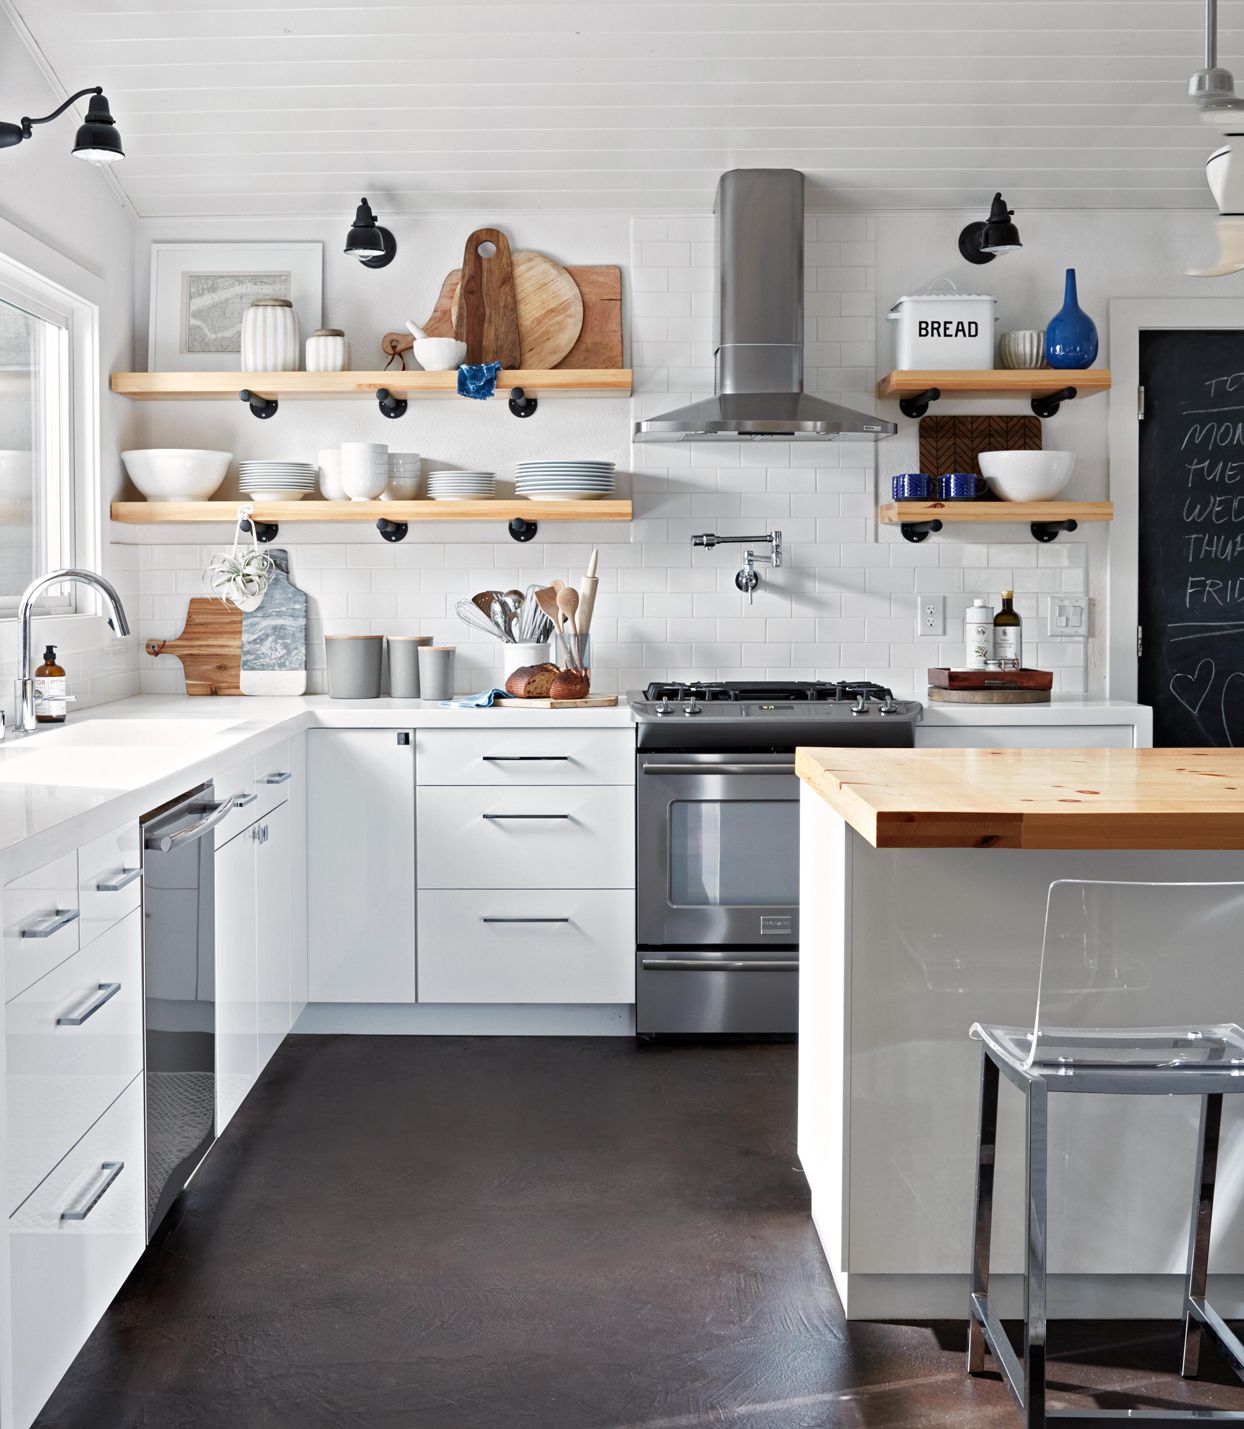
A kitchen remodel is the only home project where you can spend a small fortune and still end up arguing with a refrigerator door. The good news: most kitchen regrets are preventableif you follow a few design guidelines before you pick tile, paint, or that faucet you saw on social media at 2 a.m.
This guide covers the practical, field-tested rules that make a kitchen feel effortless: layouts that match how you actually cook, clearance numbers that keep traffic flowing, landing zones that save your countertops from becoming a game of “hot-pan Jenga,” and the lighting/ventilation basics that keep your kitchen from feeling like a cave… or a steam room.
1) Start With How You Live (Not With a Mood Board)
Before you fall in love with finishes, get crystal clear on how your household uses the kitchen. Your goal is to design around repeatable routines:
- Weeknight speed: Where do you prep? Where do you dump groceries? Who’s doing dishes?
- Multiple cooks: Are you cooking together or taking turns? (Both count as “multiple.”)
- Entertaining: Do guests hover near the stove like moths to a flame, or do they perch at the island?
- Kids, pets, and traffic: Is the kitchen a hallway to everywhere else?
If you design for the wrong version of your life (“We’ll host dinner parties every weekend!”), your kitchen will punish you daily for it. Aim for the boring truth. The boring truth is powerful.
2) Choose a Layout That Fits Your Space (And Your Patience)
Kitchen layouts are like jeans: the one that looks great on someone else may not fit your bodyor your floor plan. Start by picking a layout type that matches your footprint, then refine the workflow.
Common kitchen layouts (and why they work)
- One-wall: Best for small spaces; often improved with an island or table for extra prep.
- Galley: Efficient for cooking; can feel tight if it becomes a main traffic route.
- L-shape: Flexible, social, great for adding an island if you have clearance.
- U-shape: Tons of counter space; needs enough width so it doesn’t feel like a closet.
- Peninsula/Island: Adds prep and seating; requires generous clearances (more on that soon).
The “work triangle” still mattersjust don’t worship it
The classic work triangle connects the sink, cooktop/range, and refrigerator. It’s especially useful in smaller kitchens because it prevents marathon walking while you cook. But modern kitchens often work better as work zones: prep zone, cooking zone, cleanup zone, coffee/breakfast zone, and snack zone.
Translation: keep the triangle in mind, then design zones around your habitsespecially if you have multiple cooks, kids raiding the fridge, or guests who treat your island like a stage.
3) Clearances: The Numbers That Save Your Knees (and Your Relationships)
Clearance planning is where remodels either become delightful… or become a daily obstacle course. The following guidelines are widely used by kitchen designers because they solve common problems: cabinet doors colliding, appliances blocking pathways, and traffic jams near the fridge.
Quick clearance cheat sheet
| Design element | Guideline | Why it matters |
|---|---|---|
| Walkway | At least 36″ | Basic pass-through space (think: “human width, plus groceries”). |
| Work aisle (1 cook) | At least 42″ | Room to open doors, pivot, and move without hip-checking cabinets. |
| Work aisle (2+ cooks) | At least 48″ | Two people can function without playing bumper cars. |
| U-shaped kitchen | Plan at least 60″ between opposing runs | Prevents the “stuck between drawers” feeling and improves access. |
| Dishwasher standing space | At least 21″ clear in front | So you can load/unload without blocking the entire kitchen. |
| Seating clearance (no traffic behind) | 32″ behind seated diner | Enough for a chair and a little breathing room. |
| Seating clearance (traffic behind) | 36″ to squeeze past; 44″ to walk past | Stops “excuse me… sorry… excuse me…” on repeat. |
Pro tip: Clearances should be measured with doors and drawers in mind, not just empty floor space. A kitchen can “technically” fit, but still be miserable if the fridge door blocks the main path or the dishwasher turns the kitchen into a one-person-only zone.
4) The Work Triangle and Zone Planning (With Real Numbers)
If you’re using the work triangle as a sanity check, stick to these practical ranges:
- Distance between each of the three points (sink, cooktop, fridge): typically 4–9 feet.
- Total of all three sides: typically 13–26 feet.
- A triangle leg shouldn’t be sliced by an island more than about a foototherwise it becomes an obstacle course.
In larger kitchens, zone planning often wins. Try this:
- Prep zone: near the sink, with your main cutting surface and trash/compost pullout.
- Cooking zone: range/cooktop plus pots, pans, utensils, oils, and spices.
- Cleanup zone: sink, dishwasher, dish storage, and a landing spot for dirty dishes.
- Snack/coffee zone: fridge access + small appliances, so people can “graze” without entering the cooking lane.
5) Landing Areas: Give Hot Things (and Heavy Things) a Place to Go
“Landing area” is designer-speak for “somewhere to put stuff down without panic.” It’s one of the most overlooked kitchen design guidelinesand one of the most life-improving.
Sink landing area
Plan a landing zone on both sides of the sink: a larger one on one side and a smaller one on the other. This keeps prep and cleanup from taking over the entire counter.
Prep/work area
A great kitchen has a dedicated prep stretch: a continuous section of counter immediately next to the sink. That’s your chopping, mixing, and “where did I put the garlic” headquarters.
Refrigerator landing area
Groceries need a runway. Plan a landing area right next to the handle side of the fridgeor directly across, within easy reachso you’re not stacking eggs on the toaster like a tiny disaster.
Cooking surface landing area
You want landing space on both sides of the cooktop/range. If the cooking surface is on an island or peninsula, include extra counter behind it so hot pans aren’t inches away from someone’s shirt sleeve.
Microwave and oven landing areas
For microwaves and wall ovens, provide a landing area nearbyideally right next to the handle sideso you’re not doing the “hot casserole shuffle” across the room.
Total countertop space matters more than you think
Beyond individual landing zones, a kitchen needs enough total usable counter frontage to support daily life (prep, serving, appliances, and the reality that mail will appear no matter what you do).
6) Storage Guidelines: Organize by Task, Not by Category
If your kitchen storage doesn’t match your workflow, you’ll walk more, dig more, and mutter more. Design storage around zones:
- Prep zone: knives, cutting boards, mixing bowls, measuring tools, colanders.
- Cooking zone: pots/pans, lids, sheet trays, cooking utensils, spices, oils.
- Cleanup zone: dish soap, towels, dishwasher pods, trash/compost.
- Serving zone: plates, glasses, serving bowls, platters near the dining route.
Design moves that make storage feel “custom”
- More drawers, fewer doors: Deep drawers for pots and pans are easier than cabinet spelunking.
- Go vertical: Tray dividers for sheet pans and cutting boards are a space miracle.
- Use the top: Taller uppers reduce dust-collecting dead space and make kitchens look finished.
- Plan the trash: Put trash/compost near prep, not across the room like a punishment.
- Don’t forget the “parking spots”: A cabinet for small appliances keeps counters clear.
A note on realism: you don’t need to store everything in the kitchen. If you bake twice a year, that stand mixer can live somewhere else and visit like a seasonal relative.
7) Lighting: Make It Bright Where You Work, Soft Where You Hang Out
Kitchen lighting should do two jobs: help you see (task lighting) and help you feel (ambient lighting). The guideline most people miss is simple: every work surface deserves task lighting.
Use three layers of light
- Ambient: ceiling fixtures or recessed lights for overall brightness.
- Task: under-cabinet lighting for counters, plus strong light at the sink and range.
- Accent: pendants, toe-kick glow, or interior cabinet lighting for mood and navigation.
Bonus guideline: put lights on separate switches (or dimmers). You want “chop vegetables safely” mode and “late-night snack like a raccoon” mode.
8) Ventilation: Don’t Remodel a Kitchen That Can’t Breathe
Good ventilation is the difference between “I made dinner” and “Why does my sweater smell like salmon?” A correctly sized, ducted ventilation system is one of the most important functional upgrades you can make.
Practical ventilation rules
- Prefer ducted-to-outdoors range hoods whenever possible.
- Size for your cooking style: if you sear, fry, or use high heat often, don’t under-buy your hood.
- Mind the noise: a loud hood gets ignored. A quiet hood gets used. Your nose will thank you.
If you’re installing a high-powered hood, ask your contractor about makeup air requirements in your area. (Translation: air going out needs air coming in, or your house starts acting like a moody vacuum.)
9) Safety and Universal Design: Build for Humans, Not Just for Instagram
Kitchens are busy, hot, sharp, and occasionally chaoticso safety is not optional. And “universal design” isn’t a special style; it’s simply making the kitchen easier for everyone, at every age and mobility level.
Kitchen safety guidelines worth following
- Keep major traffic out of the main work area so cooks aren’t dodging passersby with boiling water.
- Avoid placing the cooktop under an operable window (drafts + curtains + flame = nope).
- Keep a fire extinguisher near the kitchen exit (close enough to grab, not so close you reach through danger).
- Choose rounded counter edges if you have kids, tight spaces, or hips that like to meet corners.
Universal design upgrades that don’t scream “medical”
- Wider aisles where possible (especially for multiple cooks).
- Comfortable reach ranges for frequently used items.
- Lever-style handles and easy-grip pulls.
- At least one work area that can be used seated if needed (great for kids doing homework, too).
10) Pick Materials Like a Person Who Actually Cooks
Your finishes should match your tolerance for maintenance. If you love a dramatic surface that stains easily, that’s finejust know what you’re signing up for.
Countertops
- Busy household? Prioritize durability and easy cleanup over “precious.”
- Baker? Consider how the surface feels for rolling dough and whether it stays cool.
- Entertainer? Make sure you have landing space near serving routes, not just near the stove.
Floors
Choose something that handles spills and standing time. Kitchens are hard on floorswater, grit, dropped pans, and whatever is happening with that one leaky dog bowl.
Backsplash and wall finishes
The best backsplash is the one you can wipe down quickly. Anything with deep texture looks amazing until it becomes a museum exhibit of spaghetti sauce.
11) Efficiency Upgrades That Pay Off Every Day
If you’re remodeling anyway, it’s the perfect time to upgrade the stuff you use constantly: appliances, fixtures, and cooking tech.
Appliances: prioritize efficiency and right-sizing
- Look for high-efficiency models and compare features you’ll actually use.
- Consider induction if you’re open to itit’s fast, efficient, and keeps extra heat out of the room.
- Choose capacity that fits your household, not your ego. (A fridge the size of a studio apartment is not always a blessing.)
Water-smart fixtures
Water-efficient faucets and aerators can reduce waste without ruining performanceespecially when matched to how you wash and prep. If your area has specific fixture flow rules, follow local requirements.
12) Planning Rules That Protect Your Budget (and Your Sanity)
Great kitchen design isn’t just about what you buildit’s also about how you plan. The best guideline here is unglamorous: decide early, and change less.
Use these process guidelines before demo day
- Lock the layout first: moving plumbing and electrical is where budgets go to cry.
- Coordinate appliances early: cabinet sizes, clearances, ventilation, and electrical depend on it.
- Plan a contingency: hidden issues love kitchens (old wiring, water damage, surprise plumbing).
- Think in 3D: doors, drawers, pullouts, and appliance swings matter as much as the floor plan.
- Permits and code: don’t skip them. A “quick remodel” can become a very slow resale headache.
Conclusion: The Best Kitchens Are the Ones That Disappear
A truly great kitchen doesn’t demand attention every time you cook. It quietly supports you: the aisles are generous enough, the prep space is where you need it, the lighting makes your counters usable, and the ventilation keeps the air clean. Follow the guidelines in this article, and your remodel won’t just look good on launch dayit’ll work beautifully on a random Tuesday night when you’re tired and hungry, which is the real test of design.
Real-Life Remodel Experiences: Lessons People Learn the Hard Way (About )
If you want the truth about kitchen remodels, don’t ask someone on reveal day. Ask them three months later, when the novelty wears off and the kitchen starts grading their decisions like a strict teacher. Here are common “experience-based” lessons homeowners and remodel pros bring up again and againshared here as composite stories, because the details change, but the pain points are oddly consistent.
1) “The island looked perfect… until we tried living around it.”
Islands are the golden retrievers of kitchen features: friendly, popular, and often adopted without enough planning. A frequent experience goes like this: the island fits on paper, but in real life, the fridge door opens into the main aisle, the dishwasher blocks the walkway when it’s down, and suddenly the kitchen becomes a one-person stage play. The fix is rarely “smaller island forever.” It’s usually “respect the clearances” and place the island so appliance doors don’t collide with traffic. When people adjust the island size by even a few inches and plan the seating correctly, the kitchen feels twice as calm.
2) “We didn’t plan a landing zone… so the counter became a junk airport.”
Many remodelers swear their biggest daily annoyance wasn’t the color of the cabinetsit was the lack of a place to set things down. No landing area by the fridge meant grocery bags landed on the cooktop. No landing by the oven meant hot dishes got placed wherever fate (and panic) allowed. After living with it, people often add a small shelf, a pull-out landing surface, or simply reclaim a bit of counter by moving a coffee station. The lesson: landing zones aren’t “nice to have.” They’re how you keep your kitchen from feeling permanently cluttered.
3) “We bought statement lighting… and then discovered shadows.”
Pendant lights can be gorgeous. They can also make you chop onions in a dramatic noir film. A common remodel story: the kitchen looks amazing at night, but the countertops are dim because there’s no under-cabinet task lighting. The fix is straightforward and relatively inexpensive compared to other mistakes: add task lighting where you work. Once people do this, they’re shocked by how much more “expensive” the kitchen feelsbecause it’s functional.
4) “We underpowered the hood because we didn’t want noise.”
Another repeat experience: a weak or poorly ducted hood that barely moves air. Homeowners notice it most when they cook anything flavorful (fish, bacon, stir-fry) and the smell lingers like an uninvited houseguest. Often, the hood wasn’t sized for how they cookor it was installed with ductwork that fights airflow. People who upgrade to a properly sized, ducted system and prioritize a quieter model report the biggest quality-of-life improvement of the entire remodel: cleaner air, fewer odors, and less grease everywhere.
5) “Our storage is bigger… but somehow we still can’t find the lids.”
More cabinets don’t automatically equal better storage. Many remodels add square footage but forget workflow: utensils far from the cooktop, trash far from prep, and everyday plates stored across the kitchen from the dishwasher. The happiest post-remodel stories come from kitchens organized by zones. When people move the trash pullout to the prep area, store cooking tools right by the range, and keep dishes near the dishwasher, the kitchen starts feeling “effortless.” It’s not magic. It’s simply putting items where your hands reach for them.
If you take only one experience-based lesson from all of this, make it this: a kitchen remodel succeeds when you design for the ordinary day. The big holiday meal is nice, but Tuesday night is the real client.