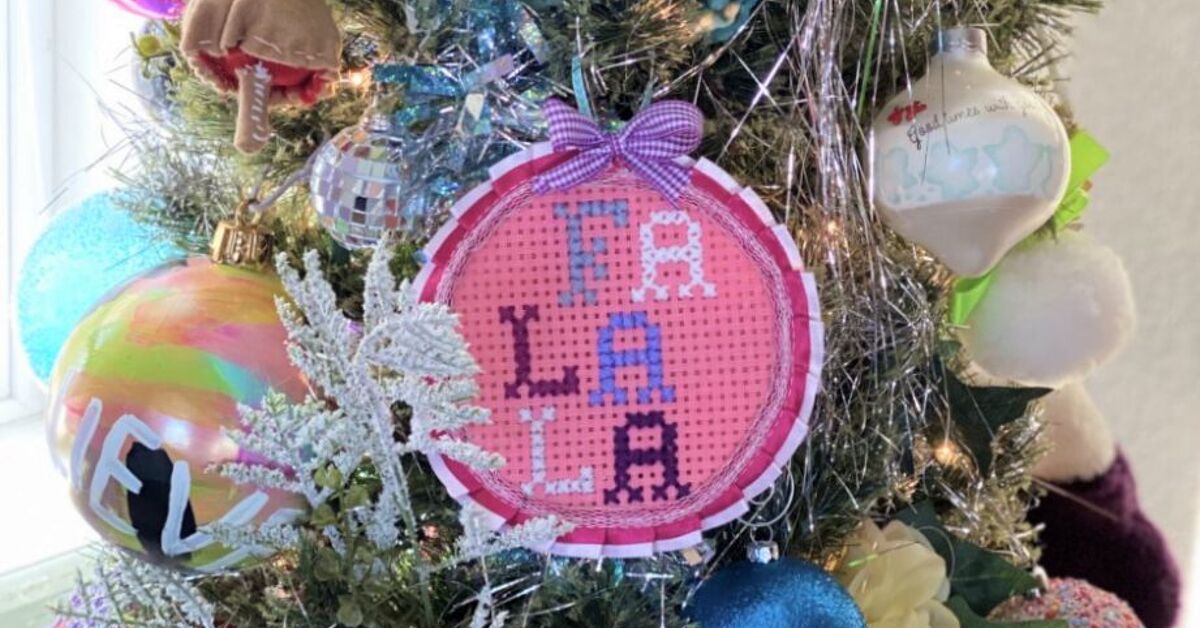
Some holiday crafts require power tools, a garage, and the emotional stamina of a reality-show contestant. Easy cross stitch ornaments are not that kind of project. They are small, charming, wonderfully portable, and forgiving enough for beginners who still occasionally thread the needle and immediately forget what they were doing.
Cross stitch ornaments combine the cozy look of hand embroidery with the practicality of bite-sized projects. Instead of committing to a giant sampler that may or may not be finished before the next presidential administration, you can stitch a tiny snowflake, tree, heart, star, initial, mitten, wreath, or gingerbread house in an evening or weekend. Then you finish it as a hanging ornament, gift tag, mini hoop, framed keepsake, or stocking stuffer.
Whether you are decorating a Christmas tree, making handmade gifts, adding personality to wrapped presents, or simply looking for a relaxing craft that does not involve glitter in your eyebrows, cross stitch ornaments are a smart place to start. They are affordable, beginner-friendly, customizable, and surprisingly addictive. One minute you are stitching a tiny red heart; the next, you are sorting embroidery floss like a tiny textile librarian.
What Are Cross Stitch Ornaments?
Cross stitch ornaments are small decorative pieces made with counted cross stitch, usually stitched on Aida cloth, linen, evenweave, perforated paper, or plastic canvas. The design is formed by X-shaped stitches placed on a grid. Because the fabric has visible squares or holes, it is easier to count and follow a pattern than freehand embroidery.
Most easy cross stitch ornaments are between 2 and 5 inches wide. That small size is part of their charm. They do not require much fabric, floss, or finishing material, and they are perfect for using leftover supplies from larger projects. Popular designs include Christmas trees, candy canes, snowmen, reindeer, stars, initials, floral motifs, farmhouse-style words, Scandinavian borders, and simple geometric patterns.
Why Easy Cross Stitch Ornaments Are Perfect for Beginners
Beginner cross stitch projects should be simple enough to finish before frustration arrives wearing tap shoes. Ornaments fit that description beautifully. They use small charts, limited colors, and basic stitches. Many designs rely almost entirely on full cross stitches, with optional backstitch for outlines and French knots for tiny details such as berries, eyes, or snow.
Another advantage is that ornaments teach multiple skills in one manageable project. You learn how to read a chart, prepare fabric, separate embroidery floss, make neat stitches, secure thread ends, wash or press your work, and finish the piece for display. It is a complete crafting lesson disguised as a cute little decoration.
Basic Supplies for Easy Cross Stitch Ornaments
Fabric
For beginners, 14-count Aida cloth is one of the easiest choices. The holes are large enough to see clearly, and the grid makes counting simple. White, ivory, oatmeal, navy, red, and black Aida all work well for ornaments, though very dark fabric can be harder on tired eyes. If you want a rustic look, natural-colored Aida or linen-style fabric gives ornaments a handmade, heirloom feel.
Embroidery Floss
Most cross stitch patterns use six-strand cotton embroidery floss. For 14-count Aida, stitchers commonly use two strands for regular cross stitches and one strand for backstitch. Metallic thread, variegated floss, and glow-in-the-dark floss can add fun accents, but beginners may want to master cotton floss first. Metallic thread has a personality, and that personality is “sparkly but dramatic.”
Needles
A tapestry needle is best for cross stitch because it has a blunt tip and a larger eye. The blunt tip slides through the fabric holes without splitting the threads. A size 24 or 26 tapestry needle works well for many ornament projects on 14-count Aida.
Hoop or Frame
A small embroidery hoop keeps fabric taut while you stitch. For ornaments, a 3-inch, 4-inch, or 5-inch hoop is usually enough. Some stitchers also use hoops as the final frame, which is one of the easiest finishing methods. Stitch, trim, back it with felt, add ribbon, and suddenly you are the person who “makes handmade ornaments.” Very impressive. Very cozy.
Finishing Materials
To turn stitched fabric into an ornament, gather felt, backing fabric, thin cardboard or mat board, batting, ribbon, cording, fabric glue, sewing thread, sharp scissors, and optional embellishments. Tiny bells, buttons, beads, charms, lace, and mini pom-pom trim can transform a simple stitched square into something gift-shop worthy.
Easy Cross Stitch Ornament Ideas
1. Mini Hoop Ornaments
Mini hoop ornaments are the easiest finishing option for many beginners. Stitch a small motif, place it neatly inside a wooden hoop, trim the excess fabric, gather the back, and cover it with felt. Add ribbon through the hoop screw and hang it on the tree. This method works beautifully for initials, tiny wreaths, snowflakes, hearts, and short words like “joy,” “noel,” or “merry.”
2. Felt-Backed Flat Ornaments
Flat ornaments are lightweight and classic. After stitching, mount the fabric over thin cardboard with a little batting for softness. Add felt or cotton fabric to the back, then finish the edge with cording, blanket stitch, ribbon, or decorative trim. This method is great for square, round, oval, and tag-shaped ornaments.
3. Stuffed Pillow Ornaments
Small pillow ornaments look soft and nostalgic. Stitch the front, cut a matching piece of fabric for the back, sew around the edges, lightly stuff with fiberfill, and close the opening. Add a ribbon loop at the top before sewing shut. Pillow ornaments are perfect for primitive, farmhouse, vintage, and cottage-style designs.
4. Plastic Canvas Ornaments
Plastic canvas is sturdy and easy to cut into shapes. It works well for kids, beginners, and anyone who wants ornaments that can survive being dropped, squashed, or attacked by a curious cat. Cross stitch on plastic canvas can be finished by trimming around the design and covering the edges with a simple whipstitch.
5. Perforated Paper Ornaments
Perforated paper is another fun option. It is firm, easy to cut, and excellent for gift tags or card-style ornaments. Because paper can bend or tear if handled roughly, it is best for simple projects with fewer color changes. Add a punched hole and ribbon, and you have a handmade tag that doubles as a keepsake.
How to Make Easy Cross Stitch Ornaments Step by Step
Step 1: Choose a Simple Pattern
Look for a small design with a limited color palette. A 25-by-25 stitch chart or 40-by-40 stitch chart is usually manageable for beginners. Designs with large blocks of color are easier than designs with constant confetti stitches. Confetti stitches are those lonely single stitches scattered everywhere, usually placed by designers who apparently enjoy testing our patience.
Step 2: Cut Your Fabric
Leave at least 2 inches of extra fabric around the stitched design. This gives you room for the hoop and finishing. If your ornament will be mounted on cardboard, extra fabric also makes it easier to fold and secure the edges at the back.
Step 3: Find the Center
Fold the fabric in half vertically and horizontally to find the center point. Do the same with the chart. Starting near the center helps keep the design properly placed, especially when using a hoop or small backing shape.
Step 4: Stitch the Design
Use two strands of embroidery floss for full cross stitches on 14-count Aida unless your pattern says otherwise. Try to keep all top stitches going in the same direction. This small habit makes the finished piece look smoother and more professional.
Step 5: Add Details
Backstitch can define shapes, outline letters, add branches, or give a snowman his cheerful little grin. French knots can become berries, buttons, stars, or falling snow. If French knots make you nervous, substitute tiny seed beads or a single straight stitch. Crafting is not a courtroom; you are allowed to adapt.
Step 6: Clean and Press
If the piece looks wrinkled or handled, gently wash it according to the floss and fabric instructions, then let it dry flat. Press from the back on a clean towel so the stitches stay raised. Avoid dragging the iron across the front of the design.
Step 7: Finish the Ornament
Choose a finishing style based on your comfort level. Mini hoops are fast and beginner-friendly. Felt-backed flat ornaments look polished. Stuffed pillow ornaments feel soft and traditional. Plastic canvas works well for shaped pieces. Whatever method you choose, add a ribbon loop securely so the ornament hangs straight.
Best Designs for Beginner Cross Stitch Ornaments
The best beginner designs are clear, small, and not overly fussy. Try a red-and-white candy cane, a green triangle Christmas tree, a blue snowflake, a monogrammed initial, a tiny house, a plaid heart, or a simple star. These motifs are easy to recognize even with minimal detail.
For a modern look, use simple shapes and a limited color palette: black and white, red and cream, navy and gold, or forest green and ivory. For a vintage look, choose muted reds, dusty blues, antique gold, and natural linen tones. For kids’ ornaments, bright colors and simple shapes make the project more cheerful and easier to follow.
Tips for Making Cross Stitch Ornaments Look Professional
Small projects can show little mistakes more clearly, but a few smart habits make a big difference. First, avoid carrying dark thread across the back of light fabric where it might show through. Second, keep thread lengths manageable, around 18 inches or less, to reduce tangles. Third, do not pull stitches too tightly. Tight stitches can warp the fabric and make the design look pinched.
For finishing, measure carefully before cutting backing shapes. Use sharp scissors for clean edges. If you use glue, apply it lightly and evenly so it does not soak through. Choose ribbon or cording that complements the stitched design instead of overpowering it. A tiny ornament can wear a bow, but it should not look like it is being swallowed by one.
Common Mistakes to Avoid
One common mistake is cutting fabric too small. Always leave extra room. Another is using too many floss strands, which can make stitches bulky. Beginners may also forget to check fabric count before choosing a pattern. A design stitched on 14-count Aida will finish larger than the same design stitched on 18-count Aida.
Another mistake is rushing the finishing step. The stitching may be beautiful, but crooked backing, lumpy batting, or a poorly attached hanger can distract from it. Take your time at the end. Finishing is where the ornament becomes a keepsake instead of just a square of fabric having a very productive day.
Creative Ways to Use Cross Stitch Ornaments
Cross stitch ornaments are not limited to Christmas trees. Tie them to wrapped gifts as reusable tags. Hang them from cabinet knobs, wreaths, garlands, drawer pulls, or peg rails. Use initials as personalized stocking markers. Make a set of tiny stitched foods for a kitchen tree, or create seasonal ornaments for Valentine’s Day, Easter, Halloween, Thanksgiving, and birthdays.
They also make thoughtful handmade gifts. A stitched housewarming ornament, baby’s first Christmas design, wedding date keepsake, pet portrait silhouette, or family name ornament can feel personal without being expensive. Handmade gifts carry a little extra warmth because they say, “I spent time on you,” which is basically the deluxe version of “I saw this and thought of you.”
How to Store Handmade Cross Stitch Ornaments
Store ornaments in a dry place away from direct sunlight. Wrap delicate pieces in acid-free tissue paper or soft cotton fabric. Avoid crushing stuffed ornaments under heavy decorations. If you used beads, metallic thread, or dimensional trim, store those pieces separately so they do not snag other ornaments.
For heirloom ornaments, add a small label on the back with the year, maker’s initials, or recipient’s name. Years later, that tiny note can turn a simple decoration into a family memory.
Personal Experience: What Making Easy Cross Stitch Ornaments Teaches You
The first thing you learn when making easy cross stitch ornaments is that “easy” does not mean boring. A tiny pattern can still feel satisfying because every stitch shows progress. There is something deeply encouraging about watching a blank piece of Aida turn into a recognizable tree, star, or little red house one X at a time. It is slow enough to feel calming but fast enough that you do not start questioning your life choices halfway through.
Another experience many stitchers share is the joy of using scraps. Cross stitch ornaments are perfect for leftover fabric, short strands of floss, odd buttons, small pieces of felt, and ribbon from previous gifts. Instead of throwing those bits into a drawer where they form a mysterious craft nest, you can turn them into something charming. A small green floss leftover becomes pine branches. A scrap of red felt becomes a backing. A piece of gold ribbon becomes the hanger. Suddenly the craft drawer looks less chaotic and more like a treasure chest with mild organizational issues.
Making ornaments also teaches patience in a gentle way. If you miscount on a tiny project, it is usually fixable. If the back looks messy, nobody has to know unless you invite them to conduct a forensic inspection. If the finishing is not perfect, the ornament still has warmth and personality. In fact, handmade ornaments often look better when they are not factory-perfect. A slightly uneven edge or hand-tied bow reminds people that an actual human made it, probably while drinking coffee and searching for the scissors that were definitely right there five minutes ago.
One of the best experiences is giving the ornaments away. Small handmade gifts are easy to personalize. You can stitch a friend’s favorite color, a child’s initial, a pet-inspired shape, or a tiny symbol that means something to the recipient. These ornaments are light, inexpensive to mail, and easy to tuck into a card. They feel thoughtful without requiring a grand production.
Finally, easy cross stitch ornaments create a lovely yearly tradition. You can stitch one ornament each December, make a set for family members, or create a theme for every year: woodland animals, cozy cottages, holiday sweets, snowflakes, stars, or tiny stitched words. Over time, your tree becomes a stitched scrapbook. Each ornament remembers a season, a mood, a person, or a quiet evening spent making something by hand. That is the real magic of this craft. It is not just about thread and fabric. It is about slowing down long enough to make a small thing with care.
Conclusion
Easy cross stitch ornaments are one of the most rewarding beginner-friendly crafts because they are small, affordable, customizable, and genuinely useful. They help new stitchers practice the basics without feeling overwhelmed, while giving experienced makers a quick project that still feels meaningful. With simple supplies like Aida cloth, embroidery floss, a tapestry needle, felt, ribbon, and a little patience, you can create ornaments that look beautiful on trees, packages, wreaths, garlands, and keepsake displays.
The best part is that every ornament can carry a personal touch. A stitched initial, favorite color, meaningful date, or tiny seasonal motif turns a simple decoration into something memorable. Whether you prefer mini hoops, flat felt-backed ornaments, stuffed pillows, plastic canvas shapes, or perforated paper tags, the process is approachable and fun. Start with one small design, finish it neatly, and do not be surprised if one ornament becomes twelve. Cross stitch has a sneaky way of turning “just one quick project” into a very cozy tradition.