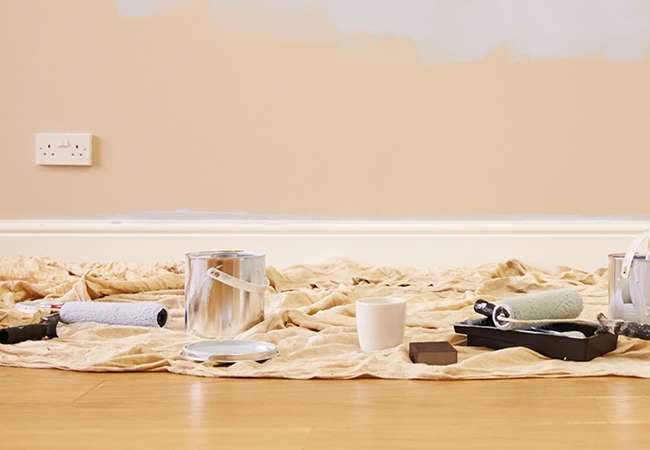
Finishing a DIY project feels fantasticuntil you notice the sawdust in the hallway, paint on the doorknob, and a mysterious screw stuck to your sock. Fortunately, post-project cleanup does not have to become a second renovation. With thoughtful preparation, smart dust control, and a few humble supplies, you can protect your home, save your tools, and reclaim your weekend faster.
The following DIY project cleanup tips cover woodworking, painting, drywall repair, furniture refinishing, tile work, and general home improvement. Many begin before the first tool is switched on because the easiest mess to clean is the one you never create.
Prepare the Work Area Before Making a Mess
1. Create a Cleanup Plan
Before starting, identify what the project will produce: dust, paint, adhesive, sharp scraps, or bulky debris. Decide where each type of waste will go. Five minutes of planning can prevent an evening spent introducing random trash bags to random piles.
2. Empty the Room When Possible
Remove furniture, rugs, curtains, decorations, electronics, and pet supplies. Every object left behind becomes another surface to clean. If something is too heavy to move, place it in the center of the room and cover it completely.
3. Protect Floors With the Right Covering
Use canvas drop cloths for painting because they absorb small drips and are less slippery than thin plastic. For demolition or heavy traffic, choose reinforced floor protection, rosin paper, or secured cardboard that can resist scratches and dropped tools.
4. Seal Off the Project Zone
Hang plastic sheeting across doorways and close gaps with painter’s tape. For a dusty renovation, temporarily switch off the HVAC system and seal supply and return registers inside the work zone. Remove those covers before operating the system again.
5. Establish One Entrance
Create a single route into and out of the work area. Place a sticky dust-control mat, damp towel, or inexpensive runner at the entrance. This simple boundary keeps dirty shoes from touring the entire house like enthusiastic travel bloggers.
6. Assemble a Cleanup Station
Keep trash bags, paper towels, microfiber cloths, a scraper, dustpan, disposable gloves, and the appropriate cleaner within reach. Add two labeled containers for reusable hardware and waste. Immediate cleanup becomes much easier when supplies are not three rooms away.
7. Use Trays Beneath Small Projects
Repair appliances, assemble hardware, or paint small objects over a rimmed tray or shallow box. It catches loose screws, glue drips, wire clippings, and sanding residue. A discarded baking sheet also works, provided nobody later uses it for cookies.
Control Clutter While You Work
8. Follow the “Tools Up, Trash Down” Rule
Keep tools on a bench, cart, or shelf and waste in a container below. Separating useful items from debris prevents damaged tools, lost drill bits, and the classic DIY mystery of accidentally throwing away the one bracket you still need.
9. Keep a Magnetic Parts Dish Nearby
A magnetic tray prevents screws, nails, washers, and driver bits from disappearing. When removing cabinets or fixtures, use separate dishes or labeled bags for each component so reassembly does not become an unwanted logic puzzle.
10. Label Hardware Immediately
Place removed hardware in resealable bags and write its location on the bag: “left cabinet hinge,” for example. Tape the bag to the related component when practical. This tiny habit saves cleanup time and makes tomorrow’s work considerably less confusing.
11. Place Trash Containers on Both Sides of the Room
People postpone cleanup when the trash can is inconvenient. Put lightweight containers near the cutting station and assembly area. Use a rigid bucket for sharp offcuts or broken blades so they cannot puncture an ordinary plastic bag.
12. Clean in Short Intervals
Pause after each major stage to remove debris and return unused tools. Frequent five-minute resets reduce tripping hazards and prevent dust from being ground into flooring. They also make the final cleanup feel like a closing act instead of an unexpected sequel.
13. Capture Dust at the Tool
Connect sanders, saws, and routers to compatible dust extraction whenever possible. Capturing particles where they are generated is more effective than chasing them after they settle on every horizontal surfaceincluding shelves you forgot existed.
14. Avoid Blowing Dust With Compressed Air
Compressed air usually relocates dust rather than removing it. It can also create an inhalation or combustible-dust hazard. OSHA recommends controlling wood dust with collection and vacuum systems instead of creating airborne clouds. Use a suitable vacuum and soft brush attachment.
Make Paint, Stain, Glue, and Caulk Cleanup Easier
15. Line Paint Trays Before Pouring
Use a fitted disposable liner or sturdy foil shaped tightly around the tray. A liner shortens cleanup and makes color changes easier. Make sure it cannot shift under the roller, because a loose liner has the grace and predictability of a startled squirrel.
16. Protect the Paint Can Rim
Pour paint through a removable spout or punch several drainage holes inside the rim where appropriate. Keeping the groove clean allows the lid to reseal properly and reduces splatter when the can is closed.
17. Load Brushes Conservatively
Dip only the working portion of the bristles into paint rather than submerging the brush to its metal ferrule. Less excess paint means fewer drips, faster washing, and a longer-lasting brush.
18. Wrap Tools During Short Breaks
If you will use the same coating again soon, wrap the brush or roller tightly in plastic to limit air exposure. Follow the paint manufacturer’s storage guidance, and never leave wrapped tools near heat, flames, children, or pets.
19. Wipe Spills While They Are Fresh
Keep clean rags and the product-approved cleaner nearby. Blot rather than spread a spill, working from its outer edge toward the center. Test cleaners in an inconspicuous spot before applying them to finished flooring, fabric, or furniture.
20. Match the Cleaner to the Coating
After scraping excess product back into its container, clean water-based paint with soap and water when the label permits. Oil-based coatings generally require the specified solvent and good ventilation. Never improvise a chemical cocktail; the garage is not a chemistry game show.
21. Remove Excess Caulk Before It Cures
Use a caulk-finishing tool or damp cloth when appropriate for the formula. Clean the nozzle, replace its cap, and store the tube according to its label. A small screw or purpose-made plug can help keep some opened nozzles usable.
Handle Dust and Construction Debris Safely
22. Let Airborne Dust Settle
After cutting or sanding stops, allow fine particles time to settle before the final cleaning pass. Keep the work zone isolated during this period. Immediately opening every barrier can release the dust you worked so carefully to contain.
23. Vacuum From High to Low
Begin with window trim, shelves, door frames, and other elevated surfaces. Continue down walls and cabinets before finishing with the floor. Working downward prevents dust from landing on areas you have already cleaned.
24. Use HEPA Filtration for Fine Dust
Drywall, wood, and renovation dust can contain extremely small particles. A properly maintained HEPA-filtered vacuum captures fine material more effectively than a basic household vacuum, which may exhaust dust back into the room.
25. Dry-Clean Drywall Dust First
Remove most drywall dust with a vacuum and microfiber cloth before using moisture. Adding water too early can turn gypsum dust into a streaky paste. Finish with a barely damp cloth and avoid saturating unfinished drywall.
26. Use Damp Wiping as the Final Pass
After vacuuming, wipe hard surfaces with a slightly damp microfiber cloth. Fold the cloth frequently so a clean section contacts the surface. Change rinse water as it becomes cloudy instead of redistributing yesterday’s wall patch around the room.
27. Treat Older Materials as Potential Hazards
Projects in pre-1978 homes may disturb lead-based paint. Older flooring, insulation, siding, and textured products may also contain asbestos. Do not sand, sweep, or vacuum suspect material with ordinary equipment. Test first and use qualified professionals when necessary.
28. Bag Debris Before Removing Barriers
Place dust, chips, and disposable coverings in durable bags while they remain inside the contained area. Seal the bags before carrying them through the house. Fold dirty plastic inward so trapped residue stays inside rather than shaking it loose.
Clean, Inspect, and Store Your Tools Properly
29. Unplug Tools Before Cleaning
Disconnect corded equipment and remove batteries from cordless tools before maintenance. Brush or vacuum dust from housings, vents, guards, and bases without pushing debris into the motor. Follow the manufacturer’s instructions for lubrication and cleaning products.
30. Inspect Blades, Bits, and Sandpaper
Look for chipped teeth, dull edges, cracks, clogged abrasives, and damaged cords. Discard compromised accessories safely and add replacements to a shopping list. Finding a dull blade now is better than discovering it halfway through the next cut.
31. Clean Brushes and Rollers Promptly
Remove as much paint as possible before washing. Clean with the solvent specified on the product label, rinse as directed, reshape brush bristles, and allow everything to dry completely before storage. Well-maintained applicators improve the next finish and reduce waste.
32. Store Oily Rags Safely
Rags containing drying oils, oil-based stain, or solvent can heat up and ignite when piled together. Follow product and local fire-safety instructions. Typically, they should be spread flat outdoors away from structures until completely dry or stored in an approved metal container with a tight-fitting lid.
33. Sort Leftovers Into Keep, Donate, Recycle, and Dispose
Save useful lumber and clearly labeled materials, donate unopened supplies when accepted, recycle eligible metal or cardboard, and separate hazardous products. Do not keep warped scraps, mystery liquids, or seventeen pieces of wood that are “almost long enough.”
34. Follow Local Disposal Rules
Never pour paint, solvent, adhesive, or chemical cleaner into a storm drain. Requirements differ by state and municipality. Check local household hazardous-waste programs or PaintCare availability before discarding leftover coatings, aerosols, solvents, and contaminated materials.
35. Finish With a Five-Minute Reset
Return tools to labeled storage, restock cleanup supplies, charge batteries, empty the appropriate vacuum container, and record any materials needed next time. A clean ending makes the workshop safer and lowers the mental hurdle of beginning another project.
Practical Cleanup Experiences: Lessons From Common DIY Projects
The “Quick” Drywall Repair
A small drywall patch often looks harmless. The repair may cover only a few inches, but aggressive sanding can dust an entire room. The practical lesson is to isolate even modest jobs. Place a drop cloth directly below the patch, keep a vacuum nozzle close to the sanding surface, and use light pressure. For suitable repairs, a damp sanding sponge can reduce airborne dust, although it may leave a softer texture than dry sanding.
The most efficient sequence is to vacuum the wall and nearby trim, clean the floor, wait for remaining particles to settle, and repeat. One pass rarely catches everything. Trying to mop first usually produces pale streaks that make the floor look as though it lost an argument with a bag of flour.
The Weekend Painting Marathon
Painting cleanup becomes exhausting when every tool is left until the final evening. A better routine is to scrape excess paint from rollers and brushes after each color, wipe the can rim, and seal containers immediately. Keep one small bucket for washing and another for rinsing instead of running gallons of water over heavily loaded tools.
Painter’s tape deserves attention too. Remove it according to the coating manufacturer’s timing recommendations, pulling it back slowly at an angle. If the paint has formed a firm film across the edge, score that line carefully before removal. This helps prevent the triumphant reveal from turning into twenty minutes of touching up peeled paint.
The Furniture Refinishing Surprise
Refinishing a table can generate sanding dust, sticky residue, stained rags, and solvent wasteall from one innocent-looking piece of furniture. Divide the work surface into clean and dirty zones. Keep fresh applicators and hardware on one side, then place used abrasives and contaminated rags in designated containers on the other.
Do not bunch oil-soaked materials on a workbench or toss them into ordinary trash while wet. Their fire risk makes immediate, correct handling part of the project, not an optional chore for later. Labeling leftover stain with the furniture name and application date also makes future repairs easier.
The Garage Woodworking Cleanup
Woodworking demonstrates why capturing debris at its source beats sweeping afterward. Connecting a compatible vacuum to the saw or sander reduces airborne material and keeps dust out of tool motors. It also prevents sawdust from mixing with stray screws, wire fragments, and finish-soaked waste.
Before vacuuming the floor, pick up larger offcuts by hand while wearing appropriate gloves. Sharp metal and long splinters can damage vacuum hoses. Clean shelves, window ledges, and tool tops before the floor, then inspect the walking path under strong light. Fine sawdust can be surprisingly slippery on smooth concrete.
The Habit That Makes the Biggest Difference
Across nearly every project, the most useful practice is cleaning at natural stopping points. Remove demolition debris before measuring new materials. Vacuum after sanding but before applying finish. Put away installation tools before bringing furniture back into the room.
These resets improve safety, protect finished surfaces, and reveal mistakes while they are still easy to correct. They also change the emotional ending of a project. Instead of staring at a disaster zone after the final screw goes in, you are left with a short checklist and the pleasant realization that the room is already mostly clean.
A Cleaner Finish to Every DIY Project
Easy DIY cleanup is less about scrubbing harder and more about controlling the mess from the beginning. Protect surfaces, isolate dust, clean in stages, maintain tools promptly, and handle chemicals and oily materials responsibly. These habits shorten post-project cleanup while helping your tools and home finishes last longer.
The next time you tackle a repair, remember that cleanup is part of the buildnot punishment for enjoying power tools. Leave ten percent of the schedule for an organized reset, and the finished project will feel far more satisfying.