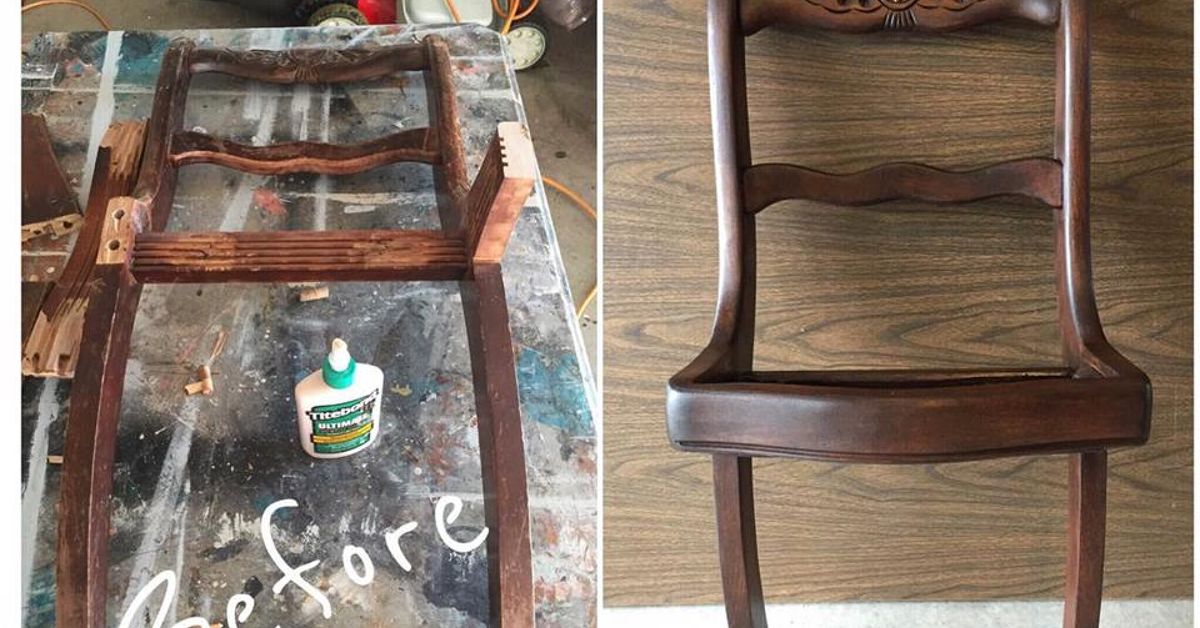
An old chair with a cracked seat and one suspbe one afternoon away from becoming the most interesting garden feature on your wall. Instead of trying to make the chair sit politely at the dining table again, this project gives it a completely different job: framing a living arrangement of colorful, low-growing succulents.
The backrest becomes a decorative frame, the seat becomes a planting pocket, and scratches begin to read as history rather than damage. It is upcycling with a sense of humor: the chair can no longer hold a person, so it holds a tiny desert instead.
Why an Old Chair Makes Such a Good Vertical Planter
Upcycling extends the useful life of materials and reduces the need to buy a brand-new decorative object. It also gives a one-of-a-kind result that mass-produced wall planters rarely match. A discarded wooden chair may already have carved rails, curved spindles, old paint, or a beautifully weathered finish. Those details become part of the design rather than something you have to manufacture.
Vertical gardening adds greenery without using floor space, making this idea useful on a patio, porch, balcony, potting shed, or bright interior wall. Many succulents stay compact and suit shallow containers when drainage, light, and watering are handled correctly.
You are not restoring the chair as furniture; you are converting it into garden architecture. Missing legs or a cracked seat may be removed, while the back and frame must remain strong enough to support soil, plants, water, and mounting hardware.
Choose the Right Chair Before You Reach for a Drill
Look for a Strong Backrest
The best candidate is a solid wood chair with an attractive back and enough sound material to accept screws. Press on the joints, rails, and spindles. A little cosmetic wear is charming; crumbling wood is not. If the backrest twists dramatically in your hands, reinforce the joints with exterior-rated wood glue and screws or choose another chair.
Dining, ladder-back, cottage, and vintage school chairs can all work. Upholstered chairs require more demolition, while metal or plastic models need different tools and mounting methods.
Check Old Paint Before Disturbing It
Vintage paint deserves caution. If the chair may date from before 1978, or its history is unknown, test the finish for lead before sanding, scraping, or creating dust. Do not assume that “shabby chic” means “harmless chic.” A safer approach may be to clean the surface gently, stabilize loose areas, and seal the existing finish rather than aggressively sanding it bare.
Decide Which Parts Will Survive
Keep the full silhouette, shorten the legs, or use only the backrest and seat frame. A complete chair creates a playful illusion, but a trimmed version is lighter, shallower, and easier to hang.
Tools and Materials
- A broken wooden chair with a sound back and seat frame
- Screwdriver, drill, bits, and a jigsaw or handsaw
- Exterior-rated screws and wood glue
- Staple gun with corrosion-resistant staples
- Hardware cloth or sturdy galvanized wire mesh
- Landscape fabric, coconut-fiber liner, or breathable planter liner
- Fast-draining cactus and succulent potting mix
- Perlite, pumice, or a coarse mineral amendment if the mix is dense
- Small succulents or rooted cuttings
- Exterior paint, stain, or clear sealer, if desired
- French cleat, structural screws, or wall anchors rated for the loaded planter
- Gloves, eye protection, and a dust mask appropriate for the work
Use corrosion-resistant hardware. Indoor staples and untreated screws may rust, stain the wood, and weaken outdoors.
How to Turn the Chair Into a Succulent Wall Planter
Step 1: Clean and Inspect the Frame
Brush away dirt, wash the chair with mild soap, and let it dry. Tighten loose joints and reinforce load-bearing connections. Remove upholstery, protruding nails, broken caning, and fragments waiting to snag a sleeve.
Step 2: Open or Rebuild the Seat Area
Remove a detachable seat, or cut an opening in a solid seat while preserving a strong border. For badly damaged seats, screw a simple exterior-grade support frame beneath the remaining rails. The liner and plants will hide it.
Step 3: Create the Planting Pocket
Cut wire mesh larger than the opening and shape it into a shallow basket. Fold the edges over and fasten them securely underneath. A deep pocket adds unnecessary wet weight and dries slowly. Line it with landscape fabric or coconut fiber, overlap the seams, and preserve drainage paths at the lowest point.
Step 4: Finish the Chair
Use a finish suited to the chair’s location and let it cure fully. Matte black creates a gallery-like frame, white feels cottage-inspired, and clear sealer preserves weathered wood.
Step 5: Add a Lightweight, Fast-Draining Growing Medium
Fill the pocket with cactus and succulent mix. Loosen a dense mix with perlite, pumice, or another coarse mineral amendment. Do not rely on a gravel layer instead of drainage; excess water needs a route out of the root zone. Keep the soil below the rim to prevent tiny landslides.
Step 6: Arrange the Succulents Before Planting
Arrange nursery pots on the soil before planting. Use one or two rosettes as focal points, small plants to fill gaps, and trailing types near the edge. Echeveria and Graptopetalum offer rosettes, Sedum trails, and Crassula adds upright structure. Match every choice to the available light and temperature.
Step 7: Plant, Settle, and Wait Before Hanging
Loosen circling roots gently, plant, and firm the mix without compacting it. A thin gravel top-dressing can keep leaves off damp soil. Let the planter rest horizontally while roots settle. Callus fresh cuttings before planting and give them time to root, or the rosettes may stage a dramatic escape when the chair goes vertical.
Mounting the Chair Safely
Weigh the planted chair after watering and allowing excess moisture to drain. That numbernot the weight of the empty chairshould guide the mounting system. Soil and water can make a decorative project surprisingly heavy.
A French cleat is a strong, level, removable option. Fasten it to the chair frame and to studs or masonry with appropriate structural hardware. Use at least two attachment points, add lower spacers to prevent rocking, and never mount the planter over a bed, sofa, play area, or electronics. A wall garden should create conversation, not an insurance claim.
Watering and Ongoing Succulent Care
Use the Soak-and-Dry Approach
Water only when the growing medium has dried. When watering, moisten the root zone thoroughly and allow the excess to drain. Frequent tiny sips can encourage weak roots and make it difficult to know whether the center of the planter is actually wet or dry.
Indoors, remove the chair from its cleat and water over a sink or tub when practical. Otherwise, use a narrow spout and protect the wall and floor. Outdoor watering needs will change with rain, heat, and wind.
Give the Plants Enough Light
Most succulents need abundant light for compact growth and strong color. Introduce direct sun gradually to prevent scorching. Long gaps between leaves or leaning stems suggest insufficient light; soft or yellowing leaves may signal excess moisture. The chair may be decorative, but the plants still vote on the location.
Plan for Maintenance
Remove dead leaves, check for pests, and replace plants that outgrow the shallow pocket. Prune trailing stems when they overwhelm the chair’s shape. Many healthy pieces can be propagated: cut a stem with clean tools, let the cut end dry and callus, then place it in fast-draining medium.
Design Variations Worth Trying
Preserve weathered wood for a rustic porch, use one bold paint color for a modern patio, or pair a curved back with pale paint and cascading sedum. You can also attach small pots to the slats or mount only the decorative chair back above a separate planter box, reducing weight and simplifying plant replacement.
Common Mistakes to Avoid
- Using rotten wood: Paint cannot restore structural strength.
- Skipping drainage: A sealed pocket turns into a root-rot reservoir.
- Overfilling with soil: Extra depth adds weight and holds moisture.
- Hanging immediately: Unrooted plants can shift or fall.
- Mounting by guesswork: Hardware must match the wet, loaded weight and wall type.
- Putting low-light plants in blazing sun: Acclimate them gradually.
- Sanding mystery paint: Test vintage finishes before creating dust.
Experience-Based Lessons From a Weekend Chair-Planter Build
The most useful lesson from this kind of project is that the chair usually makes the design decisions for you. A perfectly square plan drawn on paper may become irrelevant once you discover that the seat rails are slightly uneven, one spindle is loose, and the old paint looks far better than the new color you bought. The project improves when you stop forcing the chair to behave like new lumber and start working with its oddities.
During a typical build, the first surprise is weight. An empty chair back feels almost comically light after the legs and broken seat are removed. Then the mesh, damp potting mix, top-dressing, and plants go in, and the object suddenly develops ambitions of becoming a small appliance. Building the mounting system earlybefore plantingprevents a last-minute scramble involving undersized picture hooks and nervous optimism.
The second lesson is to shape the wire basket more shallowly than instinct suggests. A deep pocket looks useful while it is empty, but succulents do not need a bucket of wet soil hanging beneath them. A shallow, broad cavity is easier to plant, lighter to mount, and faster to dry. It also keeps the foliage visually connected to the chair instead of making the plants look as though they are hiding in a grocery bag.
Plant arrangement also changes once the chair is viewed vertically. A composition that looks balanced on a workbench can appear bottom-heavy on the wall. Photographing the arrangement from directly above, then rotating the photo on a phone, is a simple way to preview the upright design. Trailing Sedum belongs near the lower edge, while strong rosettes look best where the eye naturally landsusually around the center or just above it.
Another practical discovery is that smaller plants settle more reliably than oversized specimens. Large nursery succulents create instant drama, but their root balls may be too deep for the pocket. Smaller rooted plants and callused cuttings fit between the mesh and develop into the available space. The finished planter may look slightly sparse on day one, but it often becomes more convincing as the plants root, branch, and soften the hard outline of the seat.
Watering is where enthusiasm needs boundaries. The first instinct after completing a planter is to water everything generously as a ceremonial finale. That can be a mistake when roots were disturbed or fresh cuttings were used. It is better to consider the condition of the plants, allow damaged roots or cut ends time to dry when appropriate, and begin the normal wet-dry cycle once the planting is stable.
Finally, the chair becomes easier to live with when it is removable. A cleat-style mount allows the planter to come down for watering, pruning, pest checks, or seasonal protection. That one design choice turns a clever object into a manageable garden. Without it, every maintenance task becomes a balancing act involving a watering can, a towel, and language unsuitable for a wholesome gardening article.
Conclusion: Let the Chair Retire Into Something Better
A broken chair does not have to return to its original purpose to be useful again. By reinforcing the sound parts, building a breathable planting pocket, choosing a fast-draining mix, and mounting the finished piece securely, you can turn damaged furniture into a living wall feature with genuine personality.
The result is part garden, part sculpture, and part rescue story. It saves a recognizable object from disposal, makes use of vertical space, and gives small succulents a frame worthy of their strange geometry. Best of all, the project does not require the chair to become perfect. Its cracks, rubbed edges, and uneven history are exactly what make the transformation memorable.
Note: Test uncertain vintage paint before sanding, wear appropriate protective equipment, and select wall hardware using the planter’s fully watered weight.