A pincushion is the tiny sewing-room hero that rarely gets applause. It does not have a motor, a touchscreen, or a dramatic before-and-after photo. Still, the moment your pins roll off the table and disappear into the carpet like tiny metal ninjas, you suddenly understand its importance. Learning 3 ways to make a pincushion gives you practical storage for pins and needles, a quick sewing win, and a very satisfying way to use fabric scraps that are too cute to throw away.
The best part? A homemade pincushion does not need to be complicated. Whether you are brand-new to sewing or already have a fabric stash with its own zip code, you can make a useful, attractive DIY pincushion in an afternoon. This guide walks through three beginner-friendly methods: a classic square pincushion, a jar-top pincushion with storage, and a wrist pincushion you can wear while working. Each one uses basic supplies, simple stitches, and practical techniques that help your pins stay upright, visible, and safely contained.
Before we begin, remember one golden rule: a pincushion should be firm enough to hold pins securely but soft enough for pins to slide in smoothly. Think supportive pillow, not decorative brick. Now grab your fabric scraps, thread, stuffing, and a sense of crafting optimism. We are about to turn small pieces of cloth into something your sewing table will actually thank you for.
What Makes a Good Homemade Pincushion?
A good homemade pincushion does three things well: it holds pins safely, it stays put while you work, and it makes sewing easier instead of adding clutter. The shape can be square, round, tomato-inspired, pie-shaped, jar-mounted, or proudly weird. Function matters most.
For fabric, quilting cotton is the easiest choice because it is stable, easy to sew, and available in endless prints. Linen, wool felt, canvas, and cotton scraps also work well. Stretchy knits are trickier because they can distort, especially when stuffed firmly. Very loose-weave fabrics may let filling leak out or let pin tips poke through in unexpected places, which is how a relaxing craft project becomes a suspense thriller.
For filling, you have several options. Polyester fiberfill is affordable, easy to find, and beginner-friendly. Wool batting or wool roving creates a dense, smooth cushion and is popular among sewists who like a natural filling. Crushed walnut shells add weight and help a pincushion sit firmly on the table, though they should be avoided if anyone in your home has nut allergies. Some sewists also use fine sawdust or fabric scraps, but these can be lumpy if not packed carefully. Rice is sometimes suggested, but it can attract moisture or pests, so it is not the best long-term choice.
You may also see classic tomato pincushions with a tiny attached strawberry. That small strawberry is often filled with emery, an abrasive material traditionally used to clean and polish pins and needles. For most homemade pincushions, you do not need emery. A firm, well-stuffed cushion is enough for everyday sewing.
Basic Supplies for All Three Pincushion Projects
You do not need a professional sewing studio to make a pincushion. A kitchen table, decent lighting, and a place where the cat will not “help” are enough.
Recommended Materials
- Quilting cotton, linen, wool felt, or sturdy fabric scraps
- Coordinating thread
- Sewing needle for hand finishing
- Sewing machine or hand-sewing needle
- Fabric scissors or rotary cutter
- Ruler or measuring tape
- Fabric marker or pencil
- Polyester fiberfill, wool batting, or crushed walnut shells
- Chopstick, point turner, or blunt pencil for corners
- Optional: button, embroidery floss, elastic, ribbon, small jar, hot glue, or craft glue
Helpful Sewing Tips Before You Start
Use a 1/4-inch seam allowance for small pincushions unless your pattern says otherwise. Backstitch at the beginning and end of your seams to keep them secure. Leave a turning gap so you can flip the cushion right side out and add filling. After stuffing, close the opening with a ladder stitch or slip stitch for a neat finish.
Pack the filling firmly. A loose pincushion may look puffy and adorable, but pins will wobble around like they are at a tiny dance party. Firm stuffing gives the pins something to grip.
Way 1: Make a Classic Square Pincushion
The classic square pincushion is the perfect first project. It uses two fabric squares, one seam, some stuffing, and a hand-sewn closure. This is the “little black dress” of DIY pincushions: simple, useful, and easy to customize.
Best For
This method is ideal for beginners, kids learning to sew with supervision, quilters using leftover fabric, and anyone who wants a fast homemade pincushion without hunting down special materials.
Materials
- Two fabric squares, each 5 inches by 5 inches
- Thread
- Stuffing of choice
- Needle for closing
- Optional: button and embroidery floss for a tufted center
Step-by-Step Instructions
- Place the two fabric squares together with the right sides facing each other.
- Pin or clip the edges, leaving a 1 1/2-inch gap on one side for turning.
- Sew around the square using a 1/4-inch seam allowance. Start in the middle of one side, not at a corner, because the opening is easier to close there.
- Clip the corners carefully, making sure not to cut through the stitches. This reduces bulk and helps the corners look sharper.
- Turn the pincushion right side out through the opening.
- Use a chopstick or point turner to gently push out the corners.
- Fill the pincushion firmly with polyester fiberfill, wool batting, or crushed walnut shells.
- Fold the raw edges of the opening inward and close it with a ladder stitch.
Optional Tufted Finish
To make the square pincushion look more polished, add a button in the center. Thread a long needle with strong thread or embroidery floss. Push the needle through the center from top to bottom, add a button if desired, then bring it back up through the center. Pull gently to create a little dip, then knot securely. Do not pull so hard that the pincushion looks like it just received alarming news.
Why This Method Works
A square pincushion is easy to sew because there are no curves, darts, or fussy shapes. It also shows off fabric beautifully. Use one print on top and another on the bottom, or make the top from patchwork scraps. If you want a heavier cushion, fill the bottom half with crushed walnut shells and the top half with fiberfill. This gives you weight plus softness.
Way 2: Make a Jar-Top Pincushion With Storage
A jar-top pincushion is clever because it does two jobs at once. The padded lid holds pins, while the jar underneath stores buttons, clips, bobbins, thimbles, safety pins, or the mysterious tiny objects that appear whenever sewing supplies gather in groups.
Best For
This DIY pincushion is great for small sewing spaces, travel kits, craft rooms, gift baskets, and anyone who likes storage that looks cute instead of purely practical.
Materials
- Small mason jar or clean lidded jar with a two-piece lid
- Fabric circle, about 1 1/2 to 2 inches wider than the jar lid insert
- Fiberfill or wool batting
- Needle and thread
- Cardstock or felt circle for the underside
- Hot glue or strong craft glue
- Ribbon or trim, optional
Step-by-Step Instructions
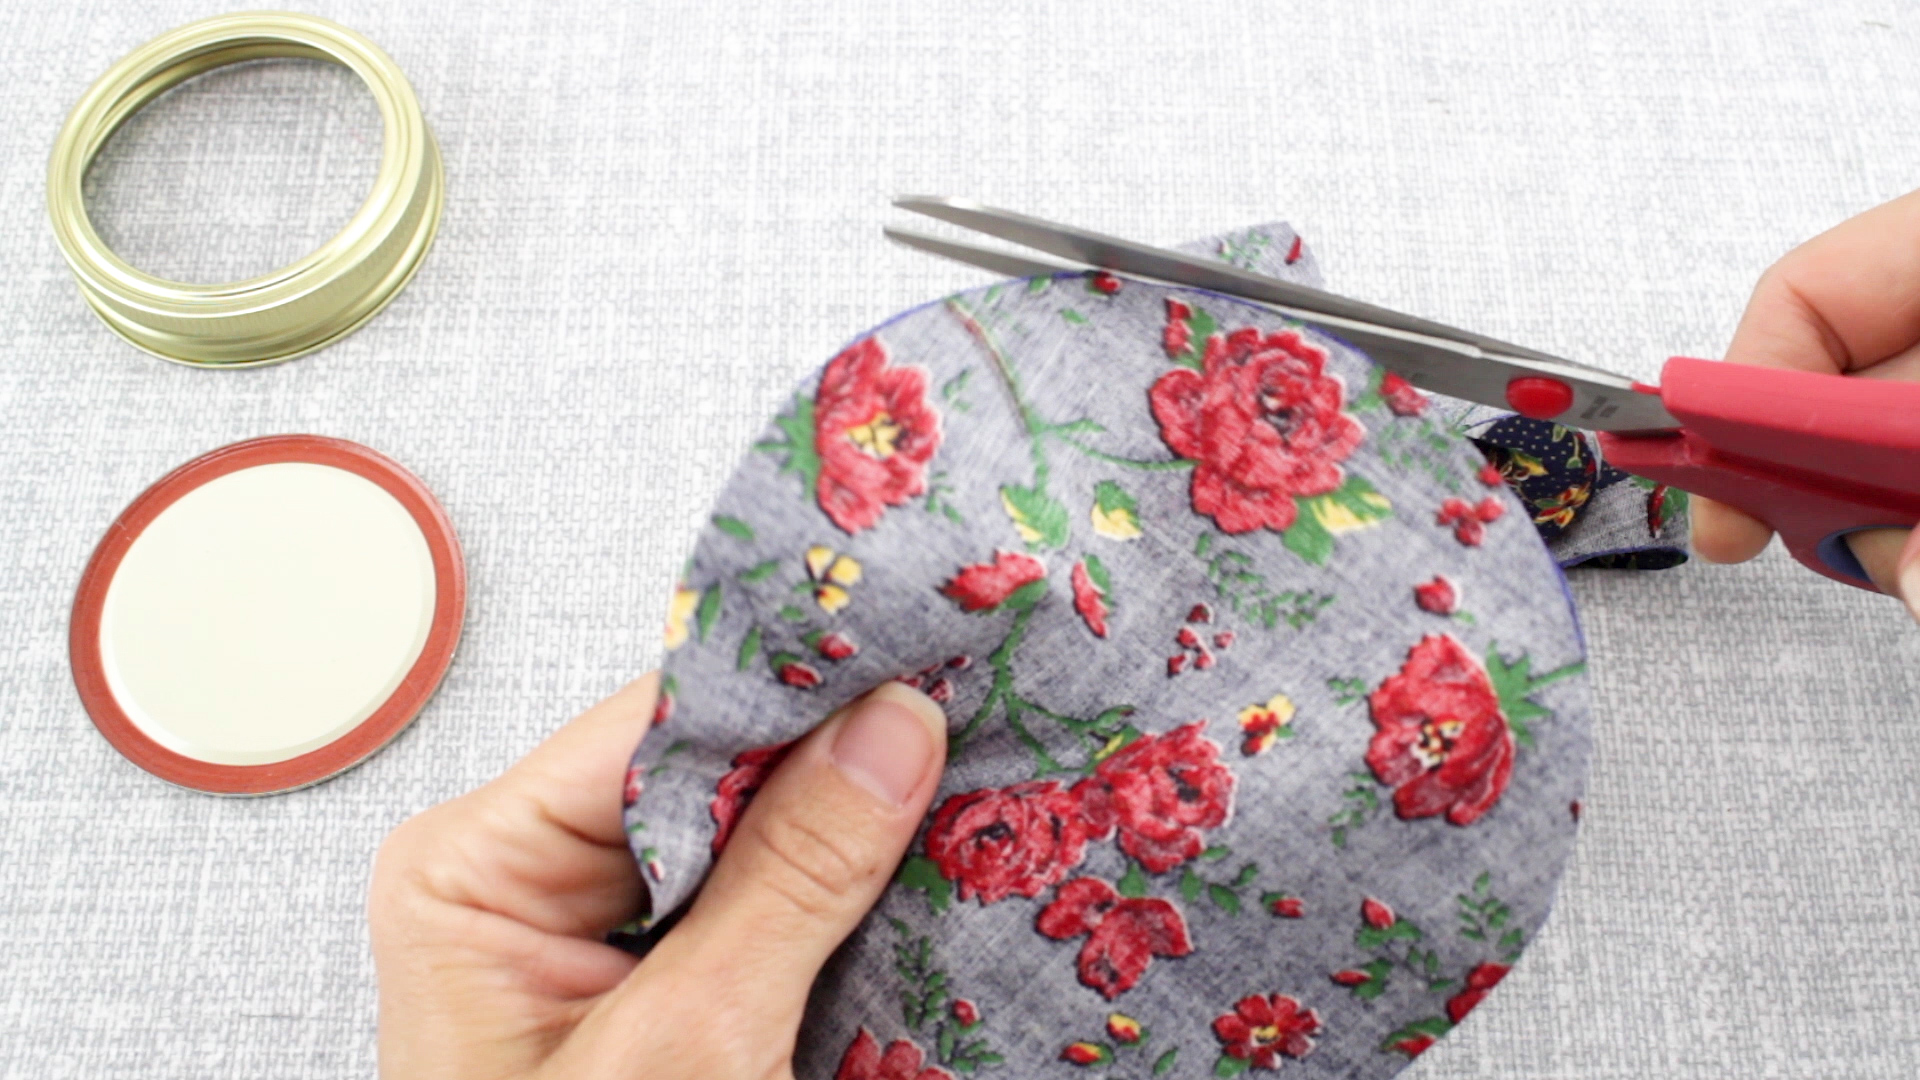
- Remove the flat lid insert from the jar ring. Use it as a guide to cut a fabric circle larger than the lid.
- Place the fabric circle wrong side up. Put a generous mound of stuffing in the center.
- Set the lid insert on top of the stuffing with the top side facing down toward the filling.
- Run a gathering stitch around the edge of the fabric circle.
- Pull the thread to gather the fabric tightly around the lid insert. Adjust the stuffing so the top looks smooth and rounded.
- Knot the thread securely.
- Glue a felt or cardstock circle over the gathered fabric on the underside to hide raw edges.
- Place the padded lid back into the jar ring, padded side up.
- Screw the lid onto the jar and add ribbon or trim if desired.
Tips for a Neater Jar Pincushion
Use enough stuffing to create a rounded dome, but not so much that the jar lid refuses to fit. If the lid looks lumpy, remove the fabric and smooth the filling before gluing anything permanently. Cotton fabric works especially well because it gathers neatly around the lid.
If you plan to store sharp needles inside the jar, keep them in a small needle case or packet rather than loose at the bottom. A jar full of loose needles is technically storage, but so is a junk drawer, and neither should be trusted blindly.
Why This Method Works
The jar-top pincushion is both decorative and practical. It keeps pins on top and small notions below, which makes it perfect for mending kits. It also makes a thoughtful handmade gift. Fill the jar with thread, mini scissors, buttons, and a measuring tape, and you have a compact sewing kit that looks charming on a shelf.
Way 3: Make a Wrist Pincushion
A wrist pincushion keeps pins close while you fit garments, hem curtains, quilt blocks, or move between the ironing board and sewing machine. It is especially useful when your table is crowded or when you keep setting your pins down “somewhere safe,” which is crafter language for “lost forever.”
Best For
This method is perfect for garment sewing, quilting, alterations, craft fairs, and anyone who wants pins within reach without constantly searching the table.
Materials
- Two fabric circles, each about 4 inches wide, or two 4-inch squares
- Stuffing of choice
- Elastic, ribbon, or soft fabric strip for wristband
- Needle and thread
- Optional: felt backing for extra stability
- Optional: small plastic or cardboard insert between cushion and wristband
Step-by-Step Instructions
- Measure your wrist and cut elastic so it fits comfortably, adding about 1 inch for overlap.
- Sew the elastic ends together securely to form a loop. Make sure it is snug but not tight.
- Place the two fabric pieces right sides together.
- Sew around the edge with a 1/4-inch seam allowance, leaving a small opening for turning.
- Turn the cushion right side out.
- Stuff firmly, keeping the shape rounded and compact.
- Close the opening with a ladder stitch.
- Hand-sew the cushion securely to the elastic loop. For more stability, stitch a felt circle to the bottom of the cushion first, then attach the felt to the wristband.
Safety Tip for Wrist Pincushions
Keep the cushion thick enough so pins do not poke through toward your wrist. If you use long pins, add a small plastic circle, firm felt layer, or cardboard insert between the cushion and the wristband. Comfort matters. A wrist pincushion should make sewing easier, not turn your arm into a medieval warning sign.
Why This Method Works
A wrist pincushion saves time because your pins travel with you. It is especially handy for pinning hems, adjusting fabric on a dress form, or working on large projects where a table pincushion is always just out of reach. Make the band from soft elastic, fabric ties, or hook-and-loop tape so it is comfortable for longer sewing sessions.
Choosing the Best Filling for Your DIY Pincushion
The filling changes how your pincushion feels, sits, and performs. For a soft, lightweight cushion, use polyester fiberfill. It is easy to find, inexpensive, and forgiving for beginners. Pack it tightly in small handfuls to avoid hollow spots.
For a slightly denser, smoother feel, use wool batting or wool roving. Many sewists like wool because pins slide in nicely and the cushion feels substantial without being heavy. Wool is also excellent for small hand-sewn pincushions.
For weight, crushed walnut shells are a favorite. They give a pincushion a satisfying heft and help it stay in place on a sewing table. They are especially useful for square pincushions and jar-top pincushions. However, they are not ideal for households with nut allergies, and they can spill if your seams are loose. Use tightly woven fabric and secure stitching.
For a budget-friendly option, combine fillings. A pinch of crushed walnut shells at the bottom and fiberfill at the top creates a cushion that is stable but still soft. This hybrid method works beautifully for beginners who want a practical sewing pincushion without overthinking every grain of filling.
Creative Design Ideas for Homemade Pincushions
Once you understand the basic construction, you can customize your pincushion in dozens of ways. Use patchwork scraps for a quilted look. Add embroidery with your initials, a tiny flower, or a funny phrase like “Pin It Real Good.” Use wool felt to make a cactus, pumpkin, strawberry, mushroom, or tiny pie. Pincushions are one of the rare projects where cute and useful can peacefully share a chair.
Buttons, ribbon, lace, and decorative stitching can add personality, but keep the top practical. Avoid bulky embellishments in the center if they make it hard to insert pins. The prettiest pincushion in the world is not much help if every pin has to dodge a mountain of trim.
Color also matters. A bright pincushion is easier to find on a messy table. If your pins have colorful heads, choose a contrasting fabric so you can see them clearly. For example, white pearl-head pins show up beautifully on navy, red, green, or black fabric.
Common Pincushion Mistakes and How to Avoid Them
Using Too Little Stuffing
Under-stuffed pincushions collapse quickly and do not hold pins upright. Add more filling than you think you need, then add a little more. The cushion should feel firm but not strained.
Leaving Weak Seams
Small pincushions experience a surprising amount of pressure from stuffing and pin use. Backstitch your seams and use a secure hand stitch to close the opening. If you use heavy filling, such as crushed walnut shells, reinforce the closure carefully.
Choosing Fabric That Is Too Thin
Thin or loosely woven fabric can wear out quickly. Choose sturdy cotton, linen, canvas, or felt. If you love a delicate fabric, layer it with lightweight interfacing before sewing.
Forgetting About Pin Length
Long quilting pins need a thicker cushion than short dressmaker pins. If the cushion is too shallow, pin tips may poke through the bottom. Test with your longest pins before calling the project finished.
Real-Life Experience: What Making Pincushions Teaches You
The first pincushion many people make is not perfect. The corners may look a little rounded, the stuffing may gather in one enthusiastic lump, and the closing stitch may be less “invisible ladder stitch” and more “tiny railroad track.” That is perfectly fine. A pincushion is one of the best beginner sewing projects because it lets you practice essential skills on a small, low-pressure item. If it turns out charmingly uneven, congratulations: you made a handmade object with personality.
One of the biggest lessons is how much stuffing matters. A pincushion that looks full before closing often needs more filling after you test it with pins. The fabric stretches slightly, the stuffing settles, and suddenly your pins are leaning like tired tourists. Experienced sewists often stuff in small amounts, press the filling into the corners, test the firmness, then add more before stitching the opening shut. That extra minute makes the finished pincushion feel professional.
Another lesson is that fabric scraps have hidden potential. A 5-inch square left over from a quilt, a linen remnant from a curtain project, or a piece of cotton from an old shirt can become a useful tool. This is why pincushions are so satisfying: they turn leftovers into something you will use constantly. There is also a small emotional bonus. Every time you reach for pins, you see fabric from past projects. Your sewing table becomes a tiny scrapbook, except with sharper edges.
The jar-top pincushion is especially rewarding because it solves a real organization problem. Buttons stop roaming freely. Bobbins have a place to live. Safety pins no longer form secret societies in the bottom of a drawer. When the cushion is attached to the lid, the whole jar feels intentional. It is the kind of project that makes people say, “Wait, you made that?” which is a delightful sentence no crafter ever gets tired of hearing.
The wrist pincushion teaches a different lesson: convenience changes workflow. When pins are on your wrist, fitting fabric becomes faster. You can remove pins as you sew, park them safely, and keep moving. However, comfort is important. A too-tight elastic band is annoying after five minutes, and a too-thin cushion can feel risky with long pins. The best version is thick, secure, and comfortable enough that you forget you are wearing it until someone compliments it.
Making pincushions also builds confidence. You practice measuring, cutting, sewing right sides together, turning corners, stuffing evenly, and closing by hand. These skills appear again in pillows, bags, plush toys, quilt blocks, and home decor projects. In other words, the humble DIY pincushion is secretly a sewing teacher wearing a very small outfit.
Most importantly, handmade pincushions make sewing feel personal. Store-bought tools are useful, but handmade tools bring warmth to the workspace. They remind you that sewing is not just about perfect seams. It is about problem-solving, creativity, patience, and occasionally laughing when your fabric refuses to behave. A pincushion may be small, but it can make your sewing area safer, prettier, and more organized. That is a lot of responsibility for something that fits in your palm.
Conclusion
Learning how to make a pincushion is a simple project with a big payoff. The classic square pincushion is fast and beginner-friendly. The jar-top pincushion adds clever storage for notions. The wrist pincushion keeps pins close while you sew, fit, quilt, or mend. Each method uses basic materials and teaches useful sewing skills you can apply to larger projects.
Whether you choose fiberfill, wool batting, crushed walnut shells, or a combination, the key is to stuff the cushion firmly, sew the seams securely, and choose fabric that can handle regular pin use. Add buttons, embroidery, patchwork, or trim if you want personality, but keep the design practical. A pincushion should be cute, yes, but it also has a job to do. Tiny but mightythat is the pincushion way.
So the next time your fabric bin produces a scrap too small for a tote bag but too pretty for the trash, turn it into a pincushion. Your pins will be safer, your sewing table will look happier, and your future self will not have to crawl around looking for runaway needles. That alone is worth a little stitching.