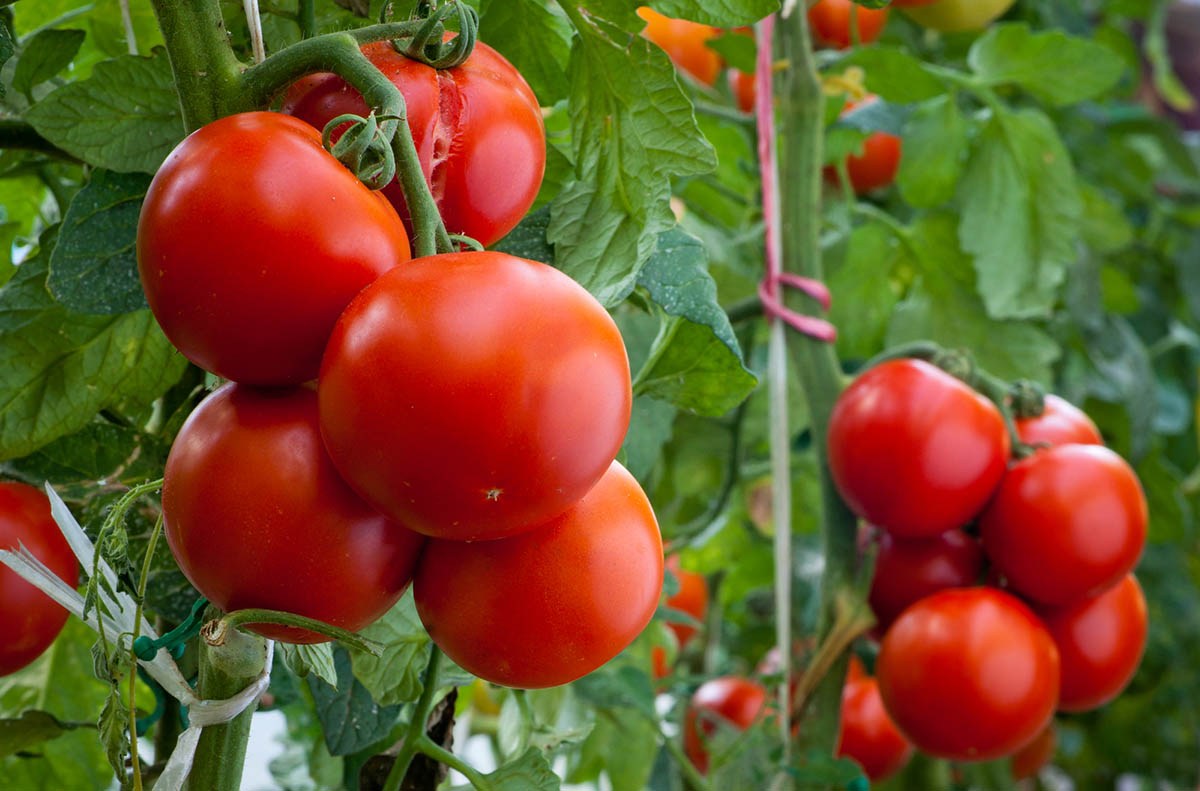
Tomato plants have a reputation for being easy to grow, right up until they begin acting like leafy drama queens. One morning, everything is green and glorious. By dinner, a leaf has curled, a fruit has developed a mysterious black bottom, and something appears to have eaten half the plant without leaving a forwarding address.
The good news is that many common tomato plant problems are manageable when you identify them early. The bad news is that several problems look annoyingly similar. Yellow leaves can indicate disease, pests, overwatering, underwatering, root damage, or simply an older leaf preparing for retirement.
This guide explains how to recognize 11 frequent tomato growing problems, what causes them, and how to respond without spraying every bottle in the garden shed. The first rule is simple: diagnose before you treat. Environmental disorders, fungal diseases, bacterial infections, and insect damage require very different solutions.
How to Diagnose a Struggling Tomato Plant
Before declaring your garden a botanical crime scene, inspect the entire plant. Note where the symptoms started, what the spots look like, whether insects are present, and what the weather has been doing.
- Check the oldest leaves: Many fungal diseases begin near the soil and move upward.
- Inspect new growth: Distorted or unusually small new leaves may suggest herbicide injury, viruses, or sap-feeding pests.
- Examine both sides of each leaf: Aphids, whiteflies, eggs, fungal growth, and mites often hide underneath.
- Look at the fruit: The location and shape of damage can distinguish blossom-end rot, cracking, sunscald, and infectious disease.
- Review your watering: Irregular moisture causes or contributes to several common tomato disorders.
Take clear photographs before removing damaged tissue. If the symptoms remain confusing or several plants are declining quickly, contact a local Cooperative Extension office or plant diagnostic laboratory. Accurate identification is cheaper than buying five treatments that address the wrong problem.
1. Blossom-End Rot
What It Looks Like
Blossom-end rot begins as a pale, water-soaked area on the bottom of a developing tomato. The patch becomes dark brown or black, sunken, and leathery. Secondary fungi or bacteria may later invade the damaged tissue, making the fruit look even more alarming.
Why It Happens
The developing fruit is not receiving enough calcium, but that does not automatically mean your soil lacks calcium. Fluctuating soil moisture, damaged roots, excessive nitrogen, rapid growth, and environmental stress can interfere with calcium movement inside the plant. In other words, the calcium may be present but unable to catch the bus to the tomato.
How to Fix It
Remove badly damaged fruit so the plant can redirect energy. Water deeply and consistently, then add two to three inches of organic mulch to moderate soil moisture. Avoid heavy fertilizer applications and aggressive cultivation near the roots. Do not automatically add eggshells, lime, or calcium products without a soil test; they will not correct poor water management. Later fruit may develop normally once growing conditions stabilize.
2. Early Blight
What It Looks Like
Early blight usually appears first on older, lower leaves. Look for brown or black lesions containing concentric rings that resemble tiny targets. Surrounding tissue often turns yellow, and infected leaves eventually dry up and fall. Severe infections may also produce dark, sunken lesions on stems or fruit.
Why It Happens
Early blight is associated with Alternaria fungi that survive in infected crop debris and can affect tomatoes, potatoes, peppers, and eggplants. Warm, wet conditions encourage the disease, while splashing water helps move spores onto healthy foliage.
How to Fix It
Remove infected lower leaves when plants are dry, disinfect pruning tools between plants, and collect fallen debris. Water at soil level instead of soaking the foliage. Stake or cage plants to improve airflow and keep leaves away from the ground. Mulch can reduce soil splash.
Once early blight is established, fungicides cannot repair damaged leaves, although a product labeled for tomatoes may help protect healthy growth. Follow the label precisely, including application timing and harvest restrictions. Rotate future tomato-family crops into a different section of the garden whenever space allows.
3. Septoria Leaf Spot
What It Looks Like
Septoria leaf spot creates numerous small, round spots, usually on lower leaves. The lesions develop pale gray or tan centers with dark borders. Under close inspection, tiny black dots may be visible inside the spots. These are fungal fruiting structures, not miniature garden decorations.
Why It Happens
The fungus survives in infected tomato debris and certain weeds. Rain, overhead irrigation, and contact with wet plants spread spores. Prolonged warm, humid weather can lead to rapid yellowing and defoliation.
How to Fix It
Prune infected lower foliage carefully, remove diseased debris, and avoid working among wet plants. Increase spacing and airflow, mulch beneath the plants, and use drip irrigation or a watering wand directed at the soil. Do not compost heavily infected material unless your composting system reliably reaches temperatures capable of destroying plant pathogens.
Preventive fungicides may be useful when wet weather persists, but control becomes more difficult after the disease has spread throughout the canopy. Start with sanitation and moisture management rather than expecting a spray to perform a resurrection.
4. Late Blight
What It Looks Like
Late blight can affect upper or lower foliage and often moves much faster than early blight. Leaves develop irregular, greasy-looking or water-soaked patches that turn brown or nearly black. During humid conditions, white fuzzy growth may appear around lesions on the undersides of leaves. Stems can develop dark lesions, and fruit may form firm, greasy brown patches.
Why It Happens
Late blight is caused by the water mold Phytophthora infestans. Cool, wet weather favors outbreaks, and spores can travel between tomato and potato plantings. A severe infection can destroy plants quickly.
How to Fix It
Act immediately when late blight is suspected. Avoid carrying spores through the garden on wet hands, clothing, or tools. Severely infected plants should generally be removed and disposed of according to local extension recommendations rather than placed in an ordinary compost pile.
Contact a local Extension office for confirmation because late blight management may depend on regional outbreaks. Preventive products can protect healthy tissue when applied correctly, but they do not cure infected leaves or fruit. At the end of the season, remove volunteer tomato and potato plants that could help pathogens persist.
5. Bacterial Spot and Bacterial Speck
What They Look Like
Bacterial diseases can produce small, dark leaf spots surrounded by yellow tissue. Spots may merge, causing leaves to look scorched. Fruit symptoms vary but may include raised, scabby, dark, or speckled lesions. Exact identification can be difficult because bacterial spot, bacterial speck, fungal leaf spots, and some environmental injuries overlap visually.
Why They Happen
Bacteria may arrive on contaminated seeds or transplants and survive in infected debris. Splashing rain, overhead watering, wet tools, and handling damp foliage can spread them from plant to plant.
How to Fix Them
Purchase healthy transplants and disease-free seed from reliable suppliers. Remove heavily infected plants, sanitize stakes and tools, and avoid touching plants while they are wet. Water near the soil and rotate crops where practical.
Copper-based products may suppress certain bacterial diseases when applied preventively, but they are not guaranteed cures and may perform poorly where resistant bacterial populations are present. Confirm the diagnosis before treatment and use only products specifically labeled for tomatoes and the identified disease.
6. Fusarium or Verticillium Wilt
What It Looks Like
Vascular wilt diseases often begin with yellowing and drooping of older leaves. Fusarium wilt may affect one side of a plant, branch, or individual leaflet first. The plant may appear to recover overnight before wilting again during the day. Eventually, the wilt becomes permanent.
Cutting lengthwise into the lower stem may reveal brown discoloration in the vascular tissue. However, root rot, bacterial wilt, drought, and waterlogged soil can produce similar symptoms, so do not rely on one clue alone.
How to Fix It
There is no simple curative spray once a systemic wilt has colonized the plant. Remove declining plants with as much of the root system as possible. Do not move contaminated soil to clean beds on shovels, footwear, cages, or tillers.
For future plantings, choose resistant varieties. Seed labels may use letters such as “V” for Verticillium resistance and “F,” “FF,” or “FFF” for resistance to particular Fusarium races. Rotate away from tomatoes and related crops, use clean potting media for seedlings, maintain suitable soil pH, and avoid excessive nitrogen. Resistant rootstocks or grafted tomatoes can help in gardens with recurring soilborne disease.
7. Curling or Rolling Leaves
What It Looks Like
Physiological leaf roll commonly begins on lower leaves. The edges curl upward, and the leaves may feel thick or leathery. Despite their dramatic appearance, affected plants can continue growing and producing normally.
Why It Happens
Heat, dry soil, rapid growth, root disturbance, and heavy pruning can trigger physiological leaf roll. No infectious organism is involved, and the rolled leaves may remain curled even after conditions improve.
How to Fix It
Maintain consistent soil moisture, protect roots, and avoid removing too much foliage at once. If the plant remains vigorous and the leaves retain a normal green color, treatment may not be necessary.
Be more cautious when curling is accompanied by yellowing, mottling, severe stunting, twisted new growth, or an unusually bushy appearance. Those symptoms may indicate virus infection, herbicide exposure, or insect feeding. Viral diseases generally cannot be cured; affected plants may need to be removed to reduce spread.
8. Blossom Drop and Poor Fruit Set
What It Looks Like
The plant produces plenty of cheerful yellow flowers, but they dry up and fall without forming tomatoes. Sometimes tiny fruit begins developing and then aborts.
Why It Happens
Tomato pollination is sensitive to environmental conditions. Several days of high daytime and nighttime temperatures can make pollen sticky or nonviable. Excessive humidity may prevent pollen from releasing properly. Cold weather, very dry or saturated soil, shade, hot winds, and too much nitrogen can also reduce fruit set.
How to Fix It
You cannot negotiate with the weather, but you can reduce additional stress. Water consistently, mulch the soil, avoid heavy nitrogen feeding, and provide temporary afternoon shade during extreme heat. Gently shaking flower clusters around midday can help move pollen under moderate conditions, although it will not restore pollen damaged by severe heat.
Be patient. Healthy plants often begin setting fruit again when temperatures become more favorable. In consistently hot regions, choose cultivars described as heat-tolerant or suitable for warm nights.
9. Cracked Tomatoes
What It Looks Like
Radial cracks extend outward from the stem, while concentric cracks form rings around the shoulders of the fruit. Fresh cracks may expose inner tissue and create an entrance for insects and decay organisms.
Why It Happens
Cracking commonly occurs when fruit swells rapidly after a sudden increase in water. A dry period followed by heavy rain is the classic setup. High temperatures, rapid fruit growth, and variety genetics also influence susceptibility. Large-fruited and heirloom tomatoes are often enthusiastic participants in this particular garden disaster.
How to Fix It
Keep moisture as consistent as possible with deep watering and mulch. Harvest ripening fruit before a forecast of heavy rain, especially if the plants have recently experienced dry conditions. Choose crack-resistant varieties when the problem occurs every season.
Slightly cracked fruit may still be usable if harvested promptly and if the damaged tissue is clean and free from mold, insects, unpleasant odors, or soft rot. Severely split or decaying fruit should be discarded.
10. Aphids and Whiteflies
What They Look Like
Aphids are small, soft-bodied insects that cluster on stems and leaf undersides. Whiteflies resemble tiny white moths and flutter upward when foliage is disturbed. Both feed on plant fluids and may cause yellowing, distorted growth, or general loss of vigor.
A shiny, sticky coating called honeydew is another clue. Sooty mold may grow on this residue, making the leaves look dirty even though the fungus itself is feeding on honeydew rather than directly attacking the plant.
How to Fix Them
Small populations often cause limited damage and may be controlled by lady beetles, lacewings, parasitoid wasps, and other natural enemies. Knock aphids from sturdy plants with a firm stream of water. Remove badly infested leaves when doing so will not strip the plant of essential shade.
For persistent infestations, use a commercial insecticidal soap or horticultural oil labeled for edible crops. Thorough coverage is important because these products generally work through direct contact. Do not substitute dishwashing liquid or household cleaner; formulations designed for dishes may injure tomato foliage. Apply treatments during cooler parts of the day and follow all label precautions.
11. Tomato Hornworms
What They Look Like
Tomato and tobacco hornworms are large green caterpillars with diagonal markings and a hornlike projection at the rear. Their color provides excellent camouflage, but their damage is less subtle. Entire leaves may disappear, stems may be stripped, and green fruit may show feeding scars.
Dark pellets of caterpillar waste on leaves or the ground can help you locate the culprit. Follow the trail upward and stare patiently. Eventually, the “stem” you have been looking at may blink.
How to Fix Them
Hand-picking is highly effective in a home garden. Check plants in the morning or evening, especially near fresh damage. Drop removed caterpillars into soapy water or relocate them only where they cannot return to vegetable crops.
A hornworm covered with small white, rice-like cocoons has been parasitized by beneficial braconid wasps. Leaving it in place allows the next generation of wasps to emerge and continue controlling caterpillars.
If treatment is necessary, products containing Bacillus thuringiensis subspecies kurstaki, commonly called Bt, work best against young caterpillars. Larger hornworms are harder to control and are usually faster to remove by hand. Use only products labeled for tomatoes and follow the required preharvest interval.
A Prevention Plan for Healthier Tomato Plants
The most effective tomato problem-solving begins before symptoms appear. A plant with healthy roots, adequate spacing, and balanced nutrition is better prepared to tolerate weather stress and minor pest activity.
Water the Soil, Not the Leaves
Apply water deeply enough to moisten the root zone, then allow the soil surface to begin drying before watering again. The schedule will vary with temperature, rainfall, soil type, containers, and plant size. Consistency matters more than obeying a rigid calendar.
Use Mulch
Organic mulch reduces evaporation, limits soil splash, suppresses weeds, and helps stabilize root-zone temperatures. Keep it slightly away from the main stem to prevent constantly damp conditions around the crown.
Provide Space and Support
Cages, stakes, or trellises keep foliage off the ground and improve air circulation. Avoid crowding plants merely because the seedlings looked tiny in May. Tomato plants remember that decision and will collect payment in July.
Prune With Restraint
Remove diseased or soil-touching leaves, but preserve enough healthy foliage to shade fruit. Excessive pruning can increase heat stress, physiological leaf roll, and sunscald.
Practice Garden Sanitation
Clean reusable containers, cages, stakes, and cutting tools. Remove diseased debris and volunteer tomato plants. Rotate tomato-family crops where possible, understanding that small gardens may require containers, grafted plants, or resistant varieties when full rotation is unrealistic.
Feed According to Evidence
Use a soil test rather than fertilizing in response to every yellow leaf. Excess nitrogen can create enormous leafy plants with weak fruit production and increased susceptibility to certain disorders. The goal is a productive tomato plant, not a decorative hedge.
Grower Experiences: What a Difficult Tomato Season Teaches You
A common beginner experience is assuming that every tomato symptom has one obvious cause. A few yellow leaves appear, so fertilizer is added. The leaves continue yellowing, so more fertilizer follows. Soon the plant has enough nitrogen to qualify as a small forest, yet it still looks miserable because the original problem was wet soil or early blight.
The first practical lesson is to slow down. A tomato plant rarely benefits from panic. Gardeners who develop a simple inspection routine often catch problems earlier and make fewer unnecessary treatments. Once or twice a week, they examine the lower leaves, inspect new growth, look beneath the foliage, check developing fruit, and feel the soil several inches below the surface. This five-minute habit is more useful than discovering a nearly defoliated plant after returning from vacation.
Watering is another source of hard-earned wisdom. Many growers initially provide small daily splashes because the soil surface looks dry. The upper inch becomes damp, but deeper roots receive little moisture. Other gardeners wait until plants wilt dramatically and then flood the bed. Both routines create stress. Over time, successful growers learn to check the root zone, water deeply, and adjust for rainfall, heat, containers, and soil type.
Mulch often becomes the quiet hero of the season. A layer of clean straw, shredded leaves, or another appropriate material reduces the speed at which soil dries and prevents mud from splashing onto lower leaves. It is not glamorous. Nobody posts a heroic portrait of mulch holding a tiny sword. Yet it prevents more trouble than many expensive garden products.
Another memorable experience is finding the first hornworm. The gardener sees missing leaves but no insect. Fifteen minutes of searching produces nothing. Then a large green caterpillar suddenly becomes visible six inches from the gardener’s face, where it has apparently been laughing the entire time. After that encounter, droppings and stripped stems become much easier to recognize.
Disease also teaches gardeners when to let go. Removing a badly infected plant can feel like surrender, particularly when it is loaded with immature fruit. However, keeping a rapidly declining plant may expose neighboring tomatoes to additional inoculum while producing little usable harvest. Sometimes the best gardening decision is not saving one plant but protecting the remaining ten.
Weather creates its own lessons. A week of extreme heat may cause flower drop despite perfect care. Heavy rain after drought can split fruit overnight. Cool, wet weather can accelerate disease. These events are frustrating, but they also reveal which varieties handle local conditions best. Keeping brief notes about planting dates, weather, symptoms, treatments, and harvest quality turns each growing season into useful evidence for the next.
Finally, experienced gardeners become less offended by imperfect tomatoes. A scarred or slightly cracked fruit is not automatically a failure. Many cosmetically challenged tomatoes are perfectly useful once damaged portions are removed and the remaining tissue is sound. Home gardening offers something grocery displays rarely do: permission for food to look like it has experienced weather.
The real goal is not flawless plants. It is learning to distinguish harmless stress from serious disease, responding proportionately, and harvesting enough tomatoes to make the squirrels jealous. Every season includes a few mysteries, but careful observation steadily replaces guesswork with confidence.
Conclusion
Most common tomato plant problems become easier to manage when you identify the affected plant part, examine how the symptoms are spreading, and consider recent weather and watering conditions. Blossom-end rot and cracking point toward moisture management. Target-shaped lesions suggest early blight, while numerous small pale-centered spots suggest Septoria. Sudden water-soaked lesions require urgent investigation for late blight.
Not every curled leaf needs treatment, and not every insect requires pesticide. Consistent watering, mulch, sanitation, airflow, resistant varieties, and regular inspection prevent many problems while protecting beneficial organisms. When symptoms are severe or unclear, professional diagnosis from a local Extension service can prevent wasted time and ineffective treatments.
Tomatoes may be dramatic, but they are also remarkably resilient. Give them healthy roots, steady care, and a little investigative attention, and they will often recover strongly enough to reward you with the only apology a tomato plant knows how to offer: lunch.