Hanging curtains sounds easy until you are standing on a ladder, holding a rod in one hand, a pencil in the other, and wondering why your living room suddenly looks like it borrowed pants from a taller cousin. Curtains are one of those deceptively simple design details that can make a room feel elegant, taller, brighter, cozier, and more finished. Hang them wrong, though, and even expensive panels can look sad, skimpy, or strangely apologetic.
The good news? You do not need a mansion, custom drapery budget, or secret interior designer handshake to get it right. You need accurate measurements, the right hardware, proper curtain length, and a few designer-approved rules that work in real homes. The biggest secret is simple: hang curtains high and wide. This trick makes windows look larger, ceilings feel taller, and rooms seem more polished almost instantly.
Below is a complete guide to how to hang curtains the right way, from measuring your windows to choosing rod placement, panel width, fabric, hardware, and finishing touches. Think of it as a designer’s cheat sheetminus the invoice and dramatic fabric swatches scattered across your dining table.
Why Curtain Placement Matters More Than You Think
Curtains are not just fabric rectangles trying their best. They frame your windows, control light, add privacy, soften hard edges, improve acoustics, and help define the mood of a room. In design terms, they are vertical lines, texture, color, and architecture all rolled into one.
When curtains are hung too low, the window can feel squat. When panels are too narrow, they look thin and unfinished. When curtains stop awkwardly above the floor, they can make the entire room feel visually chopped. Proper curtain installation solves these problems by creating the illusion of height, fullness, and intention.
A designer looks at curtains as part of the whole wall, not just the window. That means the rod, finials, brackets, panel width, fabric weight, and length all need to work together. The goal is not simply to cover glass. The goal is to make the room look like it had a plan before the drill came out.
The Designer Rule: Hang Curtains High and Wide
If you remember only one curtain-hanging rule, make it this one: mount the rod higher than the window frame and extend it beyond the sides of the window. This is the classic “high and wide” approach, and it is popular because it works almost everywhere.
How High Should You Hang Curtains?
As a general rule, hang the curtain rod 4 to 6 inches above the window frame. In rooms with taller ceilings, you can go higher, often 8 to 12 inches above the frame or a few inches below the ceiling or crown molding. The higher placement draws the eye upward, making the ceiling feel taller and the window appear grander.
For an 8-foot ceiling, a 95- or 96-inch panel often works well if the rod is mounted high. For a 9-foot ceiling, 108-inch curtains may be a better fit. The exact length depends on where the rod sits and whether you want the curtains to kiss, skim, break, or puddle on the floor.
How Wide Should Curtain Rods Be?
Extend the curtain rod at least 4 to 6 inches beyond each side of the window frame. For a more generous designer look, especially on larger windows, extend it 8 to 12 inches on each side. This extra width lets the curtains stack outside the glass when open, which brings in more natural light and makes the window look wider.
For example, if your window is 48 inches wide, consider a rod that measures about 60 to 72 inches, depending on wall space and curtain fullness. The extra inches are not wasted. They are visual magic, like contouring for your window.
How to Measure for Curtains Correctly
Measuring is where many curtain projects go sideways. A tiny mistake with a tape measure can lead to panels that float awkwardly, drag like a wedding gown in a mud puddle, or refuse to close without looking stretched. Measure before buying curtains, rods, brackets, rings, or hooks.
Step 1: Measure the Window Width
Measure the full width of the window, including the frame or trim. Then add extra width for the rod extension on both sides. This gives you the correct rod length.
For a polished look, your total curtain panel width should usually be 1.5 to 3 times the width of the window. A good everyday target is about 2 times the window width. If your window is 50 inches wide, aim for at least 100 inches of total curtain fabric width. That could mean two 50-inch panels or wider panels if you want a fuller, more luxurious look.
Step 2: Measure the Height
Decide where the rod will be mounted first. Then measure from the rod position down to the floor. Do not measure only from the top of the window unless you are planning to hang the rod directly above the frame, which designers usually do not recommend for the most elevated look.
Measure in at least three places: left, center, and right. Floors and ceilings are not always perfectly level, even in newer homes. Your house may look innocent, but it has secrets. Measuring multiple points helps you avoid curtains that are perfect on one side and oddly airborne on the other.
Step 3: Account for Rings, Hooks, or Headers
The curtain style affects the final length. Grommet curtains, rod-pocket curtains, pleated drapes with rings, and back-tab panels all hang differently. Curtain rings can add length. Rod pockets may hide part of the rod. Pleated drapes often hang from hooks below rings, which changes the drop.
Before ordering, check how the curtain attaches to the rod. A beautiful panel can still look wrong if you ignore the heading style. Curtain math is not glamorous, but neither is reordering panels at midnight.
Choosing the Right Curtain Length
Curtain length sets the tone. The wrong length can make a room look unfinished, while the right length gives even affordable curtains a custom feel.
Option 1: The Kiss
The most tailored look is when curtains just touch the floor. Designers often call this a “kiss.” The fabric barely meets the floor without bunching. This works well in living rooms, dining rooms, bedrooms, and formal spaces where you want a clean, elegant finish.
Option 2: The Float
A floating curtain hangs about 1/4 to 1/2 inch above the floor. This is practical for rooms where curtains are opened and closed often. It is also a smart choice for homes with pets, kids, robot vacuums, or anyone who believes curtains should not collect snack crumbs.
Option 3: The Break
A slight break means the curtain extends just a little onto the floor. It feels relaxed and soft without becoming messy. This look works nicely with linen, cotton blends, and casual interiors.
Option 4: The Puddle
Puddled curtains add extra fabric that pools on the floor. This can look romantic and dramatic in formal bedrooms or low-traffic rooms. However, puddling is not ideal for busy spaces, dusty floors, or households with pets that see fabric piles as luxury nap zones.
Picking the Right Curtain Width and Fullness
Width is just as important as length. Curtains that are too narrow look like they are rationing fabric. Full curtains look intentional, soft, and expensive.
For standard fullness, choose total panel width that is about twice the width of your window. For sheer curtains, you may want closer to 2.5 or 3 times the width because lightweight fabric needs extra volume to look full. For heavier drapes, 1.5 to 2 times the width may be enough.
Here is a simple example: for a 60-inch window, two 50-inch panels give you 100 inches of total fabric width. That is about 1.67 times the window width, which can work for medium-weight curtains. If you want a fuller designer look, two 60-inch or 72-inch panels may be better.
Choosing Curtain Fabric Like a Designer
Fabric changes how curtains hang, move, and filter light. Linen has a relaxed, airy feel. Cotton is versatile and easygoing. Velvet adds weight, drama, and insulation. Sheers soften daylight and create privacy without blocking all the sun. Blackout curtains are practical for bedrooms, nurseries, media rooms, and anyone who considers morning sunlight a personal attack.
For living rooms, linen blends and cotton blends are dependable choices because they drape well and suit many design styles. For bedrooms, consider lined or blackout panels for privacy and light control. For dining rooms, a slightly more formal pleat or heavier fabric can help the space feel finished.
Color matters too. Curtains that match or closely relate to the wall color create a calm, seamless effect. High-contrast curtains make a stronger statement. Patterned curtains can add personality, but they should connect with something else in the room, such as upholstery, pillows, rugs, or artwork.
Best Curtain Header Styles
The curtain header is the top section that attaches to the rod. It has a major impact on the final look.
Rod Pocket Curtains
Rod pocket curtains slide directly onto the rod. They are simple and affordable, but they can be harder to open and close smoothly. They work best for decorative panels that stay mostly in place.
Grommet Curtains
Grommet curtains have metal rings built into the fabric. They slide easily and create large, even folds. Their look is more casual and modern, though not always as tailored as pleated drapes.
Back-Tab Curtains
Back-tab curtains hide the rod and create soft pleats. They are a good middle ground between casual rod pockets and formal pleats.
Pinch Pleat Drapes
Pinch pleats are a designer favorite because they look structured, elegant, and custom. They usually hang from rings or hooks and work beautifully in traditional, transitional, and modern rooms.
Tools You Need to Hang Curtains
Before you start, gather everything. Curtain projects become much less charming when you are balancing on a chair, searching for a missing screw, and questioning every life choice that led you to this moment.
- Tape measure
- Pencil
- Level
- Drill
- Screwdriver
- Stud finder
- Wall anchors
- Screws
- Curtain rod
- Brackets
- Curtain panels
- Ladder or sturdy step stool
- Steamer or iron
How to Hang Curtains Step by Step
Step 1: Decide the Rod Height
Mark the height where the brackets will sit. A safe starting point is 4 to 6 inches above the window frame. For a more dramatic look, go higher, especially if you have space between the window and ceiling.
Step 2: Mark the Rod Width
Measure beyond the window frame on both sides. Aim for at least 4 to 6 inches per side, or 8 to 12 inches for a more generous look. Make sure there is enough wall space for finials and curtain stack-back.
Step 3: Use a Level
Use a level to confirm your bracket marks are even. Do not trust your eye alone. Your eye is optimistic. Your level is honest.
Step 4: Find Studs or Use Anchors
If you can screw brackets into wall studs, great. If not, use proper drywall anchors rated for the weight of your curtains and rod. Heavy drapes need stronger support than lightweight sheers. A curtain rod should not sag in the middle like it has given up on adulthood.
Step 5: Install the Brackets
Drill pilot holes, insert anchors if needed, and screw the brackets into place. Check again with the level before fully tightening. For wide rods, use a center support bracket to prevent bowing.
Step 6: Add Curtains to the Rod
Thread the panels onto the rod or attach them with rings and hooks. Secure finials at the ends. If using rings, place the last ring outside the bracket on each side to keep the curtain edge anchored when you open and close the panels.
Step 7: Hang, Adjust, and Steam
Place the rod on the brackets, tighten any set screws, and adjust the panels. Then steam or iron the curtains. Wrinkles can make even beautiful drapes look like they arrived in a suitcase after a rough vacation.
Common Curtain Hanging Mistakes to Avoid
Mistake 1: Hanging the Rod Too Low
Low rods make windows look shorter. Raise the rod several inches above the frame or closer to the ceiling to create height.
Mistake 2: Buying Curtains That Are Too Narrow
Panels should have enough width to look full when closed. Aim for about twice the window width in total fabric.
Mistake 3: Choosing the Wrong Length
Curtains that stop several inches above the floor often look accidental. Choose panels that kiss, skim, break, or intentionally puddle.
Mistake 4: Ignoring Function
A curtain can look gorgeous and still fail the room. Bedrooms may need blackout lining. Street-facing rooms may need privacy. Sunny rooms may need UV-filtering fabric. Design is about beauty, but also about not being woken up at 5:42 a.m. by a sunbeam with an agenda.
Mistake 5: Forgetting the Hardware Finish
Rods, rings, brackets, and finials should relate to the room. Matte black, brass, bronze, nickel, and wood all create different moods. Match the hardware to lighting, door handles, furniture legs, or other finishes for a cohesive look.
Room-by-Room Curtain Tips
Living Room
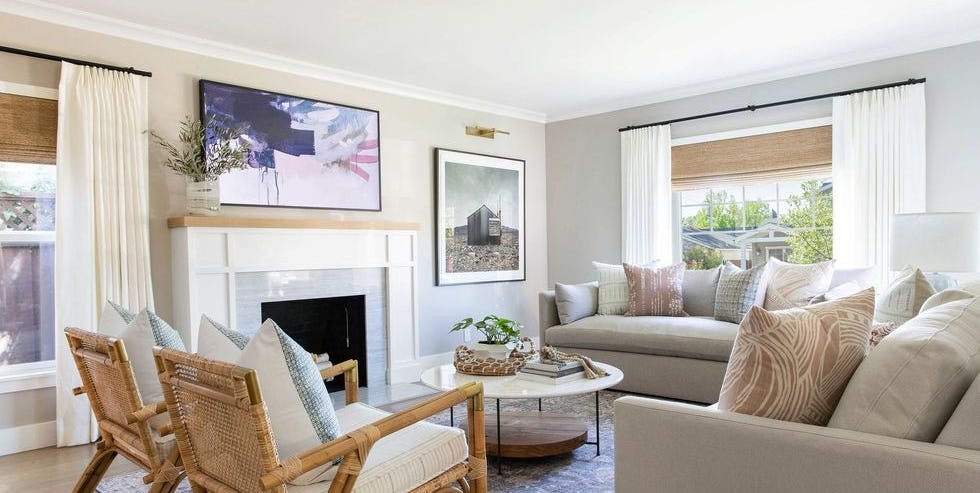
Choose full-length curtains that frame the window and soften the room. If the space feels small, hang the rod high and wide to visually expand the wall. Linen blends, cotton, and light-filtering panels are excellent choices.
Bedroom
Prioritize privacy and light control. Layer sheers with blackout drapes for flexibility. A double rod lets you enjoy filtered daylight during the day and full darkness at night.
Dining Room
Use curtains to add elegance. Pinch pleats, lined panels, or richer fabrics can make a dining space feel more intentional. Let the curtains kiss or lightly break at the floor for a polished finish.
Kitchen
Full-length curtains are not always practical near sinks, counters, or cooking areas. Café curtains, Roman shades, or washable panels may work better. Keep fabric away from heat and moisture.
Home Office
Control glare without making the room feel dark. Light-filtering curtains or layered sheers can reduce screen reflections while keeping the space bright and productive.
Designer Experience: What Actually Makes Curtains Look Expensive
After helping with many curtain decisions in real homes, one lesson shows up again and again: expensive-looking curtains are usually the result of proportion, not price. I have seen affordable store-bought panels look custom simply because they were hung high, extended wide, steamed properly, and chosen in the right length. I have also seen pricey curtains look oddly cheap because the rod was too short or the panels were too skimpy. Curtains are dramatic like that. They do not whisper when something is wrong; they perform it.
One of the most common situations is the “almost right” living room. The homeowner buys nice curtains, mounts the rod directly on top of the window frame, and wonders why the room still feels flat. When the rod moves up near the ceiling and extends several inches beyond the window, the same panels suddenly look more intentional. The wall feels taller. The window feels wider. The room looks brighter because the open panels no longer block the glass. Nothing else changed, but the space starts acting like it has been to finishing school.
Another useful experience involves curtain length. Many people choose 84-inch panels because they are common and convenient. Sometimes they work beautifully. Other times, especially when the rod is hung higher, they end up floating too far above the floor. That small gap can make the room feel unfinished. When longer panels are hemmed to the correct length, the difference is enormous. Hemming is not glamorous, but it is often the secret between “I bought curtains” and “a designer touched this room.”
Fabric also teaches lessons quickly. Lightweight sheers need extra fullness or they can look thin. Heavy velvet needs strong hardware or it may pull the rod down over time. Linen looks relaxed and beautiful, but it wrinkles easily, so steaming is part of the relationship. Blackout curtains are wonderful in bedrooms, but they can feel visually heavy if they are not balanced with sheers or lighter wall colors. Every fabric has a personality. Some are breezy. Some are formal. Some require emotional support and a steamer.
The biggest practical lesson is to install hardware carefully. A rod that is level, secure, and properly anchored makes everything else easier. If brackets are uneven, the curtains will never look quite right. If the rod is too thin for heavy panels, it may sag. If anchors are weak, the whole arrangement can become a slow-motion home improvement tragedy. Taking an extra 15 minutes to measure, level, and anchor correctly saves hours of frustration later.
Finally, the best curtain installations consider how the room is actually used. In a child’s bedroom, curtains that float slightly above the floor may be smarter than a dramatic puddle. In a formal guest room, a soft break can look elegant. In a sunny living room, lined curtains can protect furniture from fading. In a rental, tension rods or no-drill brackets may be the right compromise. Designer style is not about following rules blindly. It is about using the rules to make the room more beautiful, comfortable, and livable.
Conclusion: Curtains Are the Shortcut to a Finished Room
Learning how to hang curtains the right way is one of the fastest ways to upgrade a room. The designer formula is simple: hang the rod high, extend it wide, choose enough fabric fullness, get the length right, and install hardware securely. These details may seem small, but together they create a room that feels taller, softer, brighter, and more complete.
Whether you choose breezy linen, tailored pinch pleats, dramatic velvet, practical blackout panels, or cheerful café curtains, the installation matters as much as the fabric. Measure carefully, use a level, support the rod properly, and finish by steaming the panels. Your windows will look larger, your ceiling will feel higher, and your room will finally have that “yes, an adult lives here” polish.