A new router may arrive looking like a mysterious plastic spaceship with blinking lights, tiny labels, and enough ports to make you question your life choices. Fortunately, setting up a home router is much easier than the equipment makes it appear. In most homes, the job comes down to connecting the correct cable, following a setup wizard, creating secure passwords, and placing the router somewhere other than behind a metal filing cabinet.
This guide explains how to set up and configure a router from start to finish. You will learn how to connect it to a modem, access its settings, secure your Wi-Fi network, improve coverage, create a guest network, test performance, and fix common problems. The instructions apply broadly to standalone routers, mesh Wi-Fi systems, and many internet-provider gateways, although individual menu names may differ.
Before You Begin: Know What Equipment You Have
A router shares your internet connection among phones, computers, televisions, game consoles, smart speakers, and other devices. A modem connects your home to your internet service provider. Some providers supply a single gateway that combines both functions in one box.
If you purchased your own router and your provider already gave you a modem-router gateway, you may need to enable bridge mode on the provider’s gateway. Bridge mode turns off its routing function so your new router can manage the network without creating a double-NAT arrangement. Double NAT is not always disastrous, but it can cause headaches with online gaming, remote access, port forwarding, and certain work applications. Xfinity specifically recommends checking bridge mode when a personal router is connected behind its gateway.
Gather These Items
- Your router and its power adapter
- Your modem or provider gateway
- At least one Ethernet cable
- A phone, tablet, or computer
- Your internet account information, if required
- The router’s default Wi-Fi name and password
The default network details are usually printed on a label underneath or behind the router. Many newer models also include a QR code that lets a phone connect without manually typing the temporary password. NETGEAR, Verizon, and other manufacturers use these labels to provide initial login information.
Step 1: Choose a Good Router Location
Router placement has a surprisingly large effect on Wi-Fi performance. Put the router near the center of the home, in an open and elevated position. A shelf is generally better than the floor, and the middle of the house is usually better than the far corner of a basement.
Avoid hiding the router inside a cabinet or placing it directly beside a microwave, large television, cordless-phone base, aquarium, concrete wall, or metal appliance. Wi-Fi signals can pass through ordinary walls, but dense materials and electrical interference weaken them. The FCC recommends central placement and suggests mesh equipment or an extender when one router cannot adequately cover the home.
If your modem is stuck in a poor location, use a longer Ethernet cable to position the router more favorably. Ethernet does not care whether your decorating style is minimalist, farmhouse, or “cables everywhere until Saturday.”
Step 2: Connect the Router to the Modem
- Turn off or unplug the modem.
- Unplug the router if it is already powered on.
- Connect one end of an Ethernet cable to the modem’s Ethernet port.
- Connect the other end to the router’s WAN or Internet port.
- Reconnect the modem’s power and allow it to finish starting.
- Connect power to the router and wait for its status lights to stabilize.
The WAN port is often a different color from the router’s LAN ports. The WAN port receives the internet connection; the LAN ports connect wired devices inside your home. Spectrum and major router manufacturers follow this same basic modem-to-WAN wiring arrangement.
Starting the modem before the router gives the modem time to establish a connection with the provider. Some modems remember the previously attached device, so a full power cycle may be necessary when replacing an old router.
Step 3: Connect a Phone or Computer
You can configure most routers through a mobile app or a browser-based management page. Manufacturer apps are often the simplest choice because they identify the router, guide you through the wiring process, and check for updates automatically.
To use Wi-Fi, open your device’s network settings and select the temporary network name printed on the router. Enter the printed password or scan the QR code. For the most reliable setup, connect a computer to a LAN port with an Ethernet cable. A wired connection prevents you from being disconnected when the Wi-Fi name or password changes. TP-Link specifically recommends a wired connection for wireless-setting changes and firmware updates when practical.
Accessing the Router in a Browser
Open a browser and enter the management address listed in the router’s instructions. Common local addresses include 192.168.0.1 and 192.168.1.1, but you should use the address provided for your model. Some brands use a local setup name instead of a numeric address.
You do not need an active internet connection to open a router’s local management page. Your phone or computer only needs to be connected directly to the router. TP-Link, Verizon, ASUS, Linksys, and NETGEAR all provide either local web interfaces, mobile apps, or both.
Step 4: Follow the Internet Setup Wizard
The router will usually try to detect your internet connection automatically. Most cable and fiber connections use a dynamic IP address, meaning the provider assigns the required network information without asking you to type anything.
You may need additional details in less common situations:
- PPPoE: Enter the username and password supplied by your internet provider.
- Static IP: Enter the IP address, gateway, subnet mask, and DNS information assigned by the provider.
- VLAN settings: Some fiber or specialized services require a particular VLAN identification number.
- MAC registration: A provider may need to register the new router or release the old device’s address.
Do not randomly select PPPoE, static IP, or VLAN options because they sound impressively technical. Use them only when your provider has supplied the corresponding information. Modern setup wizards normally guide users through the connection type, time zone, Wi-Fi settings, and firmware check.
Step 5: Change the Router Administrator Password
The router administrator password controls access to the settings dashboard. It is different from the Wi-Fi password used by household devices. Change the administrator password during setup, even when the router arrives with a unique factory credential.
Create a long password that is not reused for email, banking, social media, or other accounts. Store it in a reputable password manager. Anyone who gains administrator access may be able to change your DNS settings, expose devices, disable protections, or lock you out of your own network.
The FTC and CISA recommend changing default credentials, keeping router software current, and turning off unnecessary remote-management access. The FTC also advises logging out of the administrator interface after configuration.
Step 6: Create Your Wi-Fi Name and Password
The Wi-Fi network name is also called the SSID. Choose a recognizable name that does not reveal your full name, apartment number, or exact address. “SmithFamily_Unit12B” is helpful to neighbors, delivery drivers, and anyone conducting an oddly specific Wi-Fi survey.
Create a strong, unique Wi-Fi password. A long passphrase made from several unrelated words is easier to type and harder to guess than a short collection of substitutions such as P@ssw0rd1. Avoid phone numbers, pet names, birthdays, and anything displayed on your social profiles.
Select WPA3 or WPA2 Encryption
Choose WPA3-Personal when all important devices support it. Otherwise, use WPA2-Personal or a WPA2/WPA3 transition mode. Do not use WEP or the original WPA security standard; both are obsolete.
The FTC identifies WPA3 Personal as the preferred option and WPA2 Personal as an acceptable fallback. CISA likewise recommends using the strongest encryption supported by the router and connected devices.
Some older printers, cameras, smart plugs, and appliances cannot join a WPA3-only network. Rather than weakening security for every device, place older equipment on a separate IoT or guest network that uses WPA2 when your router supports that arrangement.
Step 7: Configure the Wi-Fi Bands
Modern routers may provide 2.4 GHz, 5 GHz, and 6 GHz wireless bands:
- 2.4 GHz: Longer range and better wall penetration, but generally lower speeds and more interference.
- 5 GHz: Faster at short and medium distances, with less range through dense walls.
- 6 GHz: Additional clean spectrum for compatible Wi-Fi 6E and Wi-Fi 7 devices, but a shorter practical reach and stricter compatibility requirements.
For most households, leaving band steering or a unified network name enabled is the easiest option. The router automatically encourages compatible devices to use the most appropriate band. Separate the band names only when troubleshooting an older smart device or when you need precise control.
Wi-Fi 6E implementations use WPA3 on the 6 GHz band. Verizon notes that older WPA2-only devices may need a separate IoT network when 6 GHz service is enabled.
Step 8: Update the Router Firmware
Firmware is the router’s operating software. Updates may patch security vulnerabilities, improve stability, add features, or correct compatibility problems. Install the latest official firmware during setup and enable automatic updates when the router offers that option.
Never unplug the router while an update is being installed. Interrupting the process can corrupt the firmware and turn a useful networking device into a decorative object with antennas.
NIST’s consumer-router guidance emphasizes secure software updates and protection of configuration data. Router manufacturers including ASUS, NETGEAR, TP-Link, and Linksys also direct users to keep firmware current.
Step 9: Review Important Security Settings
Disable Remote Administration Unless Needed
Remote administration allows the settings page to be reached from outside your home. Leave it disabled unless you have a specific reason to use it and understand how the router protects remote access.
Confirm the Firewall Is Enabled
Most routers enable their firewall by default. Keep it on. A firewall filters unwanted network traffic and helps shield internal devices from unsolicited connections originating on the internet.
Review WPS and UPnP
Wi-Fi Protected Setup, or WPS, provides convenient device pairing, but it is not essential. Disable it when you do not use it. Universal Plug and Play, or UPnP, lets applications create network rules automatically. It can be useful for gaming or media devices, but users seeking tighter control may disable it and turn it on only when required.
Avoid Unnecessary Port Forwarding and DMZ Settings
Port forwarding makes a service inside your network reachable from the internet. A DMZ setting may expose nearly all ports for one device. Do not enable either feature merely to “make the internet faster.” They do not perform that magic trick. Configure them only for a documented application and remove rules you no longer need.
Step 10: Create Guest and IoT Networks
A guest network gives visitors internet access without placing them directly on your primary home network. Disable any option that allows guest devices to access local computers, storage drives, printers, or other clients unless that access is genuinely necessary.
Linksys and TP-Link describe guest networking as a way to separate visitors from devices on the main LAN. ASUS provides similar isolation controls on supported models.
An IoT network can be useful for cameras, smart plugs, appliances, voice assistants, and other connected products. Ideally, untrusted smart-home equipment should not have unrestricted access to laptops, phones, and network storage. Available isolation features vary, so check whether your router’s “IoT network” is actually separated or simply uses a different name.
Step 11: Configure Optional Performance Features
Quality of Service
Quality of Service, commonly labeled QoS, prioritizes certain devices or activities when the connection is busy. It may help video calls, gaming, or streaming on a slower internet plan. On a fast, lightly used connection, aggressive QoS settings can add complexity without producing a noticeable improvement.
DNS Settings
The router normally uses DNS servers supplied by your internet provider. You may select another reputable DNS provider for filtering, privacy features, or reliability. Changing DNS does not automatically increase your purchased internet speed, and a poorly chosen server may make browsing slower.
Parental Controls
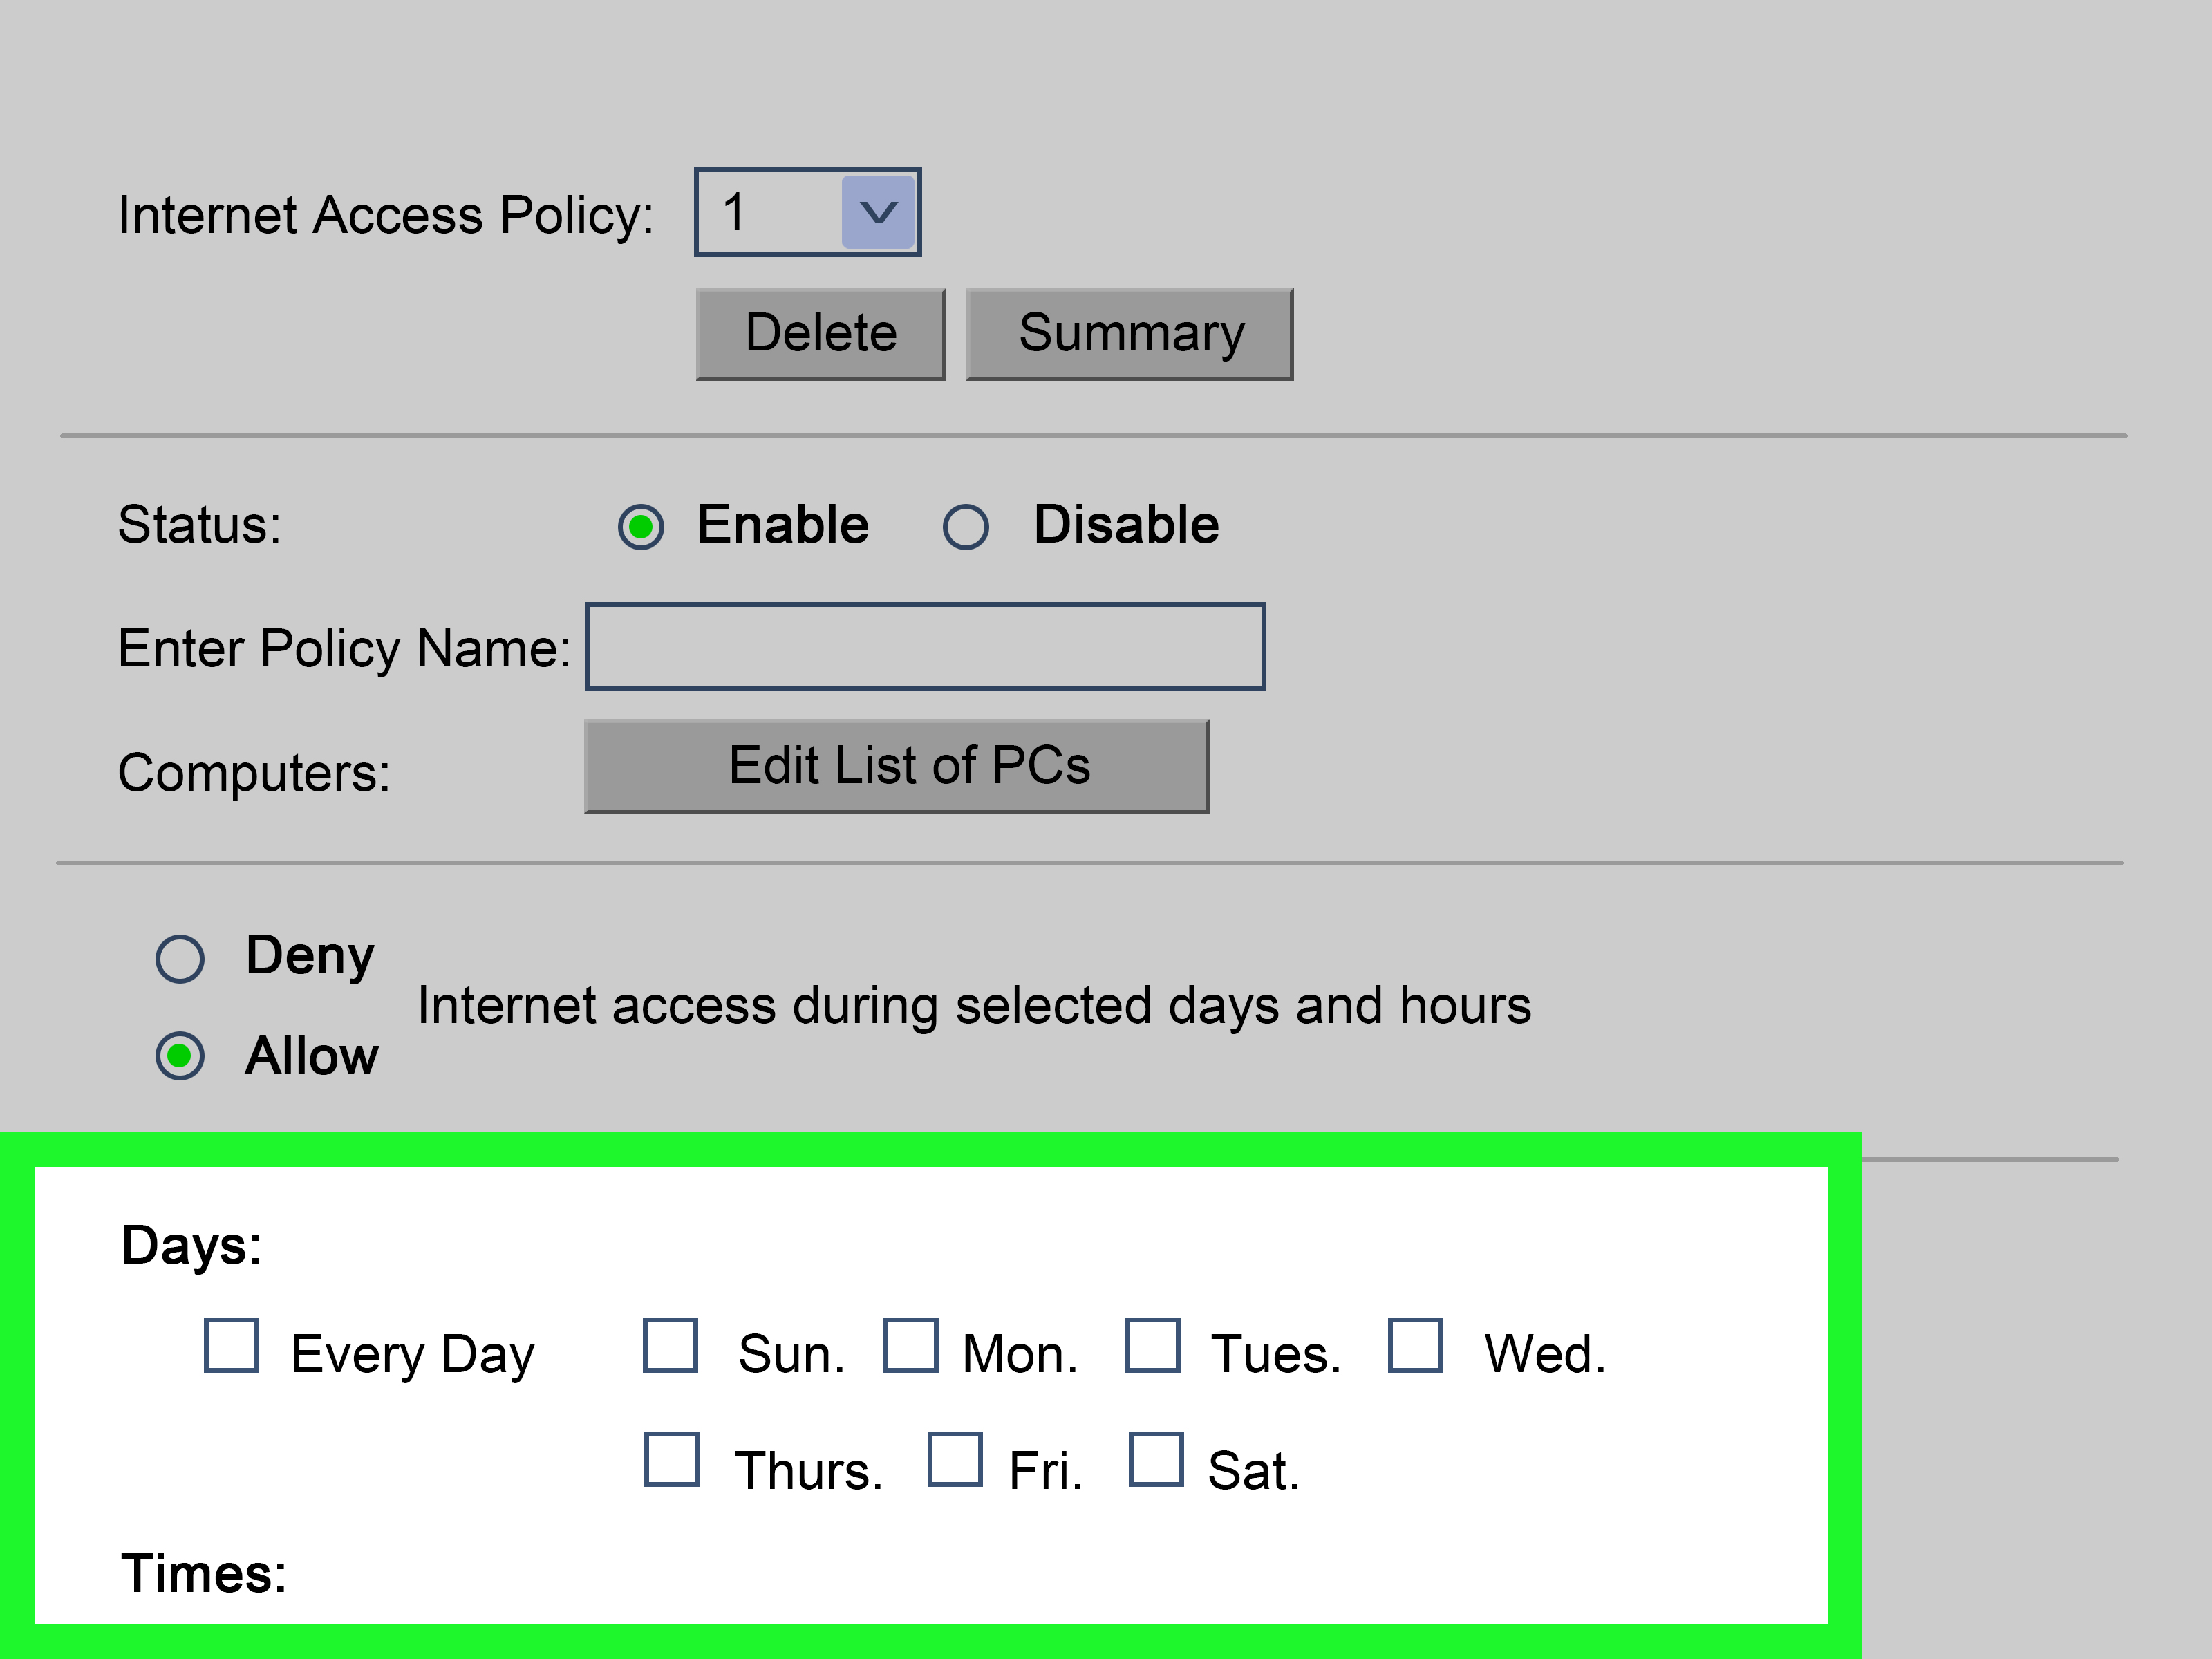
Router-level parental controls may schedule internet access, pause individual devices, or block categories of websites. Treat them as household-management tools rather than perfect safety systems. They do not replace device controls, account supervision, conversations about online safety, or healthy skepticism when a teenager announces that homework requires six uninterrupted hours of online gaming.
Step 12: Test the Connection
Once setup is complete, connect a computer by Ethernet and confirm that websites load. A wired test establishes whether the internet connection itself is working without introducing Wi-Fi range or interference into the diagnosis.
Next, test Wi-Fi in several rooms. Check ordinary activities such as browsing, video calling, streaming, and uploading files. A speed test can be useful, but run it near the router first, close bandwidth-heavy applications, and compare results across multiple tests rather than treating one number as a sacred prophecy.
Remember that the speed reaching a wireless device depends on the device’s Wi-Fi capabilities, distance, interference, router load, server conditions, and your internet plan. A phone connected through two walls will rarely match a computer connected directly by Ethernet.
Common Router Setup Problems and Fixes
The Router Says “Connected,” but There Is No Internet
- Confirm that the modem-to-router cable is connected to the WAN port.
- Check whether the modem itself shows an online connection.
- Restart the modem, wait for it to initialize, and then restart the router.
- Confirm that the router is using the correct internet connection type.
- Contact the provider to check activation, outages, or device registration.
Spectrum and NETGEAR both recommend checking cables and rebooting equipment when installation fails.
The Wi-Fi Network Does Not Appear
Make sure Wi-Fi broadcasting is enabled, move closer to the router, and restart the connecting device. Update the device’s wireless drivers when applicable. An older device may not recognize newer Wi-Fi modes, certain channels, or a WPA3-only network. Verizon specifically notes that outdated wireless drivers can prevent some computers from seeing Wi-Fi 6 networks.
The Signal Is Weak in Part of the Home
Move the router to a central, elevated location and away from obstructions. For a large or unusually shaped home, consider a mesh system or wired access points. When possible, use Ethernet backhaul between mesh nodes. A wired backhaul reserves wireless capacity for client devices and usually improves consistency.
An Older Smart Device Will Not Connect
Temporarily connect your phone to 2.4 GHz, use a WPA2-compatible IoT network, and verify that the device supports the current network name and password. Avoid permanently disabling modern security across the entire network just to satisfy one stubborn light bulb.
You Forgot the Administrator Password
Check the manufacturer’s app, password manager, or recovery process first. If recovery is unavailable, a factory reset may be required. Resetting deletes custom settings, including Wi-Fi names, passwords, guest networks, and port-forwarding rules. Verizon warns that connected devices must be reconfigured after a factory reset restores the original credentials.
Practical Router Setup Experiences: Lessons From Realistic Home Scenarios
The most useful router lessons are often discovered after the setup wizard cheerfully announces that everything is perfect. A router can technically be online while still delivering an experience that makes every family member blame the internet provider, the laptop, the weather, and eventually one another.
Experience 1: The Router Worked, but the Location Did Not
Consider a typical two-story home where the modem connection enters through a downstairs utility room. The router is installed beside the electrical panel because that is where the cable happens to be. Setup succeeds, the phone connects, and the speed test looks excellent from three feet away. Upstairs, however, video calls freeze and the bedroom television displays a loading circle with the confidence of a modern art installation.
The problem is not the internet plan. It is placement. Electrical equipment, pipes, walls, and distance are weakening the signal. Moving the router into the open with a longer Ethernet cable may produce a larger improvement than buying a more expensive plan. When relocation is impossible, a properly positioned mesh node or wired access point is usually more effective than randomly adding several bargain extenders.
Experience 2: The New Router Created Double NAT
In another common situation, a user connects a new gaming router to an internet-provider gateway. Browsing works immediately, so the installation appears successful. Later, a game console reports a restrictive NAT type, remote access fails, and port-forwarding instructions seem to have no effect.
Both boxes are operating as routers. The first creates one private network, and the second creates another private network inside it. Enabling bridge mode on the provider gatewayor configuring the new device as an access pointremoves the unnecessary routing layer. The lesson is simple: having two devices with antennas does not mean both should be in charge.
Experience 3: One Old Device Held Back the Security Plan
A household may enable WPA3 and reconnect every phone, computer, and television without trouble. Then a five-year-old smart plug refuses to join. The tempting response is to weaken the main network to an older security mode.
A better solution is to create a WPA2-compatible IoT network for older equipment while keeping modern devices on the stronger primary network. This approach also makes future cleanup easier. When the old smart plug finally retires after years of heroic lamp control, its entire network can be reviewed or removed without changing the credentials used by every personal device.
Experience 4: Reusing the Old Wi-Fi Name Saved Time
When replacing a router, using the previous Wi-Fi name and password can allow many devices to reconnect automatically. This is especially convenient in homes containing televisions, speakers, cameras, thermostats, and printers that each seem to require a different app and a ceremonial sequence of blinking lights.
However, copying the old credentials is wise only when the old password is strong and has not been widely shared. If former roommates, contractors, neighbors, or half the extended family know it, a new router is the perfect opportunity to start fresh. Security sometimes requires reconnecting twenty devices while muttering their model numbers under your breath.
Experience 5: The Best Troubleshooting Step Was Testing by Ethernet
When Wi-Fi feels slow, users often change channels, DNS servers, antennas, and advanced settings all at once. That makes the real cause harder to identify. A better process begins with a wired test.
If Ethernet performance is also poor, investigate the modem, provider connection, WAN cable, router processing, or service plan. If Ethernet is fast but Wi-Fi is slow, focus on placement, interference, wireless bands, mesh-node positioning, or client-device limitations. Changing one variable at a time may feel less dramatic, but it prevents a five-minute problem from becoming an evening-long networking documentary.
Final Router Setup Checklist
- The modem is connected to the router’s WAN or Internet port.
- The router is centrally placed, elevated, and unobstructed.
- The administrator password has been changed.
- The Wi-Fi network uses a strong, unique password.
- WPA3-Personal or WPA2-Personal encryption is enabled.
- The latest firmware is installed, with automatic updates enabled when available.
- Remote administration is disabled unless specifically needed.
- The firewall remains enabled.
- Guests and less-trusted smart devices use separate networks where possible.
- Performance has been tested by Ethernet and in multiple rooms.
- Configuration details are stored securely for future troubleshooting.
Conclusion
Learning how to set up and configure a router does not require a networking degree or the ability to communicate with blinking LEDs. Connect the modem to the WAN port, follow the setup wizard, change the administrator credentials, use modern Wi-Fi encryption, install firmware updates, and test the network methodically.
The best home network is not necessarily the one with the most complicated settings. It is the one that is secure, stable, properly placed, easy to maintain, and fast enough that nobody has to stand beside the router to finish a video call.
Note: Router interfaces, feature names, and supported security options vary by brand, model, firmware version, and internet provider. Consult the current manual for your exact equipment before changing advanced WAN, VLAN, bridge-mode, DMZ, or port-forwarding settings.