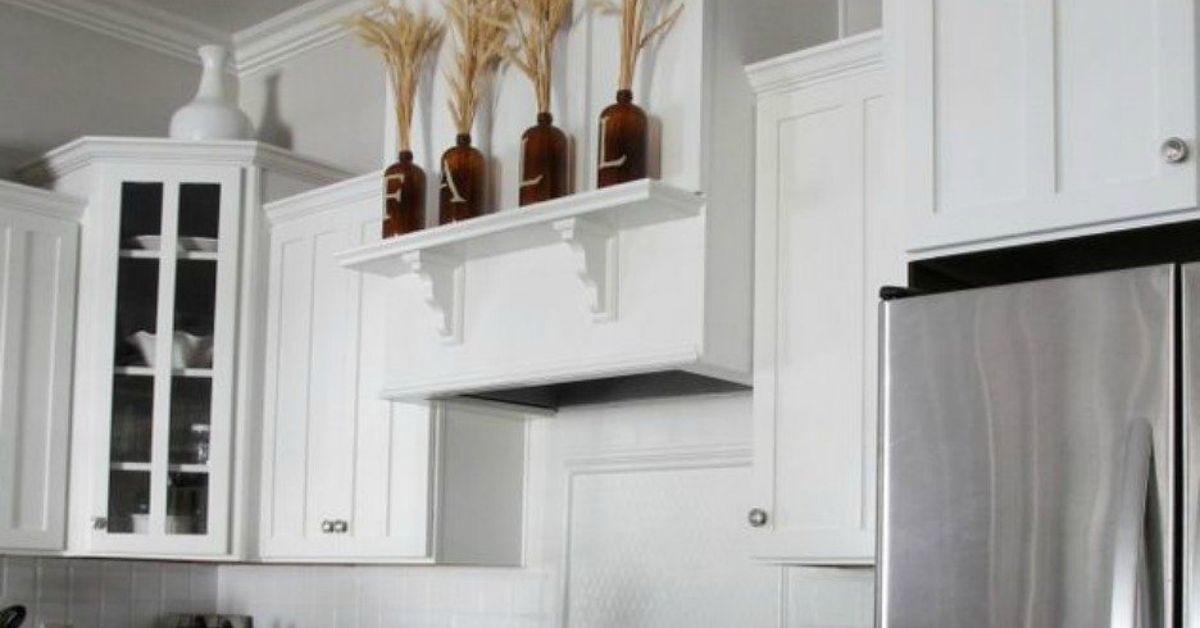
A built-in kitchen has a certain magic. Cabinets appear to grow straight from the floor, glide into the ceiling, and politely pretend that the refrigerator has never existed as a separate object. The whole room feels tailored, expensive, and suspiciously organizedeven when there is a drawer full of mystery takeout menus.
The good news is that you do not need a custom-cabinet budget, a television renovation crew, or a contractor named Chip to get the look. A convincing built-in kitchen is usually less about buying glamorous cabinetry and more about creating visual continuity. When cabinets, trim, panels, paint, lighting, and appliances look like they belong to one carefully planned system, even basic kitchen cabinets can feel custom.
These built-in kitchen hacks focus on the finishing details that make a kitchen look intentional rather than assembled one box at a time. Start with the changes that make the biggest visual difference, then layer on the extras as your budget and patience allow.
What Makes a Kitchen Look Built In?
Built-in kitchen design is all about reducing visual interruptions. Random gaps, unfinished cabinet sides, awkward space above upper cabinets, mismatched hardware, and exposed appliance edges make a room look pieced together. Custom kitchens look polished because the details are coordinated: the cabinet lines align, the trim feels architectural, and every visible side has a finish.
Before attempting any of these kitchen cabinet makeover ideas, stand across the room and identify what catches your eye first. Is it the empty space above your cabinets? The exposed side of the refrigerator? The tiny drawer pulls that look like they were selected during a five-minute lunch break? Those are usually your highest-impact targets.
1. Extend Upper Cabinets to the Ceiling
Nothing announces “builder-grade kitchen” quite like a dusty canyon between the tops of cabinets and the ceiling. Extending cabinets upward creates immediate height and makes the room look more architectural.
You do not always need to replace the upper cabinets. A carpenter can build simple cabinet boxes or soffit-style extensions above existing cabinets, then finish them with matching panels, trim, and paint. In some kitchens, a shallow box topped with crown molding is enough to create the illusion that the cabinetry runs all the way up.
For a traditional or transitional kitchen, use crown molding at the ceiling line. For a modern built-in kitchen look, skip ornate trim and use a clean, flat extension panel instead. The goal is not to make the cabinets look like they are wearing a fancy hat. The goal is to make them look like they were always meant to live there.
2. Add Crown Molding or a Clean Top Trim
Crown molding is one of the fastest ways to make stock cabinets look custom. It creates a visual bridge between the cabinetry and the ceiling, making the upper cabinets feel more permanent and less like furniture that wandered in from another room.
Choose molding that fits your home’s style. A simple stepped profile works beautifully in a modern farmhouse or transitional kitchen. A more detailed profile can suit a classic home with traditional trim. If your kitchen is sleek and contemporary, use a flat trim board or minimal shadow-gap detail instead of decorative crown molding.
Paint the molding to match the cabinets for a seamless built-in effect. A contrasting wood tone can also work, but only when it repeats elsewhere in the room, such as on open shelves, island stools, or ceiling beams. One lonely strip of walnut-colored trim can look less “designer kitchen” and more “we had one board left.”
3. Cover Every Exposed Cabinet Side
Cabinet sides are the kitchen equivalent of wearing a tuxedo with gym shorts. You may not notice them at first, but once you do, they are impossible to unsee. Finished end panels, also called cabinet skins or cover panels, give exposed cabinet sides the same polished appearance as the doors and drawer fronts.
Add matching panels to the sides of upper cabinets, pantry cabinets, refrigerator enclosures, islands, and any base cabinet visible from the dining room or hallway. For extra dimension, frame a flat end panel with narrow trim to mimic furniture panels.
This simple detail is especially important for kitchen islands. A plain cabinet back can make an island look temporary, while a wrapped panel treatment makes it feel like a true piece of built-in furniture.
4. Use Filler Strips Like They Are Interior Design Spackle
Filler strips may not sound glamorous, but neither does flossing, and both make a dramatic difference in the final result. Fillers close awkward spaces between cabinets and walls, help doors and drawers open correctly, and remove the tiny shadows that make a kitchen look unfinished.
Use matching filler panels beside pantry cabinets, refrigerator enclosures, corner cabinets, and walls with slightly uneven angles. Once painted or finished to match, these strips make the cabinetry look fitted to the room rather than squeezed into it.
The key is proportion. A very wide filler strip can look accidental, so consider balancing it with a matching panel or trim detail on the opposite side of the cabinet run. Visual symmetry is a small trick with a surprisingly expensive-looking payoff.
5. Turn a Basic Island Into Furniture
A standard kitchen island is useful. A furniture-style island is useful and knows how to make an entrance. You can fake a custom built-in island by wrapping it with decorative panels, beadboard, vertical slats, or simple box molding.
Add an overhang on one side for stools, then finish the back with a panel treatment that matches your kitchen style. A traditional kitchen may look great with recessed panels and a painted finish. A contemporary kitchen can use clean slab panels, fluted wood, or narrow vertical battens.
Consider adding furniture-style feet or a recessed toe kick beneath the island. These details make the base feel intentional and help the island read as a substantial architectural feature instead of a row of cabinets playing dress-up.
6. Upgrade Flat Cabinet Doors With Trim
If your kitchen has simple slab cabinet doors, do not assume replacement is your only option. Thin trim can transform flat doors into faux Shaker-style fronts or classic paneled cabinetry.
Use narrow decorative molding to create a rectangular frame on each door and drawer front. Keep the layout consistent, measure carefully, and test one cabinet before committing to the entire kitchen. A slightly crooked trim frame has a powerful ability to ruin your confidence and make every future meal feel personally judgmental.
Once the trim is attached, fill seams, sand the surface, prime, and paint with durable cabinet-grade paint. This hack works best when the existing doors are sturdy, smooth, and free from peeling laminate or major damage.
7. Paint Cabinets, Walls, and Trim as One Coordinated System
Color continuity can make a kitchen feel larger, calmer, and much more built in. Painting cabinetry, surrounding trim, and nearby walls in related tones reduces visual stops and starts.
You do not have to paint every surface exactly the same color. A warm white cabinet color paired with a slightly softer white wall can still look cohesive. Another effective approach is color drenching: paint the cabinets, trim, and walls in one unified shade for a tailored, architectural effect.
For a two-tone kitchen, keep the upper cabinets lighter and use a deeper color on base cabinets or the island. This gives the room dimension without making it look like several unrelated kitchens decided to share a lease.
8. Frame the Refrigerator With Pantry Cabinets
A freestanding refrigerator can interrupt an otherwise polished kitchen, especially when it sits between random filler strips or exposed cabinet sides. Framing it with pantry cabinets and a cabinet bridge above can make the appliance look intentionally integrated.
Use tall cabinets or side panels on both sides, then add an upper cabinet or custom bridge above the refrigerator. Finish the enclosure with matching trim and panels so the appliance feels visually grounded.
Always confirm the refrigerator manufacturer’s ventilation and clearance requirements before building around it. A beautiful refrigerator surround is not much of a victory if the appliance overheats, performs poorly, or starts making noises that suggest it is plotting revenge.
9. Build a Custom-Looking Range Hood Cover
A range hood is often the visual centerpiece of a kitchen wall, so hiding a basic metal hood inside a custom cover can change the entire room. A hood surround can be made from painted wood, plaster, tile, wood veneer, or cabinet-matching panels.
In a traditional kitchen, a painted wood hood with crown molding and side corbels can create a classic built-in look. In a modern kitchen, a simple rectangular hood cover with clean lines often feels more expensive than a highly decorative design.
Do not treat this as a purely decorative project. Range hoods need proper ventilation, correct ducting, and manufacturer-required clearances around the cooking surface. Use a qualified professional for electrical, gas, ductwork, or structural changes. Gorgeous is good; gorgeous and safe is better.
10. Create a Continuous Toe Kick
The toe kick is the recessed strip at the bottom of base cabinets. It is easy to ignore, which is exactly why it can quietly reveal whether a kitchen was thoughtfully finished.
Replace mismatched or damaged toe kicks with a continuous, color-matched panel that runs beneath the full cabinet line. On an island, wrap the toe kick around visible sides so the piece looks complete from every angle.
For a dramatic nighttime effect, install discreet LED lighting beneath the toe kick. This creates a soft floating effect and works especially well in contemporary kitchens. Just keep the lighting subtle. You are aiming for “boutique hotel kitchen,” not “airport runway for baguettes.”
11. Add Layered Lighting Under Cabinets and Inside Glass Fronts
Lighting is one of the easiest ways to make a kitchen feel layered and custom. Under-cabinet lighting improves task visibility on countertops while also adding a warm, upscale glow in the evening.
Install LED strips or puck lights near the front underside of upper cabinets so the light lands across the countertop instead of creating a harsh shadow against the backsplash. Warm or neutral white lighting usually feels more inviting than very cool blue-toned light.
For an elevated detail, add interior lighting to one or two glass-front cabinets. Display glassware, cookbooks, or serving pieces rather than every mug you have owned since college. Built-ins look curated because they are edited, not because they contain forty-seven souvenir tumblers.
12. Swap Hardware for Something With Presence
Cabinet hardware is small, but it acts like jewelry for your kitchen. Replacing lightweight knobs and undersized pulls with substantial hardware can make basic cabinets feel more refined.
Choose one main finish and repeat it throughout the kitchen. Brass, polished nickel, matte black, aged bronze, and brushed stainless can all work, but the finish should connect with your faucet, lighting, or bar stools. You can mix metals, but do it deliberately. Random hardware finishes can make a kitchen look like it was accessorized during a power outage.
Use longer pulls on wide drawers and pantry doors to create scale. Keep placement consistent from cabinet to cabinet. Even beautiful hardware looks awkward when every handle sits at a slightly different height.
13. Finish the Backsplash Like a Built-In Wall
A backsplash does more than protect your walls from pasta sauce enthusiasm. It can make the kitchen feel like a finished architectural composition.
Extend tile, stone, or a slab backsplash higher than the standard short strip behind the countertop. Running the backsplash to the ceiling behind a range hood, open shelves, or a focal wall creates a more custom and intentional look.
Another built-in kitchen trick is to use the same countertop material as a short backsplash. This creates a seamless transition and gives even modest cabinetry a more polished foundation. If a full slab backsplash is outside your budget, use a smaller premium material only in the focal zone behind the range, then pair it with a simpler coordinating tile elsewhere.
How to Prioritize Your Built-In Kitchen Upgrade
You do not need to tackle all 13 hacks at once. In fact, trying to do everything in one weekend is how people end up eating cereal from a measuring cup while three cabinet doors dry in the garage.
Start with the visible structure: cabinet extensions, crown molding, end panels, refrigerator framing, and island detailing. Next, move to the finish layer: paint, hardware, backsplash, and lighting. Finally, edit the surfaces. Clear counters, store small appliances, and display only a few useful or meaningful pieces.
The most convincing faux built-in kitchens are not necessarily the most expensive. They are the ones where every visible choice looks connected to the next.
Real-World Experience: What These Kitchen Hacks Teach You Once You Live With Them
The first lesson homeowners often learn during a built-in kitchen makeover is that the “before” photo does not always reveal the real problem. A kitchen may have perfectly decent cabinets, a functional layout, and enough storage, yet still feel strangely unfinished. In many cases, the issue is not the cabinets themselves. It is the lack of visual closure around them.
For example, a kitchen with upper cabinets that stop well below the ceiling can feel smaller and more cluttered than it really is. Once that empty space is boxed in or finished with trim, the room often feels taller almost immediately. The cabinet storage has not increased. The countertops have not gotten larger. But the eye sees one long, uninterrupted vertical line instead of a set of boxes floating halfway up the wall.
Another common experience is realizing how much exposed cabinet sides affect the room. People frequently focus on door color, countertops, and backsplash first, then notice that the unfinished side of an island is visible from the living room every single day. Adding one finished panel can create the kind of transformation that seems wildly disproportionate to the amount of material used. It is a little like putting a tailored jacket over a plain shirt: suddenly, everything appears more intentional.
Paint can also be more powerful than expected, especially when it is used beyond the cabinet doors. When walls, trim, and cabinets share a coordinated palette, the kitchen stops looking like a collection of separate objects. It starts feeling like part of the home’s architecture. The effect is especially useful in compact kitchens, where too many sharp color changes can make the room feel busy.
Hardware and lighting tend to be the upgrades people underestimate before starting. New pulls may seem minor when they are sitting in a small box, but once installed, they become one of the most touched and noticed details in the kitchen. Similarly, under-cabinet lighting often feels optional until the first evening it is switched on. Suddenly the countertops look warmer, the backsplash has texture, and late-night snack preparation feels oddly luxurious.
The biggest practical takeaway is that built-in style should support everyday life. Pantry cabinets should still open fully. Refrigerator surrounds need breathing room. Island seating should not block traffic. Open shelves should hold things you actually use or genuinely enjoy seeing. A kitchen can look custom in photographs, but it earns its keep when it still works on a Tuesday evening while someone is reheating leftovers, hunting for a lunch container, and asking where the scissors went.
The best faux built-in kitchen is not the one that imitates a showroom perfectly. It is the one that looks intentional, fits the room, reflects the household, and makes daily cooking feel a little more polishedeven when dinner is frozen pizza.
Note: Before enclosing appliances, altering ventilation, changing electrical wiring, or modifying gas connections, follow the appliance manufacturer’s instructions and use qualified professionals where required.