The Monoprice MP Select Mini is the 3D-printing equivalent of a tiny hatchback with a surprisingly enthusiastic owners’ club. It is compact, affordable, and capable of respectable prints right out of the box. It is also practically begging to be modified.
Often shortened to the Monoprice MP Mini, the Select Mini family includes several hardware revisions, most notably the V1 and V2. These machines generally use a single extruder, a heated build platform, microSD or USB printing, and a compact build area of roughly 120 by 120 by 120 millimeters. That modest footprint makes the printer easy to place on a desk, although it also encourages owners to squeeze every possible improvement from the hardware.
The best Monoprice MP Mini mods do not turn the machine into an industrial printer overnight. They address specific weaknesses: vulnerable bed wiring, inconsistent first layers, mediocre part cooling, awkward maintenance, limited remote control, and the occasional case of Z-axis wobble. The goal is not to replace every component until only the Monoprice logo remains. The goal is to make a small printer safer, more reliable, and less likely to ruin a six-hour print during the final twelve minutes.
Before Modding the Monoprice MP Mini
Begin by identifying the exact printer revision. The MP Select Mini V1, V2, and Pro may look related, but their wiring routes, connectors, hotend assemblies, bed systems, and firmware behavior are not always identical. A guide written for one version should never be treated as a universal wiring diagram.
Establish a Working Baseline
Print a calibration cube, a first-layer test, and a small bridging model before changing anything. Record the temperatures, layer height, retraction settings, print speed, and filament used. Photograph the finished parts from several angles.
This baseline prevents the classic modification mystery: the printer seems different, but nobody remembers whether it is actually better. A successful upgrade should produce measurable improvement, such as a smoother first layer, steadier temperature graph, cleaner bridge, quieter motion, or fewer failed prints.
Collect the Right Tools
A practical Monoprice MP Mini upgrade kit may include metric hex keys, small screwdrivers, needle-nose pliers, a digital multimeter, zip ties, heat-shrink tubing, crimping tools, wire labels, isopropyl alcohol, and a reliable soldering iron. Silicone-insulated wire is useful for moving cable runs because it remains flexible during repeated bed movement.
Always cool, switch off, and unplug the printer before opening its enclosure or working on electrical components. The manufacturer’s manual specifically warns users to avoid hot parts and disconnect power before service or repair.
Start With the Heated-Bed Wiring Mod
For many owners, the most important Monoprice MP Select Mini mod is not decorative, glamorous, or likely to impress anyone at a dinner party. It is rerouting the heated-bed wiring.
On affected machines, the heater and thermistor wires beneath the moving bed can rub against the frame, interfere with the Y-axis belt, or bend repeatedly at a stressful point. Over time, damaged conductors may cause intermittent heating, unstable temperature readings, or complete bed-heater failure. Community repair logs have documented nicked insulation, broken heater wires, erratic thermistor readings, and belt deflection caused by the original cable path.
What the Bed Rewire Accomplishes
A proper rewire moves the cable bundle away from the belt and sharp sheet-metal edges. Flexible replacement wire, abrasion-resistant sleeving, strain relief, insulation, and a gradual bending radius help the cable move without folding at the same spot thousands of times.
Some modders route the bundle through an opening near the Z-axis tower, while others install a printed side panel, cable guide, or compact cable chain. The exact route matters less than four basic outcomes:
- The wires cannot touch or deflect the Y-axis belt.
- The moving bed does not pinch the cable at either travel limit.
- Solder joints and connectors do not carry mechanical strain.
- Exposed conductors are insulated and protected against abrasion.
Test the Full Range of Motion
After completing the modification, leave the printer unplugged and slide the bed slowly from front to back. Watch the cable rather than the bed. It should flex smoothly without tightening, scraping, snagging, or pulling against a connector.
Next, inspect continuity with a multimeter and confirm that no conductor is shorted to the metal chassis. Once power is restored, heat the bed while watching its temperature reading. Stop immediately if the display jumps unpredictably, the cable becomes hot, or the bed fails to heat consistently.
Upgrade the Build Surface
The stock build surface can produce perfectly usable results when it is clean, level, and undamaged. However, years of scraping, adhesive residue, bubbles, and enthusiastic print removal can leave it looking like a cutting board from a restaurant with poor supervision.
Adding a Glass Build Plate
A small glass plate creates a flatter, more durable printing surface and can leave the bottom of a print impressively smooth. Modders commonly secure the glass with low-profile clips, thermal pads, adhesive transfer material, or other mounting methods that do not interfere with nozzle travel.
Glass adds thickness and mass. The added height usually requires a Z-limit-switch spacer, adjustable endstop, or another method of restoring the correct nozzle-to-bed relationship. It may also increase heating time and reduce the bed’s maximum practical temperature at the top surface. Community glass-bed installations frequently pair the plate with a printed Z spacer and a fresh first-layer calibration.
Choose the Surface for the Material
Clean glass may work well for some PLA filaments, while other materials benefit from a thin layer of glue stick or a removable build-surface sheet. PETG can bond aggressively to bare glass, so an appropriate release layer is wise. Whichever material you print, avoid piling on adhesive until the build plate resembles frosted cake.
Relevel the bed while it is heated to the temperature normally used for printing. Thermal expansion may slightly change the nozzle gap, and on a compact machine, “slightly” can separate a beautiful first layer from a plate of plastic spaghetti.
Improve Part Cooling Without Creating Heat Creep
The stock cooling arrangement is adequate for simple PLA models, but bridges, steep overhangs, and small details can expose its limitations. A printed fan duct or separate part-cooling fan directs airflow more precisely at newly extruded plastic.
Separate Hotend Cooling From Part Cooling
The hotend heatsink needs continuous airflow during printing to prevent heat from traveling upward into the filament path. The part-cooling fan, by contrast, should respond to slicer commands. It may remain off during the first layers and increase later for bridges and overhangs.
Some MP Mini fan modifications separate these jobs by keeping a heatsink fan powered whenever the printer is operating and connecting a dedicated ducted fan to the controllable fan output. Community designs report improved bridge and overhang performance when cooling air is aimed directly beneath the nozzle.
Check Voltage and Polarity
Do not choose a replacement fan based only on its diameter and number of online stars. Confirm the printer’s output voltage, connector pinout, polarity, current requirements, physical clearance, and fan-control behavior. A fan that spins happily on a workbench may behave differently when driven by pulse-width modulation.
After installation, verify that the duct cannot collide with the build plate, bed clips, printed model, or frame. Home every axis manually and check clearance before starting an unattended print.
Replace or Improve the Hotend
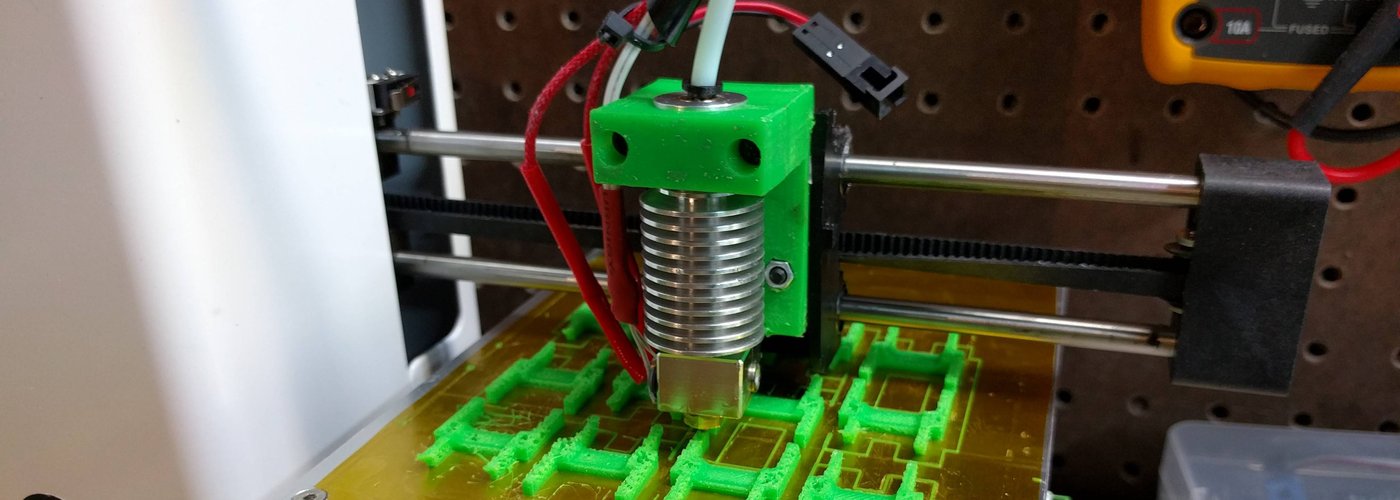
A hotend upgrade can make nozzle replacement easier, improve the filament path, and support a wider range of materials. E3D V6-style installations became popular among MP Select Mini owners because printable mounting systems could adapt the compact machine to a widely supported hotend format.
Do Not Treat the Hotend as a Simple Bolt-On Accessory
A successful conversion requires more than attaching a shiny metal cylinder and declaring victory. The mount must position the nozzle correctly, the heater cartridge must match the electrical system, and the thermistor must report temperature accurately. The fan must cool the heatsink, wires need strain relief, and the assembly must clear the bed throughout the printer’s movement range.
Original and replacement nozzles may also differ in thread length or sealing geometry. Installing an apparently compatible nozzle without confirming dimensions can create a gap between the nozzle and heat break. Molten filament then escapes into the heater block, producing the dreaded plastic blob of consequences. Community documentation shows both successful V6-style conversions and the need to verify nozzle dimensions before substitution.
Retune Temperature Control
Changing the heater block, cartridge, fan, thermistor, or cooling duct changes the hotend’s thermal behavior. Temperature control should therefore be checked after a hotend modification.
Some compatible firmware accepts commands such as M301 for hotend PID values, M503 for reporting settings, and M500 for saving supported settings. Modern Marlin documentation also describes M303 PID autotuning, but the stock MP Mini firmware does not necessarily support every modern command or parameter. Back up existing values and confirm firmware-specific instructions before sending commands copied from an old forum post.
Stabilize the Z-Axis and Inspect Motion Components
Printable Z-axis rod stabilizers are among the easiest mechanical MP Mini modifications. They support loose upper rod ends and may reduce visible movement in the tower. However, a stabilizer should align the rods rather than force them into a new position. Overconstraining misaligned rods can increase binding instead of improving prints.
Perform Basic Maintenance First
Before installing structural parts, inspect the lead screw, smooth rods, belts, pulleys, bearings, and fasteners. Clean old debris from the rods and apply an appropriate lubricant sparingly. Check that pulley set screws are secure and that belts are tensioned without being stretched like guitar strings.
Printable stabilizers are inexpensive and reversible, while a NEMA 17 motor and leadscrew conversion is a more substantial project. Advanced Z-axis upgrades can improve movement speed or reduce artifacts, but they also require careful mechanical alignment, electrical compatibility, steps-per-millimeter calibration, and adequate clearance.
Add OctoPrint for Remote Control and Monitoring
OctoPrint is one of the most useful nonmechanical upgrades for the Monoprice MP Mini. Installed on a compatible Raspberry Pi or another supported host, it provides a browser-based dashboard for uploading G-code, starting prints, viewing temperatures, monitoring progress, and using an optional camera.
Create the Correct Printer Profile
For a standard MP Select Mini, configure a rectangular heated bed and confirm a usable build volume of approximately 120 millimeters on each axis. Check the origin setting, nozzle diameter, extruder count, and axis limits against the exact machine. OctoPrint uses printer profiles to represent physical properties such as build volume, bed shape, heated-bed support, and movement limits.
Use a Reliable USB Connection
A short, good-quality data cable can prevent mysterious disconnects. Depending on the printer, host, and cable, it may also be useful to block the USB cable’s 5-volt power line so the Raspberry Pi does not partially back-power the printer’s electronics when the main printer supply is off.
The official Raspberry Pi OctoPrint setup process includes preparing an OctoPi image, configuring network access, connecting the printer over USB, completing the browser-based setup wizard, and optionally adding a camera. A webcam is convenient, but remote video does not transform an open-frame printer into an appliance that should run without appropriate supervision and fire precautions.
Build a Better Cura Profile
Mechanical upgrades cannot rescue careless slicing. A tuned Cura profile often delivers a larger improvement than an expensive replacement component.
Create or update a custom FDM printer profile using the correct bed dimensions, heated-bed setting, nozzle diameter, filament diameter, and start and end G-code. Cura’s custom-printer configuration supports build-plate dimensions, heater options, machine geometry, and printer-specific G-code.
Use Conservative Starting Settings
For a standard 0.4-millimeter nozzle printing PLA, a 0.2-millimeter layer height and moderate speed provide a sensible starting point. Slowing the first layer improves adhesion, while reducing outer-wall speed can help the compact motion system produce cleaner surfaces.
Calibrate one variable at a time:
- Set the nozzle temperature with a temperature tower.
- Adjust flow using a measured wall-thickness test.
- Tune retraction with a compact stringing model.
- Test bridging after the cooling upgrade.
- Verify dimensional accuracy with a calibration cube.
Changing six settings at once may produce a better print, but it provides no clue which adjustment helped. Scientific method is less exciting than button-mashing, yet it produces fewer drawers full of almost-correct plastic boats.
Advanced MP Mini Mods: Useful or Excessive?
Mainboard and Stepper-Driver Replacement
Replacing the stock controller with a third-party board can provide newer firmware, quieter stepper drivers, expanded configuration options, and easier component replacement. It can also require a new display, custom enclosure parts, connector changes, firmware compilation, endstop verification, temperature-sensor configuration, and complete motion calibration.
This upgrade makes sense when the original controller has failed or when rebuilding the printer is the hobby. It makes less sense when the only goal is to print a phone stand by Tuesday.
Extended Build Plates
Community projects have enlarged the MP Mini’s bed and Y-axis travel. These conversions can be clever and educational, but a larger plate adds moving mass and may exceed the evenly heated area. The frame, belt path, bearings, heater capacity, firmware limits, and slicer profile all require attention.
Lighting, Handles, and Tool Holders
Not every modification needs an engineering review board. LED lighting improves webcam visibility and makes nozzle inspection easier. Printed tool holders keep hex keys and cutters nearby. Spool guides can reduce filament drag, while handles make the compact printer easier to move.
These convenience mods are low risk, provided they do not block ventilation, obstruct an axis, overload the power supply, or direct loose wires into moving parts.
The Best Order for Monoprice MP Mini Upgrades
- Confirm the printer works in stock form. Fix ordinary leveling, extrusion, or slicer problems before modifying hardware.
- Inspect and reroute vulnerable bed wiring. Reliability and electrical safety come before cosmetic upgrades.
- Service belts, rods, pulleys, and fasteners. Maintenance is cheaper than replacement.
- Restore a dependable build surface. Install glass or a removable sheet only when the original surface needs improvement.
- Tune the slicer. Temperature, flow, retraction, cooling, and first-layer settings should match the filament.
- Improve part cooling. Add a well-positioned duct or separate fan while preserving heatsink cooling.
- Add OctoPrint. Remote uploads, temperature graphs, and camera monitoring improve daily usability.
- Consider major conversions last. Hotend, Z-axis, mainboard, and extended-bed projects require the most testing.
A Composite MP Mini Modding Experience
The following workshop narrative combines common experiences reported by MP Select Mini owners. It is not presented as a claim of personal hands-on use.
The adventure often begins with a printer that technically works. It prints a calibration cat, a small gear, and perhaps seventeen cable clips that nobody actually needed. Then the owner notices that the first layer is thinner on one side. The bed temperature graph looks a little nervous. A bridge test resembles warm mozzarella. This is the moment when “I’ll make one small improvement” enters the room carrying a screwdriver.
The first inspection usually produces the most valuable discovery: the bed cable is rubbing somewhere it should not. The case is opened, photographs are taken, and every connector is labeled because confidence is not a substitute for documentation. Once the cable is rerouted and given proper strain relief, the bed slides more freely. The temperature reading stops twitching when the platform moves. Nothing about the printer looks dramatically different, but reliability improvesand reliability is the upgrade that saves the most filament.
Next comes the build surface. A glass plate is installed, followed by the realization that glass has thickness. The nozzle now homes too close to the bed, so a Z spacer or adjustable endstop becomes necessary. The bed is leveled once, twice, and then a third time because the second attempt was performed while the plate was cold. Eventually, the first layer appears as connected, gently flattened lines instead of round strings or translucent smears.
The cooling modification is more theatrical. A new fan duct looks impressive, but the first version sits slightly too low and threatens a binder clip. A revised duct is printed, installed, and tested at different fan speeds. Bridges become straighter, overhangs curl less, and small PLA parts look sharper. Then a long print jams because the heatsink fan was mistakenly placed under slicer control. The wiring is corrected so hotend cooling remains continuous while the part fan follows G-code. Lesson learned: two fans may look similar, but they have very different jobs.
OctoPrint changes the daily routine more than expected. Instead of carrying a tiny memory card across the room and dropping it into another dimension beneath the desk, files are uploaded through a browser. Temperature graphs make heater behavior visible. A camera reveals whether the first layer succeeded without requiring repeated visits to the printer. The convenience is substantial, although responsible monitoring remains necessary.
Eventually, the owner faces a decision. A new controller board, quiet drivers, larger bed, and upgraded Z-axis all sound fascinating. However, the MP Mini is already producing clean parts. At this point, the smartest modification may be restraint. The machine does not need to become a tiny experimental spaceship simply because printable brackets exist.
The most satisfying MP Mini builds are rarely the ones with the longest parts list. They are the machines whose modifications solve observed problems. A safe bed rewire, clean build plate, tuned profile, effective cooling duct, and reliable remote interface can make the printer feel dramatically more capable without sacrificing its compact charm. The result is still a small, affordable printerjust one that has been thoughtfully sharpened rather than randomly transformed.
Conclusion
Modding the Monoprice MP Mini printer is an excellent way to learn 3D-printer mechanics, electronics, thermal control, and slicer calibration. Begin with reliability upgrades, particularly an inspection of the heated-bed wiring. Improve the build surface and cooling only after establishing a repeatable baseline, and use software tools such as Cura and OctoPrint to extract more performance from the existing hardware.
The MP Select Mini responds best to focused upgrades rather than indiscriminate replacement. Solve the problem the printer actually has, test the result, and document every change. With a sensible modification plan, this compact machine can remain useful long after newer printers have arrived with larger screens, faster motion systems, and significantly less personality.
Note: MP Select Mini revisions can differ in wiring, connectors, voltage, thermistor configuration, hotend geometry, and firmware support. Verify the exact model and document original settings before modifying electrical or thermal systems.