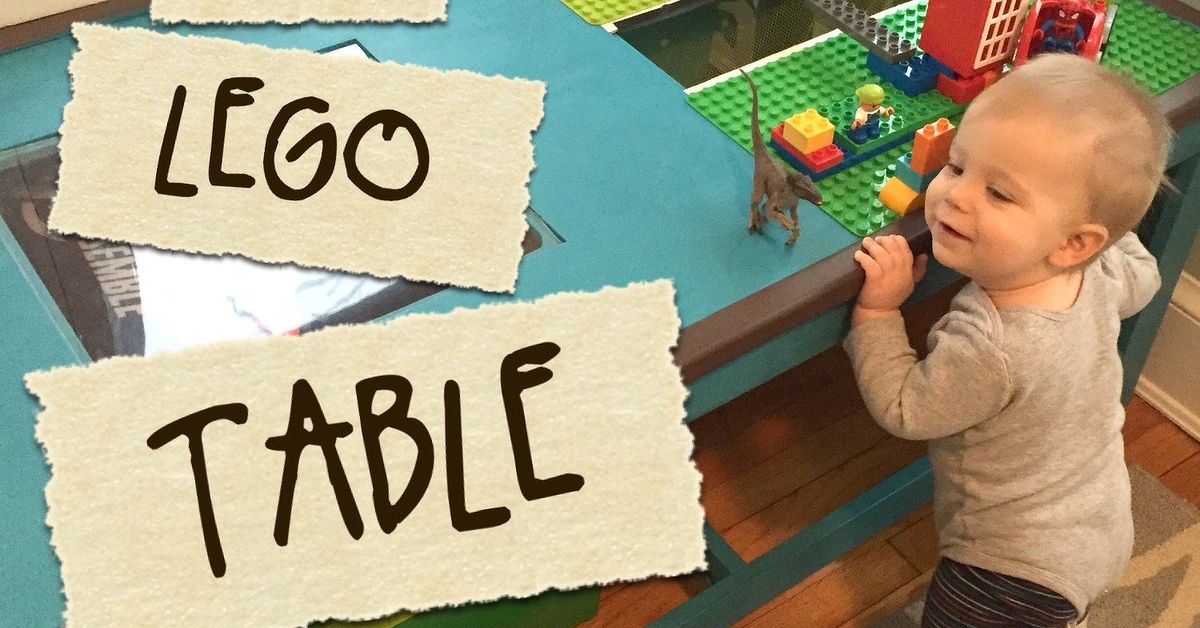
A DIY Lego table can rescue a playroom from the colorful chaos of loose bricks while giving young builders a dedicated place to create. Instead of discovering a tiny red brick with your bare foot at 2 a.m.an experience more effective than any alarm clockyou can keep building pieces, unfinished projects, and instruction books in one organized station.
The best Lego table is not necessarily the largest or most complicated. It is the one that fits the available room, matches the child’s height, provides practical Lego storage, and makes cleanup simple enough that children can handle it themselves. This guide explains how to build a sturdy table with a smooth plywood top, optional baseplates, raised edges, storage bins, and locking casters. It also covers compact designs, IKEA-style hacks, safety considerations, and lessons learned from real-world builds.
Why Build a DIY Lego Table?
A regular desk can hold a Lego project, but it rarely solves the complete problem. Pieces roll off the edges, half-built vehicles are moved whenever someone needs the desk, and storage bins often end up on the opposite side of the room. A purpose-built Lego activity table combines the work surface and the storage system in one convenient location.
Building your own table also allows you to customize features that are difficult to find in ready-made furniture. You can adjust the height, select the number of bins, add wheels, create a removable building surface, or make the tabletop large enough for siblings to work together.
Common DIY designs include tables built over drawer units, converted coffee tables, compact wall-mounted desks, rolling play tables, and simple wooden frames with bins suspended beneath the top. Established DIY projects frequently combine storage units with plywood tops because this approach provides a stable work surface and generous organization without requiring complicated cabinetmaking.
Choose the Right Lego Table Design
A Simple Wooden Table
A basic frame with four legs is inexpensive, easy to customize, and suitable for beginners. Add a lower shelf or rails beneath the tabletop to support plastic storage bins. This design works especially well when you want the table to resemble normal furniture rather than a brightly colored play station.
A Storage-Unit Table
Two short storage cabinets or bin organizers can serve as the table base. A plywood panel bridges the units and creates a wide building surface. This style offers excellent storage and requires fewer woodworking cuts because the cabinets replace the legs and most of the frame.
A Coffee Table Conversion
An old coffee table can become a Lego play table with sanding, paint, trim, and baseplates. This is one of the fastest options for a small room. Before starting, check that the table is stable, that its joints are tight, and that its height is comfortable for the intended users.
A Rolling Lego Table
Locking casters make a larger table easier to move for vacuuming or rearranging the room. Wheels are particularly useful when the table must slide against a wall after playtime. Use casters rated to support more than the combined weight of the table, storage bins, and Lego collection.
Recommended DIY Lego Table Dimensions
A practical starting size is a tabletop measuring 24 inches wide by 36 inches long. This provides room for two children without overwhelming a small playroom. For a larger collection, consider a 30-by-48-inch top.
A table height of approximately 22 to 24 inches often suits preschool and early elementary-age children, but age alone is not a reliable measurement. Seat the child in the chair that will be used with the table. The tabletop should sit slightly above the child’s elbows without forcing the shoulders upward.
Plan the tabletop around the baseplates when you want a permanent building surface. Official standard LEGO baseplates are generally 32 by 32 studs and approximately 10 inches square, while the larger gray baseplate measures 48 by 48 studs and approximately 15 inches square. Measure the actual plates before cutting because product dimensions and availability can vary.
Materials and Tools
Suggested Materials
- One 3/4-inch plywood panel for the tabletop
- Four 2-by-2 boards for the legs
- 1-by-3 boards for the apron and support frame
- 1-by-2 boards or decorative trim for the tabletop border
- Wood glue
- 1 1/4-inch and 2-inch wood screws
- Wood filler
- 120-grit and 220-grit sandpaper
- Primer and durable interior paint
- Clear water-based protective finish, if desired
- Plastic storage bins
- LEGO-compatible baseplates
- Strong double-sided mounting tape or plastic-compatible adhesive
- Four locking casters, optional
- Corner braces, optional
Useful Tools
- Tape measure and pencil
- Carpenter’s square
- Circular saw or table saw
- Jigsaw, if adding recessed bins
- Drill and driver bits
- Countersink bit
- Random-orbit sander or sanding block
- Clamps
- Paintbrush, foam roller, or small paint sprayer
- Hearing protection, safety glasses, and a dust mask
A home-improvement store can cut the plywood to size when a large saw is unavailable. Confirm the measurements before leaving the store; “close enough” becomes much less charming when four baseplates refuse to fit.
How to Build a DIY Lego Table
Step 1: Measure the Room and Storage Bins
Measure the planned location, including nearby doors, closets, and walking paths. Leave enough space for chairs and for children to move around the table without climbing over one another.
Select the storage bins before constructing the frame. Measure each bin’s width, depth, top lip, and required sliding clearance. Building the table first and shopping for containers later is a reliable way to discover that every suitable bin is half an inch too wide.
Step 2: Cut the Tabletop
Cut the 3/4-inch plywood to the chosen dimensions. A 24-by-36-inch panel is manageable, stable, and large enough for many home play areas. Support the full sheet carefully during cutting and use a blade intended for plywood to reduce splintering.
Round each corner with a jigsaw or router. Even a modest curve makes the table more comfortable in a room where children may run, crouch, and suddenly stand up without checking whether furniture is nearby.
Step 3: Build the Apron Frame
Cut two long and two short apron boards to fit beneath the tabletop. Assemble them into a rectangular frame with wood glue and screws. Check both diagonals before tightening the fasteners. When the diagonal measurements match, the frame is square.
The apron strengthens the top, supports the legs, and helps prevent side-to-side wobbling. Position it approximately one inch inside the tabletop edges so the border has a clean overhang.
Step 4: Attach the Legs
Cut four legs to equal length. Clamp one leg inside each corner of the apron, drill pilot holes, and secure it with screws driven through both adjoining apron boards. Corner braces can provide additional reinforcement, particularly when the table will be moved frequently.
Set the frame upright and test it on a flat floor. Correct any wobble before attaching the tabletop. A table that rocks when empty will perform an impressive dance routine after several storage bins are filled.
Step 5: Add Storage Supports
For removable bins, install wooden rails beneath the tabletop. The lips of the bins can rest on these rails and slide outward like shallow drawers. Test the spacing with an empty bin before fastening every support.
Another option is to install a lower shelf between the legs and place labeled containers on top. A shelf is easier to build and can accommodate bins of different sizes, while sliding rails provide faster access during play.
Step 6: Attach the Tabletop
Center the plywood top over the frame and clamp it in place. Drive screws upward through the apron into the underside of the top. Select screws that cannot penetrate the upper surface.
Attaching the top from below creates a clean surface without visible screw heads. It also makes replacing the tabletop easier if it becomes damaged or the table is eventually converted into a homework desk.
Step 7: Create a Raised Border
Cut 1-by-2 trim pieces to fit around the tabletop. A border approximately 1/2 to 3/4 inch above the playing surface helps stop loose bricks, wheels, and tiny accessories from falling to the floor.
Keep at least one small opening in the border so pieces can be swept directly into a storage bin. Without that opening, cleanup may involve picking up several hundred pieces one at a time, which is less a chore and more a test of character.
Step 8: Sand Every Surface
Fill screw holes and visible gaps with wood filler. Sand rough areas with 120-grit paper, then finish with 220-grit paper. Pay special attention to corners, cut edges, the underside of the top, and all places where hands or knees may make contact.
U.S. Consumer Product Safety Commission guidance emphasizes avoiding hazardous edges, burrs, points, and splintered wooden surfaces on products used by children. Smooth edges and rounded corners are therefore functional safety features, not merely decorative details.
Step 9: Prime, Paint, and Protect
Remove sanding dust and apply primer. Follow with two thin coats of durable interior paint, allowing each layer to dry according to the manufacturer’s instructions. A foam roller can create a smoother finish than a heavily loaded brush.
Choose a finish intended for interior furniture and allow it to cure completely before bringing the table into the playroom. Paints, coatings, adhesives, and solvents can release volatile organic compounds, so work in a well-ventilated area and consider low- or zero-VOC products.
Step 10: Position the Baseplates
Arrange the baseplates without adhesive first. Leave a narrow strip of plain tabletop around the outside for loose pieces, instructions, or minifigures.
Before securing neighboring plates, connect several Lego bricks across each seam. The bricks maintain the correct stud spacing and prevent a tiny alignment error from making the seam unusable. This simple technique appears repeatedly in successful DIY Lego table projects.
For a reversible table, attach the plates with removable mounting strips or leave them loose inside a shallow framed recess. For permanent installation, use a thin layer of adhesive compatible with both the tabletop finish and the plastic plates. Test the adhesive on an inconspicuous area before committing the entire Lego city to it.
Step 11: Add Labels and Accessories
Label the bins with words, pictures, or both. Broad categories are easier for children to maintain than an extremely detailed system. Useful groups include:
- Basic bricks
- Plates and flat pieces
- Wheels and vehicle parts
- Windows and doors
- Minifigures
- Special pieces
- Projects in progress
Add a shallow tray for frequently used pieces, a cup for brick separators, and a file holder for instruction booklets. Official LEGO guidance recommends using a brick separator rather than straining fingers to pry tightly connected pieces apart.
Smart Lego Storage Ideas
Sort by Piece Type Rather Than Color
Sorting by color looks beautiful, but finding one tiny red hinge inside a bin filled with every possible red shape can be frustrating. For larger collections, grouping pieces by function or shape is usually more useful. Younger children may prefer broad categories, while experienced builders can manage smaller drawers for specialized components.
Include a Project Bin
Not every creation should be dismantled at cleanup time. Reserve one large container for unfinished builds. Children can move an entire project into the bin without breaking it apart, leaving the tabletop ready for the next activity.
Keep Storage Within Reach
Children are more likely to use a storage system when every container is visible and reachable from the building position. Deep cabinets with heavy doors may hide clutter, but they also make independent cleanup harder.
Do Not Overorganize Immediately
Begin with six or seven categories and observe how the table is actually used. Add dividers only when one category becomes difficult to search. The ideal system supports play; it should not feel like a warehouse inventory audit.
DIY Lego Table Variations
Double-Sided Activity Table
Create a removable panel with baseplates on one side and a smooth surface on the other. Flip it over for drawing, puzzles, board games, or homework. Add finger openings near the edges so adults can lift the panel easily.
Recessed Building Pit
Install the building surface slightly below the outer frame. The shallow recess contains loose pieces more effectively than a narrow trim border. Avoid making the pit too deep, or children will have to reach awkwardly across the edge.
Fold-Down Wall Table
A wall-mounted tabletop is useful in a bedroom with limited floor space. Use sturdy folding brackets and a reliable locking mechanism. Because moving furniture creates possible pinching and crushing points, adults should operate and inspect the folding hardware.
Sibling Building Station
For two or more builders, install storage at both ends and divide the top into flexible zones. Avoid a permanent divider down the middle; many Lego projects begin as separate kingdoms and eventually require a shared bridge, airport, or suspiciously elaborate snack bar.
Adult Display and Building Desk
An adult Lego table can use a standard desk height, deeper drawers, task lighting, and a large neutral-colored surface. Removable baseplates preserve flexibility for sorting, photography, and displaying finished models.
Common Mistakes to Avoid
Gluing Baseplates Without Testing the Seams
Always bridge neighboring baseplates with bricks before the adhesive sets. Visually aligned plates may still be slightly too close or too far apart.
Using an Oversized Table
A huge surface looks exciting, but a child may be unable to reach the center. It also encourages pieces to remain scattered because the table never appears full. Keep every part of the building area comfortably accessible.
Ignoring Chair Height
A perfectly built table can still be uncomfortable when paired with the wrong chair. Measure the child while seated and confirm that knees fit beneath the apron.
Skipping the Raised Edge
A flat tabletop allows wheels and round pieces to roll away. A small border dramatically reduces floor cleanup without interfering with building.
Installing Nonlocking Casters
A mobile table should become stationary during use. Choose locking wheels and verify that the brakes are easy for an adult to operate but difficult to release accidentally.
Putting the Table Into Service Too Soon
Dry paint is not always fully cured paint. Follow the coating manufacturer’s curing instructions before installing baseplates or loading the storage bins.
Cleaning and Maintaining the Table
Wipe the painted wooden surface with a slightly damp cloth and mild household soap when necessary. Avoid soaking plywood edges, particularly around screw holes and seams.
Inspect the table periodically for loose screws, wobbling legs, damaged casters, peeling trim, sharp edges, or lifting baseplates. Repair small problems before they turn into structural ones.
For genuine LEGO bricks and pieces, the manufacturer recommends hand washing with water no hotter than 104 degrees Fahrenheit, or 40 degrees Celsius, using a soft cloth or sponge. Mild detergent may be used, but the pieces should be rinsed thoroughly and kept away from excessive heat.
Practical Experience: Lessons From Building and Using a DIY Lego Table
The most important lesson from a DIY Lego table project is that storage should be designed before the furniture. It is tempting to focus on the exciting partsthe paint color, the baseplate layout, and the impressive size of the tabletop. However, the table succeeds or fails during cleanup. When bins are difficult to remove, too deep to search, or located beneath a chair, loose bricks quickly return to the floor.
Shallow containers usually work better than one enormous tub. Children can spread pieces across a shallow bin and see what is available instead of digging through a plastic cave. Deeper containers remain useful for large basic bricks, bulk pieces, and unfinished projects, so combining several bin sizes provides the best balance.
Another practical lesson is to delay permanent decisions. Before gluing baseplates, use the unfinished table for several building sessions. The child may prefer a large plain sorting zone, removable baseplates, or space for instructions. A layout that appears perfect on paper can feel crowded once a castle, spaceship, and handful of snack-free fingers arrive.
Raised edges are more useful than they initially seem, but they should not surround the table like fortress walls. A low border prevents pieces from rolling away while allowing forearms to rest comfortably on the surface. One intentional cleanup opening is worth adding. Place a bin below it, and hundreds of pieces can be swept off the top in seconds.
Mobility also changes how the table is used. A compact table on locking casters can move toward a window for daytime building, into the center of the room when friends visit, and back against the wall afterward. The locks matter. Without them, an enthusiastic builder may lean forward and send the entire city traveling several inches west.
During construction, sanding takes longer than expected because a child encounters more surfaces than an adult normally notices. Hands wrap under the tabletop. Knees touch the apron. Feet rest against lower rails. Every exposed edge deserves attention. Running a clean cloth over the wood after sanding can reveal snags that are difficult to detect by sight.
Paint color is another area where experience beats theory. Bright primary colors create an obvious toy-room look, while white, natural wood, gray, or muted green allows the furniture to remain useful as the child grows. A neutral table can later become a craft desk, homework station, puzzle table, or general storage bench. Color can still come from bins, labels, and the Lego creations themselveswhich rarely suffer from a shortage of visual enthusiasm.
The organization system should evolve with the collection. Young builders may be perfectly happy with categories such as “bricks,” “people,” and “car parts.” As their building becomes more detailed, those bins can be divided into plates, slopes, hinges, tiles, clips, and technical elements. Beginning with dozens of tiny categories often creates more frustration than order.
Finally, the table should preserve imagination rather than turn playtime into a strict cleanup program. Leave room for unfinished work. Display a favorite model on a small shelf. Keep one miscellaneous bin where mysterious pieces can wait for identification. The goal is not to create a spotless museum. It is to make building easier, cleanup faster, and bare feet significantly safer.
Conclusion
A well-planned DIY Lego table transforms a scattered collection into an inviting creative station. Start with a size that fits the room, measure the child and storage bins before cutting, build a rigid frame, smooth every edge, and choose a finish suitable for indoor furniture. Add accessible storage, a low border, carefully aligned baseplates, and optional locking casters.
The finished table does not need complicated joinery or expensive materials. Thoughtful details matter more: comfortable height, reachable bins, room for unfinished projects, and a surface that can adapt as the child grows. Build those features correctly, and the table may become the busiest piece of furniture in the housewhile the floor becomes considerably less dangerous.
Note: The measurements in this guide are flexible starting points. Verify the dimensions of your chairs, storage bins, baseplates, hardware, and available room before purchasing materials or cutting wood. Small Lego pieces may present a choking hazard to young children, so follow the age guidance supplied with each building set and supervise play appropriately.