Note: This guide is for interior decorative hardboard wall panels. Always confirm the exact product label, installaur project.
A beaded white hardboard wall is one of those rare home upgrades that looks as though it required a design team, a vintage farmhouse, and a suspiciously large latte budget. In reality, it can be a practical DIY project that adds texture, brightness, and personality to a plain room without rebuilding half the house.
Beaded hardboard wall panels create the look of traditional beadboard: evenly spaced vertical grooves with small raised “beads” between them. The result feels clean, classic, and slightly nostalgic, like a well-organized mudroom that somehow never contains three abandoned soccer cleats.
Whether you install it as full-height wall paneling, a chair-rail-height wainscoting treatment, or a compact accent wall, white beadboard-style hardboard can make an ordinary room feel more finished. The key is understanding where it works best, how to install it correctly, and how to avoid the little mistakes that turn a quick weekend project into a long-term relationship with caulk.
What Is a Beaded White Hardboard Wall?
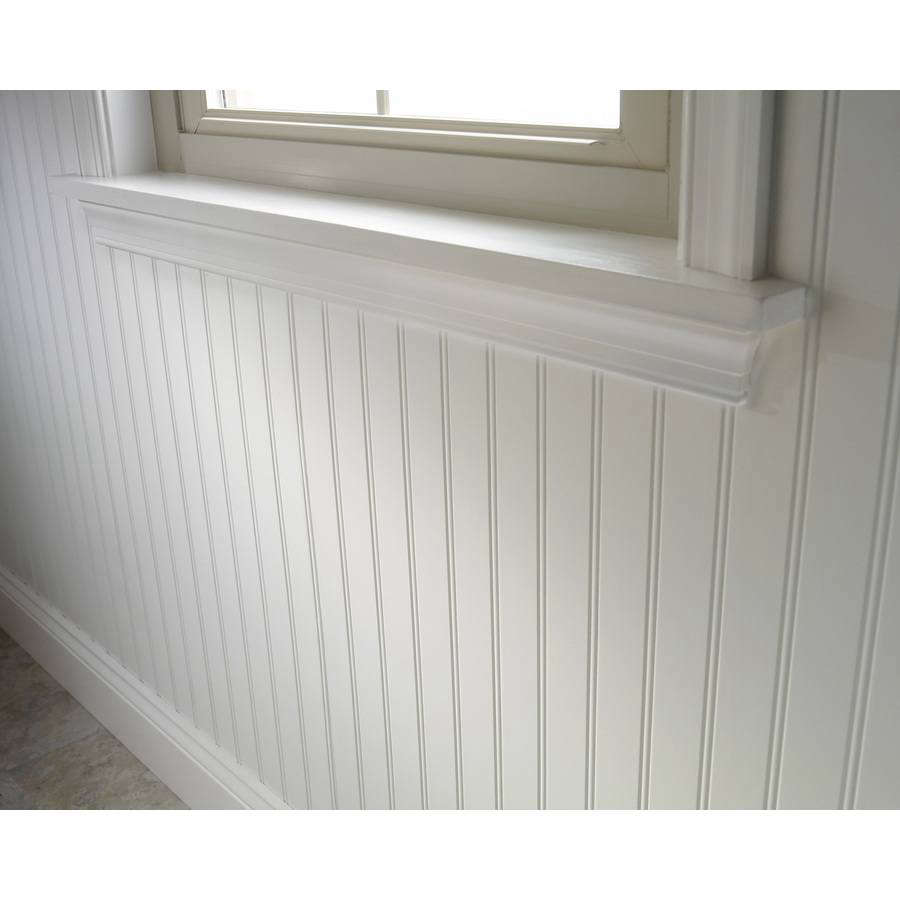
Beaded white hardboard wall paneling is an engineered wood-fiber panel with a decorative, embossed beadboard pattern. Instead of installing many individual tongue-and-groove boards, homeowners can use large panels that create a similar visual effect with fewer seams and less cutting.
Many beaded hardboard panels are sold in large wall-panel sizes, often around four feet wide and eight feet tall. Some are factory finished in white, while others are designed to be painted with latex paint. Depending on the product, panels may be installed with construction adhesive, finish nails, or a combination of both.
The vertical grooves give the wall more depth than flat drywall. That detail is especially helpful in rooms that need visual warmth but do not need an entire renovation. A white beaded wall can suit cottage, farmhouse, coastal, traditional, transitional, and even modern interiors when paired with simple trim and clean colors.
Why Homeowners Choose White Beaded Hardboard Paneling
It adds architectural detail without major construction
Drywall is useful, dependable, and about as emotionally expressive as an unopened cardboard box. Beaded hardboard wall panels add dimension quickly. The vertical lines draw the eye upward, helping a small room feel taller and more intentional.
It can hide minor wall imperfections
Older walls often come with tiny dents, uneven texture, old patchwork, or a mysterious ripple that nobody remembers creating. Decorative wall paneling can visually soften those flaws, especially when installed over a properly prepared surface.
It works for full walls or half-wall wainscoting
You do not need to cover every inch of a room. Beaded white hardboard is often used as wainscoting on the lower half of a wall, topped with a chair rail or cap molding. Traditional wainscoting often falls around chair-rail height, but the best height depends on windows, furniture, ceilings, and the proportions of the room.
It gives white walls more personality
White paint can be crisp and timeless, but white beadboard adds shadows, texture, and rhythm. It keeps a neutral room from looking flat while remaining flexible enough to work with colorful rugs, patterned wallpaper, wood furniture, or dramatic artwork.
Hardboard vs. MDF vs. PVC Beadboard
Before buying panels, understand that “beadboard” describes the look more than one specific material. Hardboard, MDF, PVC, natural wood, and plywood products can all be manufactured with beadboard-style grooves.
- Hardboard: Dense wood-fiber paneling that can be smooth, durable, and easy to cut. It is commonly used for interior decorative wall applications.
- MDF: A stable engineered wood material that paints well but can swell when exposed to excess moisture, especially around unsealed cut edges.
- PVC: A moisture-resistant option often used in bathrooms, laundry rooms, and other humid spaces. It is usually more forgiving around water but may have a different appearance than wood-based products.
- Solid wood: Traditional and beautiful, but usually more expensive and more sensitive to seasonal movement.
For a beaded white hardboard wall, the safest approach is to use the panel exactly where the manufacturer allows it. “Moisture-resistant” does not automatically mean “waterproof enough for a shower wall.” A product may be perfectly suitable for a powder room or laundry wall but not for a direct-splash area behind a bathtub.
Best Rooms for a Beaded White Hardboard Wall
Beaded white hardboard wall panels work especially well in entryways, hallways, dining rooms, breakfast nooks, home offices, laundry rooms, bedrooms, mudrooms, and powder rooms. They can also create a polished backdrop for built-in benches, coat hooks, open shelving, or a reading corner.
In a small entryway, a half-wall beadboard treatment can protect the lower wall from bags, umbrellas, backpacks, and the occasional enthusiastic dog tail. In a home office, full-height beadboard behind a desk can create a finished background for video calls without making the room feel overly formal.
For bathrooms, use extra caution. Good ventilation, sealed cut edges, appropriate caulk, and a panel rated for the environment matter more than decorative ambition. The wall should look charming, not slowly absorb humidity like a sponge with a mortgage.
How to Plan a Beaded White Hardboard Wall
Measure carefully before buying panels
Measure the width and height of each wall section. Subtract large openings such as doors and windows only when doing so truly changes the panel count. Keep extra material for cuts, outlet openings, damaged edges, and the inevitable moment when a measurement seems to have developed a personal agenda.
Choose the wall height
For wainscoting, decide where the top edge will sit. A chair rail, cap board, or simple horizontal trim can create a clean finish. For full-height beadboard, plan how the paneling will meet the ceiling, crown molding, baseboard, and corners.
Think about seams before installation day
Large panels reduce visible seams, but every room has corners, outlets, windows, and odd wall lengths. Dry-fit panels when possible and plan where seams will land. Try to avoid putting a narrow sliver of paneling in a highly visible place unless you enjoy explaining it to every guest for the next decade.
Tools and Materials You May Need
- Beaded white hardboard wall panels
- Tape measure, pencil, level, and straightedge
- Stud finder
- Construction adhesive approved for the panel material
- Finish nails or paneling nails
- Hammer or brad nailer
- Fine-tooth saw blade or circular saw
- Jigsaw for outlet and switch openings
- Safety glasses, hearing protection, and dust mask
- Paintable caulk, wood filler, trim, and touch-up paint
How to Install a Beaded White Hardboard Wall
1. Let the panels acclimate
Bring the panels into the room where they will be installed and allow them to adjust to the room’s temperature and humidity. This step helps reduce movement after installation. Stack panels with spacers when possible so air can circulate around them.
2. Prepare the wall surface
The wall should be clean, dry, sound, and reasonably flat. Repair loose drywall, fill major holes, and remove obstacles such as outlet covers, wall hooks, and base trim if needed. If the wall is noticeably uneven, furring strips or shims may be necessary to create a flatter installation surface.
3. Locate and mark studs
Use a stud finder and mark stud locations lightly with pencil. These marks are useful for securing the panels and trim. Keep your marks high enough that they will be covered by the chair rail or low enough that they will disappear behind baseboard trim.
4. Dry-fit the first panel
Start in a corner. Hold the first panel in position and check that it is plumb. This is one of the most important steps in the project because every panel after it will follow the first panel’s lead. A slightly crooked first panel can create a dramatic wall-wide lean that makes the room look as though it has had a long night.
5. Leave room for expansion
Follow the manufacturer’s instructions for spacing. Many paneling systems require a small gap at the floor, corners, and edges to allow for seasonal movement. Do not force panels tightly into every corner. Trim can cover the gap later while still giving the material room to move.
6. Apply adhesive and fasten the panel
Use a panel adhesive compatible with hardboard and the wall surface. Apply it according to the adhesive label, often in beads or a zigzag pattern. Press the panel firmly into place, then use finish nails or paneling nails where required. Nails placed in grooves are often less noticeable than nails driven across the flat face of the panel.
7. Cut openings for outlets and switches
Turn off power at the breaker before working around electrical boxes. Measure outlet locations carefully, transfer those measurements to the panel, and cut slowly with a jigsaw. It is better to test the opening gradually than to create a hole large enough to qualify as a new decorative feature.
8. Continue across the wall
Check each panel for level and plumb before fastening. Keep the groove pattern aligned so the wall looks continuous. If the room has unusual corners or uneven floors, scribe cuts may be necessary to make the final panel fit neatly.
9. Add trim and finish details
Install baseboard, chair rail, cap trim, or corner molding after the panels are secure. Use paintable caulk where trim meets the wall or where small cosmetic gaps remain. Avoid filling manufacturer-required expansion gaps so rigidly that the panel has no room to move.
Painting and Maintaining White Beaded Hardboard
Some beaded white hardboard panels can be installed as they are, while others are designed to be painted. If painting is needed, clean the surface first and use the primer or paint system recommended for the panel material. For grooves, a small brush is often more effective than trying to force a roller into every recessed line.
For the best finish, brush paint into the grooves and use a small roller on the flatter sections. Two thin coats usually look better than one thick coat that drips into the beading and creates tiny paint stalactites.
Maintenance is simple. Dust occasionally with a microfiber cloth, wipe fingerprints with a lightly damp cloth, and avoid soaking the paneling. Test cleaning products in an inconspicuous spot first, especially if the panel has a factory finish.
Common Beaded Hardboard Wall Mistakes to Avoid
- Installing panels without acclimating them to the room.
- Skipping wall preparation on a wavy, damp, or damaged surface.
- Forgetting to mark studs before adhesive covers the wall.
- Starting with a panel that is not plumb.
- Forcing panels tightly against floors and corners.
- Using the wrong adhesive for the panel material.
- Installing moisture-sensitive panels in direct-water areas.
- Ignoring outlet box extensions after adding panel thickness.
- Painting grooves too quickly and leaving drips behind.
Frequently Asked Questions
Can beaded white hardboard be used as wainscoting?
Yes. It is a popular choice for wainscoting because the vertical bead pattern gives a traditional look without requiring individual boards. Add a cap rail or chair rail for a more finished appearance.
Can I paint a white hardboard wall panel?
Many products are paintable, but always check the manufacturer’s instructions. Some factory-finished panels can accept latex paint with minimal preparation, while others may need light sanding or a bonding primer.
Can hardboard beadboard go in a bathroom?
It may work in a well-ventilated bathroom if the product is approved for the location and edges are properly sealed. Avoid using standard hardboard in direct-splash shower or tub areas unless the manufacturer specifically allows it.
Should I use adhesive, nails, or both?
That depends on the panel material, wall surface, and manufacturer instructions. Many installations use adhesive for broad support and nails for secure positioning, especially while the adhesive cures.
Why a Beaded White Hardboard Wall Is Worth Considering
A beaded white hardboard wall is a practical way to give a room texture, brightness, and character without committing to an expensive renovation. It can make a hallway feel intentional, a laundry room feel less like a utility closet, and a plain wall feel as though it finally received the memo that it is part of the house.
Plan the layout, respect moisture limits, prepare the wall carefully, and take your time with the first panel. Done well, white beaded hardboard paneling can look crisp, classic, and surprisingly custom.
Composite Project Experiences: What Homeowners Learn After Installing Beaded White Hardboard Walls
One of the most common reactions after installing a beaded white hardboard wall is surprise at how much it changes the room without changing the room’s footprint. A narrow hallway can still be narrow, of course, but once the vertical grooves and clean white finish are in place, it tends to feel more purposeful. Instead of looking like a passage between rooms, it begins to feel like an actual part of the home. This is especially noticeable in older houses where hallways often seem to have been designed during a historical shortage of elbow room.
Many DIY projects begin with the idea that the installation will be the hard part. In reality, the planning stage is often where the biggest decisions happen. Homeowners frequently discover that choosing the height of wainscoting takes longer than expected. A few inches can make the room feel balanced or awkward. A panel height that looks perfect in a photo may clash with a nearby windowsill, thermostat, or existing trim. The lesson is simple: use painter’s tape to mark the proposed top edge before cutting any panels. It is cheaper than buying more trim and far less dramatic than trying to explain a crooked chair rail.
Another experience many people share is learning to respect walls that are not flat. A wall can look perfectly normal until a rigid panel is pressed against it. Suddenly, small waves, bows, and old repairs reveal themselves with the enthusiasm of a bad reality-show contestant. Furring strips, shims, and careful adhesive use can solve many of these issues, but patience matters. The finished paneling will only look as straight as the surface behind it allows.
Painting is another area where expectations become more realistic. White beadboard may look simple, but the grooves need attention. Homeowners who rush with a roller often discover missed recesses, tiny drips, or darker shadows where paint did not fully cover. The best results usually come from brushing paint into the grooves first, then rolling the flat faces lightly. It takes longer, but the wall looks cleaner and more intentional when light hits it from the side.
In busy areas such as mudrooms, laundry rooms, and entryways, homeowners often appreciate the practical side of beadboard after installation. The lower wall becomes visually tougher, even when it is still decorative. Scuffs are easier to spot and touch up, hooks can be mounted above it, and the whole room feels more prepared for daily life. A white beaded wall also creates a useful backdrop for baskets, benches, framed prints, and storage cubbies without competing with them.
The final lesson is that trim makes the project feel finished. Panels alone can look good, but baseboard, cap molding, caulk, and touch-up paint are what make the work look intentional instead of temporary. Most successful beaded white hardboard walls are not memorable because anyone notices the individual panels. They are memorable because the room suddenly feels warmer, brighter, and more complete. That is the quiet magic of a good wall treatment: it does not shout for attention, but it makes everything around it look more at home.