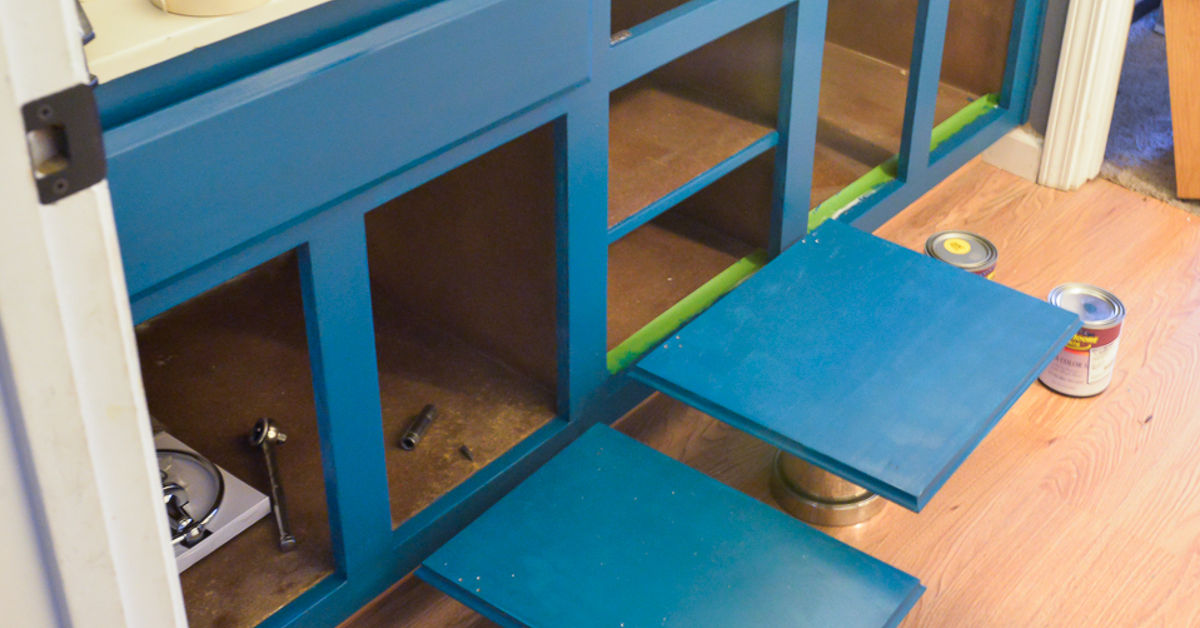
Painting cabinets looks easy from a distance. You remove some doors, open a can of paint, add a playlist, and suddenly your kitchen is supposed to look like a home-improvement show. Then reality arrives wearing old sweatpants and holding a tack cloth. Cabinet painting is absolutely one of the best budget-friendly ways to transform a kitchen, bath, laundry room, or built-in storage area, but it is also one of the easiest places to make a small mistake that turns into a big, peeling, sticky, streaky headache.
Why? Because cabinets live a rough life. They get touched constantly, exposed to grease, steam, humidity, crumbs, fingerprints, and the occasional mystery splatter that no one in the house will confess to. Unlike walls, cabinets need a finish that can stand up to daily abuse and still look sharp. That means prep matters more, product choice matters more, and patience matters a whole lot more.
If you are thinking about painting kitchen cabinets, bathroom vanities, laundry room storage, or built-ins, avoid these five common cabinet painting mistakes. Save yourself the regret, the redo, and the dramatic moment where you stare at a bubbling door and whisper, “We were all rooting for you.”
Why Cabinet Painting Is a Different Beast
Before we get into the mistakes, here is the big picture: cabinet painting is not the same as painting drywall. Cabinets usually have slicker surfaces, more corners, more detail work, and much more wear and tear. Many are coated with old finishes that resist paint. Some are wood, some are laminate, some are melamine, and each surface has its own personality. Some cooperate. Some behave like stubborn toddlers.
A good cabinet finish usually depends on four things: proper cleaning, solid surface prep, the right primer-and-paint system, and enough drying and curing time. Miss one of those, and the whole project can look good for exactly three business days before it starts tattling on you.
Mistake #1: Skipping the Deep Clean
Why this mistake ruins cabinet paint
Cabinets, especially kitchen cabinets, collect grease in ways that feel almost supernatural. Even if they look clean, they may have a thin film of cooking oil, dust, hand residue, or cleaning-product buildup sitting on the surface. Paint does not bond well to grime. It bonds to the grime itself, which means the finish can peel, bubble, chip, or wear unevenly.
This is one of the biggest cabinet painting mistakes because it creates problems that may not show up immediately. At first, everything looks fine. A few weeks later, the paint starts lifting near handles, corners, or areas near the stove. That is when the cabinet says, “Remember when you thought a quick wipe with a damp rag was enough?”
What to do instead
Clean like you mean it. Use a degreasing approach that matches the condition of the cabinets. For lightly soiled surfaces, soap and water may help. For kitchens with heavier buildup, many pros use stronger degreasers designed to cut oil and residue. Pay extra attention to areas around pulls, knobs, edges, lower doors, and cabinets near the range.
After cleaning, rinse away any cleaner residue and let everything dry fully. This part is not glamorous, but it is one of the most important steps in painting cabinets successfully. Clean cabinets give primer a fighting chance. Dirty cabinets give you a future repainting project.
Mistake #2: Treating Prep Like an Optional Side Quest
Why poor prep leads to poor adhesion
If you want paint to stay put, the surface needs “tooth.” In plain English, that means the finish needs something to grab onto. Many cabinets have glossy factory coatings, polyurethane, old paint, or smooth laminate surfaces. If you paint directly over that slick finish without sanding or deglossing properly, the paint may look decent on day one and start failing after normal use.
Poor prep also shows up visually. Dings, chips, rough edges, raised grain, and dust nibs are all more noticeable on cabinets than on walls. Cabinets sit right at eye level. They are basically the overachievers of exposing flaws.
What good prep actually looks like
Prep starts after cleaning. Remove doors, drawers, shelves when possible, and all hardware. Label everything carefully so reassembly does not turn into a puzzle designed by chaos. Then inspect the surfaces. Fill dents or unused hardware holes if needed. Sand or scuff-sand to remove gloss and create a paintable surface. On wood, you may need a more traditional sanding process. On previously painted or finished surfaces, a light but thorough scuff sand is often enough. On laminate or melamine, the prep must be especially careful because smooth, nonporous surfaces are less forgiving.
Do not forget dust removal. Sanding dust left on cabinets can sabotage an otherwise great finish. Vacuum crevices, wipe with a tack cloth or microfiber cloth, and make sure the surface is clean before primer goes on.
One more smart move: sand lightly between primer and paint coats when the product directions support it. That step smooths drips, ridges, and fuzz, and helps create the polished look people usually describe as “professional.” In other words, it is the difference between “wow” and “well, at least it’s brighter.”
Mistake #3: Using the Wrong Primer or the Wrong Paint
Why product choice matters so much
Not all paint is created equal, and cabinets are no place for wishful thinking. Wall paint is usually not tough enough for cabinet doors that get opened a hundred times a day. Some bargain paints look fine at first but do not hold up to touching, wiping, humidity, or friction. Likewise, the wrong primer can cause adhesion problems, bleed-through, or a finish that chips far too easily.
This is especially important if you are painting laminate cabinets, dark-stained wood, knotty wood, or cabinets with old glossy finishes. Those surfaces often need a bonding primer or a stain-blocking primer, not just a cheerful attitude and a random can from the garage.
What to use instead
Choose a cabinet-specific paint, trim enamel, or another durable interior product designed for high-touch surfaces. For many cabinet projects, satin or semi-gloss finishes are the sweet spot. They are easier to wipe clean than flat paint and tend to hold up better in kitchens and baths. If you are painting laminate, use a bonding primer designed for slick surfaces. If you are covering stains, tannins, or dark colors, use a primer system suited for that challenge.
Always read the label and keep the system compatible. Primer and topcoat need to play nicely together. This is not the place for product roulette. The best cabinet painting results usually come from choosing a quality primer, a quality cabinet paint, and applying them according to the manufacturer’s directions.
And while we are here, let’s talk tools. You do not need a paint sprayer to get beautiful cabinets. Sprayers can create a sleek finish, but if you have never used one, cabinets are not the most forgiving place to learn by improvisation. High-quality brushes, mini rollers, and a careful workflow can produce excellent results.
Mistake #4: Rushing Dry Time and Ignoring Cure Time
Dry is not the same as cured
This mistake is wildly common because paint loves to lie. It looks dry. It feels dry. It is not actually ready. Dry time is when the surface no longer feels wet. Cure time is when the coating hardens enough to resist sticking, scratching, blocking, and wear. Cabinets need that harder finish because they get touched, bumped, and cleaned constantly.
Homeowners often rehang doors too early, reinstall hardware too fast, or start using painted cabinets before the finish has cured. The result can be sticking doors, fingerprints trapped in soft paint, dents around knobs, peeling at contact points, and that sad “rubberized” feel that screams unfinished business.
How to avoid this mistake
Follow the manufacturer’s instructions for recoat times, dry times, and cure times. Then respect the room conditions. Humidity, low temperatures, poor ventilation, and thick coats can all slow drying. Thin, even coats are better than one heavy coat that takes forever and dries with drips or brush marks.
Plan your project around patience. If you are painting kitchen cabinets, do not assume you will start Saturday morning and be fully operational by dinner. Some projects move quickly; others need days, and full curing can take longer still. Let doors lie flat or rest on a proper painting setup, allow good airflow, and do not rush reassembly just because the room is starting to look good. Cabinets reward patience. They punish optimism.
Mistake #5: Painting Around Hardware, Hinges, and a Bad Workflow
Why a sloppy process creates a sloppy finish
If you paint around hinges, pulls, or mounted doors, the finished job usually tells on you. You end up with paint bridges around hardware, missed edges, drips near hinges, and an uneven finish where doors meet frames. It also becomes harder to clean, sand, prime, and coat every surface evenly.
Another workflow problem is failing to label doors and drawers. Cabinet doors can look nearly identical until reinstallation time, when suddenly Door 7 belongs nowhere and everyone in the room becomes a suspect.
The smarter workflow
Take the cabinets apart. Remove doors, drawers, knobs, pulls, and hinges. Label each piece clearly. Store hardware in separate marked bags. Set up a dedicated painting station with good light, ventilation, and enough room to work around each piece. Paint cabinet frames in place, but paint doors and drawers flat whenever possible for better control and fewer drips.
Work in a repeatable order. For example, paint edges first, then flat sections, and keep your brush strokes or roller passes moving in the direction of the wood grain where applicable. That consistent workflow helps the finish look smoother and reduces the “weekend warrior did their best” texture that can happen when you jump around too much.
Bonus Mistake: Forgetting About Old-House Risks
If your home was built before 1978, do not treat cabinet prep like a casual dust-making hobby. Older coatings may contain lead, and disturbing those surfaces can create hazardous dust. That matters even more if children or pregnant people are in the home. If you are dealing with an older house and you are not sure what is on those cabinets, slow down and handle the project safely. Sometimes the smartest DIY move is knowing when to bring in a certified pro.
How to Get the Best Cabinet Painting Results
If you want your painted cabinets to look smooth, durable, and worth the effort, here is the short version:
- Degrease thoroughly before anything else.
- Remove and label doors, drawers, and hardware.
- Sand or degloss for adhesion.
- Repair dents, holes, and surface flaws before priming.
- Use the right bonding or stain-blocking primer for your surface.
- Choose a durable cabinet or trim paint in a wipeable finish.
- Apply thin, even coats and sand lightly between coats when appropriate.
- Let everything dry and cure before heavy use.
Do those things, and your cabinets have a very good chance of looking crisp and lasting well. Skip them, and your project may become a cautionary tale told in the paint aisle.
Real-World Experiences With Cabinet Painting: What People Learn the Hard Way
One of the most common experiences people report after painting cabinets is simple: they underestimated the prep. Not the painting itself, but the hours of removing hardware, numbering doors, cleaning the grime off cabinet faces, sanding corners, vacuuming dust, and waiting for coats to dry. The paint part often feels like the star of the show, but prep is really the stage crew doing all the heavy lifting behind the curtain. Homeowners who rush into priming without cleaning thoroughly often notice problems first around the handles, where skin oils and cooking residue are worst. The finish may separate, chip, or feel weirdly soft in high-touch spots, even when the rest of the door looks decent.
Another frequent experience is the surprise of how different cabinet painting feels from wall painting. People who are very comfortable painting a bedroom often assume cabinets will be easier because they are smaller. In practice, cabinets can feel fussier. Every brush mark shows. Every drip forms in a corner you did not see until the paint started setting. Every missed patch of dust becomes a tiny bump under the finish. That is why many first-time cabinet painters say the second or third door looks dramatically better than the first one. They develop a rhythm. They use less paint on the brush. They stop overworking the surface. They learn that “just one more pass” is often the exact pass that creates the problem.
People also talk about the emotional roller coaster of cure time. Freshly painted cabinets can look amazing but still be delicate. A lot of DIYers rehang doors too soon because the kitchen is half functional and everyone in the house is tired of eating around sawhorses. Then a door sticks, a corner dents, or a drawer front picks up fingerprints. That is when patience suddenly becomes the most expensive supply in the project. The lesson most people take away is that cabinet painting rewards planning. If you can live with some disruption for a little longer, the finish usually looks better in the long run.
Another real-world pattern is that better products often make the job easier, not just fancier. Homeowners who switch from generic leftover paint to a proper primer and cabinet enamel usually notice smoother leveling, better adhesion, and a finish that feels harder after curing. The same goes for tools. A decent brush, a quality mini roller, and a good sanding block can make a shocking difference. No one writes poetry about tack cloths, but they earn respect fast.
Finally, people often discover that the project is less about making old cabinets perfect and more about making them look intentional, clean, and fresh. Tiny flaws may still exist if you look closely enough, because cabinets are old, wood moves, and homes are lived in. But when the surfaces are clean, the prep is solid, the finish is even, and the hardware goes back on without drama, the whole room feels updated. That is the part people love most. A cabinet painting project done well can make an outdated kitchen feel brighter, calmer, and more custom without the cost of a full remodel. That is a pretty nice payoff for a project that mostly begins with soap, sandpaper, and humility.
Conclusion
Painting cabinets is one of those home projects that can deliver a huge visual upgrade for a relatively modest budget, but only if you avoid the classic mistakes. The five biggest cabinet painting mistakes are skipping the deep clean, rushing prep, choosing the wrong primer or paint, ignoring dry and cure times, and keeping doors and hardware in place instead of using a smart workflow. None of those mistakes are glamorous, and none of them are rare.
The good news is that every one of them is preventable. If you clean thoroughly, prep carefully, use the right products, paint patiently, and let the finish cure before everyday use, your cabinets can look polished and hold up beautifully. In other words, the secret to great painted cabinets is not magic. It is method. And maybe a little restraint when you are tempted to say, “Eh, that’s probably good enough.”