A fake fireplace is one of those home projects that feels almost suspiciously satisfying. You get the cozy focal point, the mantel styling opportunities, the “let’s gather around the hearth” energy, and none of the chimney cleaning, ash sweeping, or mysterious woodland creature noises coming from the flue. That is a very fair trade.
Building the Fake Fireplace 2 is about creating a better, cleaner, more realistic version of a DIY faux fireplace. Think of it as the sequel where the hero has learned from the first movie: better measurements, sturdier framing, safer insert planning, prettier trim, and no dramatic last-minute run to the hardware store because someone forgot wood glue. Not naming names. It was probably the dog.
Whether you want a decorative fireplace mantel, an electric fireplace insert, or a purely cosmetic fireplace surround for candles and stacked birch logs, the goal is the same: make a blank wall look intentional, warm, and architecturally interesting. A well-built faux fireplace can anchor a living room, bedroom, dining area, office, or even a rental space if designed as a freestanding unit.
What Is a Fake Fireplace?
A fake fireplace, also called a faux fireplace or decorative fireplace, is a non-masonry fireplace feature built for style, ambiance, or electric heat. It does not burn wood, does not require a chimney, and does not need gas lines. The most popular versions include a wood-framed mantel surround, a recessed or wall-mounted electric fireplace insert, faux brick or tile panels, and a mantel shelf for art, mirrors, seasonal decor, or that one plant you keep promising not to overwater.
The beauty of a DIY faux fireplace is flexibility. You can build it shallow for a small room, wide and dramatic for a large wall, modern with clean lines, traditional with crown molding, rustic with reclaimed wood, or playful with color. It can be permanent, semi-permanent, or freestanding. In other words, it behaves like a fireplace but negotiates like furniture.
Why Build a Second Version?
The “2” in Building the Fake Fireplace 2 matters because most DIYers improve dramatically after the first attempt. Version one might have looked cute in photos but slightly wobbly in person. Version two is where you plan the outlet before framing, center the insert properly, anchor the structure to studs, choose trim that hides seams, and give the mantel enough visual weight to look built-in rather than “weekend craft project leaning against the wall.”
A second fake fireplace can also solve new design problems. Maybe the first one was purely decorative, but now you want heat. Maybe you moved to a new home with a blank living room wall. Maybe your TV wall needs balance. Or maybe you simply discovered that a mantel is the most powerful seasonal decorating platform known to humankind. Once you hang one garland, there is no going back.
Planning the Project Before Cutting Wood
Good fake fireplace construction begins with planning. This is the step people skip right before they learn exciting new words while holding a crooked board. Start by choosing the wall and deciding what the fireplace needs to do. Is it only decorative? Will it hold an electric fireplace insert? Will a television hang above it? Will the mantel support heavy decor? Will the unit be attached to the wall or movable?
Measure the Wall
Measure the wall width, ceiling height, baseboard height, nearby outlets, windows, door swings, and furniture placement. A common mistake is building the faux fireplace too small for the wall. If the surround is tiny, it may look like a dollhouse fireplace trying its best. A good rule is to let the fireplace feel proportional to the seating area. For a standard living room, many DIY faux fireplaces land between 48 and 72 inches wide, but your room should make the final decision.
Choose the Insert First
If you plan to use an electric fireplace insert, choose the insert before building the frame. Every insert has its own rough opening, depth, ventilation, clearance, and mounting requirements. Some units are designed to be wall-mounted, some can be recessed, and some can sit inside a cabinet or mantel structure. Do not guess. The manufacturer’s manual is not decorative reading material; it is the boss of the build.
Find the Power Source
An electric fireplace should usually plug directly into a wall outlet, not into an extension cord or power strip. Heat-producing appliances draw significant power, so outlet planning is a safety issue, not a convenience issue. If the only outlet is across the room behind a bookcase and three emotional support throw pillows, rethink the layout or call an electrician.
Tools and Materials
Your exact shopping list depends on the design, but most DIY fake fireplace builds use a similar set of basics. For the frame, choose 2x4s or 2x3s. For the face, use plywood, MDF, primed boards, shiplap, beadboard, or cement board if tile is involved. For the mantel, use solid wood, a boxed beam, reclaimed lumber, or layered boards. For detail work, add base cap molding, crown molding, lattice strips, quarter round, or decorative corbels.
Common Tools
- Measuring tape and pencil
- Level and square
- Stud finder
- Miter saw or circular saw
- Drill and driver bits
- Nail gun or finish nails
- Wood glue
- Caulk and wood filler
- Sander or sanding block
- Paintbrush, roller, or sprayer
Common Materials
- Framing lumber
- Plywood or MDF panels
- Trim and molding
- Mantel board or boxed mantel material
- Electric fireplace insert, faux logs, candles, or decorative screen
- Primer and paint
- Construction screws
- Wall anchors or screws for studs
- Optional tile, peel-and-stick brick, stone veneer, or wallpaper
Step-by-Step: Building the Fake Fireplace 2
Step 1: Sketch the Fireplace
Before cutting anything, draw the fireplace front view and side view. Include total width, total height, depth, firebox opening, mantel height, trim thickness, and insert dimensions. If you are building around an electric insert, mark the exact rough opening from the manufacturer’s instructions. Sketching may feel old-fashioned, but it prevents modern disasters.
For example, a simple design might include a 60-inch-wide surround, a 42-inch-high mantel, a 30-inch firebox opening, and a 10- to 14-inch depth. A more dramatic design might extend from floor to ceiling with vertical paneling and a wide mantel shelf. The key is not copying someone else’s dimensions blindly. Their room is not your room, and their baseboards may not be plotting against them like yours are.
Step 2: Build the Base
The base gives the fireplace visual grounding. You can build a low platform from 2x4s and cover it with plywood, or you can create a simple hearth with tile, stone-look panels, brick veneer, or painted wood. If the fireplace is decorative only, the base can be shallow. If it supports an electric insert, make sure the base is sturdy, level, and deep enough for the unit.
A raised hearth can look traditional and substantial. A flush hearth feels cleaner and more modern. For small rooms, avoid a deep hearth that steals walking space. Nobody wants a cozy fireplace that also functions as a shin trap.
Step 3: Frame the Surround
Build the frame like a shallow wall. Use vertical studs on the left and right, horizontal boards across the top and bottom, and additional supports around the firebox opening. Check for square as you work. If the frame is out of square, every piece of trim will report the crime later.
If the faux fireplace is permanent, secure it into wall studs. A stud finder is your friend, even if it makes dramatic beeping noises like it has discovered buried treasure. Screwing the frame into studs prevents tipping and gives the mantel a solid foundation. For freestanding renter-friendly designs, increase the base depth and add anti-tip hardware where allowed.
Step 4: Create the Firebox Opening
The firebox opening is the visual center of the project. For an electric fireplace insert, follow the required opening size carefully. Leave room for trim, mounting brackets, airflow, and access to controls if needed. For a decorative firebox, line the inside with faux brick panels, black-painted plywood, peel-and-stick tile, or thin brick veneer.
Painting the interior matte black is an easy trick that adds depth. It makes candles glow better, stacked logs look intentional, and small imperfections politely disappear into the shadows. Matte black paint is basically a tuxedo for plywood.
Step 5: Skin the Frame
Once the frame is square and secure, cover it with plywood, MDF, or paneling. MDF is smooth and great for painted finishes, but it dislikes moisture. Plywood is stronger and more forgiving. Cement board is best behind real tile. Cut panels carefully, dry-fit them, then fasten them with screws or brad nails. Keep seams where trim can hide them.
If you want a farmhouse look, use vertical shiplap or beadboard. For a modern fake fireplace, use flat panels with minimal trim. For a vintage look, layer molding around the firebox and add decorative side columns. The structure underneath may be simple, but the face is where personality walks in wearing good shoes.
Step 6: Build the Mantel
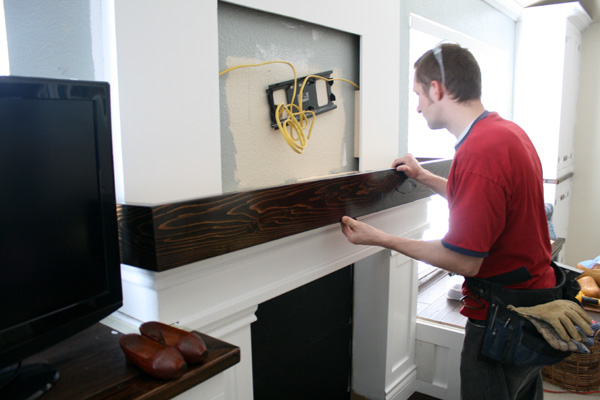
The mantel is the crown of the fireplace. It should look substantial enough to belong there, not like a random shelf that wandered into the room. A boxed mantel is a popular choice because it looks thick without being overly heavy. Build it with three boards: a front face, a top, and a bottom, then cap the ends. You can stain it for warmth or paint it to match the surround.
For a traditional style, add crown molding under the mantel shelf. For a rustic style, use a distressed beam. For a modern style, keep the mantel slab clean and squared. If the mantel will hold heavy items, anchor it securely into studs or into the fireplace frame. Decorative brackets or corbels can add both style and visual support.
Step 7: Add Trim and Details
Trim is where a basic box becomes a believable built-in. Add baseboard along the bottom so the fireplace looks connected to the room. Use casing around the firebox opening. Add crown or cove molding under the mantel. Consider picture-frame molding on the sides for a classic paneled look.
The secret is layering. A flat board can look plain, but add a thin trim piece, a shadow line, and a clean caulk bead, and suddenly it looks like architecture. This is why trim carpenters walk around with quiet confidence. They know seams are just opportunities wearing disguises.
Step 8: Fill, Caulk, Sand, and Paint
Do not rush the finishing stage. Fill nail holes, caulk inside corners, sand rough edges, and prime before painting. Semi-gloss or satin paint is easier to wipe clean, while matte paint gives a softer designer look. White is timeless, black is dramatic, deep green or navy can feel custom, and warm greige works well in neutral homes.
If staining the mantel, test the stain on scrap wood first. Different boards absorb stain differently, and surprise orange wood is not the cozy rustic moment most people are hoping for. Use a clear protective topcoat if the mantel will be handled often or decorated seasonally.
Electric Insert or Decorative Firebox?
An electric fireplace insert adds light, motion, and supplemental heat. Many modern models offer adjustable flame effects, remote controls, timers, thermostats, and heat-free flame settings for year-round ambiance. This is wonderful for people who want fireplace vibes in July without turning the living room into a baked potato.
A decorative firebox is simpler and cheaper. Fill it with stacked birch logs, battery-operated candles, fairy lights, a vintage screen, a basket of blankets, or a painted log insert. This version is ideal for renters, warm climates, bedrooms, dining rooms, and anyone who wants charm without wiring decisions.
Safety Notes You Should Not Skip
Fake does not mean careless. If your faux fireplace includes an electric heater, treat it as a heat-producing appliance. Keep combustible materials away from the heat outlet. Do not block vents. Do not place fabric garlands, stockings, paper decorations, or dried florals directly in front of heat. Plug the unit directly into a suitable wall outlet, and avoid extension cords or power strips unless the manufacturer specifically allows them.
Always follow the insert manual for clearances, framing dimensions, and mounting rules. Many electric fireplaces are designed to be safe when installed correctly, but “correctly” is doing a lot of work in that sentence. If an outlet feels warm, a breaker trips, lights flicker, or the cord looks damaged, stop using the unit and consult a qualified electrician.
Design Ideas for a Better Faux Fireplace
Modern Minimalist
Use a clean rectangular frame, a linear electric insert, smooth drywall or MDF panels, and a simple floating mantel. Paint everything the same color as the wall for a built-in look, or choose black for a bold focal point.
Classic Cottage
Add beadboard, decorative trim, a chunky white mantel, and a brick-look firebox. Style the mantel with a mirror, books, brass candlesticks, and seasonal greenery. Bonus points if the room smells faintly like cinnamon and responsible adulthood.
Rustic Farmhouse
Use shiplap, a stained wood beam mantel, black firebox paint, and stacked birch logs. Keep the styling relaxed with baskets, pottery, and simple artwork. Avoid overloading the mantel; rustic does not mean every object from a craft fair must attend the meeting.
Traditional Built-In Wall
Frame the fake fireplace between bookcases or cabinets. This makes the feature feel permanent and expensive. Add picture lights, closed storage, or floating shelves. A fireplace flanked by storage is practical, attractive, and excellent at hiding board games with missing pieces.
Common Mistakes to Avoid
The first mistake is building before buying the insert. The second is ignoring depth. A faux fireplace that sticks too far into a narrow room can make furniture placement awkward. The third is skipping stud attachment. Tall, shallow structures can tip if they are not secured. The fourth is choosing trim that is too small. Thin trim on a large fireplace can look underdressed, like wearing flip-flops to a wedding.
Another common issue is placing a TV too high above the mantel. If you must mount a TV above the fake fireplace, keep viewing height in mind. A beautiful fireplace wall becomes less charming when watching a movie feels like sitting in the front row of a tennis match.
Budget and Timeline
A simple decorative DIY fake fireplace can be built for a modest budget using framing lumber, MDF, trim, paint, and faux brick panels. Adding an electric fireplace insert increases the cost, especially for larger or more realistic models. Tile, stone veneer, custom cabinetry, and premium mantels can raise the budget further.
For timing, a basic weekend build is possible if materials are ready and the design is simple. More detailed projects may take several weekends, especially if tile, paint curing, electrical work, or built-ins are involved. The best timeline is one that leaves room for mistakes, because DIY projects love to reveal hidden side quests.
Maintenance and Seasonal Styling
A fake fireplace is low-maintenance, but it still needs care. Dust the mantel and firebox regularly. Clean the glass on an electric insert according to the manufacturer’s directions. Check vents for dust buildup. Inspect cords occasionally. Touch up paint where decor has scratched the surface.
For styling, keep the mantel balanced. Use one large anchor piece, such as a mirror or artwork, then layer smaller objects in varied heights. In fall, add pumpkins and branches. In winter, use greenery and warm lights. In spring, try flowers and pale ceramics. In summer, keep it light with framed prints, shells, or simple candlesticks. The fireplace may be fake, but the decorating addiction is very real.
Conclusion
Building the Fake Fireplace 2 is more than a decorative weekend project. It is a smart way to add character, warmth, and architectural structure to a room without committing to masonry, gas lines, or chimney maintenance. With careful planning, accurate measurements, safe electrical choices, sturdy framing, and thoughtful finishing, a DIY faux fireplace can look like it has always belonged in the home.
The best fake fireplace does not try too hard. It fits the room, respects proportions, hides seams, follows safety rules, and gives the eye a natural place to land. Whether you choose a realistic electric fireplace insert or a charming candle-filled firebox, the finished result should make the room feel warmer before anyone even turns on the heat.
Extra Experience: Lessons From Building a Better Fake Fireplace
The biggest lesson from building a fake fireplace is that the project is really three projects pretending to be one. First, there is the construction project: framing, fastening, leveling, and making sure nothing wobbles like a nervous folding table. Second, there is the design project: choosing the right width, trim, color, mantel thickness, and firebox finish. Third, there is the patience project: accepting that caulk needs time, paint needs coats, and your measuring tape will vanish exactly when you need it most.
One practical experience worth sharing is to mock up the fireplace with painter’s tape before building. Tape the width, height, mantel line, and firebox opening directly onto the wall. Then step back from different parts of the room. Sit on the sofa. Walk in from the hallway. Look at it in morning light and evening light. A fireplace that seems perfect on paper may feel too tall, too narrow, or slightly off-center in real life. Painter’s tape is cheaper than lumber and much less emotionally complicated.
Another useful lesson is to make the mantel slightly deeper than you think, but not dramatically deep. A narrow mantel can look weak and limit decorating options. A very deep mantel can overpower the room and invite clutter. Around 7 to 10 inches often works well for many faux fireplaces, depending on scale. If you want to lean artwork, use vases, or hang stockings during the holidays, plan for that early.
For a more realistic look, treat the firebox interior seriously. Many beginners spend all their energy on the outside and leave the inside looking like a plywood cave. Paint it black, add faux brick, install tile, or create a neat log stack. Even if the fireplace never produces heat, the firebox should look intentional. It is the visual “stage” of the whole feature.
One mistake that shows up often is skipping primer on MDF or raw wood. Paint may look fine at first, but primer improves coverage and helps prevent blotchy areas. Sanding between coats also makes the finish feel more professional. Nobody may walk into your house and say, “Excellent sanding discipline,” but they will notice that the fireplace looks smooth and expensive.
Finally, plan the decor before the final build. If a TV goes above the mantel, account for viewing height and cable management. If sconces will flank the fireplace, plan wiring or choose battery-operated options. If built-in shelves are coming later, leave enough wall space. The best version of a DIY fake fireplace is not just a box with trim; it is a focal point that works with the entire room. Build it like it belongs, finish it like guests will inspect it, and style it like the cozy little fraud it proudly is.
Note
This article is intended for general DIY inspiration and informational guidance. Always follow the manufacturer’s instructions for any electric fireplace insert, observe required clearances, and consult a qualified electrician or contractor when electrical work, wall structure, or local building requirements are uncertain.