Outdoor entertaining has a funny way of making us suddenly care about things we ignored all winter: the wobble in the patio table, the heroic mosquito population, and whether the backyard has “ambience” or simply “darkness with chairs.” That is where DIY candle holders come in. Inspired by the classic Remodelista approachsimple materials, elegant restraint, and a tiny wink of resourcefulnessthis guide explores how to turn everyday objects into candle holders that make outdoor dinners feel thoughtful, warm, and casually beautiful.
The original charm of the Remodelista video concept is its no-fuss brilliance: clear wine bottles, galvanized buckets, empty paint cans, glass jars, and other humble household objects can become stylish candle holders with very little effort. No need for a craft room that looks like a glitter factory exploded. No need to buy a cartload of matching décor. The best outdoor candle holders often start with what you already own, then get elevated through proportion, placement, and a little common sense.
In this article, we will walk through materials, styling ideas, safety considerations, table-setting strategies, and real-life hosting experience so you can create candlelit outdoor spaces that feel polished without being precious. Think backyard dinner party, patio happy hour, summer potluck, balcony date night, or “I brought chips, but at least the table looks magical.”
Why DIY Candle Holders Work So Well Outdoors
Outdoor spaces are forgiving in the best possible way. A slightly dented bucket looks charming under the evening sky. A recycled wine bottle feels intentional when grouped with herbs and linen napkins. A Mason jar that might look too rustic indoors suddenly becomes perfect on a garden table. Candlelight softens edges, warms faces, and politely distracts from the fact that your fence could use a touch-up.
DIY candle holders are especially useful for outdoor entertaining because they solve three common problems: lighting, atmosphere, and budget. String lights are lovely, but they can be permanent, plug-dependent, or too bright for intimate dining. Candles create smaller pools of glow, which is exactly what a dinner table, side table, porch step, or garden path needs. Even better, homemade candle holders let you customize the mood without purchasing an entire matching set.
The Remodelista Mindset: Useful, Simple, Beautiful
The Remodelista style is not about over-decorating. It is about restraint. A wine bottle becomes a taper holder. A galvanized pail becomes a wind-shielded lantern. A clean paint can becomes an industrial-chic vessel for a pillar candle. The magic is not in adding more; it is in editing well.
For outdoor entertaining, this mindset is gold. You want pieces that can handle wind, uneven surfaces, casual guests, and the occasional splash of lemonade. DIY candle holders should look good, function safely, and not require a dramatic speech if one gets knocked over by Uncle Mark reaching for the salsa.
Best Materials for DIY Outdoor Candle Holders
The strongest DIY candle holder ideas begin with materials that can tolerate heat, stay stable, and fit the style of your outdoor space. Below are some of the most practical options.
1. Clear Glass Wine Bottles
Clear glass wine bottles make excellent holders for taper candles. Remove the label, rinse the bottle thoroughly, and choose a taper that fits snugly in the opening. For a more refined look, use bottles of the same color and shape. For a relaxed, collected look, mix heights and glass tones. Clear bottles are especially beautiful because they reflect candlelight without adding visual heaviness.
Styling tip: line three to five bottles down the center of a long table. Add small bowls of olives, herbs in bud vases, and plain white plates. The result feels Mediterranean without requiring anyone to pronounce “bruschetta” correctly.
2. Mason Jars and Recycled Glass Jars
Glass jars are the dependable jeans of DIY décor: always useful, never too fancy, and somehow available in every kitchen cabinet. They work well with tea lights, votives, LED candles, sand, pebbles, shells, or even floating candles. For outdoor use, jars offer wind protection while keeping the flame visible.
Try filling the bottom inch with sand or small stones before adding a votive. This adds weight, improves stability, and gives the holder a finished look. For a coastal table, use pale sand and small shells. For a garden dinner, tuck sprigs of rosemary or lavender around the outside of the jar, keeping any greenery away from the flame.
3. Galvanized Buckets
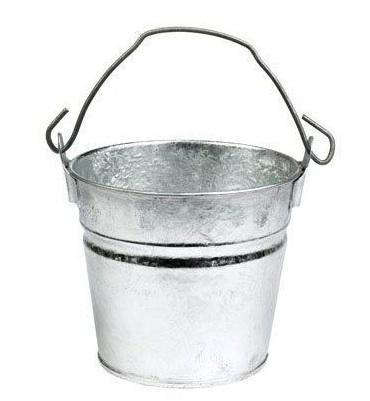
Galvanized buckets bring a casual utility-room charm to the table. They are sturdy, reflective, and wonderfully unfussy. Use small buckets for votive candles and larger ones for pillar candles protected inside glass hurricanes. They pair beautifully with farmhouse tables, picnic settings, potted herbs, grilled food, and any party where someone says, “We should do this more often.”
To keep the candle steady, add a layer of pea gravel, sand, or river stones to the bottom. This also helps elevate the candle to the right height. If the bucket is deep, place a glass votive holder inside so the flame stays controlled and visible.
4. Empty Paint Cans
Clean, unused paint cans are a clever option for modern industrial outdoor décor. Their simple shape and metal finish make them look more expensive than they are. Use them as vessels for pillar candles, or punch small holes in the sides to create a lantern effect. If you choose the punched-hole method, sketch a simple pattern first: dots, stripes, stars, or a loose botanical motif.
Important note: only use completely clean, unused cans or containers that never held flammable or toxic material. A candle holder should create ambience, not a backyard chemistry episode.
5. Terra-Cotta Pots
Small terra-cotta pots make warm, earthy candle holders. Their natural clay color works beautifully with outdoor furniture, garden beds, and herb planters. Place a votive or pillar candle inside a pot, then surround it with sand or stones. For a more finished look, use a saucer as the base.
Terra-cotta is especially attractive for casual summer dinners because it looks like it belongs outside. It does not try too hard, which is exactly why it works.
Simple DIY Candle Holder Projects for Outdoor Entertaining
Below are easy projects inspired by the Remodelista philosophy: everyday materials, minimal fuss, and maximum atmosphere.
Project 1: Wine Bottle Taper Holders
Materials: clear wine bottles, taper candles, warm soapy water, label remover or baking soda paste, soft cloth.
Soak the bottles in warm soapy water until the labels loosen. Scrub away any residue, dry the bottles, and insert taper candles into the openings. If the candle is slightly loose, wrap the base with a small strip of aluminum foil until it fits securely. Arrange the bottles in odd numbers for a natural look.
Best for: long dining tables, narrow patios, minimalist dinner parties, and anyone who has recently “saved the bottles for a project” and needs to justify that decision.
Project 2: Sand-Filled Jar Lanterns
Materials: glass jars, sand or fine gravel, tea lights or votives, twine, optional shells or small stones.
Fill each jar with one to two inches of sand. Nestle a tea light or votive holder in the center. Tie twine around the rim if desired. Use several jars along a table, porch railing, or garden step. For safer entertaining, choose LED tea lights in high-traffic areas or wherever children and pets may wander.
Best for: beach-inspired gatherings, casual cookouts, small balconies, and last-minute hosting.
Project 3: Galvanized Bucket Glow Pots
Materials: small galvanized buckets, gravel, glass votive cups, votive candles or LED candles.
Add gravel to the bottom of each bucket, place a glass votive cup in the center, and add the candle. The metal surface reflects the light, while the bucket keeps the arrangement grounded. Group three buckets together on a buffet table or place one at each end of an outdoor dining table.
Best for: rustic patios, farmhouse dinners, garden parties, and outdoor buffets.
Project 4: Punched Tin Lanterns
Materials: clean tin cans, hammer, nail, water, freezer, towel, spray paint if desired, tea lights.
Fill a clean tin can with water and freeze it. The ice supports the can while you punch holes into the metal. Once frozen, place the can on a towel, use a nail and hammer to create a pattern, then melt the ice and dry the can. Paint it if desired. Add a tea light or LED candle and watch the pattern glow.
Best for: pathway lighting, porch steps, casual parties, and crafty hosts who enjoy a little hammer therapy.
How to Style Candle Holders for an Outdoor Table
Making candle holders is only half the fun. Styling them well is what turns “I put candles outside” into “Welcome to my charming outdoor supper club.” Here are practical ways to arrange them.
Use Odd Numbers
Groups of three, five, or seven tend to look more natural than pairs. Try three wine bottle taper holders in the center of a small table or five jar lanterns along a long table runner. Odd-numbered groupings create movement without looking overly symmetrical.
Vary the Height
Mix tall taper holders with low votives to create layers of light. Height variation makes the table feel designed, even if the menu is burgers and store-bought potato salad. Just keep taller candles out of the direct line of conversation so guests are not trying to discuss dessert through a forest of flames.
Repeat One Material
For a cohesive look, repeat one material throughout the table. Use all clear glass, all galvanized metal, or all terra-cotta. Repetition makes inexpensive objects feel intentional. It also prevents the table from looking like a yard sale with snacks.
Add Natural Elements Carefully
Flowers, herbs, shells, stones, and branches can make candle arrangements feel connected to the season. Keep anything dry or flammable well away from open flames. If you want greenery close to candlelight, place it outside the holder or use flameless candles.
Outdoor Candle Safety Without Killing the Mood
Candlelight is lovely, but safety is not optional. The goal is romance, not a dramatic visit from the fire department. Outdoor settings can be breezy, crowded, and unpredictable, so follow a few basic rules.
Use sturdy holders that will not tip easily. Keep open flames away from napkins, dried flowers, paper decorations, table runners, curtains, umbrellas, and overhanging branches. Do not leave candles unattended. Trim wicks before lighting so flames burn cleanly. Place candles on heat-safe surfaces, and avoid moving them while wax is melted.
For parties with kids, pets, wind, or narrow walkways, flameless LED candles are not a compromise; they are a smart design choice. Many modern LED candles flicker convincingly, last for multiple gatherings, and remove a lot of stress from hosting. Use real candles where they can be watched easily and flameless candles where traffic is heavy.
Choosing the Right Candle Type
Different candles create different effects. Tapers are elegant and vertical, perfect for wine bottles or slim holders. Votives are compact and versatile, ideal for jars and small buckets. Pillars give a strong glow and work best inside hurricanes or larger vessels. Tea lights are affordable and easy to scatter. Floating candles are beautiful in bowls of water, especially with flower heads or citrus slices.
For outdoor entertaining, unscented candles are often the best choice at the dining table because they will not compete with food. Save citronella or scented candles for the perimeter of the seating area, not beside the salad. No one wants pasta primavera with notes of “aggressive lemon mosquito defense.”
Budget-Friendly Outdoor Entertaining Ideas
DIY candle holders pair beautifully with other low-cost outdoor entertaining tricks. Use kraft paper as a table runner. Place herbs in small jars instead of buying flower arrangements. Mix cloth napkins from different sets in the same color family. Serve water in glass bottles with citrus slices. Use cutting boards as platters. Add one strong centerpiece, then let candlelight do the rest.
Lighting is one of the fastest ways to make a budget table look expensive. Even a simple dinner feels elevated when the table glows. The trick is not to overdo it. A few well-placed candles are more elegant than a tabletop so crowded it looks like a tiny wax village.
Seasonal Ideas for DIY Candle Holders
Spring
Use clear jars, fresh herbs, pale linens, and small votive candles. Add sprigs of mint, rosemary, or thyme tied around jars with twine, keeping greenery away from the flame. The look is fresh, garden-inspired, and perfect for brunches or early evening dinners.
Summer
Try sand-filled jars, wine bottle tapers, and galvanized buckets. Pair them with striped napkins, grilled seafood, lemonade, and a playlist that says “effortless” even if you spent twenty minutes choosing it.
Fall
Use amber glass, terra-cotta pots, mini pumpkins, and warm-toned candles. Small gourds can also become temporary candle holders when hollowed carefully, though LED candles are the safer choice inside natural materials.
Winter
Use metal lanterns, evergreen accents, and simple white candles. Keep greenery away from flames and consider LED pillars for covered porches, entryways, and holiday gatherings.
Common DIY Candle Holder Mistakes to Avoid
The first mistake is using unstable containers. A beautiful holder is not successful if it tips over at the first breeze. Add weight with sand, gravel, or stones. The second mistake is placing candles too close to flammable décor. Dried flowers and open flames may look charming together for about three seconds, which is not a good design plan.
The third mistake is ignoring scale. Tiny tea lights can disappear on a large table, while tall tapers can overwhelm a small bistro setup. Match the candle size to the table and the purpose. The fourth mistake is mixing too many styles. A little variety is charming; too much variety feels chaotic. Choose one main material, one color palette, and one general mood.
Experience Notes: What Actually Works When Guests Arrive
After experimenting with DIY candle holders for outdoor dinners, the biggest lesson is this: set them up before you start cooking. Candle arrangements seem simple until guests are due in ten minutes, the salad needs dressing, and you are trying to scrape a wine label off a bottle with the emotional intensity of a detective in a crime drama. Prep your holders earlier in the day. Clean the jars, test the candles, check for wobbling, and place everything on the table before the first doorbell or text message arrives.
Wine bottle taper holders are the easiest way to create instant drama. They look tall, elegant, and deliberate, especially when grouped down the center of a table. However, they work best in calm weather. If the evening is windy, switch to jar lanterns or place the tapers inside a protected area. There is no shame in adapting. A relaxed host is better than a stubborn host guarding candle flames like a lighthouse keeper.
For casual backyard meals, sand-filled jars are the most reliable. They are inexpensive, stable, and easy to move. They also work on small patios where table space is limited. Put two or three on the dining table, then place a few more on side tables or steps. The repeated glow makes the entire area feel connected. Guests may not notice every individual holder, but they will notice that the space feels warm and welcoming.
One surprisingly effective trick is to combine real candles and flameless candles. Use real votives on the main table where people are seated and watching them. Use LED candles on stairs, near plants, beside walkways, or around low lounge furniture. This gives the atmosphere of candlelight without turning the party into a safety-monitoring exercise. It is also helpful when children are present or when the guest list includes one enthusiastic dog with a tail like a windshield wiper.
Another lesson: candle holders should support the meal, not compete with it. Keep centerpieces low enough for conversation. Leave room for serving dishes. Avoid scented candles directly on the table. If you want fragrance, use herbs, flowers, citrus, or candles placed away from the food area. The best outdoor table smells like dinner, fresh air, and maybe a little rosemarynot like a vanilla cupcake wrestling a citronella torch.
Finally, do not chase perfection. Outdoor entertaining is alive. Wind happens. A napkin escapes. Someone drops a fork. A candle goes out and gets relit. That is part of the charm. DIY candle holders are successful because they make the setting feel cared for, not staged. When the table glows, the food is shared, and people linger a little longer after sunset, the project has done its job.
Conclusion: Small Flames, Big Atmosphere
The beauty of Remodelista Video: DIY Candle Holders for Outdoor Entertaining is that it reminds us how little it takes to make an outdoor gathering feel special. A clear wine bottle, a galvanized bucket, a glass jar, or a clean tin can can become part of a memorable evening with only a few thoughtful adjustments. The best DIY candle holders are simple, stable, safe, and suited to the mood of the meal.
Whether you are hosting a backyard dinner, decorating a balcony, planning a garden party, or simply trying to make Tuesday night leftovers feel like an event, candlelight helps. It softens the scene, flatters the table, and turns ordinary objects into quiet design moments. Just choose sturdy materials, respect flame safety, and let the glow do what it does best: make everyone look relaxed, interesting, and slightly more poetic than they were in daylight.