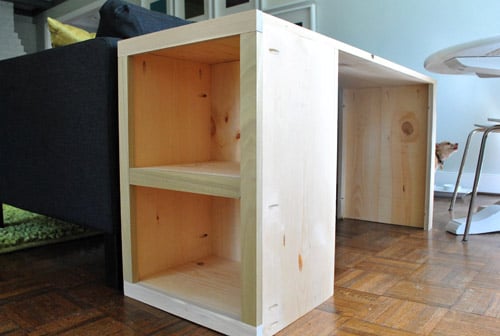
Buying wood and building a console table sounds simple until you are standing in the lumber aisle, holding a board like a detective inspecting a crime scene. Is it straight? Is it dry? Why does a “1×4” not actually measure one inch by four inches? And who allowed that one board to twist like a potato chip in July?
The good news is that a console table is one of the best DIY furniture projects for beginners and intermediate woodworkers. It is narrow, useful, stylish, and forgiving enough that a tiny mistake will not ruin your life, your living room, or your relationship with your tape measure. Whether you want a rustic entryway table, a modern sofa table, or a slim hallway console for keys, plants, and dramatic mail-sorting moments, the process starts with choosing the right wood.
This guide walks through buying lumber, planning dimensions, selecting joinery, assembling the table, sanding, finishing, and learning from real workshop experience. The goal is not just to build a console table. The goal is to build one that does not wobble every time someone looks at it too confidently.
Why Build A Console Table Yourself?
A console table is practical furniture with a small footprint. It can sit behind a sofa, along a hallway wall, under a mirror, beside an entry door, or in a dining room as a narrow serving surface. Store-bought console tables can be beautiful, but they often come with two problems: the price tag and the suspiciously vague phrase “wood veneer over engineered material.”
Building your own console table gives you control over size, wood species, finish, and strength. Need a 10-inch-deep table for a narrow hallway? Build it. Want a white oak top with painted legs? Go for it. Want a shelf underneath for baskets, shoes, books, or the emotional support pile of reusable shopping bags? Absolutely.
A DIY console table also teaches valuable woodworking skills: reading grain, choosing boards, cutting accurately, making square assemblies, sanding properly, and applying a finish. It is a small project with big lessons, like a woodworking appetizer before the full dining table buffet.
How To Choose The Right Wood For A Console Table
The best wood for a console table depends on your budget, tools, style, and patience level. Different boards behave differently, and picking the right material can save hours of sanding, clamping, adjusting, and muttering.
Softwood: Affordable And Beginner-Friendly
Pine, fir, and spruce are common softwoods found at big-box stores. They are inexpensive, lightweight, and easy to cut. For a painted console table, pine is a smart option because the grain pattern will not be the star of the show. Select boards, common boards, and dimensional lumber can work well for farmhouse, cottage, rustic, or casual styles.
The downside is that softwood dents easily. A dropped key ring may leave a mark. A determined toddler with a toy truck may leave a historical record. If you choose pine, consider a durable topcoat and accept that a few dents can become “character,” which is woodworking language for “I meant to do that.”
Hardwood: Stronger, Richer, And More Furniture-Like
Oak, maple, walnut, cherry, poplar, and alder are popular hardwood choices for furniture. Hardwood generally costs more, but it offers better durability and a more refined look. Oak is strong and visible-grained. Maple is clean and modern but harder to stain evenly. Walnut is gorgeous and expensive, the kind of wood that makes you whisper in the lumberyard. Poplar is affordable and easy to paint, though its greenish streaks may look odd under clear finish.
For a console table that will be stained or finished naturally, hardwood is usually worth the upgrade. You can also mix materials: hardwood for the top, less expensive wood for the base, and plywood for shelves or hidden structural panels.
Plywood: Stable, Clean, And Useful
Furniture-grade plywood is excellent for shelves, side panels, cabinet-style console tables, and painted builds. It is more dimensionally stable than many solid boards because its layers are arranged in alternating directions. For a simple open-leg console table, solid wood often looks better. For a console cabinet with drawers or doors, plywood can be your best friend.
Understanding Lumber Sizes Before You Buy
One of the first surprises in woodworking is that lumber names are often nominal, not actual. A board sold as a 1×4 is not actually 1 inch thick and 4 inches wide after drying and surfacing. A typical 1×4 is about 3/4 inch thick and 3 1/2 inches wide. A 2×2 is usually about 1 1/2 inches by 1 1/2 inches.
This matters because console tables rely on clean proportions. If your design assumes exact nominal sizes, your final table may end up shorter, narrower, or stranger than expected. Always measure the actual boards before cutting. Better yet, design around the actual material available at your store.
Hardwood lumber is often sold differently, especially at lumberyards. You may hear terms like 4/4, 5/4, or 8/4. These refer to rough thickness in quarters of an inch. For example, 4/4 rough lumber starts around one inch thick before milling and may finish closer to 3/4 inch after surfacing. Hardwood may also be priced by the board foot, a volume measurement calculated by thickness, width, and length.
How Much Wood Do You Need?
A common console table size is about 36 to 48 inches long, 28 to 34 inches high, and 10 to 16 inches deep. Behind a sofa, the table should usually sit at or slightly below the sofa back. In an entryway, height can be based on comfort: high enough for keys and decor, low enough that it does not feel like a bar counter sneaking into your hallway.
For a basic 42-inch-long console table, you might need:
- Four legs made from 2×2 boards or laminated hardwood stock
- Two long aprons for the front and back
- Two short side aprons
- One tabletop made from joined boards, plywood, or a pre-glued panel
- Optional lower shelf boards or plywood panel
- Extra material for mistakes, grain matching, and trimming
Buy at least 15 to 25 percent extra wood, especially if you are working around knots, cracks, bowed boards, or dramatic last-minute design choices. Woodworking has a way of turning “just enough” into “not enough by exactly one board.”
How To Inspect Boards At The Store
Choosing good wood is a skill, and it starts before the board reaches your cart. Pick up each board and sight down its length. Look for bow, cup, twist, and crook. A little movement can be corrected during milling, but a severely warped board is not a bargain. It is a future argument.
Check For Straightness
Hold one end of the board near your eye and look down the edge. If the board curves like a banana, put it back. For console table legs and aprons, straight material makes assembly easier and helps prevent wobble.
Look At The Grain
Boards with straighter, tighter grain tend to behave better than boards with wild grain, large knots, or pith running through the center. For a tabletop, choose boards with attractive grain and similar color. If you are edge-gluing boards, arrange them at the store or on the shop floor to see how the grain flows.
Watch Moisture Content
Wood expands and contracts as it gains and loses moisture. Lumber that is too wet can shrink, cup, or split after the table is built. If you have a moisture meter, use it. For indoor furniture, dry, acclimated wood is important. At minimum, bring the lumber into the room or shop where the table will be built and let it acclimate for several days before final milling and assembly.
Recommended Tools And Supplies
You do not need a professional cabinet shop to build a console table. A simple version can be built with basic tools, careful measuring, and a little patience.
- Tape measure and pencil
- Speed square or combination square
- Miter saw or circular saw with guide
- Drill and driver bits
- Pocket-hole jig or doweling jig
- Clamps
- Wood glue
- Random orbital sander or sanding block
- Sandpaper in progressive grits
- Stain, paint, oil, polyurethane, or water-based topcoat
- Safety glasses, hearing protection, and dust mask
If you have a table saw, jointer, planer, or router, you can refine the project further. But for a clean beginner-friendly build, accurate cuts and square assembly matter more than owning every tool known to humankind.
Planning The Console Table Design
Before cutting anything, sketch the table. It does not need to be museum-worthy. A rectangle with measurements is enough. Mark the length, depth, height, tabletop thickness, leg size, apron placement, and shelf height if you want one.
For a simple design, use four legs connected by aprons under the tabletop. The aprons strengthen the frame and keep the legs from spreading or racking. A lower shelf adds storage and also helps stiffen the table. If the table will sit behind a sofa, keep the design narrow and make sure it will not block outlets or floor vents.
Example Dimensions
Here is a balanced size for many homes:
- Length: 42 inches
- Depth: 12 inches
- Height: 30 inches
- Legs: 1 1/2 inches square
- Top overhang: 1 inch on all sides
- Lower shelf height: 6 to 8 inches above the floor
This creates a slim console table that works in an entryway, hallway, or behind a sofa. Adjust the measurements for your space before buying wood. Furniture should fit the room, not the fantasy version of the room where walls move politely out of the way.
Cutting And Preparing The Parts
After the wood acclimates, cut all parts to length. Label each piece with painter’s tape: front apron, back apron, left leg, right leg, shelf support, and so on. Labeling sounds fussy until you accidentally drill pocket holes into the wrong face and discover new vocabulary.
Cut legs to identical length. Even a difference of 1/16 inch can create wobble. For the tabletop, you can use a pre-glued project panel, edge-glue boards yourself, or cut plywood to size and add solid-wood edging. If edge-gluing solid boards, joint or straighten the edges, apply wood glue, clamp evenly, and let the panel dry fully before trimming.
Joinery Options For A Console Table
There are several ways to assemble a console table. Your choice depends on the tools you own and the look you want.
Pocket Holes
Pocket-hole joinery is popular for DIY furniture because it is fast, strong enough for many projects, and beginner-friendly. Drill angled holes in the hidden side of the apron, apply glue, clamp the joint, and drive pocket screws into the legs. Place the holes where they will not be visible from normal viewing angles.
Dowels
Dowels create cleaner hidden joints but require careful alignment. They are a nice step up if you want fewer visible fasteners and enjoy measuring twice, drilling once, and still holding your breath.
Mortise And Tenon
Traditional mortise-and-tenon joinery is excellent for table construction. It is strong, elegant, and durable. It also takes more time and precision, making it better for experienced woodworkers or ambitious beginners with practice pieces.
Assembling The Console Table
Start with the side frames. Attach the short aprons between two legs, making sure the top edges are flush and the assembly is square. Repeat for the second side. Then connect the two side frames with the long front and back aprons. Use clamps to hold everything steady while fastening.
Check for square by measuring diagonally from corner to corner. If both diagonal measurements match, the frame is square. If not, gently shift the frame before the glue sets. This is the calm part of woodworking where you negotiate with geometry.
Attach the tabletop using figure-eight fasteners, Z-clips, elongated screw holes, or other methods that allow seasonal wood movement. Avoid rigidly screwing a wide solid-wood top to the base in a way that traps movement. Wood will move whether you approve or not.
If adding a lower shelf, install shelf supports or stretchers first. Cut the shelf to fit and leave a tiny reveal or expansion gap if using solid wood. For plywood shelves, edge banding or thin solid strips can make the shelf look more finished.
Sanding: The Difference Between Homemade And Handmade
Sanding is where a table begins to look intentional. Start with a grit coarse enough to remove milling marks, glue squeeze-out, and small uneven areas. Then move progressively through finer grits. For many furniture projects, a sequence like 120, 150, and 180 or 220 works well, depending on the wood and finish.
Do not skip grits too aggressively. Deep scratches from coarse sandpaper can show up after stain like surprise guests at dinner. Sand with the grain on final passes, soften sharp edges slightly, and remove dust with a vacuum and clean cloth before finishing.
Choosing A Finish
The finish determines both the look and durability of your console table. Paint is forgiving and works beautifully on pine, poplar, and plywood. Stain highlights grain but can look blotchy on some woods unless you use a pre-stain conditioner. Clear topcoats protect natural wood while keeping the color close to its original tone.
Painted Finish
For a painted console table, prime first, especially over knots or dark wood. Sand lightly between coats and choose a durable enamel, furniture paint, or acrylic urethane finish. Painted bases with natural wood tops are especially popular because they combine warmth with easy color matching.
Stained Finish
Test stain on scrap from the same board before applying it to the table. This tiny test can prevent large emotional events. Apply stain evenly, wipe off excess, let it dry, and protect it with polyurethane, lacquer, or another clear finish.
Natural Oil Or Clear Coat
Oil finishes bring out grain and feel warm to the touch. Film finishes such as polyurethane offer more surface protection. For an entryway console table that will hold keys, bags, cups, and seasonal decorations, durability matters. A beautiful finish is nice; a beautiful finish that survives real life is better.
Common Mistakes To Avoid
The most common console table mistakes are easy to prevent. Do not buy badly warped boards just because they are cheap. Do not build with wet lumber. Do not assume nominal lumber sizes are actual sizes. Do not skip dry fitting. Do not sand only until you are bored. And please, for the love of level furniture, do not attach the tabletop before the base is square.
Another mistake is making the table too deep. Console tables are meant to be narrow. A hallway table that steals walking space will eventually collect hip bruises and unkind nicknames. Measure the room, tape the footprint on the floor, and walk around it before committing.
Budget Tips For Buying Wood
To save money, use premium wood only where it shows. A hardwood tabletop can sit on a painted pine or poplar base. Plywood can be used for shelves. Shorter boards may be cheaper and easier to find straight. Reclaimed wood can add character, but inspect it carefully for nails, screws, rot, insects, and mystery stains that should remain mysterious.
Ask your lumberyard about offcuts, shorts, or project boards. For a console table, you do not always need long boards. Small furniture can often be built from pieces that larger projects reject. That is not settling. That is strategic woodworking with a coupon-energy mindset.
Experience Notes: What Building A Console Table Teaches You
The first real lesson in buying wood and building a console table is that the project begins long before the first cut. It starts in the aisle, where you learn to slow down and inspect boards instead of grabbing the first one on top. The top board is often there because ten other people already rejected it. Respect the wisdom of strangers.
When I think about this kind of project, the biggest experience-based tip is to buy for the final piece, not just for the shopping list. A console table top is highly visible, so choose the nicest grain for that surface. Legs need to be straight and consistent. Aprons can be less dramatic because they sit under the top, doing honest structural work without asking for applause.
Dry fitting is another lesson that separates a smooth build from a weekend circus. Lay out every part before glue enters the room. Check the overhang. Confirm the legs face the right way. Make sure pocket holes are hidden. Look at the table from the front, side, and top. This five-minute rehearsal can save you from gluing together a table that technically works but visually says, “I was assembled during a thunderstorm.”
Clamping also teaches humility. Wood pieces slide when glue is applied, and they often slide in the one direction that ruins alignment. Use clamps, but do not crush the joint like you are trying to extract a confession. Moderate pressure is enough. Wipe glue squeeze-out before it hardens, especially in inside corners where dried glue becomes a tiny transparent fossil.
Sanding is where patience pays rent. Many beginners under-sand before finishing and over-sand after finishing. The better approach is steady surface preparation before stain, paint, or clear coat. Good light helps. Run your hand over the wood, but do not rely only on touch. Scratches often hide until stain makes them famous.
Finishing teaches another practical truth: scrap pieces are not trash; they are test subjects. Try your stain, paint, or topcoat on leftover wood from the same boards. Pine may turn blotchy. Oak may darken more than expected. Walnut may need nothing but a clear finish to look expensive enough to start charging rent.
The final experience is the best one: placing the table in your home. A handmade console table has a different feeling from a purchased one. You know where the boards came from. You remember the stubborn clamp, the slightly stressful glue-up, the sanding dust, and the moment the finish made the grain glow. It becomes more than furniture. It becomes proof that with planning, decent wood, and a willingness to measure one more time, you can build something useful, attractive, and proudly imperfect in the best possible way.
Conclusion
Buying wood and building a console table is one of the most rewarding DIY furniture projects because it combines practical design with approachable woodworking skills. The key is to choose dry, straight, attractive lumber; understand actual board dimensions; plan your cuts; assemble the base square; allow for wood movement; and finish the piece with care.
A console table does not need to be complicated to look beautiful. A clean shape, balanced proportions, and a smooth finish can turn a few boards into a piece that works in almost any room. Start simple, buy better wood than the bargain bin disaster pile, and remember: the table only has to be perfect enough to make you smile every time you walk past it.