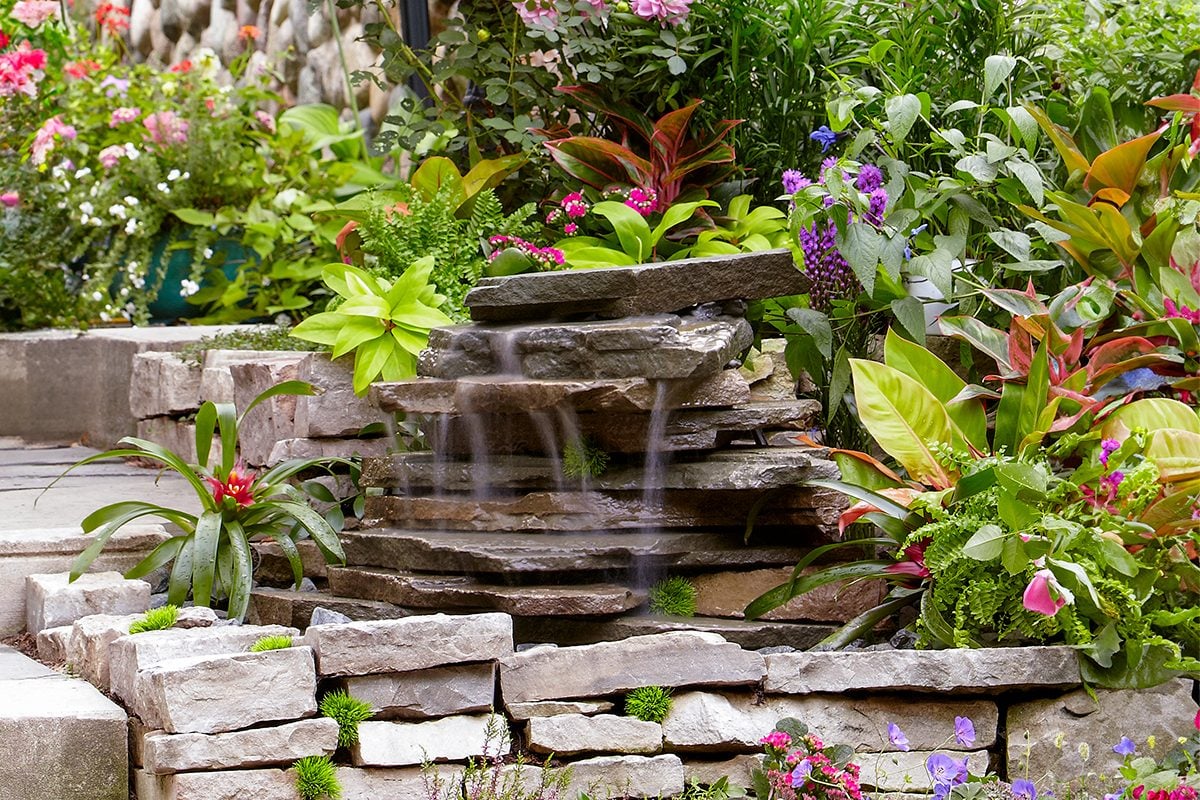
Building a backyard waterfall sounds like the kind of weekend project that begins with confidence, involves one dramatic trip to the hardware store, and ends with someone standing in muddy shoes saying, “Actually, this looks amazing.” The good news? A DIY backyard waterfall is absolutely doable when you understand the basics: water flows downhill, liners stop leaks, pumps move water back up, and rocks hide almost everything you do not want guests to notice.
Whether you want a small pond waterfall, a pondless waterfall, or a bubbling garden stream beside your patio, the process follows the same core idea. You create a basin, install a liner, place a submersible pump, run tubing to the top of the waterfall, shape the streambed, arrange rocks, and test the water flow until it looks natural instead of like a garden hose having a midlife crisis.
This guide walks you through how to build a backyard waterfall DIY-style, with practical planning tips, material lists, construction steps, mistakes to avoid, and real-world advice that makes the finished feature easier to maintain.
Why Build a Backyard Waterfall?
A backyard waterfall adds movement, sound, and personality to an outdoor space. It can soften traffic noise, attract birds, create a focal point, and make a plain garden corner feel like a tiny vacation spot. A small waterfall can fit beside a patio, while a longer stream can turn a sloped yard into a showpiece.
The biggest decision is whether you want a waterfall with a pond or a pondless waterfall. A pond waterfall includes a visible pool at the bottom. It can support aquatic plants and, if designed properly, fish. A pondless waterfall recirculates water into a hidden underground reservoir filled with gravel or structural blocks. The water disappears below the stones, then returns to the top through a pump. Pondless waterfalls are popular because they are lower maintenance, safer for children and pets, and easier to fit into small yards.
Plan the Waterfall Before You Pick Up a Shovel
Good waterfalls are designed before they are dug. Rushing into excavation without a plan is how you accidentally create a mud trench that looks like a raccoon construction site.
Choose the Right Location
Pick a spot where you will actually enjoy the waterfall. Near a patio, deck, kitchen window, or seating area is ideal. Avoid placing it directly under messy trees if possible, because leaves, seed pods, and twigs can clog the pump and make maintenance annoying. A slight natural slope is helpful, but a flat yard can still work if you build a small berm using excavated soil.
Also think about electricity. Most DIY waterfalls use a submersible pump that needs a weather-safe outdoor GFCI outlet. If you do not already have one nearby, hire a licensed electrician. Do not run extension cords through the mulch and call it “rustic.” Water and electricity are not a buddy comedy.
Decide on Size and Style
For beginners, a waterfall around 2 to 3 feet wide with a short stream is manageable. A 12- to 18-inch drop can create plenty of sound without requiring a massive pump or boulder-moving equipment. If you want a natural look, use irregular stones, river rock, gravel, and plants that blend with your existing landscape.
For a modern look, consider a clean spillway, stacked stone, basalt columns, or a narrow sheet of water flowing into a hidden basin. The construction principles are similar, but modern designs rely more on precise levels and clean edges.
Tools and Materials You Will Need
Your exact material list depends on the size of your DIY backyard waterfall, but most projects use the following:
- Flexible pond liner, preferably durable EPDM rubber
- Underlayment fabric or old carpet padding to protect the liner
- Submersible pond or waterfall pump
- Flexible tubing sized to match the pump outlet
- Waterfall spillway box or flat spill stone
- River rock, gravel, fieldstone, and accent boulders
- Waterfall foam sealant for directing water over rocks
- Sand for leveling and protecting the basin
- Shovel, tamper, wheelbarrow, level, utility knife, and garden hose
- Outdoor GFCI power source
If you are building a pondless waterfall, you will also need a reservoir basin, pump vault, and water storage blocks or a deep gravel-filled pit. A pump vault keeps the pump accessible, which matters later when you need to clean it or remove debris. Future-you will be very grateful.
How to Size the Pump
Pump sizing is one of the most important parts of building a backyard waterfall. Too little flow looks like a sad leak. Too much flow splashes out of the feature and turns your garden path into a slip-and-slide.
A common rule for waterfall flow is to use about 100 gallons per hour for every inch of waterfall width for a gentle flow. For a stronger flow, use 150 to 200 gallons per hour per inch. For example, a 12-inch-wide waterfall may need roughly 1,200 to 2,400 gallons per hour, depending on the look you want.
You must also account for head height, which is the vertical distance the pump has to push water from the basin to the top of the waterfall. Pumps lose power as water travels upward and through tubing. Check the pump’s flow chart, not just the big number printed on the box. A pump rated at 2,000 GPH at zero feet may deliver much less at a 4-foot lift.
Step-by-Step: How to Build a Backyard Waterfall
Step 1: Mark the Layout
Use a garden hose, rope, or spray paint to outline the waterfall, stream, and basin. Stand back and view it from several angles. A natural stream rarely runs in a perfectly straight line, so add a gentle curve or two. Curves also give you more opportunities to place stones that hide the liner and shape the water.
Step 2: Dig the Basin
For a pond waterfall, dig the lower pond area first. Include shelves around the edge for rocks and plants. For a pondless waterfall, dig the reservoir deep enough to hold the pump vault and enough water volume for the system to run without sucking air. Larger reservoirs are more forgiving because they lose water more slowly to evaporation and splash.
Remove sharp roots, stones, and debris from the hole. Add a thin layer of sand where needed to smooth the base. Compact the soil so the basin does not settle unevenly after you finish.
Step 3: Shape the Waterfall Berm and Streambed
Use excavated soil to build the mound behind the waterfall. A drop of 12 to 24 inches is enough for many backyard projects. Shape the streambed with shallow steps or pools so the water has places to pause before spilling over the next rock. This creates a more natural sound and keeps water from racing downhill too fast.
Make the streambed slightly deeper in the center and higher along the edges. This helps contain the flow. A common beginner mistake is creating edges that are too low, which lets water sneak out of the stream and disappear into the lawn. Water is sneaky. Build accordingly.
Step 4: Install Underlayment and Liner
Lay underlayment fabric across the basin, stream, and waterfall area. Then place the liner over it, pressing it gently into the contours. Do not stretch the liner tight. Leave slack so it can settle under the weight of water and rocks.
Allow plenty of extra liner around the edges. A foot or more of overlap is helpful because you can trim it later. It is much easier to cut away extra liner than to discover you are short by three inches after placing 500 pounds of stone.
Step 5: Set the Pump and Tubing
Place the pump in the deepest part of the pond or inside the pump vault for a pondless system. Raise it slightly on a flat stone or pump stand so it does not sit directly in sludge. Attach flexible tubing and run it along the side of the stream or under stones to the top of the waterfall.
Avoid sharp bends in the tubing because they reduce water flow. If possible, use the tubing size recommended by the pump manufacturer. Bigger tubing often improves performance, especially on longer runs.
Step 6: Build the Waterfall Spillway
The spillway is where the magic happens. You can use a manufactured waterfall spillway box, a flat stone, or a carefully arranged set of rocks. The key is to create a level lip so water spreads evenly before falling.
Set the spill stone or spillway firmly. Use a level from side to side, then tilt it slightly forward. If one side is lower, all the water will rush there and ignore the rest of your beautiful rockwork like a toddler ignoring vegetables.
Step 7: Arrange Rocks Naturally
Start with larger stones around the basin and waterfall edges. These anchor the design and hide the liner. Then add medium stones and river rock. Place rocks as if nature did it: partly buried, varied in size, and not perfectly lined up like a parade.
Use flat stones where water should sheet over the surface. Use rounded river stones where you want a softer, bubbling sound. Tuck smaller gravel into gaps to cover exposed liner and stabilize the edges.
Step 8: Use Waterfall Foam Carefully
Waterfall foam sealant helps force water over the rocks instead of behind them. Apply it in gaps behind spill stones and along hidden channels. Once it expands and cures, trim excess foam with a utility knife and cover it with gravel or small stones.
Do not rely on foam to hold major rocks in place. It is a flow-directing helper, not structural glue for boulders with ambition.
Step 9: Fill and Test
Fill the basin with water and plug in the pump. Watch the entire system carefully. Look for splashing, leaks, low edges, or areas where water flows underneath rocks instead of over them. Adjust stones, add gravel, and use foam where needed.
Let the waterfall run for at least an hour during testing. Mark the water level, then check it again. A small drop from liner absorption and splash is normal at first. A large drop means water is escaping somewhere.
Step 10: Trim the Liner and Finish the Edges
Only trim the liner after the waterfall runs correctly. Fold extra liner upward behind edge stones to create a hidden barrier. Then cover exposed areas with soil, mulch, gravel, and plants.
Finish with moisture-loving plants near the edges, ornamental grasses behind the stream, and low-growing ground covers to soften the hardscape. Native plants are a smart choice because they support pollinators and usually need less fuss once established.
Common DIY Backyard Waterfall Mistakes
Making the Basin Too Small
A small basin runs out of water quickly due to evaporation and splash. In pondless systems, an undersized reservoir can cause the pump to suck air, which shortens pump life and makes the waterfall sputter.
Forgetting Access to the Pump
Never bury the pump where you cannot reach it. Pumps need cleaning. Leaves happen. Frogs make questionable life choices. Keep access simple.
Building Edges Too Low
Low edges are one of the most common causes of water loss. The stream should have raised sides hidden under rocks and plants. During testing, check every bend and splash zone.
Choosing Rocks That Look Too Uniform
Natural waterfalls use variety. Mix boulders, flat stones, cobbles, gravel, and small pebbles. If every stone is the same size, the feature can look artificial.
Skipping Maintenance Planning
A backyard waterfall is easier to enjoy when maintenance is simple. Add a skimmer or pump vault where appropriate, keep leaves out, rinse the pump intake, and top off water during hot weather.
Backyard Waterfall Maintenance Tips
Once built, a DIY waterfall does not need constant attention, but it does need occasional care. Remove leaves and debris before they sink. Check the pump intake every few weeks during heavy use. Top off the basin when evaporation lowers the water level. In cold climates, decide whether to run the waterfall through winter or shut it down, remove the pump, and store it according to manufacturer instructions.
If algae appears, reduce excess nutrients by removing decaying leaves, avoiding fertilizer runoff, and adding shade plants around the feature. For ponds with fish, never use chemicals unless they are labeled safe for aquatic life.
Design Ideas for a More Natural Look
The best backyard waterfalls look like they belong in the landscape. To achieve that, place the largest rocks first and make them look partially buried. Create multiple small drops instead of one awkward tall drop. Add plants around the sides, not just behind the feature. Let the stream disappear behind a curve or boulder so it feels more organic.
Sound matters too. A thin sheet of water falling onto flat stone creates a crisp splash. Water tumbling through river rock creates a softer babble. A higher drop is louder, while a shallow stream is calmer. Test the sound before finalizing the rock placement, because your ears are part of the design team.
Estimated Cost of a DIY Backyard Waterfall
A small DIY backyard waterfall can cost a few hundred dollars if you already have rocks and tools. A larger pondless waterfall with quality liner, pump, vault, storage blocks, tubing, and decorative stone can cost $1,000 to $3,000 or more. The biggest expenses are usually the pump, liner, reservoir components, and stone delivery.
You can save money by building smaller, using local stone, reusing excavated soil for the berm, and choosing a simple waterfall design. Do not save money by buying a weak pump or thin liner. Those “bargains” often become expensive when you have to rebuild the feature.
Safety and Practical Considerations
Before digging, call your local utility marking service. Underground cables, irrigation lines, and pipes are not fun surprises. Use a GFCI-protected outlet for the pump. Wear gloves when moving stone, and do not lift boulders with your back just because you are feeling heroic after coffee.
If your waterfall includes a pond, consider depth, local codes, fencing rules, and child safety. A pondless waterfall is often the better choice for families who want moving water without an open pool.
Conclusion: Your Backyard Can Sound Like a Vacation
Learning how to build a backyard waterfall DIY-style is really about combining simple principles with patience. You dig a basin, protect it with underlayment and liner, install a pump, shape the stream, place rocks, test the flow, and keep adjusting until the water behaves. The process is part landscaping, part puzzle, and part negotiation with gravity.
The reward is worth it. A backyard waterfall adds beauty, movement, and relaxing sound to your outdoor space. It can make a small patio feel special, turn a forgotten corner into a garden feature, and give your yard the kind of peaceful energy usually reserved for spa brochures and very expensive resorts.
Extra Experience Notes: What DIY Builders Learn the Muddy Way
The first real lesson of building a backyard waterfall is that rocks are heavier than they look. At the garden center, they seem charming and decorative. In your wheelbarrow, they become ancient geological dumbbells. Plan stone delivery as close to the project site as possible, and stage your materials before digging. It saves time, energy, and at least one dramatic sigh.
Another experience-based tip is to test the waterfall before you become emotionally attached to the rock layout. Many DIY builders spend an hour creating the “perfect” cascade, then turn on the pump and discover the water has chosen a completely different career path. Water follows the easiest route, not the prettiest one. Keep a few flat stones, shims, and gravel nearby so you can make small adjustments as the feature runs.
It also helps to think like a photographer. Before finalizing the waterfall, sit where you normally relax: on the patio chair, near the fire pit, by the kitchen window, or wherever you drink coffee while pretending not to check email. The best-facing angle may not be the same angle you used while building. A waterfall should look good from the places people actually see it.
Do not underestimate splash. A waterfall that looks perfect for five minutes may slowly splash water out of the basin over several hours. This is especially common when water falls onto a pointed rock or hits a shallow pool at the wrong angle. If your basin keeps losing water but you cannot find a leak, splash is often the sneaky culprit. Lower the drop, widen the catch area, or adjust the landing stone.
Plants make the finished project look far more natural. Even a well-built rock waterfall can look a little staged on day one. Add creeping ground covers, ornamental grasses, ferns in shady spots, and flowering perennials nearby. Avoid aggressive roots directly against the liner, but do use plants to soften the edges. Within a season, the waterfall will look less like a project and more like it has always belonged there.
Finally, give yourself permission to revise. Many beautiful water features are improved after the first week, once the builder sees how the water behaves, where leaves collect, and which viewing angles matter most. A DIY backyard waterfall is not a one-and-done sculpture. It is a living landscape feature. Adjust a stone, add gravel, move a plant, clean the pump, and enjoy the process. The best moment comes when you finally sit down, hear the water moving, and realize your yard now has its own soundtrack.