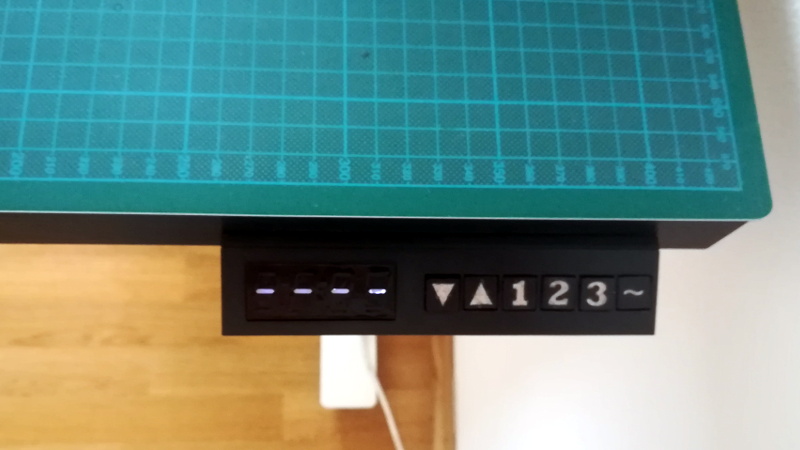
There are two kinds of people in the home-office world: those who use their standing desk every day, and those who bought a standing desk, cranked it twice, and quietly returned to sitting like a house cat on a heating vent. The IKEA SKARSTA table, famous for its clean design and manual crank height adjustment, belongs to that second-risk category. It works. It is sturdy. It is affordable. But after enough up-and-down sessions, the hand crank starts to feel less like a wellness feature and more like a tiny medieval fitness machine bolted under your desk.
That is where motorizing an IKEA SKARSTA table becomes interesting. Instead of replacing the entire desk with an electric standing desk, you can modify the existing crank mechanism so a motor turns the same shaft your hand used to turn. Done well, this DIY standing desk upgrade gives you push-button height adjustment, smoother posture changes, and the deep satisfaction of making furniture do your bidding. Done badly, it gives you a noisy science-fair robot that tries to eat your cables. Let us aim for the first outcome.
This guide explains how a motorized SKARSTA conversion works, what parts make sense, how to think about torque and safety, and what real-world experience teaches after the novelty wears off. The goal is not to create a fragile gadget. The goal is to build a useful, safe, reliable electric SKARSTA desk that encourages you to move more during the day without turning every height change into arm day.
What Makes the IKEA SKARSTA a Good Candidate for Motorization?
The SKARSTA was designed as a manually adjustable sit-stand desk. Its height changes through a crank handle connected to an internal drive shaft and lifting mechanism. That is good news for DIY builders because the desk already knows how to move. You do not need to redesign the legs, replace the frame, or invent a lifting column from scratch. You only need to replace human wrist power with controlled motor power.
Think of the desk as a bicycle with no rider. The chain, gears, and wheels are already there. Your motor simply becomes the new pair of legs. The cleanest approach is to remove or bypass the crank handle and connect a low-speed, high-torque gear motor to the crank shaft using a coupler, pulley, belt, or 3D-printed adapter. The motor turns in one direction to raise the desk and reverses to lower it.
The SKARSTA also has a practical advantage: it is mechanically simple. Electric standing desks often hide proprietary controllers, dual synchronized motors, control panels, and anti-collision systems. The manual SKARSTA is more honest. It says, “Turn this thing and I go up.” That simplicity makes it a favorite for IKEA hack projects.
The Basic Concept: Turn the Crank Without Touching the Crank
At the heart of most SKARSTA motorization projects is one simple idea: drive the crank shaft with a motor. The motor does not lift the desktop directly. It rotates the mechanism that already lifts the desktop. This distinction matters because it reduces the engineering problem from “lift a heavy desk” to “turn a shaft with enough torque.”
Typical Parts for a Motorized SKARSTA Build
A practical conversion usually includes a handful of core components:
- A low-RPM, high-torque DC gear motor or worm gear motor
- A shaft coupler, pulley system, or 3D-printed adapter
- A mounting bracket to hold the motor firmly under the desktop
- A motor driver or H-bridge for forward and reverse control
- A 12V or 24V DC power supply matched to the motor
- Up and down buttons, a rocker switch, or a microcontroller interface
- Limit switches, encoder feedback, current sensing, or another safety stop method
- Cable management, strain relief, and a fuse or power cutoff
You can build a very simple version with a motor, power supply, reversible switch, and physical limit switches. You can build a smarter version with an Arduino, ESP32, rotary encoder, speed control, soft start, presets, and a display. The right version depends on your comfort with electronics and how much you enjoy saying, “It worked on the bench,” immediately before debugging for three hours.
Choosing the Right Motor
The motor is the soul of the project. Pick one that is too weak and the desk will groan, stall, or move only when the moon is in a favorable position. Pick one that is wildly overpowered and you risk damaging the mechanism if something jams. The sweet spot is a slow gear motor with enough torque to turn the SKARSTA shaft under real desk load.
Speed Matters More Than You Think
A standing desk does not need to launch into the air like a theme-park ride. Slow and controlled movement feels safer, sounds better, and gives you time to stop the desk if a cable catches or a coffee mug begins its final journey. A low-RPM gear motor is usually better than a fast motor that needs heavy electronic speed reduction.
Many DIY builders look for motors in the range of roughly 30 to 200 RPM, then adjust the final speed through gearing, pulleys, voltage, or PWM control. A slower motor with strong torque often feels more professional than a fast motor struggling through a reduction system.
How to Estimate Torque Without a Lab Coat
You can estimate the required torque with a simple test. Load the desk as you normally use it: monitor, laptop, speakers, plants, tiny ceramic dinosaur, whatever lives there. Attach a small luggage scale or fish scale to the crank handle at a known distance from the shaft. Pull gently and note the force needed to start lifting. Torque is force multiplied by distance.
For example, if you pull with 10 pounds of force at 4 inches from the shaft, that is about 40 pound-inches of torque at the crank. You would not choose a motor rated exactly at that number. Add a safety margin because friction, uneven loading, cold grease, and real life enjoy ruining perfect calculations. A motor with two to three times the measured requirement is usually a more comfortable starting point.
Mechanical Mounting: Where DIY Projects Become Furniture Surgery
The mechanical mount is where this project succeeds or becomes a rattling under-desk tambourine. The motor must be aligned with the SKARSTA drive shaft, fixed securely, and protected from twisting itself loose. Gear motors produce reaction torque. When the shaft turns the desk, the desk also tries to turn the motor housing. If the bracket is flimsy, the motor will wiggle, click, and slowly chew through your patience.
Coupler, Belt, or 3D-Printed Adapter?
There are three common ways to connect the motor to the crank mechanism. A direct coupler is compact and efficient, but it requires careful alignment. A belt-and-pulley setup is more forgiving because the belt can absorb slight misalignment and reduce vibration. A 3D-printed adapter can work beautifully if printed strong enough and designed with proper shaft engagement, but it should not be treated like magical plastic steel.
If you use 3D-printed parts, choose a strong material, print with enough wall thickness and infill, and inspect the part after initial testing. PLA may work for prototypes, but PETG, nylon, or reinforced filament is often better for parts that experience heat, stress, or repeated torque. Keep a manual backup plan too. A removable crank or quick-disconnect coupler can save the day if the motor or controller fails.
Do Not Ignore Alignment
A motor shaft that is slightly off-center may still turn the desk, but it can add noise, vibration, and uneven wear. The shaft should rotate smoothly without binding. Before powering the motor, turn the coupling by hand if possible. If it feels crunchy, stiff, or dramatic, fix the alignment before electricity joins the party.
Control Options: From Simple Switch to Smart Desk
The simplest motorized SKARSTA uses a momentary up/down switch. Press up and the desk rises. Press down and it lowers. Release the button and motion stops. This is easy to understand and safer than a latching switch because the desk moves only while you are paying attention.
A more advanced build uses a microcontroller such as an Arduino or ESP32. With a motor driver, encoder, and basic code, the desk can track position, stop at preset heights, ramp speed up and down, and remember sitting and standing levels. This turns the project from “motorized crank” into a proper DIY electric standing desk.
Encoder Feedback vs. Limit Switches
Limit switches are physical sensors placed near the upper and lower travel limits. When the desk reaches the end, the switch tells the controller to stop. They are simple and reliable when mounted well. Encoder feedback, on the other hand, counts motor or shaft rotation. It allows the controller to estimate desk height, create presets, and stop after a set number of counts.
The best builds often use both ideas. The encoder provides position control, while limit switches act as hard safety boundaries. Software can make mistakes. Wires can loosen. A physical stop is the adult in the room.
Current Sensing and Obstruction Safety
Commercial electric standing desks often include anti-collision features. A DIY SKARSTA conversion should at least consider basic obstruction protection. If the motor current suddenly spikes, that can indicate the desk has jammed, reached the end of travel, or encountered an obstacle. A controller can detect that spike and cut power.
This is especially important if children, pets, hanging cables, shelves, windowsills, or overconfident coffee cups are nearby. Motorized furniture is still moving furniture. It deserves respect.
Power Supply and Wiring: Keep It Boring, Please
A motorized desk is not the place to improvise with mystery adapters from a drawer labeled “probably fine.” Match the power supply voltage and current capacity to the motor and driver. If the motor can draw several amps under load, the power supply and wiring must handle that current comfortably. Add a fuse. Use strain relief. Keep wires away from moving parts. Secure everything so nothing dangles into the lifting mechanism.
For many DIY builds, 12V DC is approachable and widely supported by common gear motors and motor drivers. Some standing-desk-style actuators and motors use 24V DC. Higher voltage can reduce current for the same power, but it also requires compatible drivers and more care. Whatever voltage you use, the wiring should be neat enough that future you does not open the desk and whisper, “Who did this?”
Step-by-Step Overview of a SKARSTA Motorization Project
1. Inspect and Service the Desk First
Before adding a motor, make sure the SKARSTA operates smoothly by hand. Raise and lower it through the full range. Listen for grinding. Check that both legs move evenly. Tighten loose bolts. Remove unnecessary weight. A motor will not fix a bad mechanism; it will simply automate the badness.
2. Measure the Crank Interface
Remove the crank handle and inspect the shaft shape and available space. Many builds use the existing hex shaft or crank socket as the drive point. Measure carefully with calipers if possible. A sloppy coupler will introduce backlash and noise.
3. Test Motor Strength Before Permanent Installation
Temporarily connect the motor to the shaft or a test adapter. Run the desk with minimal load first, then with normal load. Watch for stalling, overheating, twisting mounts, and uneven leg movement. If the desk moves smoothly during short tests, you can refine the mount.
4. Build a Strong Motor Bracket
The bracket should prevent the motor from rotating, sagging, or shifting. Metal brackets, plywood plates, or well-designed 3D-printed mounts can all work. Use existing frame holes where possible instead of drilling into critical structure. If you drill, avoid weakening the frame or hitting hidden parts.
5. Add Controls and Safety Stops
Install momentary controls where they are easy to reach but hard to press accidentally. Add upper and lower limit switches, encoder calibration, current cutoff, or a combination. Test stops repeatedly at low speed before trusting them.
6. Manage Cables Like a Responsible Adult
Leave enough slack for the full height range. Route cables so they cannot pinch, pull, or snag. Use adhesive clips, cable chains, Velcro wraps, or a flexible sleeve. Raise and lower the desk while watching every cable. If one cable looks nervous, reroute it.
Ergonomics: The Point Is Movement, Not Standing Forever
Motorizing the SKARSTA is not about proving you can stand for eight hours like a museum guard. The point is to make posture changes so easy that you actually use them. Good office ergonomics depend on neutral body position, comfortable reach, proper monitor height, and frequent movement. A motorized desk helps because it removes friction. When the button is right there, switching positions becomes a habit instead of a negotiation.
At sitting height, your feet should rest comfortably, your chair should support you, and your elbows should stay near a relaxed right angle. At standing height, your shoulders should stay down, wrists should remain neutral, and the monitor should be high enough that you are not folding your neck like a question mark. If your laptop is your only screen, use a stand and external keyboard. Your spine did not sign up to become a laptop hinge.
A healthy sit-stand routine usually involves alternating between sitting, standing, and moving. Start gently. Try standing for short intervals, then sit again before fatigue arrives. Add walking breaks, stretches, and task variety. The motor is not the health solution by itself. It is the convenience tool that helps you follow through.
Common Problems and Fixes
The Desk Moves Too Slowly
If the desk crawls upward like a cautious turtle, check the motor RPM, power supply voltage, and driver limits. A small speed increase may be fine, but do not chase speed at the expense of torque and safety. A desk that moves slowly but reliably is better than one that rockets upward and scares the printer.
The Motor Stalls
Stalling means the motor lacks torque, the desk is overloaded, the mechanism is binding, or the power system cannot provide enough current. Reduce load and test again. If the desk is smooth by hand but stalls under motor power, the motor or driver may be undersized.
The Legs Become Uneven
Uneven legs can happen if the internal mechanism slips, binds, or is assembled incorrectly. Stop using the motor until the frame is synchronized and level. Running a motor against an uneven lifting system can increase stress and make the problem worse.
The Mount Flexes or Clicks
Flexing means the bracket is not strong enough or the motor is not aligned. Reinforce the mount, shorten unsupported spans, and use better fasteners. A rigid mount makes the desk feel more like a real electric workstation and less like a haunted appliance.
Is Motorizing a SKARSTA Worth It?
Motorizing an IKEA SKARSTA table is worth it if you enjoy DIY projects, already own the desk, and want a custom electric standing desk without replacing the whole frame. It is also a satisfying project for people who like 3D printing, electronics, microcontrollers, and practical hacks that improve daily life.
It may not be worth it if you want a warranty-protected, certified, quiet, polished electric desk with memory presets right out of the box. Commercial electric desks have become more affordable, and some include safety systems that would take time to replicate. The DIY version wins on learning, customization, and reuse. The commercial version wins on convenience and predictable support.
The best reason to motorize a SKARSTA is not saving every possible dollar. It is turning a good manual desk into a better daily tool while learning enough mechanics and electronics to feel mildly dangerous at dinner parties.
Real-World Experience: Lessons From Living With a Motorized SKARSTA
The first thing you notice after motorizing a SKARSTA is not the technology. It is the change in behavior. With the crank, you might tell yourself, “I should stand soon,” then continue sitting for another two hours because the crank is under the desk, your headphones are on, and inertia has claimed legal ownership of your body. With a button, the transition becomes effortless. You press, the desk rises, and suddenly you are standing before your brain has time to negotiate.
The second lesson is that speed should be comfortable, not impressive. During early testing, many builders are tempted to make the desk move faster because faster feels more electric. After a week, a moderate speed feels better. It gives monitors time to settle, lets you spot cable issues, and avoids that unsettling moment when a full coffee mug begins to tremble like it has seen the future.
Cable management becomes more important than expected. A fixed desk lets you be lazy with wires. A moving desk punishes laziness. Monitor power cables, laptop chargers, speaker wires, USB hubs, and lamp cords all need enough slack for full standing height. At the same time, they cannot hang in loops that catch knees, chair arms, pets, or the lifting mechanism. A cable sleeve or under-desk tray is not decoration here; it is survival equipment.
Noise also matters. A bare motor bolted directly to a metal frame can amplify vibration. Rubber washers, better alignment, a belt drive, or a more refined bracket can make the desk sound less like a garage door opener. If you work during calls, test the motor while recording audio. Your microphone may hear things your ears forgive.
Preset heights are more useful than they sound. Manual up/down control works, but people are inconsistent. One day the standing height is perfect; the next day it is slightly too high, and your shoulders slowly migrate toward your ears. With encoder-based presets, you can return to the same sitting and standing positions every time. That consistency improves comfort and makes the desk feel finished.
The most valuable habit is testing the desk under boring conditions. Run it up and down with no load. Then with your real setup. Then with cables attached. Then after tightening the bracket. Then again the next day. DIY projects often fail at the edges: a screw loosens, a wire rubs, a printed part cracks, or the power supply gets warmer than expected. Slow testing catches those issues before they become dramatic.
Finally, the motorized SKARSTA teaches a useful design truth: convenience changes behavior. The manual desk already had the health benefit available. The motor simply made the better choice easier. That is the real upgrade. Not the motor, not the code, not the bracket, not the satisfying little button. The real upgrade is that you actually change position more often. In the end, the best DIY projects are the ones that quietly improve ordinary days. A motorized SKARSTA does exactly that, with just enough nerdy charm to make every height change feel like a tiny victory.
Note: This article is for educational DIY guidance. Motorizing furniture can void warranties and create pinch, overload, fire, or electrical hazards if done carelessly. Use properly rated components, include physical safety stops, test slowly, and disconnect power before making adjustments.