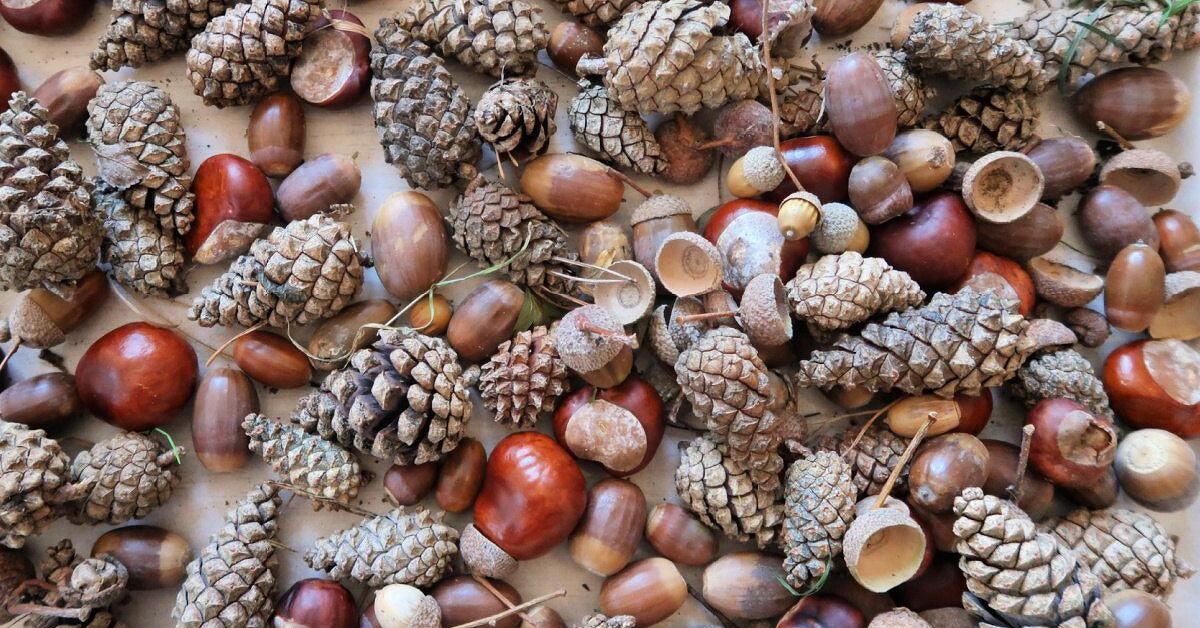
If fall had a craft mascot, it would probably be a pinecone wearing an acorn cap and pretending to be rustic on purpose. An acorn and pinecone wreath is one of the easiest seasonal projects you can make because it looks expensive, feels personal, and secretly forgives almost every mistake. A slightly crooked pinecone? Charming. A gap in the wreath? Add moss. Too many acorns? There is no such thing; the squirrels may disagree, but they do not pay rent.
This guide walks you through how to make an easy acorn and pinecone wreath using natural materials, a basic wreath form, hot glue, and a few simple styling tricks. The result is a warm, woodland-inspired DIY fall wreath that works on a front door, above a mantel, on a kitchen wall, or anywhere that needs a little “I went for a walk and came back artistic” energy.
The best part is that this project does not require professional floral design skills. You only need a good base, clean natural pieces, a clear layout, and patience while the glue sets. Whether you want a rustic Thanksgiving wreath, a natural autumn wreath, or a neutral piece that can stay up from September through winter, this acorn and pinecone wreath is simple, affordable, and surprisingly satisfying.
Why an Acorn and Pinecone Wreath Is Perfect for Fall
Acorns and pinecones bring instant texture. Pinecones have sculptural layers, acorns add small rounded details, and together they create a wreath that feels full without needing a mountain of artificial flowers. Their natural brown tones also pair beautifully with burlap ribbon, dried orange slices, faux berries, eucalyptus, preserved leaves, or even a simple velvet bow.
A DIY pinecone wreath is also budget-friendly. If you have access to a yard, park, or wooded walking path where collecting is allowed, many of your main materials may be free. If not, craft stores usually carry bags of pinecones, faux acorns, grapevine wreath bases, moss, ribbon, and seasonal picks. Store-bought materials are more uniform, while foraged pieces give the wreath that perfectly imperfect handmade look.
Another advantage is durability. Unlike fresh flowers or leafy wreaths that fade quickly, pinecones and acorns can last for years when cleaned, dried, and sealed properly. A little protective spray and careful storage can turn one afternoon of crafting into several seasons of decorating.
Materials You Will Need
Before you start, gather everything in one place. Hot glue waits for no one, and running around the house looking for scissors while holding a pinecone is not the glamorous craft lifestyle we were promised.
Basic Supplies
- One grapevine wreath form, foam wreath form, or straw wreath form, 12 to 18 inches wide
- Clean, dry pinecones in several sizes
- Clean, dry acorns, with or without caps
- Hot glue gun and plenty of glue sticks
- Floral wire or paddle wire for extra hold
- Wire cutters or sturdy scissors
- Ribbon, twine, burlap, or leather cord for hanging
- Optional moss, dried leaves, faux berries, mini pumpkins, cinnamon sticks, or seed pods
- Optional clear matte spray sealer for protection
- Work gloves, especially if your pinecones are sharp or sticky
Choosing the Right Wreath Base
A grapevine wreath base is the easiest choice for a natural acorn and pinecone wreath. It already looks rustic, so small gaps do not stand out. You can tuck pinecones, stems, and wire into the vines, which makes the project more forgiving.
A foam wreath form creates a cleaner, fuller shape, but you will need to cover the foam completely with pinecones, moss, ribbon, or burlap so it does not peek through. A straw wreath form gives a traditional harvest look and works well for chunky designs, though it can be messier. For beginners, a grapevine wreath is the best option because it does half the decorating before you even plug in the glue gun.
How to Prepare Pinecones and Acorns for Crafting
Natural materials are beautiful, but they sometimes come with dirt, sap, moisture, and tiny uninvited guests. Before turning your treasures into home decor, clean and dry them properly. This step helps your wreath last longer and keeps the finished piece from shedding debris all over your table.
Step 1: Sort Your Foraged Pieces
Spread your pinecones and acorns on newspaper or a tray. Remove anything cracked, mushy, moldy, or suspiciously wiggly. Choose pinecones with interesting shapes and acorns with secure caps. Save tiny pinecones and loose acorn caps for filling gaps later.
Step 2: Brush Off Dirt and Debris
Use an old paintbrush, toothbrush, or dry cloth to remove soil, needles, and leaves. Pinecones can hide debris between their scales, so give them a gentle shake. Do this outdoors if possible unless you enjoy vacuuming as a bonus craft activity.
Step 3: Dry Them Thoroughly
If your pinecones or acorns are damp, let them air-dry first. You can also place them on a parchment-lined baking sheet and warm them in a low oven, around 200 degrees Fahrenheit, until dry. Keep an eye on them, never leave them unattended, and let them cool completely before gluing. Pinecones often close when wet and reopen as they dry, which is normal.
Step 4: Seal for Longer Life
A clear matte spray sealer helps protect the finished wreath, especially if you plan to hang it on a covered porch. Spray outdoors or in a well-ventilated area, follow the product directions, and allow the pieces to dry fully. A matte finish keeps the wreath natural; a satin finish adds a subtle polished glow.
How To Make an Easy Acorn and Pinecone Wreath
Now comes the fun part: turning a pile of forest confetti into a wreath that makes guests say, “Wait, you made that?” The process is simple, but the order matters. Build the structure first, then fill the gaps, then add the finishing details.
Step 1: Plan the Layout Before Gluing
Place your wreath form flat on the table. Arrange your largest pinecones first, spacing them around the wreath like anchor points. Try not to line them up too perfectly. Nature rarely uses a ruler, and your wreath will look more relaxed if the pieces vary slightly in angle and direction.
After the large pinecones are placed, add medium pinecones between them. Then sprinkle acorns, tiny pinecones, and caps into the open spaces. Take a quick photo with your phone before gluing. This gives you a reference if your cat, sibling, or mysterious household breeze destroys the layout.
Step 2: Attach the Largest Pinecones
Start with the biggest pinecones because they define the shape of the wreath. Add a generous amount of hot glue to the base or side of each pinecone and press it firmly onto the wreath form. Hold it in place for several seconds while the glue grips.
For heavier pinecones, use floral wire as backup. Wrap the wire around the lower scales of the pinecone, twist it tightly, and secure it to the wreath base. Add hot glue afterward to prevent shifting. This is especially helpful if the wreath will hang on a door that opens and closes often.
Step 3: Add Medium and Small Pinecones
Once the larger pinecones are attached, add medium and small pinecones around them. Tilt some inward and some outward to create depth. A wreath looks more professional when the elements do not all face the same direction. Think of it as a group photo: everyone should not be staring straight ahead like they just heard the toaster explode.
Keep checking the wreath from different angles. Lift it upright occasionally to see how it will look on a door or wall. Flat-on-the-table views can be misleading because the outer edge and inner ring are much more visible once the wreath is hanging.
Step 4: Fill Gaps With Acorns
Acorns are perfect gap fillers because they are small, rounded, and visually lighter than pinecones. Glue them in clusters of two or three for a natural look. Mix whole acorns with loose caps, and turn some sideways so the wreath does not feel too patterned.
If your acorn caps fall off, do not panic. Glue them back on before attaching them to the wreath. You can also use loose caps as tiny decorative cups tucked between pinecone scales. This trick adds detail without making the wreath bulky.
Step 5: Add Moss, Leaves, or Berries
If the wreath still has visible holes, tuck in small pieces of moss. Moss softens the design and hides glue spots. Dried leaves can add color, but they are more fragile, so place them where they will not be crushed. Faux berries, mini pumpkins, or seed pods can make the wreath feel more festive, but use them sparingly. The acorns and pinecones should remain the stars.
For a neutral farmhouse wreath, stick to brown, tan, cream, and muted green. For a Thanksgiving wreath, add burnt orange ribbon or copper berries. For a woodland Christmas wreath, include evergreen sprigs, frosted pinecones, or a deep red bow.
Step 6: Make a Simple Hanger
Turn the wreath over and create a loop using floral wire, twine, ribbon, or leather cord. Attach it securely to the back of the wreath form. If the wreath is heavy, use wire first and cover it with ribbon for a prettier finish.
Before declaring victory, hang the wreath on a hook and gently shake it. If anything wiggles, reinforce it with glue or wire. It is better to fix a loose pinecone now than to discover it later when it makes a dramatic escape onto the porch.
Step 7: Seal the Finished Wreath
Once all pieces are attached and the glue is fully cool, spray the wreath with a clear protective sealer. Two light coats are usually better than one heavy coat. Let the first coat dry before adding the second. This helps preserve the natural materials and gives the wreath a more finished appearance.
Design Ideas for Different Styles
Rustic Farmhouse Style
Use a grapevine wreath base, natural pinecones, acorns, burlap ribbon, and a few pieces of dried wheat. Keep the color palette earthy and simple. This style looks great on a white door, brick wall, or wooden mantel.
Modern Neutral Style
Choose smaller pinecones and place them in a tighter, cleaner pattern. Add cream ribbon or black velvet ribbon for contrast. You can lightly dry-brush the tips of the pinecones with white or beige craft paint for a soft, modern look.
Thanksgiving Harvest Style
Add faux berries, mini pumpkins, dried orange slices, or preserved leaves in warm shades of amber, rust, and gold. Keep the extras balanced so the wreath does not become a produce aisle with ambitions.
Winter Woodland Style
Use pinecones, acorns, faux evergreen stems, tiny bells, and a deep green or burgundy ribbon. A dusting of white paint on the pinecone tips can create a snowy effect without turning the wreath into a glitter incident.
Common Mistakes to Avoid
The first mistake is using damp materials. Moisture can weaken glue, encourage mold, and make the wreath smell less like autumn and more like a forgotten camping bag. Always dry pinecones and acorns before attaching them.
The second mistake is under-gluing heavy pieces. Pinecones can be surprisingly weighty, especially large ones. Use wire for support when needed, particularly on a wreath that will hang outside or on a moving door.
The third mistake is making the layout too even. Perfect spacing can look stiff. Vary the size, direction, and grouping of your materials. A handmade wreath should feel natural, not like it was assembled by a committee of geometry teachers.
The fourth mistake is ignoring the back of the wreath. Make sure no sharp wires stick out, no glue blobs prevent it from lying flat, and the hanger is strong enough for the finished weight.
Where to Hang Your Acorn and Pinecone Wreath
This wreath is ideal for a covered front door, entryway, mantel, dining room wall, kitchen window, or interior door. If you hang it outside, choose a protected area away from heavy rain and direct afternoon sun. Natural materials last longer when they are not constantly exposed to moisture and harsh weather.
For a cozy entryway, hang the wreath above a bench with a plaid throw and a basket of blankets. For a mantel, place it above candles, small pumpkins, and stacked books. For a Thanksgiving table, lay the wreath flat as a centerpiece and place a hurricane candle or bowl in the center. Just avoid placing natural materials too close to open flames.
How to Store the Wreath After the Season
When the season ends, remove the wreath carefully and brush away dust. Store it in a wreath storage box or a large plastic container. If you do not have a wreath box, hang it on a sturdy hanger and cover it loosely with a breathable cloth bag. Avoid crushing it under heavy decorations, unless you want next year’s wreath to look like it lost a wrestling match.
Keep the wreath in a dry, temperature-stable place. Attics and garages can work if they do not get too humid. Add a small packet of silica gel nearby if moisture is a problem. With proper storage, your DIY acorn and pinecone wreath can be reused for several years.
Budget-Friendly Tips
To save money, forage what you can and buy only the items you truly need. A grapevine wreath form, glue sticks, and ribbon may be enough if you already have access to pinecones and acorns. Watch for seasonal craft sales, especially after fall and Christmas when wreath supplies are often discounted.
You can also repurpose old decorations. Remove berries, ribbons, or faux leaves from outdated wreaths and reuse them in your new design. A tired wreath from three seasons ago can become a fresh woodland piece with a little glue and optimism.
Extra Experience: What I Learned Making Acorn and Pinecone Wreaths
After making several acorn and pinecone wreaths, the biggest lesson is simple: collect more natural materials than you think you need. Pinecones take up space, but once you start arranging them, gaps appear everywhere. Acorns are even trickier because a bowl full of them looks like plenty until you begin filling the wreath. Then suddenly you are counting acorns like they are tiny woodland diamonds.
Another helpful experience is to separate materials by size before starting. Put large pinecones in one pile, medium ones in another, and small ones in a third. Do the same with acorns and caps. This makes the design process faster and keeps the wreath balanced. When everything is mixed together, you spend too much time digging around for “that one perfect little pinecone,” which is always hiding under the ribbon.
I also learned that grapevine bases are extremely forgiving. Foam forms can look neat, but they demand full coverage. If one tiny patch of foam shows through, your eye goes straight to it. Grapevine, on the other hand, already looks like part of the design. If a gap remains, it feels intentional. This makes grapevine the best base for beginners, busy crafters, and anyone who wants the wreath to look relaxed rather than overly polished.
Hot glue is useful, but it should not be treated like magic. Large pinecones need support. When I skipped wire on heavier pieces, a few pinecones loosened after the wreath was hung on a frequently used door. Now I wire the heaviest elements first and use hot glue as reinforcement. The wreath feels sturdier, and I no longer worry about pinecones dropping dramatically whenever someone comes home.
The most attractive wreaths usually have movement. Instead of arranging pinecones in a perfect circle, angle them in different directions. Let a few lean toward the center and a few point outward. Add acorns in clusters rather than single-file rows. Nature is layered and irregular, so a natural wreath should be too.
One small styling trick that makes a big difference is adding a final “soft layer.” Moss, tiny leaves, dried grass, or small berry stems help blend the pinecones and acorns together. Without this layer, the wreath can look like separate objects glued onto a ring. With it, the whole piece feels connected.
Color restraint also matters. It is tempting to add every fall decoration within reach: orange leaves, yellow berries, plaid ribbon, mini pumpkins, cinnamon sticks, and possibly a scarecrow with emotional baggage. But too many extras can overpower the natural beauty of the acorns and pinecones. Choose one accent color or one accent texture, then stop before the wreath starts shouting.
Finally, the best wreath is the one that feels like your home. A polished neutral wreath may look perfect in a modern entryway, while a fuller harvest wreath might suit a cozy porch. The goal is not to copy a catalog exactly. The goal is to create something warm, seasonal, and personal. If your wreath makes you smile when you walk by it, congratulations: you have officially won fall.
Conclusion
Learning how to make an easy acorn and pinecone wreath is less about perfection and more about layering simple natural materials in a thoughtful way. Start with a sturdy wreath base, clean and dry your pinecones and acorns, attach the largest pieces first, fill gaps with smaller details, and finish with ribbon or moss for a polished look.
This project is affordable, beginner-friendly, and flexible enough for many decorating styles. You can keep it rustic, make it modern, dress it up for Thanksgiving, or shift it into winter with evergreen accents. Best of all, it gives you a beautiful reason to take a walk, collect nature’s leftovers, and turn them into something that looks intentionally charming instead of accidentally crunchy.
Note: This article is original, fully rewritten, and based on practical wreath-making, natural craft preparation, and seasonal home-decor methods commonly used by reputable U.S. DIY and home design resources.