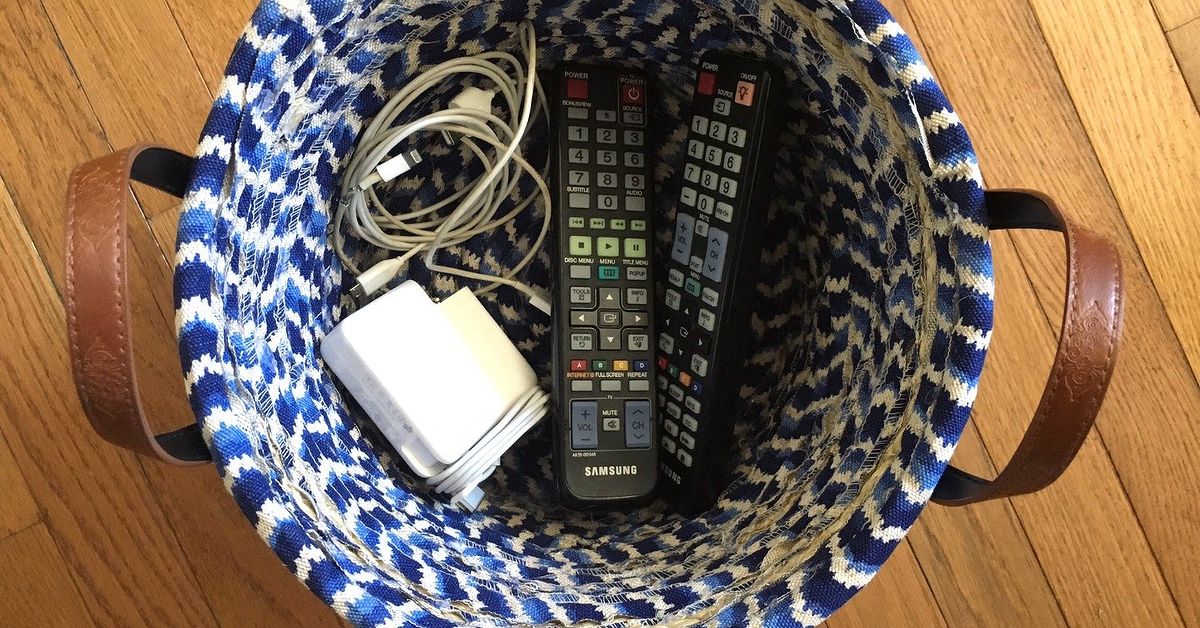
A DIY no sew fabric basket is the rare craft project that gives you storage, style, and the smug satisfaction of saying, “I made that,” without asking a sewing machine to behave. If you have fabric scraps, an old cardboard box, a glue gun, fusible hem tape, or a bottle of fabric adhesive, you are already halfway to a charming handmade basket that can hold craft supplies, towels, toys, office clutter, pantry packets, or the mysterious pile of cables every household seems legally required to own.
The beauty of a no sew basket is that it does not demand advanced skills. There are no bobbins, no threading drama, no crooked seams pretending to be “rustic.” Instead, this project relies on smart measuring, neat folding, strong adhesive, and fabric with enough body to hold its shape. The result can look like a boutique storage bin, a farmhouse-style canvas basket, a bright nursery organizer, or a soft little catch-all for keys and sunglasses.
This guide walks you through a practical, beginner-friendly method for making a fabric basket without sewing. It also includes material tips, sizing ideas, troubleshooting help, decorating options, and a long experience-based section at the end for anyone who wants the project to turn out polished instead of “Pinterest tried to warn me.”
What Is a No Sew Fabric Basket?
A no sew fabric basket is a handmade storage container created with fabric and adhesive instead of needle and thread. Some versions are made by wrapping fabric around a cardboard box. Others use rope, canvas strips, fusible interfacing, stiffened fabric, or a recycled container as the structure. The easiest and most reliable version for beginners is the fabric-covered box basket, because the box provides the shape while the fabric provides the charm.
Think of it as giving a plain box a well-tailored outfit. The box does the heavy lifting. The fabric gets all the compliments.
Why Make a DIY No Sew Fabric Basket?
Store-bought baskets are useful, but they can be oddly expensive, especially when you need several matching bins for shelves, closets, bathrooms, or playrooms. Making your own fabric basket lets you customize the size, color, pattern, texture, and finish. It is also a smart way to upcycle shipping boxes, diaper boxes, shoe boxes, cereal boxes, or leftover cardboard packaging.
A no sew fabric storage basket works especially well for:
- Organizing craft supplies, yarn, ribbon, fabric scraps, and glue sticks
- Creating matching bins for cubby shelves or closet storage
- Holding baby items such as diapers, wipes, socks, and small toys
- Corralling bathroom towels, toiletries, and extra toilet paper
- Storing pantry packets, tea bags, snacks, or reusable bags
- Making inexpensive handmade gifts, especially when filled with treats
- Adding color and softness to an office, dorm room, laundry area, or entryway
The project is also forgiving. If your corners are not perfect, trim can hide them. If the glue line looks uneven, ribbon comes riding in like a tiny decorative superhero. If your cardboard box has logos on it, nobody will know once it is wrapped in fabric. Your secret is safe with the basket.
Best Materials for a No Sew Fabric Basket
Fabric
The best fabric for a no sew basket has enough weight to cover the base neatly without becoming bulky at the corners. Cotton canvas, duck cloth, upholstery fabric, denim, linen blends, drop cloth, and medium-weight quilting cotton all work well. Thin fabric can still be used, but it may show the box underneath unless you add a white paper layer or choose a light-colored base.
For a crisp, modern look, use solid canvas or neutral drop cloth. For a cheerful craft-room basket, use printed cotton. For a child’s room, try animal prints, stars, polka dots, rainbows, or washable-looking patterns that forgive tiny fingerprints.
Base Structure
A sturdy cardboard box is the easiest base. Choose one with straight sides and minimal damage. Shoe boxes, small shipping boxes, and diaper boxes are excellent choices. Avoid flimsy boxes with crushed corners unless you are making a very small basket. If the box feels weak, reinforce the inside corners with packing tape before covering it.
Adhesive
You have several no sew adhesive options. Hot glue works quickly and is excellent for edges, trims, and corners, but it can create bumps if applied too heavily. Fabric glue gives a flexible bond and is good for fabric-to-fabric areas. Spray adhesive is helpful for large, flat surfaces because it spreads evenly and reduces wrinkles. Fusible hem tape can create clean folded edges when pressed with an iron.
For the strongest result, use a combination: spray adhesive or fabric glue for the large panels, hot glue for the tucked edges and trim, and hem tape if you want crisp folded seams.
Tools
- Cardboard box or container
- Fabric for the outside
- Fabric for the inside liner, optional but recommended
- Sharp scissors or rotary cutter
- Measuring tape or ruler
- Pencil or fabric marker
- Hot glue gun and glue sticks
- Fabric glue or spray adhesive
- Iron and ironing board
- Ribbon, rope, leather pulls, buttons, labels, or trim for decoration
- Clips, binder clips, or masking tape to hold fabric while drying
Before You Start: Pick the Right Size
The size of your basket depends on where it will live. A tiny basket is perfect for desk supplies. A medium basket can hold rolled washcloths or craft tools. A large basket works well for toys, closet shelves, or blankets, but it needs a stronger base.
| Basket Use | Suggested Base | Best Fabric |
|---|---|---|
| Desk organizer | Small shipping box or tissue box | Quilting cotton or canvas |
| Bathroom basket | Shoe box or sturdy gift box | Canvas, linen blend, or coated cotton |
| Nursery storage | Diaper box | Duck cloth or medium cotton |
| Closet shelf bin | Medium cardboard box | Drop cloth, denim, or upholstery fabric |
| Gift basket | Small box or round container | Printed cotton or seasonal fabric |
Step-by-Step: How to Make a DIY No Sew Fabric Basket
Step 1: Prepare the Box
Start with a clean, dry cardboard box. Cut off the top flaps if you want an open basket. If you prefer a rolled fabric rim, leave about half an inch of extra height so the fabric can fold neatly over the edge. Tape any weak corners, dents, or holes. If the box has glossy printing and your fabric is light, cover the outside with plain white paper first so the graphics do not peek through like an uninvited guest.
Step 2: Measure the Fabric
Place the box in the center of the fabric. Measure the bottom, sides, and inside fold-over allowance. A simple rule is to cut fabric wide enough to wrap up all four sides and extend at least two to three inches over the top edge into the inside of the basket.
If your box is 10 inches wide, 8 inches deep, and 6 inches tall, cut a fabric piece that covers the bottom plus twice the height on each side, with extra for folding. It is better to cut slightly larger and trim later than to cut too small and begin negotiating with gravity.
Step 3: Press the Fabric
Iron the fabric before gluing. This may feel like an annoying extra step, but wrinkles become much more obvious once fabric is attached to a flat surface. Pressing also helps create sharp folds at the top edge and corners. If your fabric is very stiff, use steam carefully. If it is delicate or synthetic, test the iron temperature on a scrap first.
Step 4: Cut the Corner Notches
Set the box on the wrong side of the fabric and trace around the bottom. From each corner, cut a diagonal notch toward the marked corner, leaving a small gap so the fabric can wrap around the box without bunching. Do not cut directly into the bottom outline. Leave enough fabric to fold around the corners cleanly.
This is the step that makes the difference between a smooth basket and a lumpy one. Fabric has opinions at corners. Notches are how you politely ask it to cooperate.
Step 5: Attach the Bottom
Apply spray adhesive or a thin layer of fabric glue to the bottom of the box. Center the box on the fabric and press firmly. Smooth from the middle outward to remove bubbles. If using spray adhesive, work in a well-ventilated area and protect the table with newspaper or scrap cardboard.
Step 6: Wrap the Long Sides
Apply adhesive to one long side of the box. Pull the fabric up smoothly and press it into place. Keep the fabric taut but not stretched so hard that the box bends. Repeat on the opposite side. Use binder clips along the top edge to hold the fabric while the glue sets.
If your fabric has a pattern, pause before gluing each side to make sure the design is straight. Stripes and plaids are beautiful, but they are also brutally honest.
Step 7: Fold and Glue the Short Sides
For the remaining sides, fold the fabric edges inward like wrapping a present. Add a thin line of hot glue or fabric glue along the folded edge, then press it flat against the box. Smooth the panel upward and over the top edge. Repeat on the final side.
The goal is to create crisp vertical corners. If the fabric feels bulky, trim the hidden layers slightly before gluing. Heavy upholstery fabric may need more trimming than cotton.
Step 8: Finish the Top Rim
Fold the extra fabric over the top edge and glue it inside the basket. Work one side at a time. Press firmly and clip until dry. For a cleaner look, fold the raw edge under before gluing, or cover the rim with ribbon, twill tape, rope, bias tape, or braided trim.
A finished rim makes the basket look intentional, not like a cardboard box wearing a blanket in a hurry.
Step 9: Add a No Sew Liner
A liner is optional, but it gives the basket a professional finish. Cut a second piece of fabric using the same general method, but place it inside the basket instead of outside. Glue the bottom first, then smooth the fabric up the inner walls. Fold the top edge under and glue it just below the rim.
For storage baskets that will hold delicate items, use a soft cotton liner. For craft supplies, use canvas or drop cloth. For bathroom baskets, consider fabric that tolerates occasional humidity, and avoid storing wet items inside a cardboard-based basket.
Step 10: Add Handles or Labels
Handles are useful if the basket will be pulled from a shelf. No sew handle options include rope glued through punched holes, leather strips attached with brads, wide ribbon loops, or webbing straps secured with hot glue and decorative buttons. For labels, attach a small metal label holder, chalkboard tag, wooden tag, or kraft paper tag tied with twine.
Handles should be decorative unless the base is reinforced. If you plan to carry heavy items, use a sturdier box, double the cardboard on the inside, and attach handles through the structure rather than only to the fabric.
Design Ideas for a Custom Fabric Basket
Farmhouse Canvas Basket
Use drop cloth or natural canvas, then add a black stencil label such as “Towels,” “Toys,” or “Crafts.” Finish the top rim with jute rope or cotton webbing. This style looks great in laundry rooms, bathrooms, and mudrooms.
Colorful Craft Room Basket
Choose bright quilting cotton, mix two coordinating prints, and add a contrasting liner. Use the basket for markers, glue sticks, yarn balls, or washi tape. This is also a good way to use fabric scraps from previous projects.
Nursery Basket
Pick soft cotton or canvas in a gentle pattern. Add a liner in a second fabric and a ribbon label. Use several matching baskets for diapers, socks, burp cloths, and tiny baby hats that somehow disappear even when the baby cannot walk yet.
Holiday Gift Basket
Cover a small box with seasonal fabric and fill it with cookies, cocoa packets, candles, handmade soap, or craft supplies. The container becomes part of the gift, which is a lovely upgrade from a paper bag that crinkles judgmentally.
Common Mistakes and How to Fix Them
The Fabric Wrinkles
Wrinkles usually happen when too much glue is applied at once or the fabric is not smoothed from the center outward. Work slowly, use a thin adhesive layer, and press with your palm or a clean ruler wrapped in scrap fabric.
The Corners Look Bulky
Trim hidden fabric layers before folding. Heavy fabric creates beautiful baskets, but corners can become thick. Cut small notches and glue one fold at a time.
The Glue Shows Through
Thin fabric may darken or stain when glue is applied too heavily. Test on a scrap first. Use spray adhesive lightly, or add a paper backing layer to the box before applying fabric.
The Basket Feels Weak
Reinforce the inside with extra cardboard panels before adding the liner. You can also glue a second piece of cardboard to the bottom for more strength. For large baskets, choose double-wall cardboard or a plastic bin as the hidden base.
The Rim Looks Messy
Add trim. Seriously, trim is the craft-world equivalent of a good haircut. Ribbon, rope, twill tape, lace, or faux leather strips can hide uneven edges and make the basket look finished.
Care Tips for No Sew Fabric Baskets
A cardboard-based fabric basket is not machine washable. Spot clean it with a slightly damp cloth and mild soap, then let it dry completely. Avoid soaking the basket or storing wet towels inside. If you need a washable basket, use a plastic container as the base or make a removable fabric liner.
Keep baskets away from direct moisture, high heat, and overloaded shelves. A no sew basket can be sturdy, but it is still a handmade storage piece, not a moving box for dumbbells. Use it for lightweight to medium items such as linens, toys, supplies, accessories, and household odds and ends.
Smart Places to Use Your DIY No Sew Fabric Basket
Once you make one fabric basket, you may suddenly see clutter everywhere. This is normal. The first basket opens a portal. You will look at your bathroom shelf and think, “That could be cuter.” You will look at your pantry and whisper, “Labels.” You will look at your desk drawer and realize the paper clips have been living without leadership.
Use matching baskets on open shelves to make storage look calm and intentional. Use smaller baskets inside cabinets to group similar items. Use fabric baskets in the entryway for keys, sunglasses, dog leashes, and mail. In a craft room, sort supplies by category. In a child’s room, make picture labels so kids can help clean up without turning the process into a courtroom negotiation.
Experience Section: What I Learned Making DIY No Sew Fabric Baskets
The first lesson of making a DIY no sew fabric basket is that the box matters more than you think. A beautiful fabric cannot fully rescue a crushed, flimsy, emotionally exhausted cardboard box. Start with a sturdy base. If the corners are straight, the final basket looks neat. If the box leans like it has had a long week, the basket will lean too. I have learned to reinforce corners with packing tape before fabric ever enters the conversation.
The second lesson is to iron the fabric. This feels small, but it changes everything. Wrinkled fabric glued to cardboard looks permanently tired. Pressed fabric looks crisp, clean, and almost store-bought. I also like pressing a small fold along the top edge before gluing it inside the basket. That folded edge hides fraying and gives the rim a tailored finish without sewing a single stitch.
The third lesson is to use less glue than your instincts suggest. When people say “glue it down,” the natural response is to apply enough adhesive to secure a roof during a hurricane. Resist. Too much glue can bleed through fabric, create ridges, or dry in lumps. A thin, even layer works better. For large panels, spray adhesive or fabric glue gives a smoother finish. For corners, hot glue is fast and strong, but it should be used in narrow lines rather than big blobs.
The fourth lesson is that corners are where the basket’s personality is decided. Clean corners make the whole project look polished. Messy corners make it look like the basket survived a small fabric tornado. The best technique is to treat each corner like gift wrapping: fold one side in, crease it, trim extra bulk, then glue the second side over it. Clips help hold everything while the adhesive cools or dries. Binder clips are not glamorous, but they are loyal.
The fifth lesson is that trim solves many sins. A strip of ribbon around the rim can hide uneven folds. Rope can make a plain basket feel coastal or farmhouse-inspired. A small label holder turns a recycled box into organized storage. Even a simple fabric pull on the front can make the basket look intentional. The trick is to choose one or two accents, not twelve. Otherwise, the basket starts looking like it got dressed in the dark.
The sixth lesson is to think about the basket’s job before choosing fabric. A basket for lightweight craft supplies can use printed cotton. A basket for closet shelves should use heavier canvas or drop cloth. A bathroom basket should not be made from delicate fabric if it will sit near splashes. A nursery basket should have soft edges and no tiny decorations that could come loose. A gift basket can be more decorative because it does not need to survive daily use.
The seventh lesson is that making several baskets at once is easier than making one now and trying to match it later. If you are organizing a shelf, measure the space first, choose boxes that fit together, and cover them assembly-line style. Cut all fabric pieces, iron everything, glue all outer panels, then add liners and trim. This saves time and helps the baskets look like a coordinated set rather than distant cousins who met at a family reunion.
Finally, the best part of this project is how useful it becomes. A no sew fabric basket is not just decorative clutter pretending to be productive. It actually works. It hides visual mess, uses materials you might already have, and makes everyday storage feel warmer and more personal. It is budget-friendly, beginner-friendly, and surprisingly satisfying. Plus, every time someone asks where you bought it, you get to pause dramatically and say, “I made it.” That alone is worth the glue strings.
Conclusion
A DIY no sew fabric basket is one of the simplest ways to turn ordinary materials into practical home storage. With a sturdy box, attractive fabric, smart adhesive choices, and a few careful folds, you can create a basket that looks custom without touching a sewing machine. The project is flexible enough for beginners and creative enough for experienced crafters who want a quick win.
Use neutral canvas for a clean modern look, patterned cotton for playful spaces, drop cloth for farmhouse style, or leftover fabric scraps for an eco-friendly organizing project. Add a liner, handles, labels, or trim to make the basket fit your space. Whether you are organizing shelves, gifting handmade goodies, or rescuing your desk from chaos, this no sew fabric basket is a small project with a big payoff.
Note: Always test adhesives on a fabric scrap before applying them to the full basket, and choose a washable base only if the finished basket may be exposed to moisture.