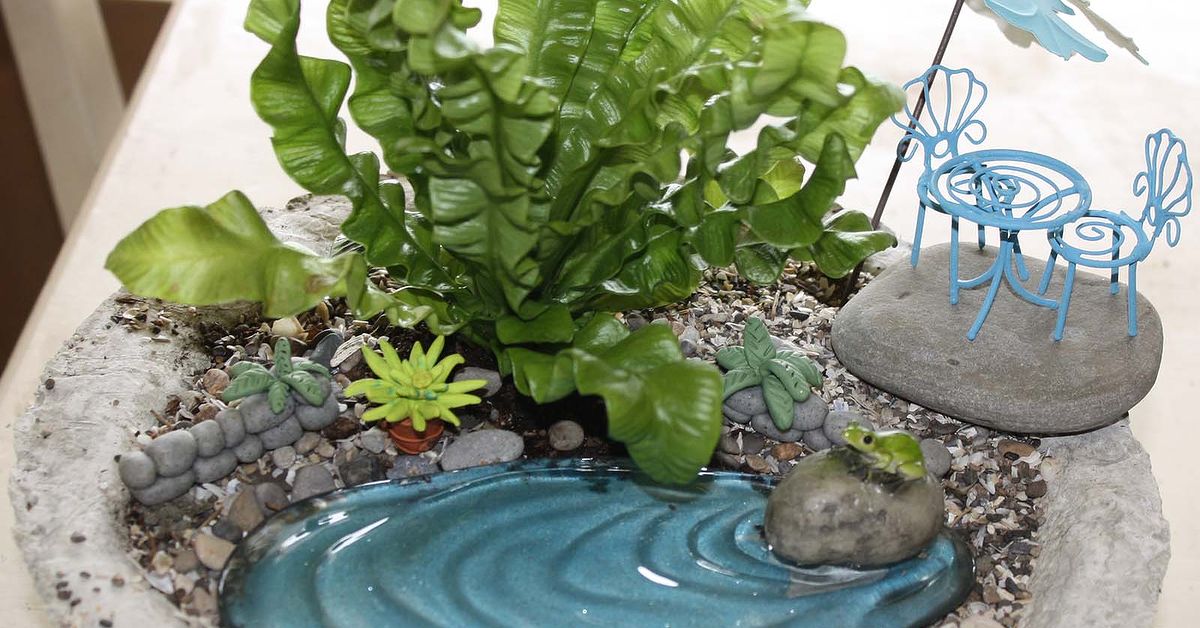
Papercrete for fairy gardens is what happens when recycling, cement, and tiny woodland real estate decide to form a charming little partnership. It is lightweight, moldable, budget-friendly, and wonderfully imperfectthe kind of material that makes a fairy cottage look as if it has been sitting under a fern since the beginning of time. For gardeners who love miniature landscapes, fairy houses, tiny bridges, mushrooms, stepping stones, planters, and storybook ruins, papercrete offers a creative way to build custom pieces without needing a kiln, a masonry degree, or a backyard full of suspiciously expensive supplies.
At its simplest, papercrete is made by combining soaked paper pulp with Portland cement and, depending on the project, sand, perlite, vermiculite, or other lightweight fillers. The paper fibers act like a flexible body inside the cement mixture, making the finished piece lighter and easier to shape than traditional concrete. That makes it especially useful for fairy gardens, where the goal is not to pour a driveway for gnomes but to create small, textured, weathered-looking objects that feel magical and handmade.
This guide explains what papercrete is, why it works so well in miniature gardens, how to mix it safely, what to make with it, and how to help your tiny creations survive sun, rain, watering cans, and the occasional squirrel with poor boundaries.
What Is Papercrete?
Papercrete is a cement-based craft and building material made with repulped paper. The paper is soaked in water until soft, shredded or blended into pulp, then mixed with cement and other ingredients until it becomes a thick, sculptable paste. Imagine papier-mâché putting on work boots and joining a construction crew. That is papercrete.
Traditional papercrete has been explored for bricks, walls, insulation, and experimental building, but fairy garden papercrete is a smaller, craft-friendly version. Instead of worrying about structural load, building codes, or whether your cottage can support a second floor for fairy in-laws, you are focusing on texture, shape, durability, and scale.
Compared with standard concrete, papercrete is lighter and easier to carve, press, mold, and sculpt. Compared with plain papier-mâché, it is more durable outdoors once properly cured and sealed. Compared with hypertufa, another popular lightweight garden material, papercrete usually has a smoother, fibrous texture and can hold whimsical detail nicely. Hypertufa often looks like porous stone; papercrete can look like old plaster, carved rock, rustic clay, or fairy-sized stucco depending on the mix and finish.
Why Papercrete Works Beautifully in Fairy Gardens
Fairy gardens depend on believable small details. A miniature house looks better when its walls are slightly uneven. A tiny path feels more magical when the stones are not identical. Papercrete naturally creates that handmade, weathered, organic look. It is forgiving, which is excellent news for anyone who has ever tried to sculpt a perfect mushroom and ended up with what appeared to be a tiny cement potato.
It Is Lightweight
Paper fibers reduce weight, especially when the mix includes perlite or vermiculite. This is helpful for container fairy gardens, where heavy decorations can compact soil or make the container hard to move. A papercrete cottage, archway, or faux stone wall can look substantial without turning your planter into a gym membership.
It Is Moldable
Papercrete can be packed into molds, shaped over armatures, spread onto wire mesh, or sculpted by hand. You can press it into silicone molds for doors and stepping stones, smear it over a cardboard form for a cottage, or roll small lumps into fairy boulders. It behaves like a thick clay when mixed correctly.
It Reuses Paper
Old newspaper, office paper, egg cartons, paper grocery bags, and shredded bills can all become crafting material. Glossy magazine paper is less ideal because coatings can resist water and break down more slowly, but small amounts can be used if thoroughly soaked and shredded. For most fairy garden projects, plain paper and cardboard work best.
It Has Natural Texture
Fairy gardens should not look like they came from a sterile laboratory where elves wear clipboards. Papercrete has texture. It can be rough, smooth, pitted, brushed, carved, or sanded. That texture helps paint, moss washes, stains, and dry-brushed highlights cling beautifully.
Basic Papercrete Recipe for Fairy Garden Crafts
There is no single universal papercrete recipe, which is both freeing and mildly annoying. The best mix depends on whether you are making planters, sculptures, stepping stones, or decorative walls. For fairy garden projects, start with a small batch and adjust after testing.
Beginner Fairy Garden Papercrete Mix
- 2 parts damp paper pulp
- 1 part Portland cement
- 1 part fine sand or perlite
- Water as needed
This mix is good for small cottages, mushrooms, stones, ruins, and decorative accents. Use sand when you want strength and a stone-like feel. Use perlite when you want a lighter piece. You can also combine half sand and half perlite for a balanced mix.
Stronger Mix for Small Outdoor Structures
- 1 part damp paper pulp
- 1.5 parts Portland cement
- 1 part fine sand
- A small handful of perlite, optional
- Water as needed
This stronger version is better for pieces that may be handled often, such as removable houses, bridge sections, raised borders, and larger fairy garden accessories. It will be heavier than the beginner mix but more durable.
Lightweight Planter or Bowl Mix
- 3 parts paper pulp
- 2 parts Portland cement
- 1 part perlite or vermiculite
- Optional: a small amount of sand for strength
This blend works well for small fairy garden bowls, shallow troughs, and decorative containers. For anything that will hold plants, drainage holes are not optional. They are the difference between a fairy garden and a swamp with accessories.
How to Make Paper Pulp
Good pulp is the heart of good papercrete. Tear paper into small strips and soak it in a bucket of water for at least 24 hours. Longer soaking makes the paper easier to break down. Cardboard and egg cartons may need extra time.
After soaking, blend or mix the paper until it becomes mushy and fibrous. A paint mixer attachment on a drill works well for larger batches, while a dedicated craft blender can handle small amounts. Do not use the same blender you use for smoothies unless you enjoy explaining to guests why breakfast tastes faintly like yesterday’s utility bill.
Drain excess water from the pulp before mixing it with cement. The pulp should be damp, not dripping like a dramatic sponge. Too much water weakens the final piece and makes the mix slump. Too little water makes it crumbly and hard to pack into details.
Safety First: Cement Is Not Fairy Dust
Papercrete may look like a playful craft material, but Portland cement is alkaline and can irritate or burn skin, especially when wet. Wear waterproof gloves, eye protection, and a dust mask or respirator when handling dry cement. Mix outdoors or in a well-ventilated area. Keep children and pets away from the mixing stage.
Avoid breathing cement dust. Add dry ingredients gently rather than dumping them from a dramatic height like a wizard casting a spell. If wet cement gets on your skin, wash it off promptly with clean water. Do not work barefoot, and do not let wet cement sit on clothing against the skin.
Once your papercrete pieces are fully cured, rinsed, and sealed, they are much safer to handle and display. During mixing and curing, however, treat the material with respect.
Step-by-Step: Making Papercrete Fairy Garden Pieces
1. Choose a Simple Project
If this is your first batch, start small. Make stepping stones, mushrooms, tiny boulders, a low wall, or a simple cottage front. Save the three-story fairy mansion with balcony, chimney, and emotional backstory for batch number two.
2. Prepare Your Mold or Armature
Papercrete can be shaped in silicone molds, plastic bowls, food containers, cardboard forms, or over wire mesh. For a fairy house, you can build a simple shape from cardboard, wrap it in plastic, cover it with wire mesh, and apply papercrete over the surface. For stepping stones, press the mix into small lids, silicone molds, or shallow trays.
If using a rigid mold, coat it lightly with cooking spray or line it with plastic wrap so the cured piece releases more easily. If making a planter, insert a dowel, straw, or pencil through the bottom to create drainage holes.
3. Mix the Dry Ingredients
Combine Portland cement with sand, perlite, or vermiculite. Stir gently until evenly distributed. Then add the damp paper pulp. Mix until the fibers are coated and the material looks like thick oatmeal or sculpting clay. Add water slowly only if needed.
4. Shape the Piece
Pack the papercrete firmly into molds or press it onto your armature. Smooth it with gloved fingers, a plastic spoon, a putty knife, or an old butter knife. For stone texture, dab with a stiff brush, crumpled foil, or a piece of bark. For cottage walls, gently drag a skewer through the surface to suggest stone blocks, planks, or stucco lines.
5. Add Details While Damp
Papercrete is easiest to decorate while still soft. Press in tiny pebbles for a path, carve window outlines, shape a rounded door, or add a chimney. Keep details chunky rather than delicate. Thin ears, tiny handles, and skinny roof points tend to break unless reinforced.
6. Cure Slowly
Cement gains strength through hydration, so slow curing is better than fast drying. Cover the piece loosely with plastic and keep it slightly damp for several days. After the first few days, remove it from the mold if it feels firm, then continue curing in a shaded spot. Let small items cure for at least one to two weeks. Larger planters and thicker pieces benefit from three to four weeks.
7. Rinse, Dry, and Seal
Cement-based pieces can be highly alkaline at first. Before planting directly in a papercrete container, rinse it several times and let it weather. For fairy garden decorations, allow the piece to dry fully before painting or sealing. Use an outdoor masonry sealer, acrylic sealer, or exterior craft sealant to reduce water absorption.
Best Papercrete Fairy Garden Ideas
Fairy Cottages
Papercrete cottages are the classic project. Build a small base shape from cardboard, foam, or a plastic bottle, cover it with mesh, and apply papercrete in layers. Add a rounded doorway, crooked windows, a pebble chimney, and a textured roof. A slightly lopsided cottage is not a mistake; it is “enchanted architecture.”
Miniature Stone Paths
Press papercrete into bottle caps, silicone candy molds, or small lids to make stepping stones. While damp, stamp each stone with a leaf, shell, button, or textured fabric. After curing, dry-brush with gray, tan, moss green, or white paint for a weathered look.
Fairy Mushrooms
Roll small stems and caps by hand. Insert a short piece of wire or toothpick inside the stem for support if needed. Keep the caps thick enough to survive handling. Paint them red, cream, brown, or speckled. Remember, fairy mushrooms do not have to be botanically accurate. They just have to look like something a tiny creature would stand under during a rainstorm.
Rustic Bridges
Shape a small arched bridge over a foil-covered cardboard form. Add stone lines with a skewer. Once cured, place it over a dry creek bed of blue glass pebbles, gravel, or tiny river stones. Do not make the bridge too thin; papercrete prefers sturdy shapes.
Ancient Ruins
Papercrete is perfect for broken columns, crumbling walls, faux castle pieces, and old garden gates. Make uneven blocks, stack them with a dab of exterior adhesive, and paint them in layers of gray and brown. Add moss around the base for instant “forgotten kingdom” energy.
Mini Planters and Troughs
Small papercrete troughs can hold succulents, moss, thyme, baby tears, or other miniature plants. Keep the walls about half an inch thick for strength, add drainage holes, and allow extra curing time before planting. Use a well-draining potting mix suited to your chosen plants.
Painting and Finishing Papercrete
Papercrete accepts paint well because of its porous surface. Acrylic craft paint works for decorative pieces, but outdoor acrylic or masonry paint is better for items exposed to weather. Start with a base coat, then add depth using dry brushing. For stone, use dark gray or brown in the crevices and lighter gray on raised areas. For cottages, try warm white walls, earthy brown roofs, and cheerful doors in blue, red, green, or yellow.
To make a piece look aged, dab on diluted green and brown paint around cracks, bases, and roof edges. A little faux moss effect goes a long way. Too much and your fairy cottage may look like it lost a wrestling match with spinach.
Seal painted pieces with an outdoor clear sealer. Matte finishes usually look more natural than glossy finishes, unless you are making a fairy disco patio, in which case sparkle responsibly.
Weatherproofing Tips for Outdoor Fairy Gardens
Papercrete is more absorbent than standard concrete because of the paper fibers. That means outdoor pieces should be sealed, elevated slightly from constantly wet soil, and protected from freeze-thaw stress when possible. In cold climates, bring delicate pieces indoors during winter or place them under cover.
For outdoor durability, avoid extremely thin edges. Keep bases thick, use mesh reinforcement for larger shapes, and seal all sides, including the bottom. If a piece will sit directly on soil, consider placing it on gravel or a flat stone so water can drain away.
For planters, remember that drainage matters. Container plants need water to move through the soil rather than sit around the roots. Add drainage holes, use appropriate potting mix, and choose miniature plants with similar light and moisture needs. Succulents and moss may both be adorable, but they do not always want the same lifestyle. One wants a dry vacation; the other wants a spa day.
Best Plants to Pair with Papercrete Fairy Gardens
Papercrete looks especially good with small-scale plants that soften the edges of handmade structures. For sunny gardens, try sedum, hens-and-chicks, creeping thyme, dwarf mondo grass, or miniature lavender cotton. For partial shade, consider baby tears, club moss, small ferns, ajuga, pilea, or miniature hosta varieties. Indoors, use tiny tropicals such as fittonia, peperomia, dwarf umbrella plant, or miniature ivy.
Match the plant to the container. Shallow papercrete troughs are better for small-rooted plants. Deeper containers can support miniature shrubs or mixed plantings. Keep aggressive spreaders trimmed so they do not swallow your tiny cottage like a botanical horror movie.
Common Mistakes to Avoid
Using Too Much Water
Wet, soupy papercrete is difficult to sculpt and weaker after curing. Add water slowly. The mix should hold its shape when squeezed.
Skipping Gloves
Cement can irritate or burn skin. Gloves are not a decorative suggestion; they are part of the project.
Making Pieces Too Thin
Thin edges chip easily. For fairy garden durability, slightly chunky is better than delicate and doomed.
Planting Too Soon
Fresh cement-based containers may be too alkaline for sensitive plants. Cure thoroughly, rinse well, and let planters weather before planting.
Forgetting Drainage
Every living container fairy garden needs drainage holes. Without them, roots can rot and your magical scene becomes a tiny wet tragedy.
Personal Experience: What Papercrete Teaches You in a Fairy Garden
The first thing papercrete teaches you is humility. You may begin with a confident plan for a charming fairy cottage with a curved roof, arched windows, and a doorway that whispers “welcome, tiny woodland nobility.” Twenty minutes later, you may be staring at a damp lump that resembles a biscuit abandoned in a rainstorm. This is normal. Papercrete rewards patience more than perfection.
In practice, the best results often come from working in layers. Instead of trying to build every detail at once, form the main shape first. Let it firm up slightly, then return to add texture, trim, stones, window frames, or roof ridges. Papercrete has a friendly working personality, but it does not like being overhandled when too wet. If a wall slumps or a mushroom cap droops, step away and let the mix rest. Many “mistakes” become easier to fix after the material stiffens.
Small batches are another lesson learned quickly. It is tempting to mix a large bucket because the creative brain suddenly believes it owns a fairy construction company. But papercrete takes time to shape, and cement does not wait forever. A small batch lets you experiment with texture and consistency without racing the clock. It also keeps cleanup manageable, which matters unless you want your workspace to look like a recycling center merged with a sidewalk repair crew.
Texture is where papercrete becomes genuinely fun. A toothbrush can make stucco. Crumpled foil can make stone. A skewer can carve bricks. A leaf pressed into a stepping stone creates instant woodland charm. Even fingerprints can look good once painted and sealed. Fairy gardens benefit from irregular surfaces because nature itself is irregular. A perfectly smooth miniature wall often looks fake, while a bumpy, uneven one looks like it has survived three fairy winters and one very dramatic acorn storm.
Painting also changes everything. A plain gray cottage may look unfinished, but a dark wash followed by dry-brushed highlights can suddenly reveal stone lines, roof texture, and tiny cracks. Earthy colors work best: gray, tan, moss green, bark brown, cream, charcoal, and muted red. Bright colors can be lovely for doors and accents, but the main structure usually looks more believable when it borrows from natural stone, clay, bark, and weathered plaster.
Outdoors, durability depends on preparation. Sealing is worth the effort. Papercrete pieces left unsealed may absorb water, especially in rainy climates or containers that are watered often. A good exterior sealer helps protect the surface and preserves paint. In areas with freezing winters, storing delicate papercrete accessories indoors can prevent cracking. For year-round outdoor displays, make pieces thicker, reinforce larger forms with mesh, and keep them off constantly wet ground.
The biggest creative advantage of papercrete is freedom. Store-bought fairy garden accessories are cute, but they often look identical. With papercrete, every piece has personality. You can make a crooked cottage that fits around a specific plant, a tiny bridge sized exactly for your pebble creek, or a planter that looks like a forgotten ruin. The material invites play. It says, “Try it.” And if the result is strange, paint it gray, call it an ancient fairy monument, and accept compliments with confidence.
Most of all, papercrete makes fairy gardening feel personal. It turns old paper into something whimsical, useful, and surprisingly durable. It lets adults enjoy mud-pie energy with better engineering. It gives kids and beginners a forgiving material to explore, while still offering enough depth for serious crafters to refine recipes, finishes, molds, and sculpting techniques. A papercrete fairy garden is not just decorated; it is built by hand, one charmingly imperfect detail at a time.
Conclusion
Papercrete for fairy gardens is a practical, creative, and budget-friendly way to make miniature worlds feel truly handmade. By mixing recycled paper pulp with Portland cement and lightweight fillers, you can create cottages, paths, bridges, planters, ruins, mushrooms, and garden accents with rustic texture and outdoor charm. The key is to start small, control the water, cure slowly, seal well, and design with sturdy shapes rather than fragile details.
Whether you are building a tiny mossy village in a planter, adding a storybook cottage beneath a shrub, or making miniature stepping stones for a succulent garden, papercrete gives you room to experiment. It is not fancy. It is not flawless. But that is exactly why it works. Fairy gardens are supposed to feel discovered, not manufactured. Papercrete helps create that magic from simple materials, a little patience, and the kind of imagination that sees an old newspaper and thinks, “That could definitely become a fairy house.”