Subscriptions are sneaky little creatures. One minute you are testing a meditation app “just for the free trial,” and the next minute your monthly statement looks like a tiny digital buffet: Apple Music, iCloud+, a photo editor, a language app you opened twice, and a puzzle game that somehow believes it is worth the same as lunch. The good news is that canceling iTunes and App Store subscriptions on a PC or Mac is usually straightforward once you know where Apple hides the right button.
This guide explains how to cancel Apple subscriptions from a Mac, a Windows PC, and older iTunes setups. It also covers what to do if the subscription does not appear, how billing works after cancellation, and when a refund request makes more sense than simply canceling. Whether you are trimming your monthly expenses or escaping a free trial before it becomes a paid “surprise party,” here is the clean, current way to manage it.
What Counts as an iTunes or App Store Subscription?
An iTunes or App Store subscription is any recurring plan billed through your Apple Account. That may include Apple services such as Apple Music, Apple TV+, Apple Arcade, Apple News+, Apple Fitness+, Apple One, or iCloud+. It can also include subscriptions purchased inside third-party apps, such as productivity tools, streaming apps, dating apps, photo editors, VPNs, learning platforms, or fitness apps.
The important phrase is “billed through Apple.” If Apple handles the payment, you can usually manage or cancel the subscription from your Apple Account settings. If the subscription was purchased directly from the company’s website, through Google Play, PayPal, a cable provider, Amazon, Roku, or another billing platform, it may not appear in your Apple subscription list. In that case, Apple is not being mysterious; it simply is not the cashier.
Before You Cancel: Check These Three Things
1. Use the Correct Apple Account
Many people have more than one Apple Account, especially if they created one years ago for iTunes and later made another for iCloud. If you do not see the subscription you expect, sign out and check whether you used a different Apple Account for the original purchase.
2. Know That Deleting an App Does Not Cancel Billing
Deleting an app from your Mac, iPhone, iPad, or PC does not automatically cancel the subscription. It only removes the app from the device. The subscription keeps renewing until you cancel it through the correct billing account. Apps are not like houseplants; neglecting them does not make them disappear.
3. Cancel Before the Renewal Date
Most Apple subscriptions continue until the end of the current billing period after you cancel. That means if your plan renews on July 20 and you cancel on July 5, you can usually keep using the service until July 20. Free trials may behave differently depending on the terms, so cancel early if you are trying to avoid a charge.
How to Cancel App Store Subscriptions on a Mac
For most Mac users, the App Store is the easiest place to cancel subscriptions linked to an Apple Account. This works well for app subscriptions and Apple services billed through Apple.
Steps to Cancel on Mac
- Open the App Store app on your Mac.
- Click your name in the bottom-left corner. If you do not see your name, click Sign In and enter your Apple Account details.
- Click Account Settings or View Information, depending on your macOS version.
- Scroll to the Subscriptions section.
- Click Manage.
- Select the subscription you want to cancel.
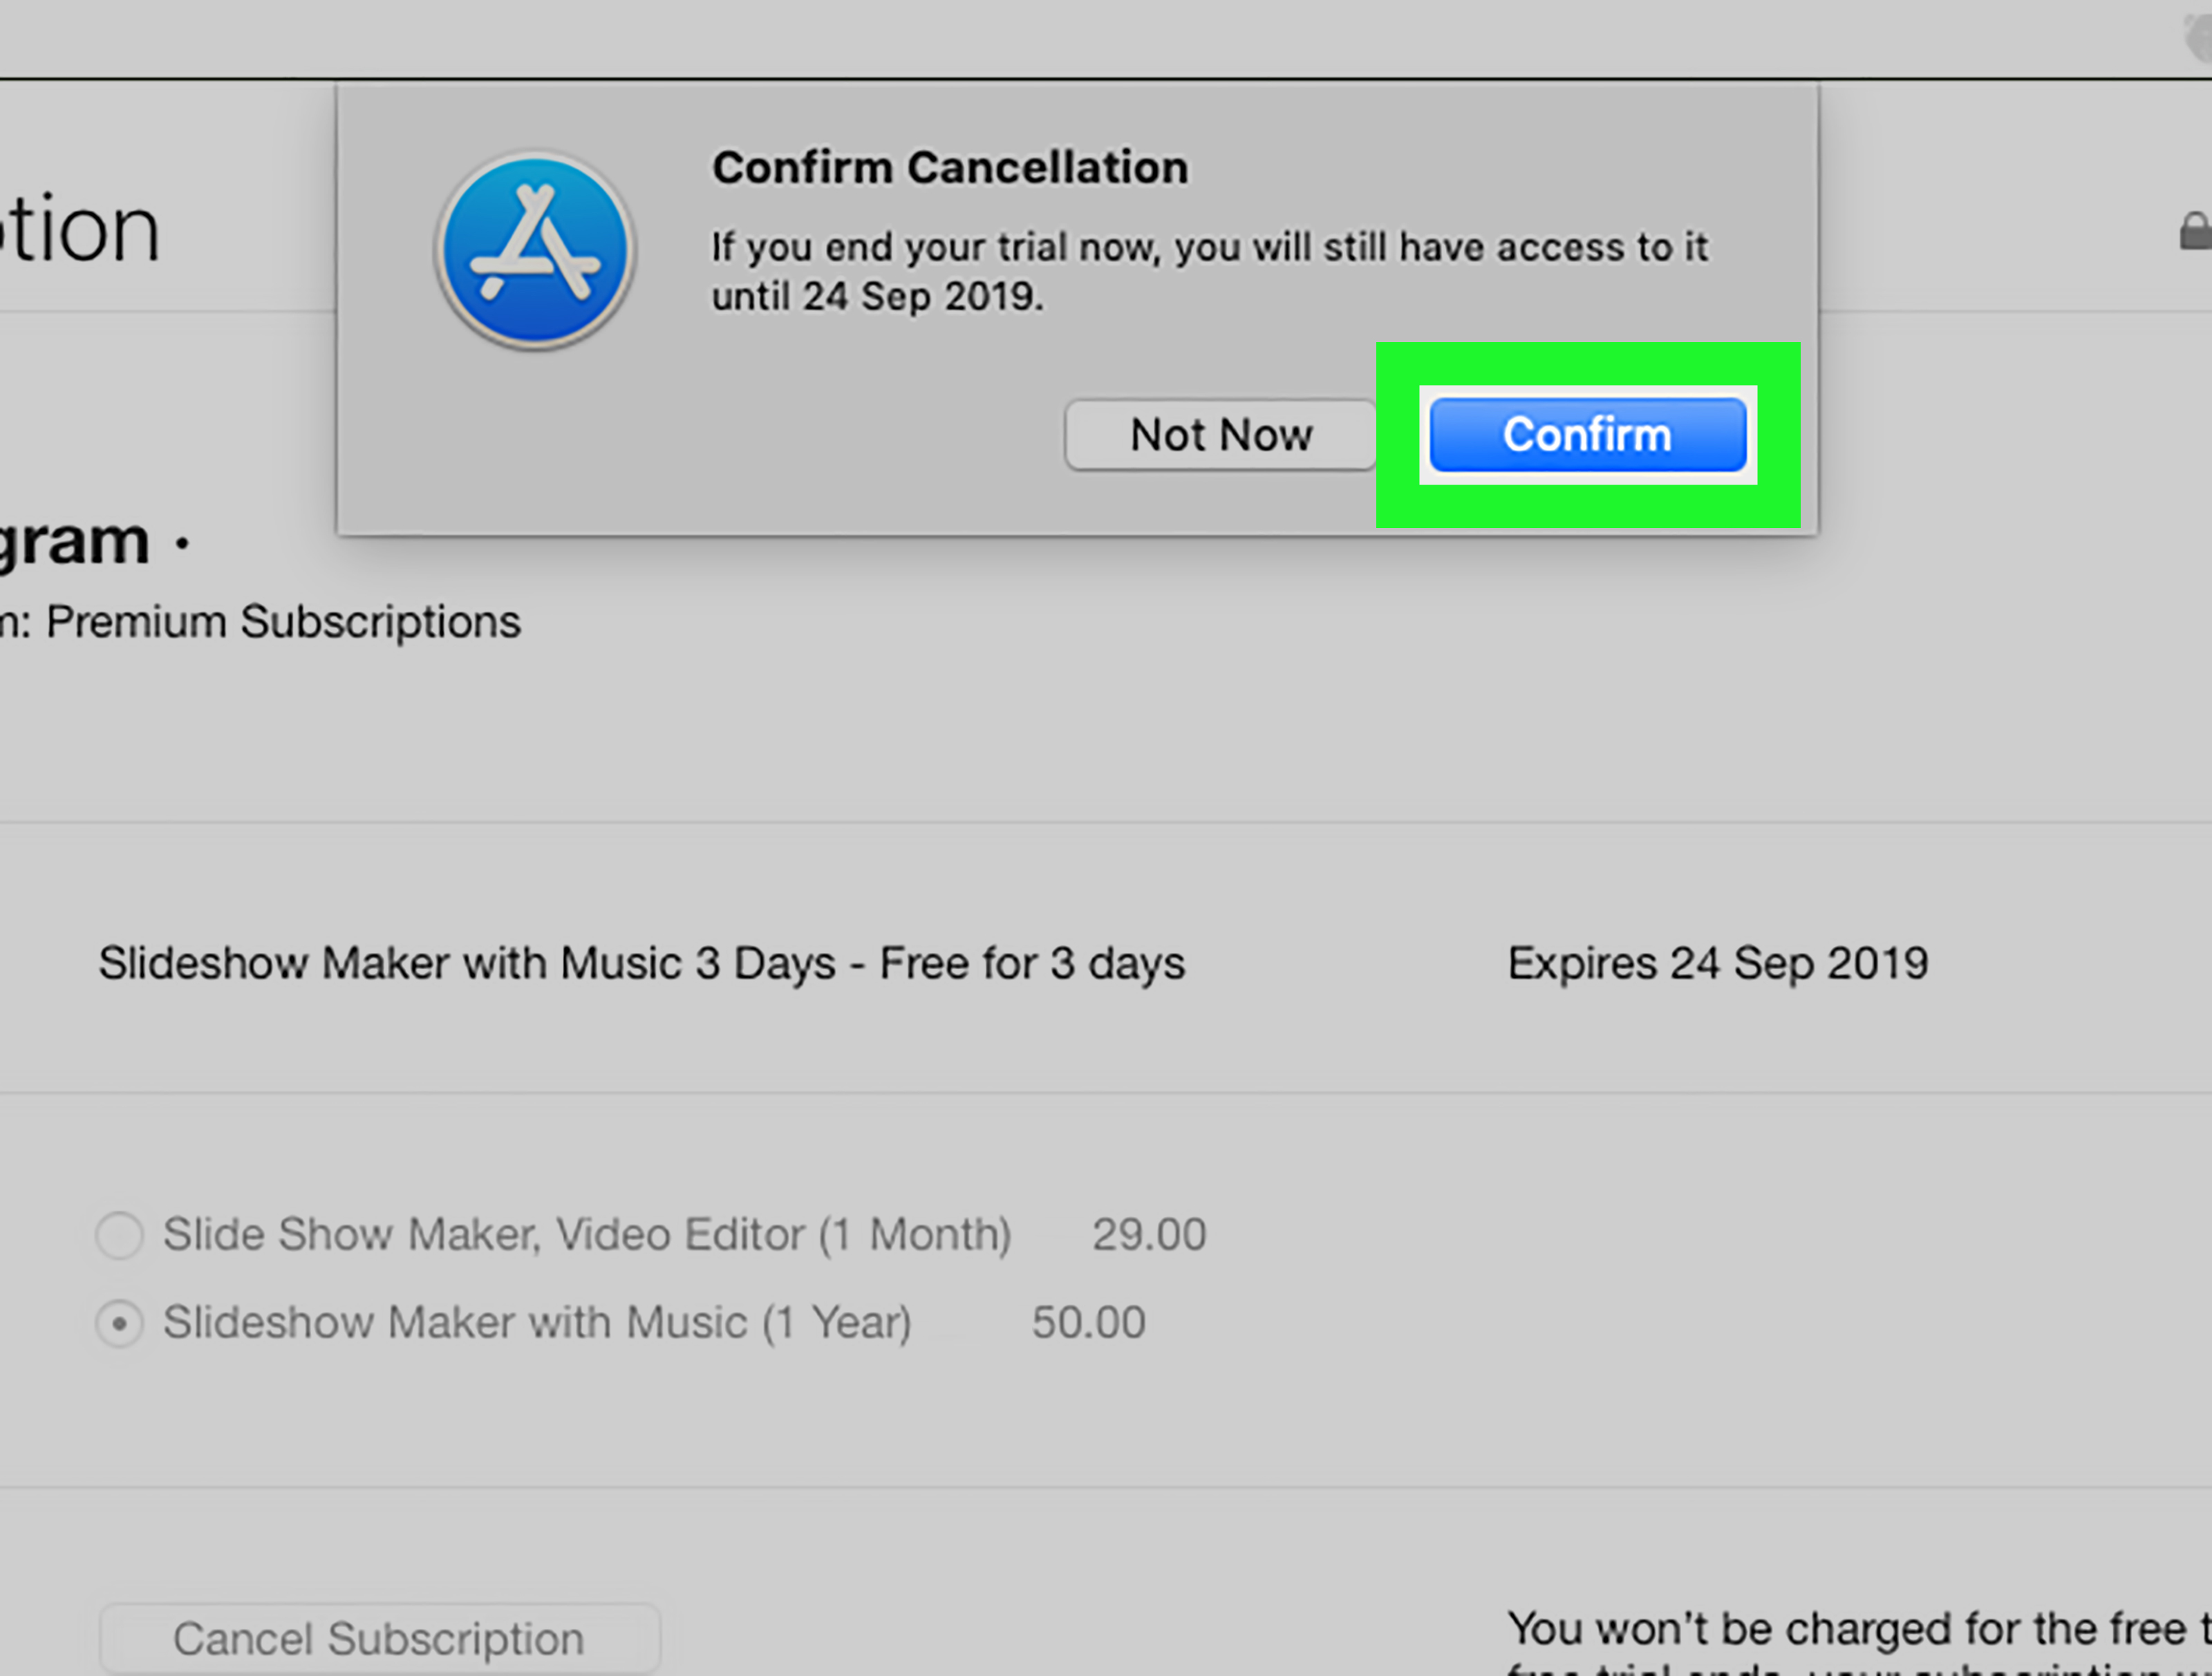
- Click Cancel Subscription, then confirm your choice.
If you do not see a cancel button, look carefully for an expiration message. If the subscription already says it will expire on a specific date, it is already canceled. In other words, no button means the job may already be done. Congratulations, you defeated the subscription goblin without realizing it.
How to Cancel iTunes and App Store Subscriptions on a Windows PC
Apple’s Windows setup has changed over time. Newer Windows users may manage subscriptions through the Apple Music app or Apple TV app. Older setups may still use iTunes for Windows. The right path depends on what software you have installed.
Option 1: Cancel Using Apple Music or Apple TV for Windows
- Open the Apple Music app or the Apple TV app on your Windows PC.
- Click your name at the bottom of the sidebar.
- Choose View My Account.
- Sign in with your Apple Account if prompted.
- Scroll to the Settings section.
- Next to Subscriptions, click Manage.
- Find the subscription you want to cancel and click Edit.
- Click Cancel Subscription and confirm.
This is the most current path for many Windows users because Apple has been moving media management away from the old iTunes model and into separate apps. If your screen looks slightly different, do not panic. Apple menu labels sometimes change just enough to make everyone feel like they missed a software memo.
Option 2: Cancel Using iTunes for Windows
If you still use iTunes on your PC, you can cancel subscriptions from your account page inside iTunes.
- Open iTunes on your Windows PC.
- From the menu bar, choose Account.
- Select View My Account.
- Sign in with your Apple Account if asked.
- Scroll down to the Settings section.
- Next to Subscriptions, click Manage.
- Click Edit next to the subscription you want to stop.
- Choose Cancel Subscription and confirm.
If iTunes is outdated, update it or try the Apple Music or Apple TV app instead. A dusty old iTunes installation can behave like a printer from 2007: technically alive, emotionally unpredictable.
How to Cancel Apple Music, Apple TV+, iCloud+, or Apple One
The process is generally the same for Apple’s own services. Open the App Store on Mac, or Apple Music/Apple TV/iTunes on Windows, then go to your account subscriptions and choose the service you want to cancel. The name may appear as Apple Music, Apple TV+, Apple Arcade, Apple One, or iCloud+.
Be careful with bundled plans such as Apple One. If you cancel Apple One, you may lose access to multiple services included in the bundle. If you only want to remove one service, check whether changing the plan makes more sense than canceling everything. For example, a family using iCloud storage, Apple Music, and Apple TV+ may find that canceling the bundle saves less than expected if they later re-subscribe to separate services.
What Happens After You Cancel?
Canceling usually stops future renewals; it does not always end access immediately. If you paid for the current month or year, you can often keep using the subscription until the billing period ends. For example, if a photo editing app renews monthly on August 12 and you cancel on August 2, you may still have access until August 12.
After cancellation, the subscription may move to an expired section of your account. You may still see it listed for a while, which is normal. That listing does not necessarily mean Apple is still charging you. It is more like a receipt drawer, not a vampire contract.
Why You Might Not See the Subscription
If the subscription does not appear under your Apple Account, one of several things may be happening.
You Bought It Through Another Company
Some services let you subscribe through Apple, their website, a smart TV, a game console, a mobile carrier, or another payment provider. If you subscribed outside Apple, you must cancel through that original platform.
You Used a Different Apple Account
Check other email addresses you may have used. Search your inbox for words like “Apple receipt,” “subscription,” “renewal,” or the app name. The receipt usually shows which Apple Account was charged.
The Subscription Is Already Canceled
If you see an expiration date instead of a cancel button, the subscription may already be canceled and simply waiting to end.
It Is a Family Sharing Subscription
If a family organizer pays for a plan, individual family members may not be able to cancel it from their own account. The organizer may need to manage the subscription.
How to Request a Refund from Apple
Canceling a subscription stops future billing, but it does not automatically refund a recent charge. If you were charged by mistake, forgot to cancel a trial, or did not intend to renew, you can request a refund through Apple’s Report a Problem website.
Basic Refund Steps
- Go to Apple’s Report a Problem page in your browser.
- Sign in with the Apple Account used for the purchase.
- Choose Request a refund.
- Select a reason for the request.
- Choose the app, subscription, or purchase.
- Submit the request and wait for Apple’s decision.
Refund approval is not guaranteed. Apple reviews requests based on purchase history, timing, regional rules, and the nature of the issue. Still, it is worth trying if the charge was accidental or confusing. Think of it as politely knocking on the billing door instead of yelling at your bank statement.
How to Avoid Accidental Renewals in the Future
The easiest way to prevent subscription regret is to treat every free trial like a carton of milk: check the expiration date immediately. When you start a trial, add a reminder to your calendar two or three days before renewal. You can also cancel many trials right after signing up and still use the remaining trial period, depending on the service terms.
It also helps to review your subscriptions once a month. Open your Apple subscription list and look for anything you no longer use. If you have not opened an app in three months, ask yourself whether it deserves a reserved seat on your credit card. Some subscriptions are useful tools; others are digital gym memberships wearing fake mustaches.
Troubleshooting Common Problems
The Cancel Button Is Missing
If there is no cancel button, the subscription may already be canceled. Look for a message showing when access will expire. If you still see charges after that date, check whether the charge is from another Apple Account or another billing provider.
You Cannot Sign In
Reset your Apple Account password, check two-factor authentication, and make sure you are using the correct email address. If your account is locked or unavailable, use Apple’s account recovery options.
You Canceled but Were Still Charged
Check the billing date. The charge may have occurred before cancellation. If the timeline does not make sense, look up your purchase history and request a refund or contact Apple Support.
The App Says Contact Apple, but Apple Shows Nothing
This usually means the app developer and Apple are pointing at each other like two Spider-Men in a meme. Check your email receipts, payment card statement, and the app’s own account settings to identify who processes the payment.
Real-Life Experience: What Canceling Apple Subscriptions Actually Feels Like
In real life, canceling iTunes and App Store subscriptions is less dramatic than people expect, but it can still feel oddly confusing the first time. The biggest problem is not the cancellation itself; it is figuring out where the subscription lives. Many users assume that because they downloaded an app from the App Store, Apple must control every payment connected to that app. That is often true, but not always. Some apps use Apple billing, while others push users to subscribe on their own websites. The result is a mini detective story starring you, your email inbox, and a suspicious $9.99 charge.
One practical habit that helps is searching your email before canceling anything. Type the app name, “Apple,” “receipt,” and “subscription” into your inbox. Apple receipts usually make it clear whether the charge came through your Apple Account. If you find no Apple receipt, the subscription may be billed elsewhere. This simple search can save twenty minutes of clicking through menus and muttering at your screen like it personally betrayed you.
Another useful experience-based tip: do not wait until the last hour of a free trial. People often plan to cancel “later tonight,” which is the same emotional category as “I will fold the laundry immediately.” Then life happens, the trial renews, and suddenly a relaxation app has caused stress. Set a reminder as soon as you start the trial. Better yet, cancel the trial immediately after signing up if the service allows you to keep access until the trial ends. That way, future you can relax instead of playing billing roulette.
On a Mac, the cancellation process feels cleaner because the App Store account page is easy to reach. On Windows, it can feel less obvious because Apple has shifted from iTunes toward separate Apple Music and Apple TV apps. If you read an old guide that says “open iTunes,” but your PC now has Apple Music instead, use the newer app and look for View My Account. The destination is basically the same: account settings, subscriptions, manage, cancel.
It is also worth taking a screenshot after you cancel, especially for expensive yearly plans. Capture the page showing the expiration date or cancellation confirmation. Most of the time you will never need it, but if another charge appears, that screenshot becomes your tiny legal bodyguard.
Finally, make subscription cleanup a routine instead of a panic event. Once a month, check Apple subscriptions, credit card statements, PayPal, Google Play, Amazon, and any streaming accounts. The goal is not to cancel everything and live in a cave with one candle and a spreadsheet. The goal is to pay only for services you actually use. A good subscription earns its place. A forgotten one is just a raccoon in your budget wearing an app icon.
Conclusion
Canceling iTunes and App Store subscriptions on a PC or Mac is mainly about finding the correct account page. On a Mac, use the App Store and open Account Settings. On a Windows PC, use Apple Music, Apple TV, or older iTunes, then manage subscriptions from your Apple Account. If you do not see the subscription, check for another Apple Account, another billing provider, or an already-canceled status.
The smartest move is to review subscriptions regularly, cancel trials before renewal, and request a refund when a charge was accidental or unclear. Your budget does not need to be haunted by forgotten apps. With a few clicks and a little digital housekeeping, you can stop unwanted renewals and keep only the subscriptions that actually deserve your money.
Note: Apple menu names can vary slightly by macOS version, Windows app version, region, and account type. If a button name looks different, follow the closest account, subscriptions, manage, and cancel path.