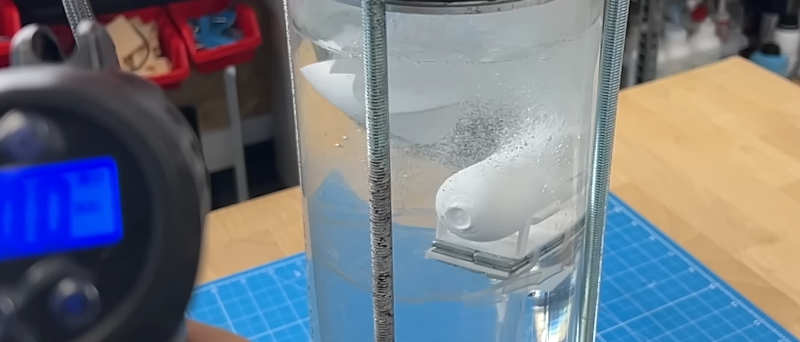
Water and 3D prints have a complicated relationship. On a good day, your printed planter holds soil, your printed cup survives a quick rinse, and your electronics enclosure laughs at a little drizzle. On a bad day, one microscopic gap between layers turns your “waterproof” masterpiece into a very expensive pasta strainer. Extreme waterproof 3D prints are not created by luck. They are created by smart material selection, tight slicer settings, careful design, and, when the job really matters, serious sealing and testing.
The big secret is this: “waterproof 3D print” does not mean the same thing in every project. A vase that holds flowers for a week is not the same as a drone enclosure in a rainstorm. A hydroponic fitting is not the same as an underwater sensor housing. A pool skimmer part is not the same as a deep-sea robotics component. The higher the water pressure, exposure time, temperature swing, and chemical stress, the more disciplined your 3D printing process must become.
This guide breaks down how to make extremely waterproof 3D prints, from filament choice and resin printing to post-processing, gaskets, coatings, and real-world testing. Think of it as a raincoat, submarine manual, and print-tuning checklist all rolled into one. No snorkel required.
What Does “Waterproof” Mean in 3D Printing?
In everyday language, waterproof means water cannot pass through. In engineering, the term needs more detail. Is the part resisting splashes? Rain? Full submersion? Pressurized water? Saltwater? Hot water? Detergent? The answer changes everything.
For functional parts, it is often better to think in levels. “Water-resistant” means the part can handle moisture or brief exposure. “Watertight” means it can hold or block water under normal conditions. “Pressure-resistant” means it can keep water out when submerged or exposed to force. Extreme waterproof 3D prints live in the last two categories.
Industry ratings such as IP67 and IP68 are useful reference points. IP67 typically refers to dust-tight protection and temporary immersion under defined conditions, while IP68 refers to deeper or longer immersion specified by the manufacturer. For a home 3D printing project, you may not be running a certified laboratory test, but the mindset is valuable: define the exposure, test the part, and do not trust wishful thinking. Wishful thinking is not a sealant.
Why 3D Prints Leak
Most leaks come from tiny gaps. In FDM printing, plastic is laid down in lines, layer by layer. If those lines do not fully fuse, water can travel through seams, corners, under-extruded areas, layer transitions, or poorly bonded top and bottom surfaces. A print can look solid on the outside and still contain capillary pathways inside. Water is annoyingly talented at finding these paths. It should honestly consider a career in inspection.
Common leak points include layer lines, infill boundaries, thin walls, sharp corners, screw holes, seams, poorly fused perimeters, and the first few bottom layers. Tall containers may leak at the wall. Flat tanks may leak at corners. Enclosures often fail around lids, cable exits, fasteners, or poorly compressed gaskets.
Porosity Is the Enemy
Porosity is the presence of small voids or channels inside the printed part. FDM parts are especially vulnerable because they are built from individual beads of plastic. Resin prints, especially SLA prints, can be more naturally watertight because cured resin parts are more isotropic and have smoother surfaces. SLS nylon parts can be strong and useful, but their powder-based structure may need sealing for demanding water applications.
Layer Adhesion Matters More Than Looks
A glossy surface is nice, but it does not guarantee waterproofing. A print with excellent layer bonding, thick walls, high extrusion consistency, and controlled cooling will usually outperform a prettier but weaker print. For waterproof 3D prints, strength between layers is not a luxury. It is the difference between “nice custom part” and “why is the table wet?”
Best Materials for Waterproof 3D Prints
Material choice sets the foundation. You can improve a weak material with coatings, but it is better to start with something suitable for moisture, impact, and environmental exposure.
PETG: The Practical Champion
PETG is one of the best all-around choices for waterproof FDM prints. It has strong layer adhesion, low warping compared with ABS, good toughness, and solid moisture resistance. It is commonly used for functional parts, brackets, containers, outdoor accessories, and parts that need to survive occasional water exposure. For hobbyists and small shops, PETG is often the sweet spot between printability and performance.
For waterproof PETG prints, use slightly hotter nozzle temperatures within the filament manufacturer’s recommended range, reduce fan speed, increase wall count, and consider a modest increase in extrusion multiplier after calibration. The goal is to make each line bond firmly to its neighbors without turning the print into a blobby swamp creature.
ASA and ABS: Good for Outdoor and Sealed Parts
ABS and ASA can work well for waterproof parts, especially when post-processed. ABS can be vapor smoothed with acetone, which helps seal layer lines and improve surface finish. ASA offers better UV resistance than ABS, making it a strong option for outdoor rain-exposed components. Both materials usually require an enclosure, good ventilation, and careful temperature control.
If you are printing outdoor housings, irrigation fixtures, boat accessories, or weatherproof covers, ASA deserves serious attention. It prints more stubbornly than PETG but rewards patience with better outdoor durability.
PLA: Fine for Prototypes, Risky for Extreme Waterproofing
PLA is easy to print and great for visual models, but it is not the best choice for long-term wet environments. It can become brittle over time, soften in heat, and depend heavily on coatings for waterproofing. PLA can work for decorative vases, short-term containers, cosplay props, and coated display pieces. For submerged or outdoor functional parts, choose a tougher material unless PLA is all you have and you are ready to seal it properly.
Nylon: Strong, but Moisture-Hungry
Nylon is strong, impact-resistant, and useful for mechanical parts, but many nylon filaments absorb moisture. That can cause swelling, dimensional changes, and property shifts. For underwater use, nylon may need sealing, careful drying before printing, and realistic expectations. It is not automatically bad; it simply demands respect.
TPU and Flexible Materials
TPU can be excellent for gaskets, seals, boots, protective covers, and flexible waterproof components. It is not always ideal for rigid pressure vessels, but it shines when used as a sealing partner. A printed TPU gasket between two PETG or SLA parts can make a huge difference when designed with proper compression.
SLA Resin: Excellent for Smooth, Watertight Geometry
SLA resin printing is often a better path for small, precise waterproof parts. SLA parts have smoother surfaces, finer detail, and fewer inter-layer gaps than typical FDM prints. For complex enclosures, sensor housings, fluidic channels, and small threaded caps, SLA can be a major upgrade. The trade-offs include resin handling, post-curing, brittleness depending on resin type, and material compatibility with heat, UV, and chemicals.
Print Settings for Waterproof FDM Parts
Once you choose a material, your slicer settings decide whether that material behaves like a sealed shell or a stack of plastic pancakes with trust issues.
Use More Walls
For waterproof 3D prints, walls matter more than infill. Use at least four to six perimeters for functional parts. For containers, tanks, and enclosures, thicker walls reduce the chance that a tiny gap will create a continuous leak path. A single-wall vase can be watertight if tuned well, but extreme waterproofing usually benefits from extra shell thickness.
Increase Top and Bottom Layers
The bottom of a printed container is a classic leak zone. Use more solid bottom layers than usual, especially for parts that must hold standing water. Six to ten top and bottom layers is a reasonable starting range for many FDM prints, but the right number depends on nozzle size, layer height, part geometry, and material.
Print Hotter, But Not Recklessly
A slightly higher nozzle temperature can improve layer bonding. Better bonding means fewer microscopic channels. However, printing too hot can create stringing, sagging, poor details, and weak overhangs. Increase temperature gradually and test. Waterproof printing is not a barbecue. More heat is not always more better.
Slow Down
Slower printing gives plastic more time to fuse properly. This is especially helpful for thick walls, large perimeters, and PETG parts. If your normal profile is tuned for speed, create a separate “watertight” profile with slower outer walls, slightly higher temperature, and reduced cooling.
Reduce Cooling Fan Speed
Too much cooling can reduce layer adhesion. For PETG, ASA, ABS, and many engineering materials, lower fan speeds often improve bonding. You still need enough cooling to preserve shape, but not so much that each layer freezes before it can fuse with the next one.
Consider Wider Extrusion
Wider extrusion lines can improve overlap and reduce gaps. Many makers use larger nozzles, wider line widths, or spiral vase mode with thick extrusion for watertight vases and containers. A 0.6 mm or 0.8 mm nozzle can produce stronger, more continuous walls than a standard 0.4 mm nozzle, especially on large parts.
Design Tips for Extreme Waterproof 3D Prints
Great waterproofing starts in CAD. A weak design cannot always be rescued by slicer settings and heroic amounts of epoxy.
Avoid Thin Walls
Thin walls are easier to leak, crack, warp, or deform. Design walls thick enough for multiple perimeters. For serious waterproofing, think in terms of structure first and aesthetics second. Sleek is nice. Dry is nicer.
Use Rounded Corners
Sharp internal corners concentrate stress and can create weak print areas. Rounded corners improve strength, reduce stress, and make coatings flow more evenly. Fillets are one of the simplest ways to make a waterproof print more reliable.
Design for Gaskets
If your part opens and closes, do not rely on plastic-to-plastic contact alone. Add a gasket groove for an O-ring, silicone cord, flat rubber gasket, or printed TPU seal. The gasket should compress evenly when the lid is tightened. Use enough fasteners to create uniform pressure, especially around corners.
Protect Screw Holes and Inserts
Fastener holes are frequent leak paths. Use brass inserts, sealed bosses, washers, or O-rings under screw heads. For electronics boxes, keep screws outside the sealed chamber when possible. If a screw passes into a wet boundary, assume water will follow it unless you block the path.
Plan Cable Entries Carefully
Waterproof enclosures often fail where wires enter. Use proper cable glands, strain reliefs, potting compounds, or sealed connectors. A beautiful enclosure with a sloppy wire hole is just a tiny swimming pool for electronics.
Post-Processing: The Waterproofing Power Move
For extreme waterproof 3D prints, post-processing is not cheating. It is engineering. Coatings and sealants close the microscopic gaps that printing may leave behind.
Epoxy Coating
Epoxy is one of the most reliable ways to waterproof FDM prints. A thin coat can fill layer lines, seal pores, and create a smooth barrier. Products designed for 3D print finishing, such as brush-on epoxy coatings, are popular because they self-level and improve surface finish. For containers, coating the inside is often more important than coating the outside.
Apply epoxy in thin, even layers. Rotate the part if needed to prevent pooling. Pay special attention to seams, corners, bottom layers, and screw bosses. Let the coating fully cure before water testing. “Feels dry” is not the same as chemically cured.
Vapor Smoothing
ABS can be vapor smoothed with acetone, and some other materials have compatible smoothing processes. Vapor smoothing slightly melts the outer surface, blending layer lines and sealing tiny gaps. It can improve waterproofing and appearance, but it may also soften fine details or change dimensions. Use it carefully, with proper safety precautions and ventilation.
Polyurethane and Silicone Sealants
Polyurethane coatings and silicone sealants are useful for flexible sealing zones, lids, seams, and outdoor parts. Silicone is excellent for gaps and removable lids, but it may not bond well to every plastic without surface preparation. Clean, sand, and test adhesion before trusting it in a critical build.
Potting Compounds for Electronics
If the goal is to protect electronics, potting can be more reliable than relying on an enclosure alone. Epoxy, polyurethane, or silicone potting compounds can encapsulate electronics and prevent water contact. The downside is repairability. Once potted, the device may be sealed forever, like a tiny plastic time capsule.
Testing Waterproof 3D Prints
Never assume a print is waterproof just because it looks good. Test it. Start gently, then increase the challenge.
The Paper Towel Test
Place a dry paper towel inside the enclosure, close it, and submerge it briefly. If the towel stays dry, extend the test. This simple method quickly reveals leaks around lids, seams, and cable holes.
The Fill Test
For containers, fill the print with water and place it on a dry surface. Watch the bottom and corners. Many leaks appear slowly, so check after 10 minutes, one hour, and overnight.
The Pressure Test
For serious enclosures, pressure testing is more meaningful than a casual dunk. Even a shallow underwater application creates pressure. Use controlled, safe methods and avoid over-pressurizing brittle parts. A sealed part that survives a bucket may still fail in real underwater use.
Saltwater and Chemical Testing
Fresh water is not the same as saltwater, pool water, detergent, oil, or fertilizer solution. If your part will live in a marine, aquarium, hydroponic, automotive, or industrial environment, test it with the actual exposure fluid or a close substitute. Material compatibility matters.
Best Uses for Extreme Waterproof 3D Prints
Waterproof 3D printing opens the door to practical, customized parts that are hard to buy off the shelf.
Outdoor Sensor Enclosures
Weather stations, garden sensors, trail cameras, and remote monitoring devices often need custom housings. PETG, ASA, or SLA parts with gaskets and cable glands can work well when properly tested.
Hydroponic and Aquarium Accessories
Custom brackets, clips, flow guides, guards, and fittings are popular 3D printing projects. Use safe materials, avoid unknown additives, seal porous prints, and test before placing anything near living systems.
Marine and Kayak Gear
Printed mounts, plugs, holders, and covers can be useful around boats and kayaks. Saltwater, UV, and impact make this environment tougher than it looks. ASA, PETG, and sealed parts are better choices than plain PLA.
Robotics and Underwater Prototypes
Underwater robotics demands careful design. SLA and SLS can be strong choices for precision housings when combined with O-rings and proper testing. FDM can work for brackets, shrouds, and non-critical wet parts, but pressure housings require extra caution.
Common Mistakes to Avoid
The first mistake is assuming infill equals waterproofing. It does not. Infill adds internal structure, but water can still travel through walls and seams. Focus on perimeters, bonding, and sealing.
The second mistake is using PLA for everything. PLA is convenient, but convenience is not waterproof performance. It is fine for prototypes and coated decorative parts, but extreme exposure deserves PETG, ASA, ABS, SLA resin, or another suitable engineering material.
The third mistake is forgetting the lid. Many makers print a strong box and then seal it with a flat lid that barely compresses. Add gasket grooves, use enough screws, and test the closure.
The fourth mistake is skipping surface preparation before coating. Epoxy and sealants bond better to clean, lightly sanded surfaces. Dust, grease, and finger oils can reduce adhesion.
The fifth mistake is testing too late. Print small test coupons first. Try different temperatures, line widths, wall counts, and coatings. A $2 test print can save a $40 enclosure and a weekend of emotional damage.
Experience Notes: What Actually Works in the Real World
In practical 3D printing, the most reliable waterproof results usually come from combining methods instead of betting everything on one magic setting. A well-tuned PETG print with thick walls may hold water by itself, but when the part protects electronics or sits outside for months, adding a gasket and coating is cheap insurance. The best approach is boring in the most beautiful way: strong material, slow print, thick walls, clean design, sealed joints, and real testing.
For vase-like prints, the biggest lesson is that the bottom fails more often than the side wall. Many beginners keep adding wall thickness while ignoring the first layers. A better strategy is to use enough bottom layers, inspect the first layer carefully, and avoid under-extrusion. If the first layer has gaps, the print is already negotiating surrender. Wider extrusion lines can help, especially with PETG. Spiral vase mode can produce surprisingly watertight parts when tuned well, but it is less forgiving than it looks. The model shape must be simple, the extrusion must be consistent, and the wall needs enough thickness to resist flexing.
For enclosures, the best lesson is that a waterproof box is really a sealing system. The printed shell is only one part. The lid, screws, gasket, cable gland, inserts, and surface finish all matter. A printed enclosure with a quality O-ring groove can perform far better than a thicker box with no gasket at all. In small electronics projects, placing screw holes outside the sealed chamber is a smart design habit. It prevents fasteners from becoming little water highways.
Coatings are helpful, but they are not a replacement for good design. Epoxy can seal layer lines, but it may pool in corners, clog threads, or make tight-fitting lids too tight. Brush-on coatings work best when applied patiently in thin layers. For internal tanks or containers, coating the inside first is usually the most effective move. If the outside is pretty but the inside leaks, the water will not compliment your surface finish.
Outdoor parts teach another lesson: waterproofing is not the only enemy. Sunlight, heat, freezing, vibration, and impact all join the party. PETG is good for many outdoor projects, but ASA often performs better when UV exposure is serious. PLA may survive a few rainy days, but long-term outdoor use can expose its weaknesses. For garden, roof, vehicle, and marine parts, choose materials for the full environment, not just the presence of water.
The final real-world rule is simple: test like the part will be used. If it will sit in rain, spray it from different angles. If it will be submerged, submerge it longer than expected. If it will hold warm nutrient solution, test with warm liquid. If it will protect electronics, test with a paper towel before installing the electronics. A dry towel is boring. Boring is good. Boring means your waterproof 3D print did its job.
Conclusion
Extreme waterproof 3D prints are absolutely possible, but they require more than clicking “print” and hoping the filament gods are in a generous mood. The strongest results come from matching the material to the job, using slicer settings that improve layer bonding, designing for seals and gaskets, applying post-processing when necessary, and testing under realistic conditions.
For most makers, PETG is the best starting point for waterproof FDM printing. ASA and ABS are strong choices for outdoor and post-processed parts. SLA resin can be excellent for precise watertight housings. Epoxy, polyurethane, silicone, vapor smoothing, O-rings, cable glands, and potting compounds all have a place in the waterproofing toolbox.
The goal is not to make every print survive the bottom of the ocean. The goal is to define your water challenge clearly and build for it. Whether you are making a vase, a rainproof sensor box, a hydroponic fitting, or an underwater prototype, the same principle applies: design the leak out before the water finds it.