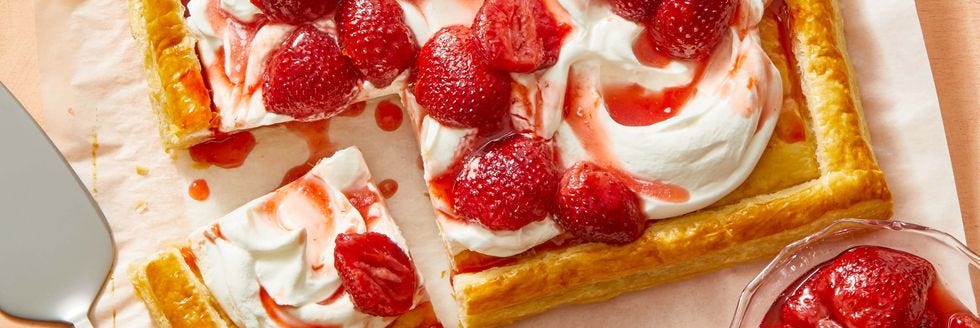
Some desserts walk into the room quietly. A strawberry tart does not. It arrives like it owns the table: glossy red berries, creamy vanilla filling, crisp buttery crust, and just enough elegance to make everyone wonder whether you secretly trained in a French bakery. The good news? You do not need a pastry diploma, a dramatic accent, or a kitchen full of copper pans to make the best strawberry tart at home.
This strawberry tart recipe is built around three classic parts: a crisp sweet tart crust, silky vanilla pastry cream, and fresh strawberries brushed with a simple glaze. Each layer matters. The crust should be tender but sturdy, the pastry cream should be smooth and rich without feeling heavy, and the strawberries should taste like actual sunshine, not refrigerator sadness.
If you have ever searched for how to make strawberry tart and felt intimidated by terms like “blind bake,” “pâte sucrée,” or “crème pâtissière,” relax. We are going to make this approachable, delicious, and slightly less scary than assembling furniture with missing instructions.
Why This Is the Best Strawberry Tart Recipe
The best strawberry tart recipe is not the most complicated one. It is the one that balances flavor, texture, and practicality. A great tart should slice cleanly, hold its shape, and still taste fresh after chilling. This version uses a homemade sweet pastry crust, a classic vanilla pastry cream, and ripe strawberries arranged beautifully on top.
The filling is inspired by traditional French fruit tarts, but the method is friendly for a home baker. The crust can be made ahead, the pastry cream can chill overnight, and the final assembly takes only a few minutes. In other words, this dessert looks like a weekend project but behaves like a reasonable human being.
Ingredients for Homemade Strawberry Tart
For the Sweet Tart Crust
- 1 1/4 cups all-purpose flour
- 1/3 cup powdered sugar
- 1/4 teaspoon fine salt
- 1/2 cup unsalted butter, cold and cubed
- 1 large egg yolk
- 1 to 2 tablespoons cold water, as needed
- 1/2 teaspoon vanilla extract
For the Vanilla Pastry Cream
- 2 cups whole milk
- 1/2 cup granulated sugar, divided
- 4 large egg yolks
- 3 tablespoons cornstarch
- 2 tablespoons unsalted butter
- 2 teaspoons vanilla extract or vanilla bean paste
- Pinch of salt
For the Strawberry Topping
- 1 1/2 to 2 pounds fresh strawberries
- 1/3 cup apricot jam or strawberry jam
- 1 tablespoon water
- Optional: lemon zest, chopped pistachios, mint leaves, or powdered sugar
Equipment You Need
You do not need a bakery setup to make this fresh strawberry tart. A 9-inch tart pan with a removable bottom is ideal because it makes unmolding the tart much easier. You will also need a rolling pin, saucepan, whisk, mixing bowls, plastic wrap, parchment paper, and pie weights or dried beans for blind baking.
If you do not have a tart pan, you can use a shallow pie dish. The tart may look a little more rustic, but rustic is just French for “I meant to do that.”
How To Make Strawberry Tart Step by Step
Step 1: Make the Tart Dough
In a large bowl, whisk together the flour, powdered sugar, and salt. Add the cold cubed butter and work it into the flour with your fingertips or a pastry cutter until the mixture looks like coarse crumbs. You want little bits of butter scattered throughout because they help create a tender crust.
Add the egg yolk and vanilla extract. Mix gently until the dough starts to clump. If it feels too dry, add cold water one teaspoon at a time. The dough should come together when pressed, but it should not feel sticky.
Step 2: Chill the Dough
Shape the dough into a disk, wrap it tightly, and refrigerate for at least 45 minutes. Chilling allows the butter to firm up and the flour to hydrate. Skipping this step is tempting, but so is eating cake for breakfast, and we all know how that story ends.
Step 3: Roll and Fit the Crust
Lightly flour your work surface and roll the chilled dough into a circle about 11 inches wide. Carefully transfer it to the tart pan. Press it into the corners without stretching the dough. Trim away excess dough from the edges.
Prick the bottom with a fork, then freeze the crust for 15 minutes. This helps prevent shrinking during baking.
Step 4: Blind Bake the Tart Shell
Preheat the oven to 375°F. Line the crust with parchment paper and fill it with pie weights, dried beans, or rice. Bake for 15 minutes. Remove the parchment and weights, then bake for another 8 to 12 minutes, or until the shell is golden and dry to the touch.
Let the tart shell cool completely before filling. A warm crust will loosen the pastry cream, and nobody wants a strawberry tart that slides around like it is trying to escape.
Step 5: Make the Vanilla Pastry Cream
In a medium saucepan, warm the milk with half of the sugar over medium heat until it steams. Do not boil it. In a separate bowl, whisk the egg yolks, remaining sugar, cornstarch, and salt until smooth and slightly pale.
Slowly pour about half of the warm milk into the egg mixture while whisking constantly. This step, called tempering, keeps the eggs from scrambling. Pour the mixture back into the saucepan and cook over medium heat, whisking constantly, until it thickens and bubbles.
Once thick, cook for about 30 more seconds to remove any starchy taste. Remove from heat and whisk in the butter and vanilla extract. The pastry cream should be glossy, smooth, and thick enough to hold soft peaks.
Step 6: Chill the Pastry Cream
Transfer the pastry cream to a bowl. Press plastic wrap directly against the surface to prevent a skin from forming. Refrigerate for at least 2 hours, or until fully chilled. Before using, whisk it briefly to loosen the texture.
Step 7: Prepare the Strawberries
Wash the strawberries gently and dry them very well. This is important. Wet berries can make the tart watery, and watery tart is not a dessert; it is a tiny fruit swamp.
Remove the stems and slice the strawberries in halves or thin slices, depending on your preferred design. For a classic bakery look, use strawberry halves arranged in circles from the outside edge toward the center.
Step 8: Assemble the Strawberry Tart
Spoon the chilled pastry cream into the cooled tart shell and spread it evenly with an offset spatula or the back of a spoon. Arrange the strawberries over the top in overlapping circles, rows, or a casual “I am artistic but not trying too hard” pattern.
Warm the jam with water in a small saucepan or microwave until loose. Strain it if needed, then brush it gently over the strawberries. This glaze adds shine, helps preserve the berries, and gives the tart that bakery-window sparkle.
Step 9: Chill, Slice, and Serve
Refrigerate the assembled tart for at least 30 minutes before slicing. Use a sharp knife and wipe it clean between cuts for neat slices. Serve chilled the same day for the freshest flavor and best texture.
Expert Tips for the Perfect Strawberry Tart
Use Cold Butter for the Crust
Cold butter helps the crust stay crisp and tender. If the dough becomes soft while rolling, place it back in the refrigerator for 10 to 15 minutes. Pastry dough is like a dramatic actor; sometimes it just needs a break.
Do Not Overcook the Pastry Cream
Pastry cream needs enough heat to thicken properly, but too much heat can make it lumpy. Whisk constantly and remove it from the stove once it is thick, glossy, and bubbling. If you see small lumps, strain the cream through a fine-mesh sieve while it is still warm.
Dry the Strawberries Completely
Fresh strawberries are the star of this dessert, so treat them well. Wash them gently, pat them dry, and avoid slicing them too early. The drier the berries, the cleaner and fresher your tart will taste.
Add the Glaze Lightly
A thin layer of glaze is enough. The goal is shine, not strawberry armor. Apricot jam is traditional because it adds gloss without overpowering the berries, but strawberry jam also works beautifully.
Best Strawberries for Strawberry Tart
The best strawberries for a homemade strawberry tart are ripe, fragrant, and firm. Look for berries that are bright red from top to bottom with fresh green leaves. Avoid berries with white shoulders, mushy spots, or a dull surface.
Medium strawberries are often easier to arrange than giant ones. Huge berries can look impressive, but they may be hollow or watery inside. Smaller berries usually have stronger flavor and a prettier shape for decorating.
Can You Make Strawberry Tart Ahead of Time?
Yes, but timing matters. You can make the tart shell one day ahead and store it at room temperature in an airtight container. You can also make the pastry cream one day ahead and refrigerate it. For the best result, assemble the tart on the day you plan to serve it.
Once assembled, the tart is best eaten within 6 to 12 hours. It will still taste good the next day, but the crust may soften as it absorbs moisture from the cream and berries.
Strawberry Tart Variations
Chocolate Strawberry Tart
Brush the cooled tart shell with melted dark chocolate before adding the pastry cream. Let the chocolate set first. This creates a thin barrier that helps keep the crust crisp and adds a rich flavor that pairs beautifully with strawberries.
Mascarpone Strawberry Tart
Fold 1/2 cup mascarpone into the chilled pastry cream for a richer, slightly tangy filling. This version tastes luxurious without becoming too sweet.
Lemon Strawberry Tart
Add lemon zest to the pastry cream or sprinkle a little zest over the finished tart. Lemon brightens the flavor and makes the strawberries taste even fresher.
Mini Strawberry Tarts
Use mini tart pans and reduce the baking time. Mini tarts are excellent for parties because they are easy to serve and make guests feel like they each received a tiny edible crown.
Common Strawberry Tart Mistakes to Avoid
The first common mistake is underbaking the crust. A pale tart shell may look delicate, but it can become soggy once filled. Bake until the crust is fully golden and crisp.
The second mistake is filling the tart while the shell is still warm. Heat melts pastry cream and can ruin the structure. Always cool the crust completely.
The third mistake is using wet strawberries. Even a little extra water can thin the filling and soften the crust. Dry those berries like they are entering a dessert beauty pageant.
The fourth mistake is skipping the chill time. Strawberry tart needs time to set so the slices hold together. Thirty minutes in the refrigerator can make the difference between elegant slices and dessert landslide.
How To Store Strawberry Tart
Store strawberry tart in the refrigerator, loosely covered, for up to 2 days. For the best texture, enjoy it the same day it is assembled. Avoid freezing the assembled tart because pastry cream can separate and strawberries can become watery after thawing.
If you need to prepare in advance, freeze only the baked tart shell. Wrap it tightly and freeze for up to 1 month. Thaw at room temperature before filling.
What To Serve With Strawberry Tart
This strawberry tart is lovely on its own, but you can serve it with lightly whipped cream, hot coffee, iced tea, sparkling lemonade, or a scoop of vanilla ice cream. For a brunch table, pair it with quiche, fresh fruit, and something savory so people can pretend they are not eating dessert before noon.
Experience Notes: What I Learned Making the Best Strawberry Tart
Making a strawberry tart at home teaches you one important truth: simple desserts are only simple when every part is treated with respect. The ingredient list looks innocent. Flour, butter, eggs, milk, sugar, strawberries. Nothing wild. No rare spice harvested under a full moon. But the magic comes from technique, patience, and knowing when to stop fussing.
The first lesson is that tart dough rewards calm hands. When I first made a sweet tart crust, I treated the dough like bread dough and worked it with far too much enthusiasm. The result was sturdy enough to patch a sidewalk. Tart dough should be handled gently, just until it comes together. Little streaks of butter are not a problem; they are a promise.
The second lesson is that blind baking is not optional. It may seem like an annoying extra step, especially when the kitchen already smells like butter and your brain is whispering, “Surely this is fine.” But a strawberry tart has a creamy filling that does not go back into the oven. That means the shell must be fully baked before assembly. A crisp shell gives the whole dessert structure and contrast. Without it, the tart tastes good but feels flat.
The third lesson is that pastry cream is less frightening than it sounds. The name crème pâtissière sounds like something guarded by a French chef with strong opinions about spoons, but it is really a stovetop custard thickened with egg yolks and cornstarch. The key is whisking. Whisk while tempering the eggs. Whisk while cooking. Whisk like you are trying to win a tiny arm workout competition. When the cream thickens, it happens quickly, so stay close to the pan.
The fourth lesson is that strawberries decide the final flavor. You can make a perfect crust and flawless pastry cream, but if the berries taste bland, the tart will taste polite instead of exciting. The best strawberry tart recipe depends on ripe berries that smell sweet before you even slice them. If the strawberries are not at their best, a thin jam glaze and a little lemon zest can help, but they cannot perform miracles. This is dessert, not wizardry.
The fifth lesson is that design does not need to be perfect. A strawberry tart looks stunning because strawberries are naturally beautiful. You can arrange them in neat circles, diagonal rows, rose-like spirals, or a relaxed pattern. Once the glaze goes on, everything looks more polished. Even a slightly uneven tart has charm. In fact, a homemade strawberry tart should look homemade in the best way: generous, fresh, and inviting.
One practical experience tip is to assemble the tart close to serving time. The crust and pastry cream can be made ahead, which makes the final process much easier. But once the cream and strawberries meet the crust, the clock starts ticking. The tart is still delicious the next day, but the texture is best within the first several hours.
Another helpful habit is tasting each component separately. Taste the pastry cream after chilling. If it needs brightness, add a little lemon zest. If the strawberries are very tart, use a slightly sweeter glaze. If the crust tastes flat, a tiny pinch of salt next time will help. Baking is science, yes, but finishing a dessert is also about listening to your ingredients. Quietly, of course. You do not need to have a full conversation with the strawberries unless it has been a long week.
In the end, making strawberry tart feels special because it transforms ordinary ingredients into something that looks celebratory. It is perfect for spring gatherings, summer birthdays, Mother’s Day, brunch, dinner parties, or any day when you want dessert to do a little dramatic entrance. And once you make it successfully, you will realize the secret: strawberry tart is not hard. It is just a few simple steps wearing a very fancy hat.
Conclusion
The best strawberry tart recipe combines a crisp buttery crust, smooth vanilla pastry cream, and fresh strawberries with a glossy finish. It is elegant enough for celebrations but realistic enough for a home kitchen. Make the crust and cream ahead, choose ripe berries, assemble with care, and chill before serving. That is how to make strawberry tart that looks bakery-worthy and tastes even better than it looks.