There are few things more humbling than feeling proud of your thriving indoor jungle, only to see tiny flies hovering above the soil like they just paid rand thenbamlittle black specks start drifting around your plants, windows, lamps, and occasionally your face. Congratulations, you may have fungus gnats, the houseplant hobby’s least glamorous welcome committee.
The good news? You do not need to panic, toss your plants, or declare botanical bankruptcy. A simple homemade fly sticky trap can help catch adult gnats, monitor the size of the problem, and reduce how many adults are available to lay eggs in your potting mix. The even better news? You can make one with inexpensive materials you probably already have at home.
This guide explains how to make your own fly sticky trap for houseplants, why yellow traps work so well, where to place them, and what else you should do so the gnats do not treat your fiddle leaf fig like a five-star resort.
What Are the Tiny Flies Around Houseplants?
Most tiny flies hovering around indoor plants are fungus gnats. They are small, dark, mosquito-like insects that are usually seen crawling over the soil surface or flying weakly around pots. Adult fungus gnats are annoying, but the larvae are the real reason gardeners pay attention. The larvae live in damp potting mix and feed on fungi, algae, decaying organic matter, and sometimes tender roots, especially on seedlings or stressed plants.
In mature houseplants, fungus gnats are often more irritating than devastating. Still, a heavy infestation can stress plants, signal that the soil is staying too wet, and make your living room feel less “urban jungle” and more “tiny swamp documentary.”
Why Sticky Traps Work for Houseplant Flies
Sticky traps work because many small flying plant pests are attracted to bright colors, especially yellow. Fungus gnats, whiteflies, winged aphids, and some thrips may land on yellow cards coated with a sticky surface. Once they land, they stay there. It is not glamorous, but it is effective.
A sticky trap does two useful jobs. First, it catches adult flies and reduces the number of insects buzzing around your plants. Second, it helps you monitor whether the problem is getting better or worse. If yesterday’s trap caught three gnats and today’s trap looks like a poppy seed bagel, your soil conditions need attention.
However, sticky traps are not a complete cure by themselves. They mostly catch adults. Fungus gnat larvae live in the potting mix, so long-term control depends on fixing the environment that lets larvae thrive: wet soil, poor drainage, decaying leaves, and constantly damp saucers.
Materials You Need for a DIY Fly Sticky Trap
You can make a homemade sticky trap in several ways. The simplest version uses yellow paper and clear tape. A slightly stickier version uses petroleum jelly or a commercial horticultural sticky coating. For houseplants, choose the neatest option you can manage. Your goal is to trap flies, not glue your cat, curtains, and favorite sweater into one tragic modern art piece.
Basic Supplies
- Bright yellow cardstock, index cards, or plastic folder material
- Scissors
- Wooden skewers, chopsticks, craft sticks, or plant stakes
- Clear packing tape or double-sided tape
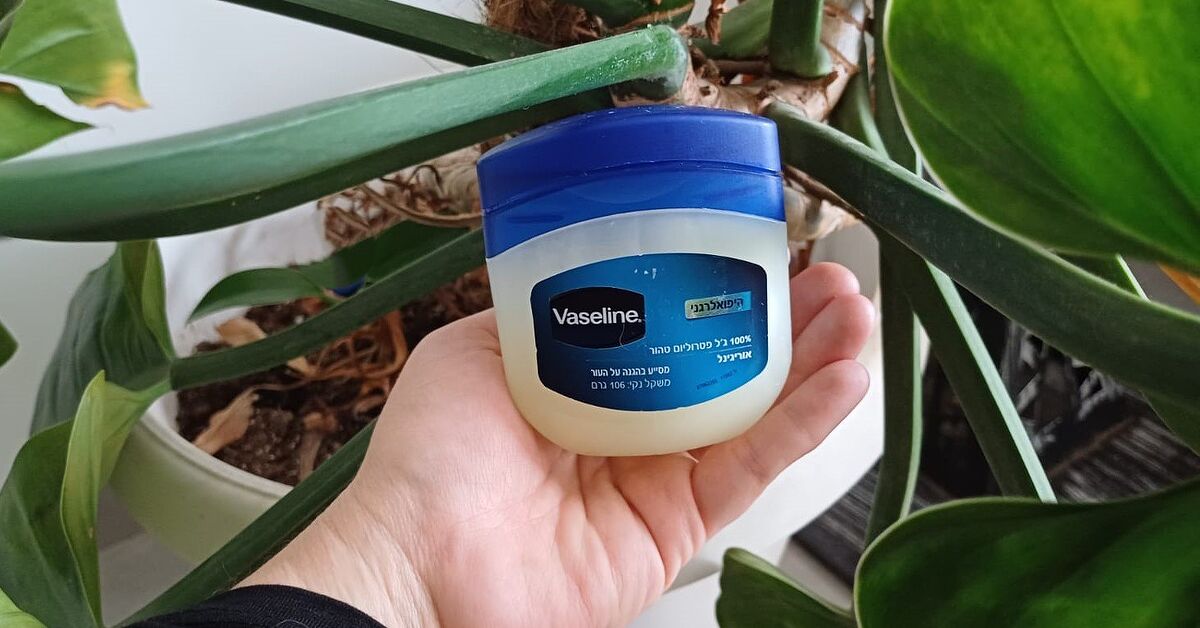
- Petroleum jelly, optional
- Hole punch or tape for attaching the card to the stake
- Marker for labeling dates, optional but helpful
Best Color to Use
Yellow is the classic choice for fungus gnats and whiteflies because it attracts many small flying insects. Blue sticky traps can be useful for thrips, but for the average houseplant owner dealing with tiny flies over wet soil, yellow is the best starting point. If you only have white paper, color it with a yellow marker or wrap it with yellow tape. The brighter the betterthink “school bus,” not “sad beige throw pillow.”
How To Make Your Own Fly Sticky Trap for Houseplants
This homemade version is clean, cheap, and easy to replace. It is perfect for indoor plants because it does not drip, smell, or require complicated ingredients.
Step 1: Cut the Yellow Card
Cut your yellow cardstock or plastic into small rectangles. A good size is about 2 inches by 3 inches for small pots and 3 inches by 5 inches for larger plants. You do not need a giant billboard. Fungus gnats are tiny, and a modest trap placed correctly can catch plenty of adults.
Step 2: Cover Both Sides With Clear Tape
Cover both sides of the card with clear packing tape, sticky side facing out. The easiest method is to place one piece of tape over the front of the card, fold the extra tape around the edges, then repeat on the back. If your tape is not sticky enough on the outside, use double-sided tape instead.
Another option is to cover the card with tape sticky-side-out by making a loop around the card. This works well, but it can be a little fiddly. Be patient. You are making a trap, not launching a satellite.
Step 3: Add Extra Stickiness, If Needed
If you want a stronger trap, lightly coat the taped surface with a thin layer of petroleum jelly. Do not slather it on like frosting. A thin film is enough. Too much can smear, collect dust, or slide down the card in a warm room.
Avoid using runny sugary mixtures near houseplants unless you are prepared for possible ants or mess. Honey, syrup, and sugar water can catch insects, but indoors they can also attract new guests to the party. And ants never RSVP.
Step 4: Attach the Trap to a Stake
Tape the card to a wooden skewer, chopstick, or plant stake. You can also punch a hole near the bottom of the card and thread the stake through it, but tape is usually faster. The sticky part should sit above the soil surface, not buried in the potting mix.
Step 5: Place the Trap Near the Soil
For fungus gnats, place the trap just above the soil surface or along the inside edge of the pot. Adult gnats tend to hang around the potting mix because that is where they lay eggs. If you place the trap too high above the plant, it may catch fewer gnats and more dust.
For whiteflies, place traps near the foliage, especially around the undersides of leaves where whiteflies gather. If you gently disturb the leaves and tiny white insects flutter out, you are likely dealing with whiteflies rather than fungus gnats.
Step 6: Check and Replace the Trap
Check your trap every day for the first week. If it fills up with insects, dust, pet hair, or soil crumbs, replace it. A trap that is completely covered is no longer working well. In most homes, replacing traps every one to two weeks is reasonable, but heavy infestations may require more frequent changes.
Where To Place Sticky Traps for Best Results
Placement matters. A sticky trap on the far side of the room will not do much if the gnats are throwing a festival in your peace lily pot. Put traps where flies are active.
For Fungus Gnats
Place traps at soil level, near the rim of the container. Use one trap for a small to medium pot and two or more for a large planter. If you have a shelf full of plants, place traps in several pots instead of relying on one heroic card to save the entire collection.
For Whiteflies
Place traps near the leaves, not just the soil. Whiteflies usually gather on foliage and flutter when disturbed. Sticky traps help catch adults, but you should also inspect leaf undersides and remove heavily infested leaves when appropriate.
For Monitoring New Plants
Whenever you bring home a new houseplant, place a sticky trap in or near the pot for a week or two. New plants can arrive with hidden pests, and a yellow card can reveal trouble before it spreads to your whole collection. Think of it as a tiny customs checkpoint for bugs.
Sticky Traps Help, But Moist Soil Is the Main Problem
If you are dealing with fungus gnats, the trap is only part of the solution. Fungus gnats love consistently moist, organic potting media. If the top layer of soil never dries, larvae have a comfortable place to feed and grow. The trap catches adults, but the potting mix keeps producing more.
The most important step is to adjust watering. Let the top inch or two of potting mix dry before watering again, depending on the plant’s needs. Succulents, snake plants, ZZ plants, and many cacti prefer drying out more thoroughly. Tropical plants may like even moisture, but “evenly moist” does not mean “permanently soggy.” There is a difference between a spa day and a flooded basement.
Also empty saucers after watering. Standing water under pots can keep the root zone wet and create a cozy breeding site. Make sure containers have drainage holes, and avoid decorative cachepots that secretly hold water around the nursery pot.
How To Break the Fungus Gnat Life Cycle
To control fungus gnats, think in stages: adults, eggs, larvae, and pupae. Sticky traps target the adults. Drying the soil surface and improving sanitation target the immature stages.
Let the Soil Surface Dry
Because larvae live near the moist upper layer of potting mix, drying the top layer makes the environment less inviting. Do not dry plants beyond what they can tolerate, but avoid watering on autopilot. Check the potting mix with your finger or a moisture meter before adding water.
Remove Dead Leaves and Debris
Dead leaves sitting on the soil are basically fungus gnat snacks. Remove fallen foliage, spent flowers, and mushy plant material from pots. This also helps prevent fungal growth and keeps your plants looking cleaner.
Improve Drainage
If water sits in the pot for too long, the potting mix may be too dense, the drainage hole may be blocked, or the plant may be in a container that is too large. Repotting into a better-draining mix can help, especially if the soil smells sour or stays wet for many days.
Use a Larval Control When Needed
For stubborn infestations, many gardeners use biological controls labeled for fungus gnat larvae, such as products containing Bacillus thuringiensis israelensis, often called Bti, or beneficial nematodes. Always follow the product label. Sticky traps and better watering habits often reduce mild problems, but serious infestations may need a soil-focused treatment.
Common Mistakes When Making DIY Sticky Traps
A homemade trap is simple, but a few mistakes can make it less effective or much messier than necessary.
Using the Wrong Color
Clear or dark traps may catch insects by accident, but yellow works better for many houseplant flies. If you are making a trap, make it bright yellow. The flies are not judging your interior design.
Placing the Trap Too Far Away
Sticky traps should be close to where the insects are active. Fungus gnats usually stay near the soil. Whiteflies stay near leaves. Put the trap in the bug traffic zone.
Forgetting To Replace Old Traps
Old traps lose stickiness and become covered with dust. If the card looks like it has been through a lint storm, replace it.
Relying Only on the Trap
If you keep overwatering, the gnats will keep coming. A sticky trap without soil management is like mopping the floor while the sink is still overflowing. Helpful? A little. Complete solution? Not quite.
How Many Sticky Traps Do You Need?
For one small plant, one small trap is usually enough. For a large planter, use two traps placed on opposite sides of the pot. For a plant shelf, place traps in the pots where you see the most activity, then add a few more around the group to monitor movement.
If you have a heavy infestation, do not be surprised if the first traps fill quickly. That does not mean the traps failed. It means they are doing their job and your plants have been hosting more tiny tenants than you realized.
DIY Sticky Trap Variations
Once you understand the basic idea, you can customize your trap to fit your plant setup.
The Clean Tape Trap
This is the best beginner option. Use yellow cardstock and double-sided tape. It is tidy, cheap, and easy to replace. It may not be as sticky as commercial traps, but it works well enough for light to moderate gnat problems.
The Reusable Plastic Trap
Cut yellow plastic from a folder, plant label, or old container lid. Coat it with a thin layer of petroleum jelly. When it becomes dirty, wipe it clean with a paper towel and reapply. This version is more durable than paper.
The Hanging Trap
For trailing plants, hanging baskets, or shelves, punch a hole in a yellow card and hang it with string near the foliage or soil line. Make sure it does not touch leaves, curtains, or walls.
How To Know Your Sticky Trap Is Working
A working trap will show fewer new insects over time. During the first few days, you may catch many adults. After you reduce watering, clean up plant debris, and replace traps regularly, the number should drop. If trap counts stay high for two or three weeks, inspect your whole plant area. The source may be one very wet pot, a forgotten propagation jar, a drain, a bag of damp potting mix, or a saucer full of old water.
Use the traps like a detective tool. The pot with the most gnats on the trap is usually closest to the breeding site. That plant should be your first suspect. Question it firmly, but respectfully.
Safety Tips for Indoor Sticky Traps
Keep sticky traps away from children, pets, and curious hands. They are not usually dangerous, but they are annoying to remove from fur, fingers, and fabric. Do not place sticky surfaces directly against plant leaves, because the adhesive can damage foliage. Also avoid using messy oils or strong adhesives that can drip into the soil or onto furniture.
If you use any commercial sticky coating, read the label carefully and use it only as directed. For most houseplant owners, tape or petroleum jelly is enough for a simple DIY trap.
Real-Life Experience: What Actually Works With Houseplant Fly Sticky Traps
In real houseplant life, fungus gnat control is rarely one dramatic battle. It is more like a quiet, slightly ridiculous routine: check the soil, move the trap, replace the card, promise yourself not to overwater, then accidentally overwater one calathea because it looked at you sadly. The key is consistency.
One practical experience is that the first sticky trap can be emotionally shocking. You might place a clean yellow card in a pothos pot at night and wake up to find it dotted with tiny black flies. This is gross, yes, but also useful. Before the trap, you were guessing. After the trap, you have evidence. It shows which plant is the main source and whether the infestation is light, moderate, or “we need to talk.”
Another useful lesson: the wettest plant is often the problem plant. In many homes, fungus gnats show up around plants that sit in decorative pots without drainage, plants watered on a strict weekly schedule, or plants in dense potting mix that stays damp too long. A homemade sticky trap catches the adults, but the real progress begins when watering changes. Once the top layer of soil dries between waterings, the number of new gnats often drops noticeably.
DIY traps also work best when they are small and numerous rather than huge and lonely. A giant sticky card in the middle of a plant shelf may catch some insects, but small traps placed directly in problem pots usually perform better. Fungus gnats are weak fliers. They do not always travel far to find a trap, so put the trap where they already are.
The cleanest homemade design is yellow plastic with double-sided tape. Paper works, but it can bend, absorb moisture, and look tired quickly. Yellow plastic holds its shape and can be trimmed into neat little flags. If you care about how your plant shelf looks, make several matching traps and cut them evenly. Pest control does not have to look like a craft project that lost a fight.
Replacing traps matters more than people think. A trap covered in dust and old insects becomes less sticky. It can also make your plant area look neglected, even if your plants are healthy. Labeling the back of the trap with the date is surprisingly helpful. If a trap is only catching one or two gnats after a week, you are likely improving. If it fills again in two days, keep investigating.
One final experience-based tip: quarantine new plants. Many fungus gnat outbreaks begin with a cheerful new plant from a nursery, grocery store, or online order. Place new arrivals away from your main collection for a week or two and add a sticky trap right away. If the trap stays clean, great. If it catches gnats, you can treat one plant instead of your entire indoor jungle. That tiny yellow card becomes the cheapest security guard in the plant world.
Conclusion
Making your own fly sticky trap for houseplants is one of the easiest ways to reduce and monitor tiny flying pests indoors. With yellow cardstock or plastic, tape, a stake, and a little patience, you can create a simple trap that catches adult fungus gnats and helps you identify problem pots. But remember: the sticky trap is the helper, not the whole hero. To truly solve fungus gnats, you need to manage moisture, remove decaying debris, improve drainage, and keep an eye on new plants before they join your collection.
A homemade yellow sticky trap will not turn you into a full-time pest control scientist, but it will make you a much smarter houseplant owner. And honestly, anything that protects your plants while costing almost nothing deserves a tiny round of applausepreferably not from the gnats.
Note: This guide is based on established houseplant pest management practices from university extension and integrated pest management resources. Sticky traps are best used as part of a broader care routine that includes proper watering, sanitation, and drainage.