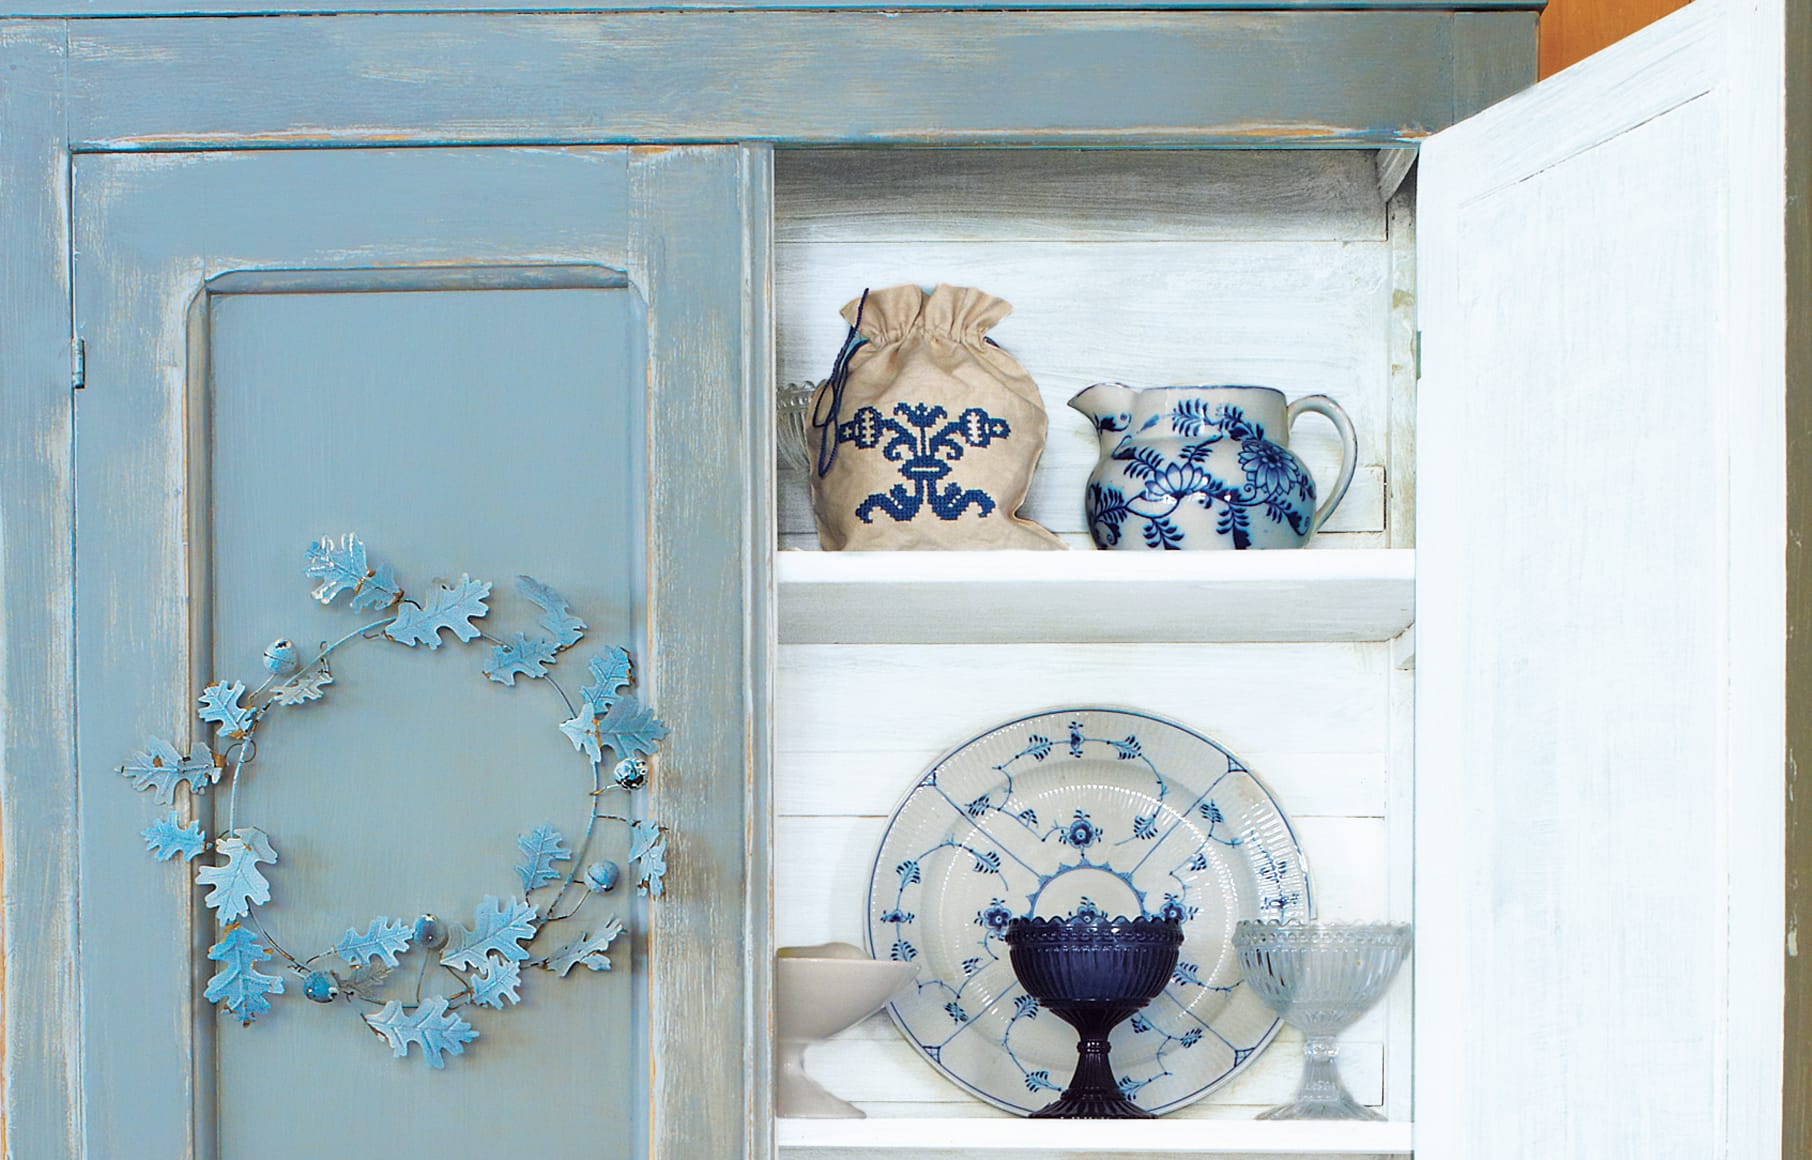
Some furniture walks into a room wearing brand-new paint and whispers, “I came from a flat-pack box.” Faux-aged furniture, on the other hand, strolls in like it has stories, secrets, and possibly a dramatic family history involving a farmhouse, a parlor, and one very stern grandmother. The good news? You do not need to wait 80 years, inherit an antique dresser, or let your coffee table survive three generations of toddlers to get that charming, timeworn look.
Learning how to faux-age painted wood furniture in your home is really about controlled imperfection. You are creating the appearance of natural wear: softened edges, rubbed corners, layered color, darker creases, and a finish that feels collected rather than freshly unboxed. With paint, wax, glaze, sandpaper, and a bit of restraint, you can turn a plain painted piece into something that looks like it came from a curated vintage shop instead of the “maybe I’ll fix this someday” corner of the garage.
This guide walks you through the full process, from choosing the right furniture to distressing, glazing, sealing, and styling your finished piece. We will keep things practical, beginner-friendly, and just a little playfulbecause if your side table is allowed to have character, so are we.
What Does Faux-Aging Painted Wood Furniture Mean?
Faux-aging is a decorative finishing technique that makes newer or freshly painted wood furniture look older than it really is. Instead of leaving the paint perfectly smooth and uniform, you add signs of age on purpose. These may include rubbed edges, exposed underlayers, muted color, darkened details, small scuffs, and a soft patina.
The goal is not to make furniture look damaged. That is an important difference. Good faux-aging looks believable because the wear appears in places where real furniture naturally gets touched, bumped, lifted, opened, and admired by people pretending not to notice the price tag.
Common Faux-Aged Furniture Styles
Faux-aging works with many design styles. A white dresser with sanded edges can lean farmhouse. A black console with brown glaze in the corners feels old-world and moody. A blue nightstand with a pale undercoat showing through can look cottage-inspired. A softly chipped green cabinet may bring vintage garden-room charm.
The best style depends on your home. A heavily distressed cabinet may look amazing in a rustic kitchen but chaotic in a sleek modern living room. A lightly aged finish, however, can blend almost anywhere because it adds warmth without shouting, “I own seven galvanized buckets.”
Before You Begin: Safety and Surface Checks
Before you start sanding, scraping, or distressing anything, inspect the furniture carefully. If the piece is very old or you suspect it may have been painted before 1978, do not sand it until you know whether lead-based paint is present. Lead dust can be hazardous, especially for children and pregnant people, so old painted furniture should be tested or handled by a qualified professional when there is any doubt.
For modern furniture or pieces you have painted yourself with current paint, normal DIY precautions still matter. Work in a well-ventilated space, wear a dust mask or respirator when sanding, protect your eyes, and keep pets away unless you want tiny paw prints permanently sealed into your “antique” finish. Charming? Maybe. Intentional? Hard to explain.
Best Furniture Pieces for Faux-Aging
Solid wood furniture is ideal because it can handle sanding and distressing better than thin veneer or laminate. Dressers, nightstands, dining chairs, coffee tables, hutches, benches, and cabinets are all excellent candidates. Painted wood furniture with raised details, turned legs, carved trim, paneled doors, or decorative edges gives you more places to highlight age.
Flat, featureless furniture can still be faux-aged, but it requires a lighter touch. Too much distressing on a plain surface can look random rather than naturally worn. When in doubt, focus on edges, corners, legs, knobs, drawer fronts, and high-touch areas.
Tools and Materials You Will Need
You do not need a professional workshop to faux-age painted wood furniture at home. A small supply list can take you surprisingly far. Gather these basics before you begin:
- Drop cloth or plastic sheeting
- Mild soap, degreaser, or furniture cleaner
- Lint-free cloths
- Sanding sponge or sandpaper in medium and fine grits
- Paintbrushes in different sizes
- Chalk paint, milk paint, acrylic furniture paint, or latex paint
- Primer, if needed
- Clear wax, dark wax, antiquing glaze, or tinted glaze
- Protective topcoat, such as furniture wax, water-based polyurethane, or polycrylic
- Small artist brush for crevices and details
- Optional: candle wax, petroleum jelly, scraper, wire brush, or damp rag
Chalk-style paints are popular for faux-aged furniture because they dry to a matte finish and are easy to distress. Milk paint can create a naturally chippy look, especially when used with bonding agents or resist techniques. Latex and acrylic furniture paints can also work well, though they may require more prep and sanding depending on the existing surface.
Step 1: Clean the Furniture Thoroughly
The most glamorous step in faux-aging is not sanding, glazing, or dramatically wiping back dark wax while nodding like a furniture wizard. It is cleaning. Dirt, grease, furniture polish, hand oils, and kitchen mystery film can prevent paint from sticking properly.
Wipe the entire piece with a mild cleaner or degreaser. Pay special attention to drawer pulls, cabinet edges, tabletops, chair backs, and any area that hands touch often. After cleaning, wipe again with a damp cloth and let the furniture dry completely.
Do not rush this part. Paint over grime and you are not creating patinayou are preserving yesterday’s fingerprints under a decorative finish. That is not vintage. That is evidence.
Step 2: Sand or Scuff the Surface
Sanding helps new paint grip the existing surface. You usually do not need to remove all the old finish. In fact, leaving some of the original surface can add depth when you distress later. Use medium-grit sandpaper or a sanding sponge to dull glossy areas, smooth rough patches, and lightly scuff the entire piece.
For furniture with curves or details, use a flexible sanding sponge. For flat tops, sand with the grain of the wood. After sanding, remove dust with a tack cloth, vacuum brush attachment, or slightly damp cloth. Dust left behind can create a gritty finish, and not in a cool “historic texture” way. More like “I painted on top of toast crumbs.”
When Should You Use Primer?
Primer is helpful if the furniture is glossy, stained, laminate, dark-colored, or prone to bleed-through. It is also useful when you want a durable finish on high-use furniture such as tables, chairs, and cabinets. If you are using chalk-style paint on a low-use decorative piece, you may be able to skip primer, but only if the paint manufacturer recommends it and the surface is clean and sound.
If the piece has knots, reddish wood, or old stain that may seep through, use a stain-blocking primer. Nothing ruins a creamy white faux-aged finish faster than mysterious orange blotches rising from below like a haunted tree.
Step 3: Choose Your Paint Colors
Color choice determines the mood of your faux-aged furniture. For a classic aged look, choose a base color and a top color. The base color is what peeks through when you distress the top layer.
For example, a charcoal base under soft white creates dramatic contrast. A warm brown base under sage green feels earthy and old. A cream base under dusty blue looks cottage-friendly and subtle. If you want the furniture to look naturally worn, use colors that could plausibly belong together. Neon orange under mint green may be memorable, but so is a raccoon in a wedding dress.
Easy Color Combinations for Faux-Aged Wood Furniture
- Warm brown under antique white for farmhouse charm
- Gray under black for a moody vintage finish
- Cream under blue for cottage-style softness
- Deep green under ivory for garden-room character
- Black under terracotta for a rustic European look
- Natural wood under any matte paint for simple worn edges
Step 4: Apply the Base Coat
If you want layered distressing, apply your base coat first. This may be a paint color, stain, or simply the original wood tone. Let the base coat dry completely according to the product instructions. If the surface feels rough after drying, lightly sand it with fine-grit sandpaper and wipe away dust.
For a more authentic look, avoid perfectly thick, plastic-looking paint. Older furniture often has subtle brush marks, variations, and softened surfaces. That does not mean sloppy. It means relaxed. Think “historic inn,” not “painted during a power outage.”
Step 5: Add a Resist Layer for Natural Wear
A resist layer keeps the top coat from bonding fully in selected areas, making it easier to distress later. This is especially useful if you want chips or rubbed spots instead of uniform sanding.
Rub candle wax, clear furniture wax, or a tiny amount of petroleum jelly on edges, corners, drawer rims, raised trim, and other high-wear zones. Use a light hand. If you apply resist everywhere, the top coat may peel like a bad sunburn. Focus only on areas where real furniture would naturally lose paint over time.
Step 6: Apply the Top Coat
Now apply your main paint color. Use long, even strokes on flat surfaces and smaller brushes for corners and trim. Let the first coat dry, then decide whether you need a second coat. For a soft aged finish, complete coverage is not always necessary. Slight variation can help the piece look more natural.
If you want a refined finish, lightly sand between coats with fine-grit sandpaper. If you want a more rustic finish, allow some brush texture to remain. The choice depends on whether you want “elegant antique shop” or “rescued from a charming barn that probably has excellent pie nearby.”
Step 7: Distress the Painted Finish
This is where the magic happensand also where many DIY projects go from “tastefully aged” to “attacked by a raccoon with a grudge.” Start slowly. You can always remove more paint, but putting it back requires touch-ups.
Use sandpaper or a sanding sponge to gently rub edges, corners, raised details, legs, drawer fronts, and areas around handles. The goal is to reveal the base color or wood underneath. Work in small sections and step back often.
Where to Distress for a Realistic Look
- Front corners of drawers
- Edges of tabletops
- Chair arms and chair backs
- Cabinet door frames
- Raised molding and carved details
- Feet, legs, and lower rails
- Around knobs, pulls, and latches
Avoid distressing the center of large flat panels unless you have a reason. Natural wear usually happens where people touch or where furniture bumps into daily life. Random sanding marks in the middle of a drawer can look less like age and more like your furniture lost a fight with a belt sander.
Step 8: Use Glaze or Dark Wax for Antique Depth
Distressing reveals wear. Glaze and dark wax create age. These products settle into crevices, corners, brush marks, carved details, and recessed areas, giving the furniture a soft shadowed effect. This is what makes a painted piece look less flat and more collected over time.
Apply glaze or dark wax in small sections. Brush it into corners and details, then wipe back the excess with a lint-free cloth. Leave more product in grooves and less on raised surfaces. If the effect looks too dark, use clear wax or a damp cloth, depending on the product, to soften and blend it.
For beginners, antiquing glaze can feel easier to control than dark wax because it often has a longer working time. Dark wax can be beautiful, but it is powerful. Treat it like hot sauce: start with a little, then add more only if the furniture asks politely.
How to Avoid a Dirty-Looking Finish
The difference between antique and grimy is blending. Concentrate darker color in joints, corners, and details, then wipe broad surfaces clean. If a tabletop looks muddy, remove more glaze from the center and leave shadowing only around the edges and seams.
Another useful trick is to apply clear wax before dark wax. The clear layer gives you more control and helps prevent the dark wax from staining the paint too heavily. This is especially helpful on white, cream, pale gray, and pastel furniture.
Step 9: Add Subtle Imperfections
If you want a more rustic finish, you can add small dents, scratches, or texture before or after painting. Use a chain, screwdriver, wire brush, or the edge of a scraper very carefully. The keyword is carefully. You are suggesting decades of use, not staging a furniture crime scene.
Tap lightly on edges, brush along the grain, or create tiny nicks around corners. Then soften the marks with sandpaper and glaze. Imperfections look more authentic when they vary in size and placement. Perfectly spaced scratches look manufactured, and not in the good way.
Step 10: Seal the Finish
Once you like the aged effect, protect it. Painted furniture needs a topcoat, especially if it will be touched often. Use clear furniture wax for a soft matte finish, or choose a water-based polyurethane or polycrylic for greater durability.
Wax works beautifully on chalky and vintage-style finishes, but it may need occasional maintenance. Water-based topcoats are better for tabletops, kitchen pieces, desks, and furniture used by children, pets, or anyone who believes coasters are decorative myths.
Apply the sealer in thin, even coats. Let each coat dry as directed. Avoid heavy application because it can create streaks, cloudiness, or a plastic look that fights the aged effect. Matte and satin sheens usually look more natural than glossy finishes.
Common Mistakes When Faux-Aging Painted Furniture
Over-Distressing Every Edge
Real furniture ages unevenly. If every edge is sanded with the same pressure, the finish can look fake. Vary the distressing. Some corners should be more worn, while others should barely show age.
Using Too Much Dark Wax or Glaze
A little shadow adds charm. Too much turns your dresser into something that looks like it has been stored in a chimney. Apply in small sections and wipe back thoroughly.
Skipping Prep
Paint needs a clean, stable surface. If you skip cleaning and scuff sanding, the finish may chip in places you did not plan. Intentional chips are cute. Accidental peeling around a coffee mug ring is less poetic.
Ignoring the Furniture’s Shape
Let the piece guide the finish. Ornate furniture can handle more glaze in the details. Simple modern furniture often looks better with light edge distressing and a subtle wash of color.
Room-by-Room Ideas for Faux-Aged Furniture
In the living room, try a faux-aged coffee table with a dark base and creamy top coat. Distress the corners and seal it well so it can survive books, remotes, snacks, and the occasional dramatic cup of tea.
In the bedroom, a painted nightstand looks beautiful with soft distressing around the drawer and legs. Add antique brass hardware for extra warmth. In the entryway, a narrow console table with black paint and brown glaze can make the space feel collected and welcoming.
For kitchens and dining rooms, use faux-aging sparingly. A distressed hutch, bench, or sideboard can add charm, but heavily chipped dining chairs may feel uncomfortable or unfinished. Always seal kitchen-adjacent pieces well because grease, moisture, and fingerprints are enthusiastic decorators.
How To Style Faux-Aged Painted Wood Furniture
Once your piece is finished, style it with balance. Faux-aged furniture already has visual texture, so pair it with smoother items. A distressed dresser looks lovely with a clean mirror, linen runner, ceramic lamp, or simple greenery. A rustic cabinet can be balanced with modern art or sleek hardware.
Avoid making every item in the room distressed. When everything looks aged, nothing feels special. One faux-aged focal piece can add personality. Six faux-aged pieces in one room can make your home look like it is auditioning for a historical reenactment.
Personal Experience: What Faux-Aging Furniture Teaches You
The first time you faux-age painted wood furniture, you may feel nervous. That is normal. There is something deeply strange about spending hours painting a piece beautifully and then immediately sanding parts of it off. Your brain says, “We just fixed this.” Your creative side says, “Yes, now ruin it tastefully.”
One of the biggest lessons is that restraint matters more than force. Beginners often sand too aggressively because they want visible results right away. But the most convincing faux-aged finishes usually happen gradually. You sand a corner, step back, soften an edge, wipe on glaze, wipe most of it off, and then suddenly the piece starts to look like it has a past. It is less like painting a wall and more like editing a story.
Another useful experience is learning how different paints behave. Chalk-style paint often sands easily and gives a powdery, soft edge. Latex paint can stretch or peel if it has not cured long enough. Milk paint may chip unpredictably, which is either delightful or mildly alarming depending on your personality. Testing on the back of a drawer or a scrap board saves a lot of emotional negotiation later.
Hardware also makes a bigger difference than people expect. A dresser can be beautifully aged, but if you put shiny modern knobs back on it, the illusion weakens. Swapping in aged brass, black iron, ceramic, glass, or wooden knobs can make the whole project feel intentional. Sometimes the hardware is the tiny hat that completes the furniture outfit.
Lighting matters too. A piece that looks subtle in a dim garage may look much darker in a sunny dining room. Glaze can appear heavier under natural light, and distressing may stand out more once the furniture is placed against a wall. This is why it helps to move the piece into its future room before making final adjustments, if possible.
There is also a practical rhythm to the work. Clean one day. Paint another day. Distress when you are patient. Seal when you are not rushing. Faux-aging rewards people who give finishes time to dry and cure. Many problems happen because someone touches, sands, waxes, or topcoats too soon. Furniture paint may feel dry to the touch long before it has hardened fully, so patience is not just a virtue; it is a protective coating.
Finally, faux-aging teaches you that imperfection can be beautiful when it has intention. A tiny scratch becomes character. A darkened groove adds depth. A rubbed corner makes a piece feel used, loved, and settled. In a home full of mass-produced surfaces, a faux-aged cabinet or table brings a human touch. It says someone made a choice, used their hands, and probably got paint on at least one sleeve. That is part of the charm.
The best advice from experience is simple: start with a small piece. A thrifted stool, side table, or old nightstand is perfect. Practice distressing, glazing, and sealing before tackling your dining table or grandmother’s heirloom cabinet. Once you understand the process, you can create finishes that look warm, layered, and personalnot fake, not forced, and definitely not like a craft project that panicked halfway through.
Conclusion
Faux-aging painted wood furniture is one of the most satisfying ways to give your home character without spending antique-store money. The process is simple in theory: clean, sand, paint, distress, glaze, and seal. The artistry comes from knowing where to place wear, how much color to remove, and when to stop before “beautifully aged” becomes “what happened here?”
Whether you want a farmhouse dresser, a cottage-style nightstand, a rustic console, or a vintage-inspired cabinet, the key is believable imperfection. Focus on natural touch points, layer colors thoughtfully, use glaze or wax with restraint, and protect your work with the right topcoat. Done well, faux-aged furniture brings warmth, texture, and personality into your home. It may not actually be 100 years old, but it can still look like it has lived a very interesting life.
Note: This article is written for general DIY guidance. Always follow the safety directions and drying times listed on your specific paint, wax, glaze, primer, and topcoat products.