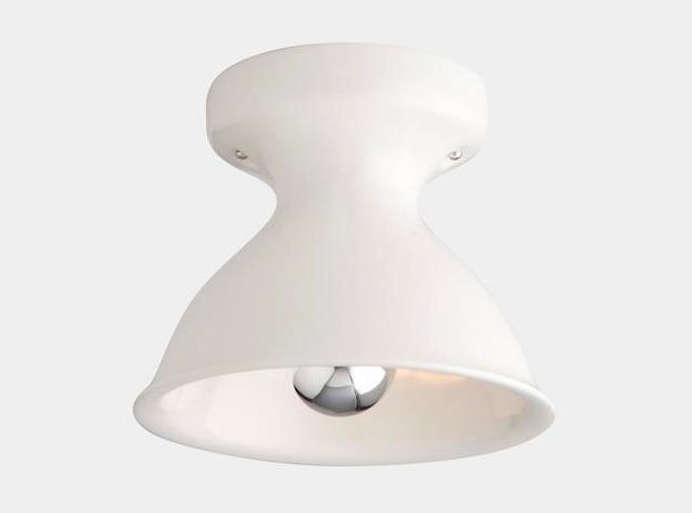
Some home upgrades are dramatic. A kitchen remodel? Sure. A wall knocked down? Absolutely. But a simple ceiling light? That’s the sneaky overachiever of home design. It can make a hallway feel intentional, a bedroom feel calmer, and a kitchen look less “temporary rental with trust issues.”
In this guide, we’re doing a true high/low ceiling light breakdown: when to save, when to spend, how to choose the right flush mount ceiling light or semi-flush ceiling light, and how to avoid the classic mistake of buying a pretty fixture that lights your room like a candle in a cave.
The goal is simple: help you choose a ceiling light that looks good, works hard, and doesn’t make your electrician sigh heavily.
What “High/Low” Means for a Simple Ceiling Light
“High/Low” doesn’t just mean expensive vs. cheap. It means choosing where your money matters most. A low-cost fixture can look fantastic if the proportions are right, the finish is clean, and the light output suits the room. A premium fixture earns its price when it offers better materials, better diffusion, longer-lasting integrated LEDs, more refined dimming performance, or truly standout design.
Low Option (Budget-Friendly)
- Great for rentals, secondary rooms, hallways, closets, laundry rooms, and quick updates.
- Often made with thinner metal, simpler glass/acrylic shades, and more limited finish options.
- Can still look polished if you choose a clean shape (drum, dome, disk, cylinder).
High Option (Investment Piece)
- Best for entryways, dining nooks, primary bedrooms, and visible “design moment” rooms.
- Often uses better materials: solid brass accents, thicker glass, fabric diffusers, higher-CRI LEDs, or artisan finishes.
- Usually offers better light quality, smoother dimming, and stronger visual impact.
In other words: save in the hallway, splurge where people actually notice. Your wallet and your guests can both be happy.
Start Here: Flush Mount vs. Semi-Flush Mount
Most “simple ceiling light” conversations come down to two categories: flush mount and semi-flush mount. They sound similar because they are cousins. One hugs the ceiling. The other hangs down a bit and gets more decorative.
Flush Mount Ceiling Lights
A flush mount ceiling light sits directly against the ceiling. It’s ideal when headroom is limited or when you want a clean, low-profile look. This is the go-to for hallways, closets, bathrooms, and many bedrooms.
Semi-Flush Ceiling Lights
A semi-flush ceiling light hangs a few inches below the ceiling, often on a short stem or frame. This creates a little breathing room around the fixture, which can improve light spread and add visual detail. It’s a popular upgrade for dining areas, breakfast nooks, and rooms where the ceiling height gives you a bit more flexibility.
Ceiling Height Rules of Thumb
For many homes, flush mounts work best on ceilings around 8 feet or lower, while semi-flush fixtures often feel more balanced on 9- to 10-foot ceilings. If your ceilings are higher than that, pendants or chandeliers may become stronger choices. That said, simple flush fixtures can still look excellent on taller ceilings when you want a minimalist aesthetic.
How to Choose the Right Size (So It Doesn’t Look Tiny or Gigantic)
Sizing is where many otherwise beautiful lighting plans go off the rails. A fixture that’s too small looks like an afterthought. Too large, and it dominates the room like a UFO.
Use Room Size as a Starting Point
A practical guideline for flush mounts: in rooms up to about 100 square feet, look at fixtures roughly 12 to 24 inches in diameter. For larger rooms, go wider than 24 inches. This isn’t a law of physicsit’s a strong starting point.
Match Fixture Style to Visual Weight
A 16-inch clear-glass fixture can feel visually lighter than a 16-inch solid metal drum. That means two fixtures with the same diameter can look completely different in the same room. If your ceiling is low, lean toward visually lighter forms: opal glass, thin metal trim, shallow profiles, and open-bottom designs.
Quick Sizing Examples
- Narrow hallway: slim flush mount or small disk light (functional, low profile).
- Small bedroom: medium flush mount with diffuser for soft general light.
- Dining nook: simple semi-flush with a short drop and wider shade for better presence.
- Laundry room: bright, easy-clean flush fixture with good lumen output.
Light Quality Matters More Than Most People Think
Here’s the truth: a gorgeous ceiling light with bad bulbs still gives you bad light. The fixture is the outfit. The bulb (or integrated LED quality) is the personality.
Lumens: Buy Brightness, Not Watts
When choosing a bulb or integrated fixture, think in lumens (brightness), not watts (energy use). LEDs can deliver the brightness you want while using far less energy than old incandescent bulbs. If you’ve ever stared at a package thinking, “But how bright is 9 watts?”you are not alone. Lumens answer that question.
Color Temperature (Kelvin): Set the Mood on Purpose
Color temperature affects how a room feels. Lower Kelvin values look warmer and more yellow; higher Kelvin values look cooler and whiter. For many homes, warm-to-neutral light works best for everyday living, while cooler light can help in task-heavy spaces.
- 2700K–3000K: warm, cozy, flattering for bedrooms, living rooms, hallways.
- 3000K–3500K: balanced and versatile for kitchens, entryways, multipurpose spaces.
- 4000K+: brighter/cooler feel for utility rooms, garages, and task-focused areas.
CRI: The “Why Does This Paint Color Look Weird?” Factor
CRI (Color Rendering Index) measures how accurately light reveals color. In practical terms, higher CRI helps your wood floors, wall paint, and food look more like themselves and less like a plot twist. For residential spaces, 80+ CRI is a solid baseline, and many higher-end fixtures or bulbs go beyond that.
Where to Spend vs. Where to Save
Spend More On…
- Primary visual zones: entryways, dining areas, primary bedrooms.
- Integrated LED fixtures: quality varies a lot; premium models often have better diffusion and dimming.
- Finishes you touch or see up close: brushed brass, matte black, aged bronze, hand-finished metal.
- Special environments: bathrooms, porches, or humid areas requiring the right location rating.
Save On…
- Utility spaces: closets, laundry rooms, garages (beauty is nice, but brightness wins).
- Repeat fixtures: long hallways or multi-room installs where consistency matters more than statement design.
- Simple forms: a clean white disk or frosted-glass flush mount can look surprisingly upscale.
The Sweet Spot Strategy
A smart high/low approach for a whole home is to choose one “hero” finish (say, warm brass or matte black) and repeat it across budget and premium fixtures. That creates visual cohesion even if your price points vary room to room.
Safety, Dimmers, and “Please Read the Label” Details
Check Dry, Damp, or Wet Location Ratings
Not every ceiling light belongs everywhere. Fixtures are marked for dry, damp, or wet locations. Bathrooms, covered porches, and outdoor ceilings may require damp- or wet-rated fixtures depending on exposure. If the fixture label and the location don’t match, don’t improviseswap the fixture.
Dimming Compatibility Is Real (and Sometimes Annoying)
If you want a dimmable ceiling light, make sure all three pieces play nicely together: the fixture/driver, the bulb (if replaceable), and the dimmer switch. LED dimming is much better than it used to be, but compatibility still matters. A mismatch can cause flicker, buzzing, or a dimming range that goes from “bright” to “slightly less bright.”
Pro tip: choose a dimmer from a major lighting controls brand and use their compatibility tools before buying a large batch of bulbs. It’s not glamorous, but neither is reinstalling six bulbs while muttering in your socks.
Lighting Facts Labels Help You Compare Fast
For bulbs, the Lighting Facts label is your shortcut. It typically includes brightness (lumens), energy cost, lifespan, light appearance (color temperature), and wattage. That makes side-by-side comparison much easier, especially when shopping online and in-store at the same time.
Simple Ceiling Light Styles That Always Work
1) The Frosted Glass Dome
The classic. Easy to clean, easy to live with, and available at almost every budget level. To avoid “builder basic” vibes, look for refined details: a thinner rim, better finish, or a slightly sculptural silhouette.
2) The Drum Flush Mount
Great for bedrooms and hallways. Fabric or metal drum shades can look more intentional than a plain dome. In a high version, you may get better diffuser quality and a more tailored finish. In a low version, you still get strong visual simplicity.
3) The Modern LED Disk Light
Clean, slim, and practicalespecially for low ceilings and utility spaces. These are excellent “low” choices when you prioritize brightness, low maintenance, and a minimal profile. Some now include selectable color temperature (CCT), which can be helpful during renovations.
4) The Small Semi-Flush Statement
Think opal glass globe, short stem, and simple metal canopy. This is the sweet spot for a “high/low” comparison: budget versions can look very good, while premium versions add richer finishes, thicker glass, and better proportions.
Common Mistakes to Avoid
- Buying only by looks: Always check lumens, color temperature, and location rating.
- Ignoring ceiling height: A pretty semi-flush in a low hallway can become a forehead hazard.
- Mixing color temperatures in one sightline: Warm hallway + icy blue bedroom = visual whiplash.
- Forgetting dimmer compatibility: The flicker is not a “quirk”; it’s a mismatch.
- Going too small: Tiny fixtures can make a room feel underlit and unfinished.
How to Build a High/Low Ceiling Light Plan for Your Home
Step 1: List Every Ceiling Fixture by Room
Write down each room and label it: “statement,” “everyday,” or “utility.” This instantly tells you where to spend and where to save.
Step 2: Standardize Bulbs (When Possible)
If your fixtures use replaceable bulbs, choose a consistent color temperature and similar CRI across common areas. Your home will feel more cohesive, and replacement shopping gets much easier.
Step 3: Prioritize Dimmers in Key Rooms
Even a simple ceiling light feels more luxurious with dimming. Bedrooms, dining nooks, and living rooms benefit the most. One fixture, two moods, zero drama.
Step 4: Choose a Repeatable Finish
Matte black, brushed nickel, and warm brass are all easy to repeat across price tiers. Consistency is what makes a mixed-budget plan look curated instead of random.
500-Word Experience Section: Real-World Scenarios With a Simple Ceiling Light
Below are composite, real-life-style experiences that reflect what homeowners and renters often discover when upgrading a simple ceiling light. They’re useful because the same fixture can feel totally different depending on room size, bulb choice, and expectations.
Experience #1: The “I changed one hallway light and now everything looks better” effect. A homeowner swapped an old yellowed dome fixture in a narrow hallway for a clean, low-profile flush mount with a frosted diffuser. The new fixture wasn’t expensive, but the change in brightness and color temperature made the wall paint look fresher and the hallway feel wider. The biggest surprise wasn’t the fixture itselfit was how much better the nearby rooms looked because the transition space no longer felt dim and dated. This is a classic “low-cost, high-impact” ceiling light upgrade.
Experience #2: The budget fixture looked great… until nighttime. Another common scenario: someone picks a stylish semi-flush mount online, installs it, and loves it during the day. At night, though, the room still feels gloomy. Why? The fixture looked good, but the bulb choice was too weak and too cool for the space. After switching to a brighter bulb with a warmer color temperature and adding a compatible dimmer, the same fixture suddenly worked. Lesson learned: the fixture shape matters, but light quality matters just as much.
Experience #3: The “splurge once, enjoy daily” entryway upgrade. In an entryway with a visible line of sight from the front door to the living room, a homeowner chose a more expensive semi-flush fixture with opal glass and a warm brass finish. It wasn’t huge, but it had better proportions and more even light diffusion than the cheaper options. Every time they came home, the space felt more intentionallike the house had a personality instead of just overhead lighting. This is where the “high” part of high/low really pays off: when the fixture acts like a design anchor.
Experience #4: The bathroom rating mistake nobody wants to make. A DIYer bought a ceiling light for a bathroom refresh and only noticed the rating issue during installation. The fixture was meant for dry locations, but the room needed a damp-rated option. It delayed the project, but it also prevented a bad install. The replacement looked nearly identical and worked perfectly. Moral of the story: always check ratings before you fall in love with the finish. A pretty ceiling light is great; a safe, properly rated pretty ceiling light is better.
Experience #5: The whole-home high/low strategy that actually works. One family updated several fixtures over time instead of doing everything at once. They invested in nicer fixtures for the entryway, dining area, and primary bedroom, then used simpler budget-friendly flush mounts in closets, the laundry room, and secondary hallways. They kept the same finish family and similar bulb color temperature throughout the house. The result looked cohesive, not piecemeal. Guests assumed the entire home had been professionally designed, when in reality the secret was just consistency and a smart high/low plan.
These experiences show the real trick with a simple ceiling light: it’s not about chasing the most expensive option. It’s about choosing the right fixture for the right room, then pairing it with the right light output, color, and controls. Do that, and even a modest fixture can look like a million bucks (without requiring you to spend it).
Conclusion
A great simple ceiling light should do three things well: fit the room, deliver quality light, and support your style. The best high/low ceiling light strategy isn’t “cheap everywhere” or “splurge everywhere”it’s intentional spending. Use budget-friendly flush mounts where function rules, invest in semi-flush or refined flush fixtures where design matters, and always check brightness, color temperature, CRI, dimming compatibility, and location rating before buying.
If you treat your ceiling lights as part of your home’s design system (not just a last-minute checkbox), you’ll get better results, better comfort, and fewer regrettable purchases. And yes, you may finally retire that builder-grade bowl light that’s been hanging on since 2009.