Loose car-door molding has a special talent for making an otherwise respectable vehicle look as though it is slowly undressing in public. One end lifts, wind works underneath it, and soon the trim is flapping against the door like a tiny plastic flag of surrender.
Fortunately, reattaching molding on a car door is often a manageable DIY repair. The secret is not simply finding the strongest glue in the garage. A durable repair depends on identifying how the molding was originally mounted, removing every trace of failed adhesive, choosing an automotive-grade attachment product, and giving the new bond enough time to cure.
This guide explains how to reattach car door molding with double-sided automotive tape, replacement clips, trim adhesive, or a combination of these methods. It also covers distorted molding, damaged paint, weatherstripping, alignment problems, and the little mistakes that turn a 30-minute repair into an afternoon of creative vocabulary.
What Is Car Door Molding?
Car door molding is the strip of plastic, rubber, vinyl, chrome-look material, or painted trim attached to the exterior or edge of a vehicle door. Depending on the design, it may protect the door from minor parking-lot impacts, cover seams, reduce wind noise, keep water out, or simply make the car look finished.
Common types of door molding
- Body-side molding: A horizontal protective strip installed across the outer door panel.
- Door-edge molding: Narrow trim wrapped around the edge of the door to reduce chips and dings.
- Belt molding: Trim running along the bottom of the window opening.
- Lower-door cladding: A larger plastic panel mounted near the rocker area.
- Weatherstrip molding: Flexible rubber trim that helps control water, wind, and road noise.
Many exterior moldings are attached with acrylic foam tape, while others use molded plastic clips, metal retainers, screws, or a hybrid system combining clips and adhesive. Automotive attachment tape is specifically designed for parts such as body-side molding, door-edge trim, emblems, and other exterior components.
Determine Why the Molding Came Loose
Before reaching for tape or glue, inspect the entire molding. Reattaching a strip without correcting the original problem is like putting a fresh bandage on a shoe with a hole in the sole. It may look promising for several minutes, but the underlying issue is still waiting.
Failed adhesive tape
Old foam tape becomes brittle, contaminated, or weak after years of heat, rain, freezing temperatures, automatic car washes, road salt, and vibration. Once an edge lifts, dirt and water enter the gap and accelerate the failure.
Broken or missing clips
If the molding has tabs, pins, slots, or mounting holes on the back, it probably relies partly or entirely on clips. Broken clips should be replaced with parts that match the original dimensions and application. Replacement molding clips are designed to restore the fit and function of the original fastener, rather than merely filling the hole with something vaguely clip-shaped.
Warped molding
Long plastic strips can bow or curl after years of sun exposure. A distorted piece constantly pulls against fresh tape, especially at the ends. Eastwood documented this problem while repairing sagging door moldings that had been removed, refinished, and unsuccessfully reattached.
Contaminated surfaces
Wax, silicone dressing, polish, road film, adhesive-remover residue, and even fingerprints can interfere with bonding. A surface may look spotless while still being chemically unsuitable for tape.
Damaged paint or plastic
Tape cannot create a lasting repair if it is attached to peeling clear coat, loose paint, chalky plastic, rust, or a cracked mounting tab. In that situation, the damaged surface or molding must be repaired first.
Choose the Correct Attachment Method
Automotive molding tape
Automotive-grade double-sided acrylic foam tape is usually the best option for straight, lightweight body-side molding that was originally tape-mounted. It conforms to small surface variations, tolerates vibration, and avoids drilling holes in the door.
Select tape close to the width and thickness of the original material. Tape that is too thick may leave the molding visibly raised. Tape that is too narrow may not provide enough contact area. Products sold specifically as exterior attachment tape or molding tape are preferable to ordinary household foam tape, which may surrender after its first serious conversation with rain.
Automotive molding tapes are made to resist weather, impact, and temperature changes. Some products are also formulated to bond to low-surface-energy plastics commonly used in vehicle trim.
Replacement clips
Use clips when the molding was originally secured mechanically. Search by the vehicle’s year, make, model, door position, and original-equipment fastener number when available. Do not assume that two clips are interchangeable merely because both are black and capable of disappearing under a workbench.
Automotive trim adhesive
Liquid trim adhesive is useful for rigid plastic ornaments, vinyl strips, small molding sections, and areas where tape cannot make sufficient contact. Products formulated for automotive trim are designed to remain more flexible and vibration-resistant than many general-purpose household glues. Trim adhesives are available for interior and exterior applications and may resist water, heat, and automotive fluids.
Weatherstrip adhesive
Flexible rubber weatherstripping needs an adhesive labeled for automotive weatherstrip or rubber seals. Apply only a thin bead, align the seal carefully, and press it into the channel. Thick blobs can prevent the rubber from sitting correctly and may squeeze into the window path.
When tape and clips are both required
Some moldings use clips to establish position and foam tape to prevent movement, vibration, or water intrusion. Reproduce the original system whenever practical. Using only tape where clips are required may leave the molding misaligned, while installing only clips may allow the edges to lift.
Tools and Materials
- Automotive molding tape, trim adhesive, or correct replacement clips
- Automotive adhesive remover safe for the vehicle’s finish
- Isopropyl alcohol or a residue-free automotive surface-preparation cleaner
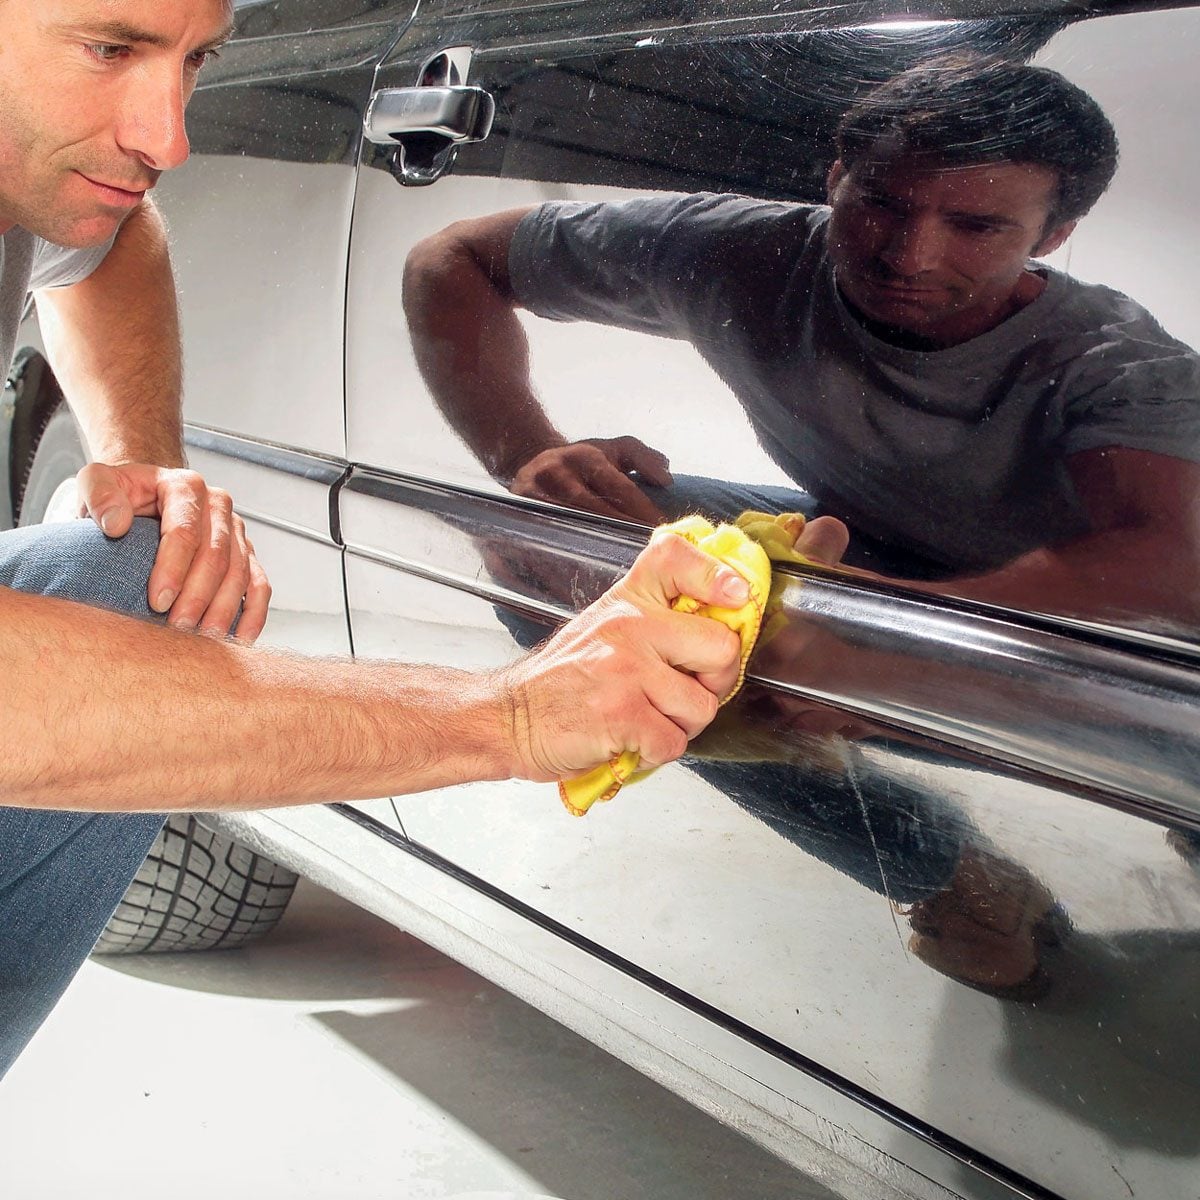
- Microfiber towels or lint-free shop towels
- Plastic razor blades or a plastic scraper
- Nylon trim-removal tools
- Masking tape or painter’s tape
- Scissors or a sharp utility knife
- Measuring tape
- Heat gun or hair dryer used on a low setting
- Disposable gloves
- Adhesion promoter, only when recommended for the chosen tape and substrate
A silicone-free surface-preparation product can leave painted surfaces and trim clean and residue-free before bonding. Whatever cleaner you choose, verify that it is compatible with automotive paint and the type of plastic being repaired.
How To Reattach Molding on a Car Door: Step by Step
Step 1: Work in suitable conditions
Park the vehicle in a dry, well-ventilated area away from blowing dust. Moderate temperatures are better than extreme heat or cold. If the door or molding feels cold, warm it gradually with a hair dryer or low-temperature heat gun. Keep the heat moving to avoid softening the plastic or damaging the paint.
Do not begin immediately before rain, freezing weather, or a trip through the automatic car wash. Adhesive enjoys drama much less than car owners do.
Step 2: Mark the original position
If part of the molding remains attached, place masking tape along its upper or lower edge before removing it. Add small vertical reference marks at both ends. These guides make it easier to reinstall a long strip at the correct height.
Measure the distance from a fixed feature, such as the door seam or lower body line. Compare the molding with the corresponding door on the opposite side of the vehicle when possible.
Step 3: Remove the molding carefully
Do not yank the loose end. A sudden pull can crack the molding, tear off a clip, or lift weak paint.
Warm the remaining adhesive gently. Slide a nylon trim tool behind the molding and work gradually along the strip. For tape-mounted pieces, dental floss or strong fishing line can sometimes be moved back and forth behind the molding to separate the foam adhesive.
Remove screws or release clips before pulling. If access requires removing an interior door panel, consult vehicle-specific instructions so hidden fasteners and electrical connectors are not damaged.
Step 4: Inspect the molding and door
Examine the backside of the molding for cracks, missing locating pins, broken tabs, curled edges, and sections that no longer match the contour of the door.
Inspect the paint for bubbling, rust, peeling clear coat, or areas pulled away by the old tape. Adhesive should not be installed over unstable paint. Repair significant corrosion or paint failure before continuing.
Step 5: Remove all old adhesive
Old tape must be removed from both the door and the molding. Installing new tape over old foam creates a weak, uneven stack that may look acceptable from 20 feet away but rarely survives real use.
Roll thick foam residue away with a thumb or plastic scraper. Apply a paint-safe automotive adhesive remover according to its instructions and allow it time to soften stubborn material. AAA recommends warming old glue and using adhesive remover to loosen remaining residue during exterior cleanup.
Avoid metal razor blades on painted surfaces. Also avoid aggressive solvents unless the vehicle manufacturer or product label specifically approves them. Test any cleaner in an inconspicuous area first.
Step 6: Clean and dry the bonding surfaces
Wash away visible dirt, then wipe the bonding area with a clean lint-free towel and an appropriate residue-free cleaner. Use a second towel for the final wipe rather than spreading dissolved contamination back across the door.
Clean the backside of the molding just as carefully. New plastic parts may contain mold-release residue, while old parts may carry trim dressing, wax, or polish. Allow both surfaces to dry completely. Do not touch the cleaned bonding areas afterward.
Step 7: Replace damaged clips or repair the molding
Install new clips before applying tape. Make certain each clip seats fully and faces the same direction as the original.
A cracked tab may be repairable with a plastic-repair product compatible with the molding material. However, replacing the molding is usually wiser when it is badly warped, split across a mounting point, or missing a large section. Adhesive should attach the part to the car, not perform emergency reconstructive surgery on a plastic strip with ambitions of becoming confetti.
Step 8: Dry-fit the molding
Position the molding without removing any tape liner or applying liquid adhesive. Confirm that the ends, clips, contours, and body lines align correctly.
If the molding rocks against the door or springs away at one end, stop and correct the fit. Fresh tape cannot reliably overcome severe distortion. Mild warping may improve with gentle, controlled warming and clamping against a flat guide, but excessive heat can permanently damage the finish.
Step 9: Apply automotive molding tape
Apply the tape to the molding rather than directly to the door unless the product instructions specify otherwise. Run it along the same path as the factory tape, keeping it flat and free of wrinkles.
Do not stretch acrylic foam tape during installation. Stretching makes it want to shrink back later, which can lift the ends. Press the tape firmly onto the molding, especially around curves.
Trim the tape neatly with sharp scissors or a utility knife. Avoid stacking strips unless the original design requires a specific thickness. Leave small liner tabs exposed at accessible points if you plan to position the molding before fully removing the backing.
Step 10: Use adhesion promoter only when appropriate
Certain plastics and painted surfaces benefit from an adhesion promoter, but the product must match the selected tape and substrate. Apply it only to the narrow bonding zone and follow the manufacturer’s drying instructions.
More promoter is not better. Flooding the area can leave visible staining or create a messy edge around the molding.
Step 11: Align and attach the molding
For clip-mounted trim, line up all retainers before pressing any one clip fully into place. Apply steady pressure near each fastener until it seats.
For tape-mounted molding, align the strip with the masking-tape guides. Tack one end lightly, verify the full position, and then remove the liner gradually while pressing the molding onto the door.
Once the adhesive makes full contact, repositioning may be difficult. This is not the moment for the classic DIY technique of “close enough, probably.” Step back and check the line before applying final pressure.
Step 12: Apply firm, even pressure
Press along the entire molding with your palm or a padded roller. Concentrate on the ends, curves, and areas where the strip previously lifted. Attachment tape needs intimate contact with both surfaces; merely placing the molding against the door is not sufficient.
Hold pressure for the period recommended by the product manufacturer. Remove alignment tape carefully without pulling on the newly attached trim.
Step 13: Brace the molding while it cures
Use painter’s tape to hold the molding against the door without covering a large area of fresh paint under excessive tension. Install several short vertical support strips rather than one heroic strip attempting to manage the entire project.
Follow the curing instructions printed on the adhesive or tape package. As one example, a high-strength automotive molding tape may permit light use after about an hour while requiring approximately 24 hours to develop full strength. Cure times vary by product, temperature, surface, and humidity.
Keep the repair dry and avoid highway speeds, pressure washing, waxing, or automatic car washes until the recommended curing period has passed.
Common Mistakes That Cause Molding To Fall Off Again
Using ordinary household double-sided tape
Indoor mounting tape is not necessarily designed for hot painted metal, freezing temperatures, water, vibration, or low-energy automotive plastics. Use a product specifically labeled for exterior automotive trim.
Leaving old foam tape in place
New adhesive bonds only as well as the material underneath it. Old foam, oxidized glue, dirt, or polish creates a failure layer.
Applying tape over wax or trim dressing
Wax and silicone products are designed to leave a protective or slippery film. That is excellent for appearance and spectacularly unhelpful for adhesion.
Ignoring broken clips
Tape should not be expected to replace structural locating clips when the molding was designed to use them. Replace missing retainers first.
Stretching the tape
Stretched foam tape may slowly contract, pulling away from curves and corners.
Using too much liquid adhesive
Excess glue can squeeze onto painted surfaces, remain soft in thick sections, interfere with fit, and make future removal miserable. Use the amount specified by the manufacturer.
Closing the door before checking clearance
After attaching edge molding or weatherstrip, open and close the door slowly. Confirm that the trim does not catch on the fender, pillar, glass, or adjacent seal.
Washing the car too soon
Even tape that grabs immediately may need substantially longer to reach its intended strength. Give the repair time to cure before exposing it to brushes, pressure, and detergent.
When the Molding Should Be Replaced
Reattachment is worthwhile only when the molding itself remains serviceable. Replace the part when:
- It has multiple cracks or missing sections.
- Several molded mounting tabs have broken off.
- It remains severely bowed after gentle reshaping.
- The visible finish is peeling or delaminating.
- The rubber has hardened, shrunk, or torn.
- The part repeatedly comes loose despite proper preparation.
- A replacement includes updated clips or mounting hardware that corrects a known fit problem.
Vehicle-specific replacement molding may cost more than a roll of tape, but repeatedly gluing a failed component can become more expensive and considerably less entertaining.
When To Use a Professional Repair Shop
Consult a body shop, dealership, or qualified automotive trim specialist when the loose molding is connected to a damaged door skin, rust repair, peeling paint, window operation, electrical components, cameras, sensors, or complicated interior-panel removal.
Professional help is also sensible when the molding flew off and cannot be located, the vehicle is still under warranty, or the trim could detach at highway speed and create a hazard. Check for manufacturer service campaigns or recalls when several owners of the same model report identical molding failures.
Practical Experiences and Lessons From Real-World Molding Repairs
The repair that failed because the door looked clean
A common driveway scenario begins with a molding strip that has lifted only at the rear. The owner wipes the visible dirt away, adds fresh tape beneath the loose end, presses for 30 seconds, and celebrates. Two days later, the end is hanging loose again.
The problem is usually not weak tape. The small repair area may still contain oxidized foam, wax, silicone trim restorer, or adhesive-remover residue. The fresh tape bonds to that contamination instead of the door. Cleaning the entire bonding stripnot merely the visibly dirty sectionoften separates a durable repair from a repeat performance.
The long molding installed one-quarter inch too low
Long body-side molding magnifies tiny alignment errors. A strip may look straight while the installer is standing inches from the door, yet appear noticeably crooked after stepping back. The easiest prevention is to place a continuous masking-tape guide along the original upper edge and mark both ends before removing the molding.
Another useful habit is to attach only a small section initially. Check the relationship between the trim, door seams, and neighboring panels before exposing the remainder of the liner. Once several feet of high-strength tape contact clean paint, negotiation becomes difficult.
The mystery gap caused by stacked tape
Some repairs fail cosmetically even when they hold securely. This often happens when new foam tape is installed over remnants of the old layer. The molding sits too far from the door, producing a visible shadow line and allowing water and dirt to collect behind it.
Removing the old material is tedious, particularly from narrow channels molded into the back of the trim. Nevertheless, a smooth, level substrate is essential. A plastic scraper, controlled warmth, adhesive remover, and patience usually work better than aggressive scraping that gouges the plastic.
The clip that looked almost correct
Automotive molding clips can differ by fractions of an inch in head diameter, stem length, hole size, and locking design. An almost-correct clip may enter the door hole but fail to lock, or it may grip so tightly that it damages the paint around the opening.
Matching the original fastener number is ideal. When that number is unavailable, compare an intact clip with the replacement side by side. Measure the stem and head, and confirm whether the clip requires a separate sealing washer. Buying a mixed container of universal clips can be useful, but “one of these will probably work” should remain a theory until the dimensions agree.
The warped molding that defeated excellent tape
A sun-baked plastic strip may pull away even after excellent surface preparation. The adhesive is fighting a continuous spring force created by the warped molding. The tape may hold initially, then release at the ends after repeated heating and cooling.
A dry fit reveals this problem immediately. If the molding will not sit against the door without being forced, gently reshape it before installation or replace it. Tape performs best when it holds two compatible surfaces together, not when it is assigned a second job as a suspension bridge.
The cure period that saved the job
Newly applied molding can feel secure within minutes, tempting the owner to drive, wash the vehicle, or remove the support tape immediately. Waiting according to the product instructions makes a noticeable difference. Firm application pressure creates initial contact, while time allows the adhesive to develop strength across the bonding surface.
Leaving the vehicle dry overnight, avoiding fast highway travel, and postponing the car wash are simple precautions. They require no additional tools, yet they are among the most effective steps in the entire repair.
Frequently Asked Questions
Can I reattach car door molding without removing it completely?
You can repair a short lifted section if the remaining molding is firmly attached, correctly aligned, and free from hidden damage. However, complete removal is usually better when a long section has loosened or old tape remains beneath most of the strip.
Can I use super glue on exterior car molding?
Super glue may work for a tiny rigid-plastic repair, but it is generally a poor choice for long exterior molding. It can cure brittle, damage finishes, leave white residue, and provide insufficient flexibility for temperature changes and vibration.
Should I apply molding tape to the car or the trim?
For most repairs, apply the tape to the cleaned backside of the molding first. This makes it easier to follow the original bonding path and trim the tape neatly. Always follow the specific product instructions.
How long should I wait before driving?
Follow the tape or adhesive label. Some products permit light use relatively quickly but need approximately 24 hours or longer to approach full strength. Cold temperatures can extend the required time.
Can I pressure-wash newly installed molding?
Not immediately. Wait until the adhesive has fully cured, then keep a reasonable distance between the pressure-washer nozzle and the molding edges.
Why does the molding keep lifting at the ends?
Common causes include curved or warped molding, insufficient pressure, contaminated surfaces, stretched tape, tape that stops too far from the end, or a missing end clip.
Conclusion
Learning how to reattach molding on a car door is less about brute adhesive strength and more about careful preparation. Identify whether the part uses tape, clips, liquid adhesive, or a combination. Remove the failed material completely, clean both surfaces, perform a dry fit, align the molding with reference marks, and press it into place using an automotive-grade product.
Most importantly, respect the curing period. A patient repair can remain neat and secure through rain, heat, vibration, and ordinary driving. A rushed repair may provide the molding with another opportunity to wave at passing traffic.