Hard wax beans look innocent enough: tiny colorful pellets, almost like candy for a beauty salon. Then you try to melt them for the first time utty. Too hot, and you have created a tiny pot of lava that should stay nowhere near your skin.
Fortunately, learning how to melt hard wax beans is straightforward once you understand the right consistency, heating method, and safety checks. You can melt hard wax beads in a microwave, with an electric wax warmer, orwhen the product permits itusing a carefully controlled stovetop water-bath method.
The most important rule is simple: follow the heating instructions supplied with your particular wax. Formulas vary significantly, so a temperature or heating time that works beautifully for one product may overheat another. Dermatology guidance also recommends testing warmed wax on the inside of the wrist before it touches the treatment area because wax that is too hot can burn skin.
What Are Hard Wax Beans?
Hard wax beans, also called hard wax beads or stripless wax beads, are small pieces of depilatory wax designed to be melted before hair removal. Unlike traditional soft wax, hard wax generally does not require a cloth or paper strip.
The melted wax is spread over the hair in a relatively thick layer. As it cools, it becomes flexible enough to grip and remove by hand. Hard wax tends to grip hair more than skin, which is one reason it is commonly used on smaller or more sensitive areas such as the underarms, face, and bikini line.
What should melted hard wax look like?
Forget trying to judge readiness from temperature alone. Consistency is one of your best clues.
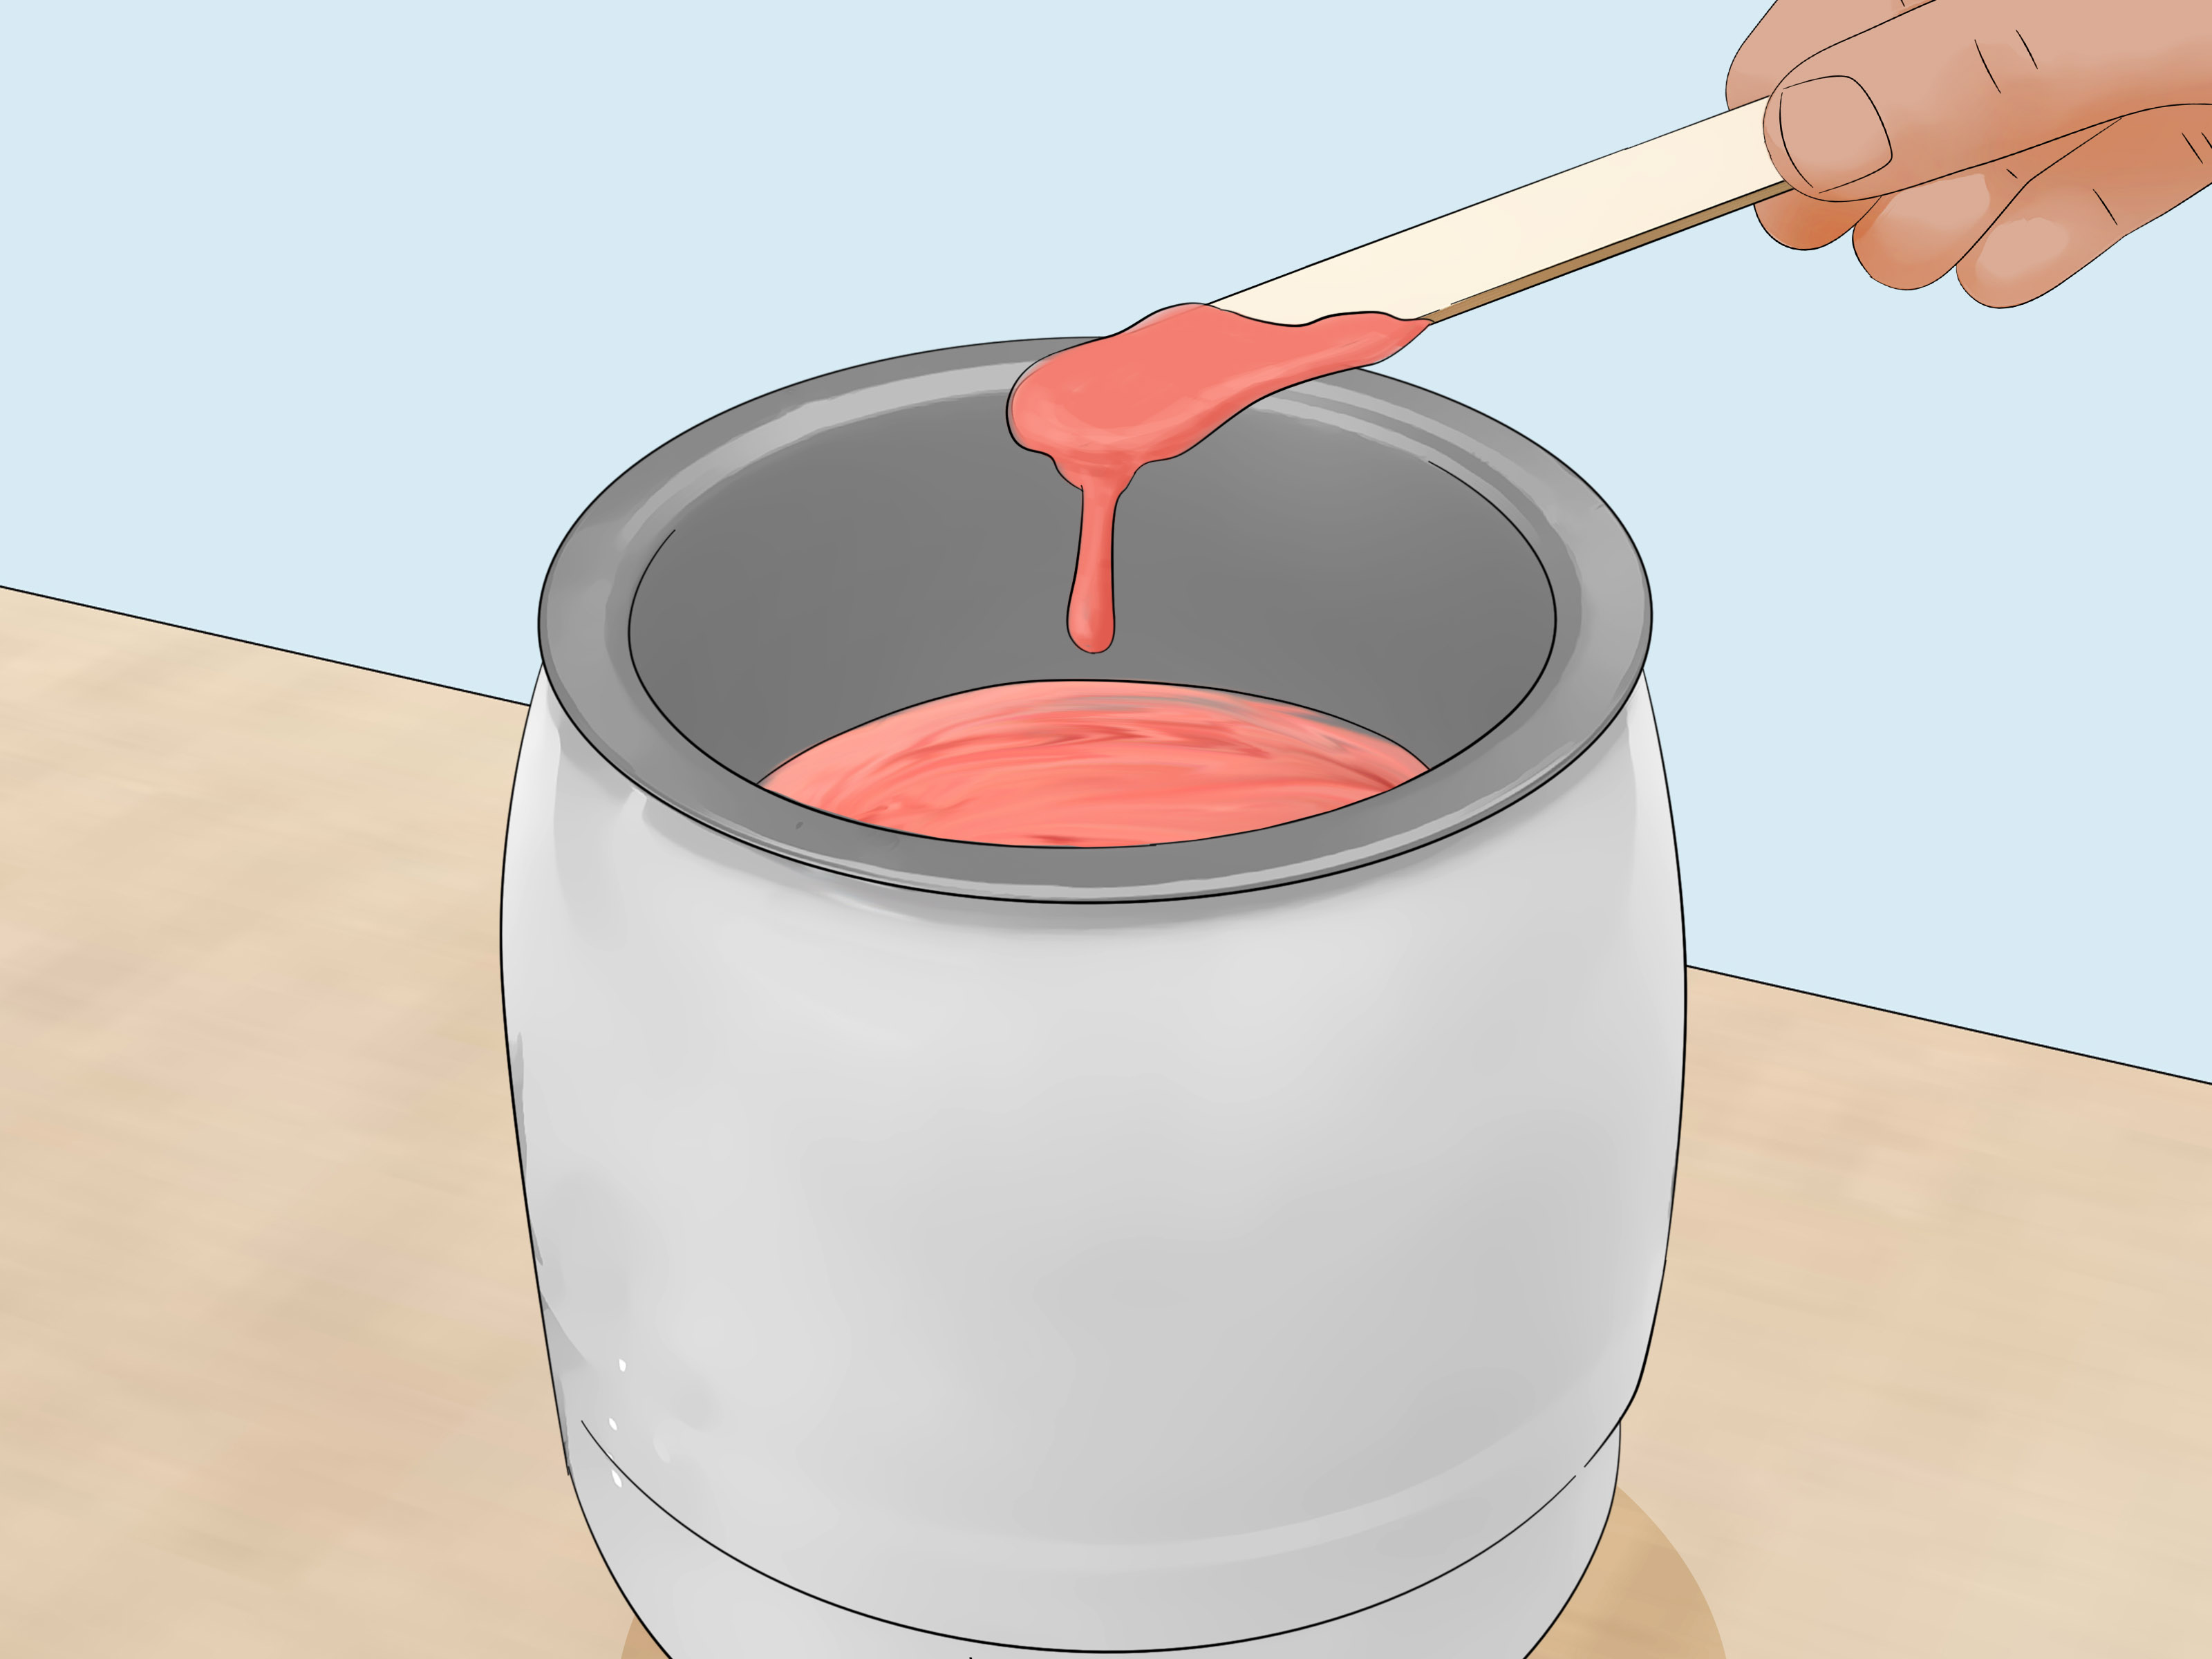
Properly melted hard wax should usually:
- look smooth and glossy;
- have no solid wax beads remaining;
- move slowly from the applicator;
- resemble thick honey or warm caramel;
- spread easily without running like water.
Several professional and retail wax manufacturers describe the ideal consistency as similar to thick honey or caramel. If wax pours from your stick like soup, it is probably too hot. If it stretches into stubborn strings or refuses to spread, it may need additional gentle heating.
Three Ways to Melt Hard Wax Beans
The three practical options are a dedicated wax warmer, a microwave, and an indirect stovetop setup. Each method can work, but they are not equally convenient or forgiving.
| Method | Best For | Main Advantage | Main Drawback |
|---|---|---|---|
| Wax warmer | Regular waxing | Consistent heat control | Takes longer to initially melt wax |
| Microwave | Small, occasional sessions | Fast and convenient | Can heat unevenly |
| Stovetop water bath | No warmer or microwave available | Uses ordinary kitchen equipment | Requires close supervision |
How to Melt Hard Wax Beans in a Wax Warmer
If you wax regularly, an electric wax warmer is usually the easiest method because it gives you much better control over the wax while you work.
Step 1: Add the wax beans
Place the amount of hard wax you need into the warmer’s removable pot or compatible silicone insert. For a small area such as the upper lip or underarms, you do not need to melt an entire bag. Starting with a modest amount also makes temperature adjustments easier.
Step 2: Use the initial melting setting
Turn on the warmer and follow the wax manufacturer’s recommended melting instructions. Some professional systems initially use a high setting to liquefy the beads before reducing the heat significantly for application.
For example, certain professional wax warmers recommend beginning at a high temperature until the beads have completely melted, then lowering the control to the formula’s working range. Heating time varies with the amount and formula of wax, so the dial is not a universal recipe.
Step 3: Stir thoroughly
Once the lower layer begins melting, gently stir the wax with a clean wooden applicator. Stirring distributes heat and helps the remaining beads melt evenly.
Continue until you have a smooth mixture without hard lumps hiding at the bottom. Those sneaky little pellets have an impressive ability to survive while everything around them turns liquid.
Step 4: Reduce the heat
When all the beads have melted, reduce the warmer to the recommended working setting. Let the wax settle until it develops a thick, controlled consistency.
Do not assume fully melted wax is immediately ready for skin. The melting stage may be considerably hotter than the appropriate application stage.
Step 5: Test before applying
Dip an applicator into the wax and place a tiny amount on the inside of your wrist. It should feel comfortably warm rather than painfully hot.
If it stings or feels excessively hot, stop and allow the wax to cool. Dermatologists specifically recommend wrist-testing warmed wax before use.
How to Melt Hard Wax Beans in the Microwave
The microwave is convenient when you need only a small amount of wax. The disadvantage is uneven heating. The surface may appear harmless while part of the container is significantly hotter.
Research summarized in medically reviewed guidance has identified microwave-heated waxing products as a source of accidental burns, including burns to the hands while handling hot containers.
Step 1: Use a microwave-safe container
Place your wax beans in a microwave-safe silicone melting cup or another container explicitly approved by the wax manufacturer. Never microwave metal components or a metal warmer pot.
Place the container on a microwave-safe plate. The plate provides a stable surface and gives you something safer to handle if the wax container becomes unexpectedly hot.
Step 2: Heat in short intervals
Follow the instructions printed on your wax. Many microwave-compatible hard wax products recommend short heating cycles, commonly around 45 seconds at a time, although some products use different intervals.
Do not simply program several minutes and walk away to check your phone. Wax is not impressed by multitasking.
Heat, inspect, stir, and repeat as necessary. Retail hard-wax instructions commonly advise incremental heating until the wax reaches a thick caramel or honey-like consistency.
Step 3: Stir between heating cycles
Use a wooden applicator to stir thoroughly after each interval. Microwave energy can produce hot spots, so mixing is essential for distributing heat.
If several beans remain unmelted, give the wax another short heating cycle rather than dramatically increasing the time.
Step 4: Remove the container carefully
Use the container’s insulated handle when provided or an appropriate oven mitt. Remember that the cup itself can become hot enough to burn your fingers even when the wax appears perfectly calm.
Step 5: Let overheated wax cool
If the wax drips quickly from the applicator like thin syrup, wait. Stir it periodically while it cools until it thickens.
Finally, test a tiny amount on your inner wrist before using it elsewhere.
How to Melt Hard Wax Beans on the Stovetop
A stovetop is the least convenient of the three methods, and you should use it only when the wax manufacturer allows this type of heating.
Do not put wax beans directly into a cooking saucepan over a burner. Direct heat makes temperature control difficult and can overheat or scorch the wax. Instead, use an indirect water-bath setup similar to a double boiler.
Step 1: Prepare a water bath
Add a shallow amount of water to a saucepan. Place a heat-resistant container holding the wax beads above or within the water according to your double-boiler setup.
The goal is to warm the wax indirectly rather than expose it to the direct heat of the burner.
Step 2: Use low, controlled heat
Warm the water gently. You do not need an aggressively boiling pot worthy of a pasta commercial.
Keep water out of the wax container. Moisture can interfere with the wax and create an unpleasant mess.
Step 3: Stir continuously as the wax softens
As the wax begins melting around the edges, stir with a clean applicator. Continue heating gradually until the beads disappear and the texture becomes uniform.
Step 4: Remove it from the heat
Once fully melted, carefully remove the wax container from the water bath and place it on a heat-resistant surface.
Let it cool until the consistency resembles thick honey, then perform the wrist test.
If the package specifically states that the product should only be heated in its supplied warmer or microwave container, follow those directions instead of improvising a stovetop method.
How Hot Should Hard Wax Be?
There is no single temperature that is correct for every hard wax bean formula.
Professional products can have noticeably different melting and working temperatures. Some warmers initially melt hard wax at relatively high settings and then operate at substantially lower application settings. Other specialty formulations are designed to work at lower temperatures.
For home users, three signals matter more than chasing a magic number:
- Follow the temperature instructions supplied with your wax.
- Look for the recommended thick-honey or caramel consistency.
- Always test a small amount on the inside of your wrist.
If the wax hurts your wrist, it does not belong on your upper lip, underarm, or bikini line.
How to Fix Common Hard Wax Problems
The wax is too thick
Wax that barely leaves the applicator is probably too cool. Increase the warmer slightly or return microwaveable wax for another brief heating interval, then stir.
Make small adjustments. Wax temperature is easier to increase than a burned patch of skin is to negotiate with.
The wax is too runny
If the wax streams quickly from your applicator, it may be too hot. Stop heating and allow it to cool while stirring occasionally.
Do not add unmelted beads solely to force the temperature down unless the manufacturer specifically recommends doing so; you may end up with an uneven mixture.
The wax becomes brittle
Hard wax should generally remain somewhat flexible when removed. Wax that cracks into pieces may have been applied too thinly, allowed to cool too long, or may be operating outside the formula’s proper temperature range.
Unmelted beans remain in the pot
Stir from the bottom and sides. The outer wax often melts before the center. Give the mixture additional controlled heat instead of turning the dial dramatically higher.
Preparing Your Skin Before Waxing
Good melting technique cannot rescue poorly prepared skin.
The American Academy of Dermatology recommends washing and thoroughly drying the area before waxing. Hair should generally be around one-quarter to three-quarters of an inch long so the wax can grip it effectively.
Avoid waxing skin that is sunburned, injured, highly irritated, or inflamed. Retinoids and certain acne treatments can also make skin more vulnerable to being damaged during waxing. Dermatology guidance advises avoiding facial waxing for several days after topical retinoid use and avoiding waxing while using or recently after certain medications such as isotretinoin.
Basic Hard Wax Application Technique
Once the wax is properly melted:
- Clean and completely dry the treatment area.
- Check the wax temperature on your inner wrist.
- Load a suitable amount onto a wooden applicator.
- Spread a thick, even layer in the direction of hair growth.
- Create a slightly thicker lip at the end for gripping.
- Allow the wax to set while remaining flexible.
- Hold the surrounding skin taut.
- Pull the wax quickly in the opposite direction of hair growth, staying close and parallel to the skin instead of pulling straight upward.
Hard wax does not normally require a cloth strip because the hardened wax itself becomes the strip.
Hard Wax Safety Tips Worth Remembering
Waxing is common, but hot wax deserves respect. Burns, irritation, folliculitis, ingrown hairs, abrasions, and skin injury can occur when home waxing goes wrong.
- Never apply wax without checking its temperature first.
- Never wax broken, sunburned, or severely irritated skin.
- Follow medication-related warnings, especially for retinoids and isotretinoin.
- Do not share personal waxing equipment.
- Use clean applicators and equipment.
- Never assume reheating wax sterilizes contaminated wax.
- Do not wax directly over moles, warts, or varicose veins when product labeling advises against it.
- Consider professional waxing for difficult-to-reach or particularly delicate areas.
Public-health and dermatology guidance also warns that heated wax is not reliably hot enough to sterilize contaminated material, which is why clean tools and avoiding double-dipping matter.
Which Wax-Melting Method Is Best?
For most people who wax regularly, the electric wax warmer is the best overall option. It provides the easiest temperature control and can keep wax at a usable consistency throughout a session.
The microwave is best for convenience. It works especially well for small amounts of wax when the manufacturer specifically designs the product for microwave heating. Just remember that microwave heating can be uneven.
The stovetop water-bath method is a backup option. It can work when permitted by the product instructions, but maintaining consistent heat is more difficult. Avoid direct burner contact.
Frequently Asked Questions
Can you microwave hard wax beans?
Yes, if the product is labeled as microwave-compatible. Use an approved microwave-safe container, heat the beads in short intervals, stir frequently, and test the temperature before application.
Can you melt hard wax without a wax warmer?
Yes. Microwave-compatible wax can be heated in a microwave, while some products may be suitable for indirect stovetop heating. Always check the manufacturer’s directions first.
How do you know when hard wax is ready?
It should be completely melted, smooth, and usually similar to thick honey or caramel. It should spread easily without dripping like water.
Why is my hard wax stringy?
Stringiness can mean the wax is outside its ideal working range. Depending on the formula, it may need a small temperature adjustment and thorough stirring.
Can I reheat leftover hard wax?
Many personal-use hard wax products can be reheated according to manufacturer directions, provided the wax and equipment have remained clean. Never treat reheating as sterilization, and do not reuse contaminated wax.
Should hard wax be extremely hot?
No. Hard wax must be warm enough to remain workable but comfortable enough for skin. If your wrist test burns or hurts, wait for the wax to cool.
Conclusion
Learning how to melt hard wax beans is less about memorizing one temperature and more about controlling heat carefully. A wax warmer gives you the most consistent results, a microwave provides speed, and an indirect stovetop water bath can serve as a backup when the product instructions permit it.
Whatever method you choose, melt the wax gradually, stir it thoroughly, watch for a thick honey-like texture, and perform a wrist test every time. Hard wax should remove hairnot make you reconsider every decision that led you to owning a bag of colorful molten resin.
Practical Experience-Based Lessons for Melting Hard Wax Beans
One of the most common lessons beginners discover is that more heat does not mean better wax. When the beans seem stubborn, the natural reaction is to crank the warmer to maximum or give the microwave another heroic two minutes. That often creates the opposite problem: the wax becomes dangerously thin and then requires a long cooling period.
A much better habit is making small adjustments. Heat briefly, stir, inspect, and repeat. Once you start judging wax by its behavior on the applicator rather than by impatience, the process becomes dramatically easier.
Another practical lesson is to melt only what you reasonably expect to use. Filling an entire wax warmer for two underarms is roughly the beauty equivalent of renting a moving truck to transport one lamp. A smaller quantity generally melts faster and is easier to control.
Beginners also frequently underestimate stirring. Wax can look completely melted on top while cooler material remains underneath. In a microwave, the opposite can happen: one portion may become extremely hot while another remains partially solid. A thorough stir after each heating stage gives you a far more accurate picture of the wax’s true consistency.
The applicator itself becomes a useful diagnostic tool. Scoop a small amount and slowly rotate the stick. Wax that immediately drips away may be too hot. Wax that refuses to move may be too cold. Proper hard wax usually moves slowly, smoothly, and predictably. Think warm honey rather than maple syrup straight from a refrigeratoror boiling soup.
Another lesson concerns timing after application. New users sometimes wait until the wax becomes completely rigid because the name says “hard wax.” Unfortunately, rock-hard wax may crack instead of peeling away cleanly. The ideal removal point is generally when the surface has set but the strip still has some flexibility. Exact timing depends on the product, thickness of application, room temperature, and body area.
Room conditions matter more than many people expect. In a cool room, wax may thicken rapidly on both the applicator and skin. In a warm room, it can remain soft longer. Rather than repeatedly blaming the wax, adjust your warmer gradually and pay attention to how quickly your test strip sets.
Good preparation also makes the melting process feel more successful. Trying to apply perfectly melted wax over damp, oily skin can produce disappointing results because the wax may not grip the hair properly. Clean, dry skin gives the wax a much better chance to do its job.
Finally, keeping the workspace organized makes home waxing considerably calmer. Prepare applicators, towels, pre-wax cleanser, aftercare products, and a heat-resistant surface before turning on the warmer. Trying to locate a wooden stick while a cup of hot wax sits beside you is an unnecessary subplot.
With experience, melting hard wax becomes less about watching a clock and more about recognizing visual and tactile cues. Heat gradually, stir frequently, respect the manufacturer’s instructions, and test before every application. Those habits are far more valuable than memorizing one supposedly perfect temperature.
Note: This article provides general cosmetic-use information based on dermatology guidance and current hard-wax manufacturer instructions. Individual wax formulations and heating appliances vary, so the directions supplied with your specific product should always take priority.