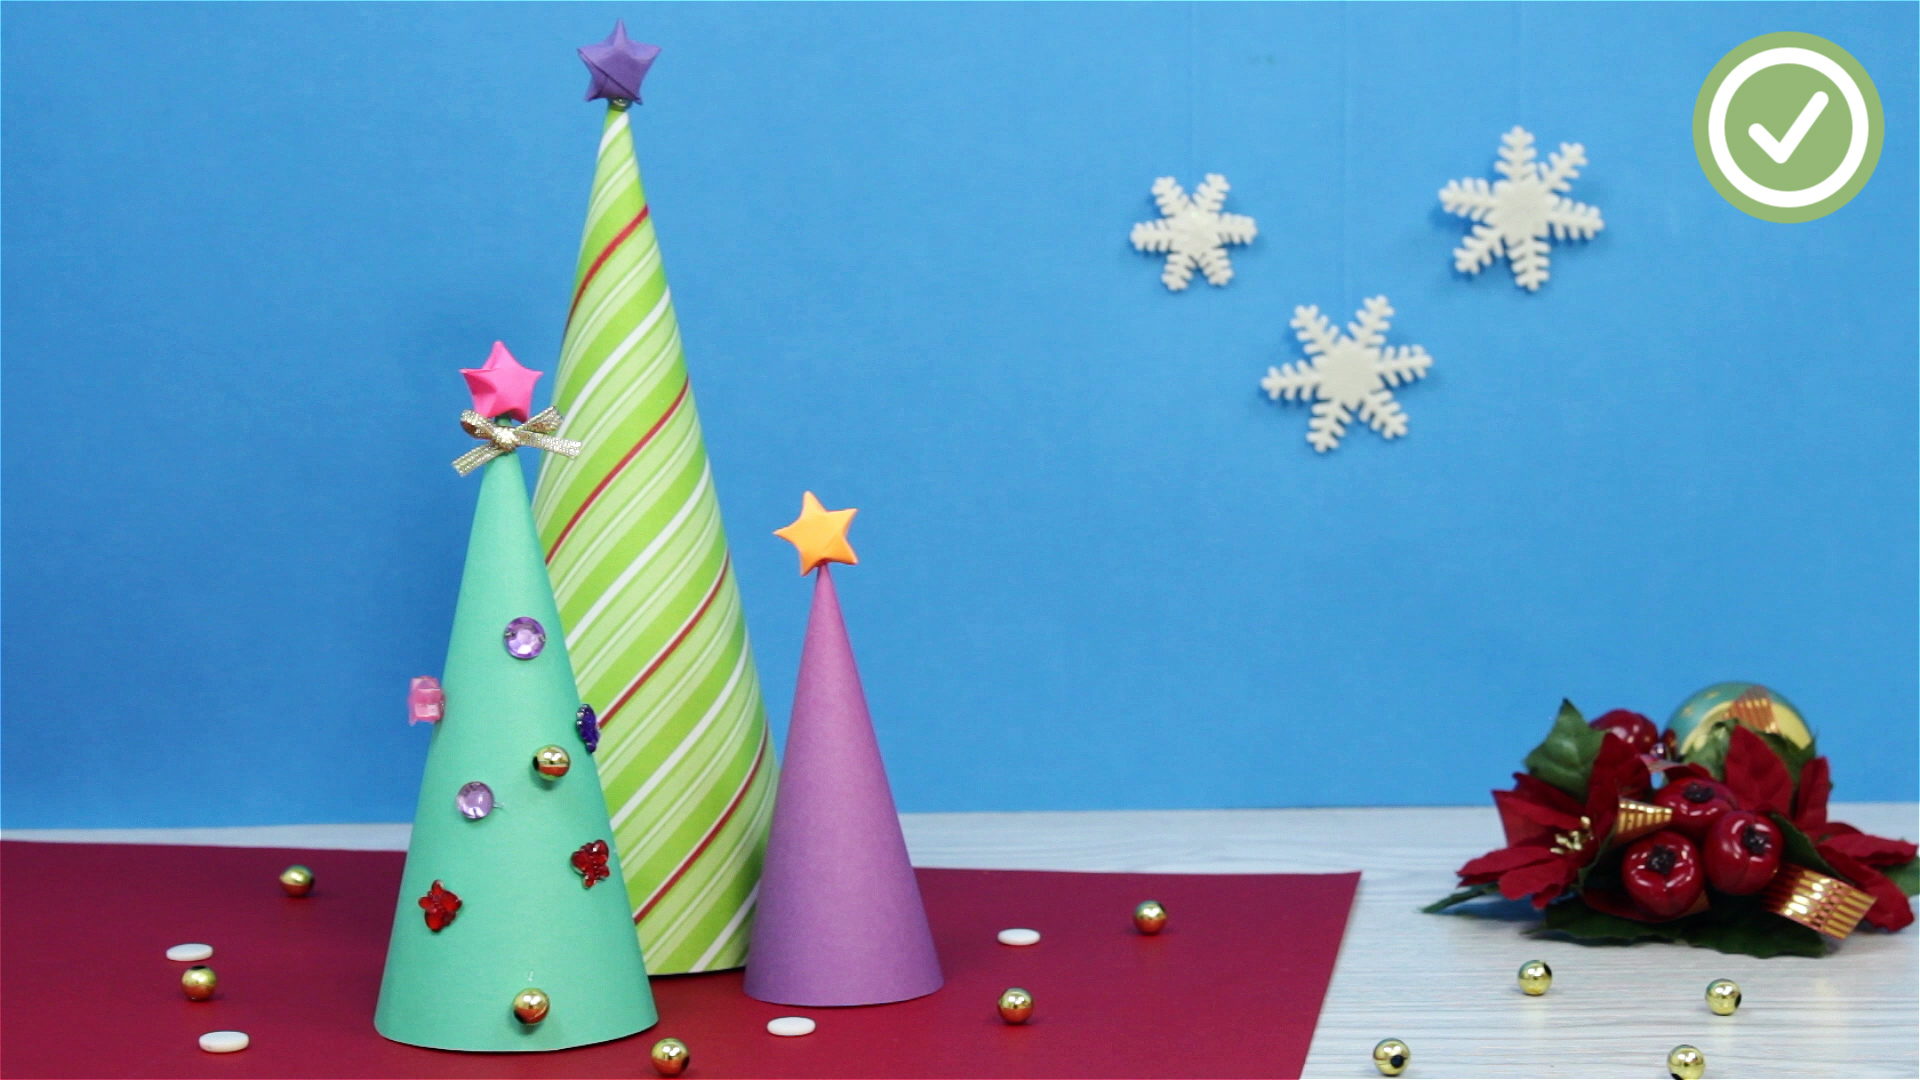
Paper Christmas trees are inexpensive, cheerful, and wonderfully forgiving. A slightly crooked fold does not ruin the project; it gives the tree “woodland character.” With a few sheets of paper and basic craft supplies, you can create tabletop decorations, mantel displays, classroom projects, gift toppers, or an entire miniature forest without finding pine needles in your socks until February.
This guide explains three easy ways to make a paper Christmas tree: a sturdy cone tree, a pleated accordion tree, and an interlocking 3D tree. Each method produces a different look, so you can choose the design that fits your supplies, skill level, and holiday decorating style.
Choosing the Best Paper Christmas Tree Method
Before reaching for the scissors, decide how you want to use the finished tree. A cone works well as a centerpiece, an accordion tree has playful texture, and an interlocking tree folds flat for storage. All three can be resized by adjusting the original paper dimensions.
| Method | Difficulty | Approximate Time | Best Use |
|---|---|---|---|
| Paper cone tree | Easy | 15–25 minutes | Tabletops and centerpieces |
| Accordion-fold tree | Easy to moderate | 20–30 minutes | Kids’ crafts and colorful displays |
| Interlocking 3D tree | Easy | 10–20 minutes | Place settings, shelves, and flat storage |
Basic Supplies for Making Paper Christmas Trees
You do not need an overflowing craft closet to complete these projects. In fact, a determined crafter could make all three with materials found in an average desk drawer.
- Construction paper, scrapbook paper, origami paper, or lightweight cardstock
- Scissors
- A pencil
- A ruler
- A glue stick, craft glue, or double-sided tape
- A plate, bowl, or compass for drawing circles
- A hole punch or sharp pencil for the accordion method
- A paper straw, bamboo skewer, or wooden dowel
- Optional decorations such as stickers, sequins, pom-poms, ribbon, paper stars, and markers
What Kind of Paper Works Best?
Standard construction paper is easy for children to cut and fold. Scrapbook paper offers attractive patterns and usually has enough structure for tabletop decorations. Lightweight cardstock makes durable cone and interlocking trees, but it can become stubborn when used for narrow accordion folds.
Origami paper is excellent for crisp pleats because it is thin and strong. Wrapping-paper scraps can also work, although very lightweight wrapping paper benefits from being glued to printer paper first. If the paper feels capable of collapsing when someone walks briskly past it, give it a backing layer.
Method 1: Make a Paper Cone Christmas Tree
A cone tree is the simplest way to create a freestanding paper Christmas tree with plenty of decorating space. Make one large tree for a centerpiece or combine several sizes for a modern paper forest.
Step 1: Draw and Cut a Circle
Place a large plate or bowl upside down on the back of a sheet of cardstock. Trace around it and cut out the circle. A 10- to 12-inch circle creates a convenient tabletop tree, but there is no sacred Christmas-tree measurement. Smaller circles produce gift toppers, while larger sheets can become window-display trees.
Step 2: Create the Cone
Mark the approximate center of the circle. Cut one straight line from the outer edge to that point. Slide one cut edge over the other until the paper forms a cone. A small overlap creates a wide tree; a larger overlap creates a tall, narrow tree.
Adjust the shape before securing it. Once you are satisfied, apply double-sided tape or a line of glue beneath the overlapping edge. Hold it briefly until the seam stays closed. If the bottom looks uneven, set the cone on a flat surface, draw a light trimming line around the high spots, and carefully even the edge.
Step 3: Add Branch-Like Texture
The plain cone already resembles a minimalist Christmas tree, but texture gives it more personality. Cut narrow paper strips and fringe one long edge, leaving an uncut border along the other edge. Wrap the fringed strips around the cone from bottom to top, overlapping each row like shingles.
For a softer style, use scalloped strips instead of fringe. You can also attach curled paper loops, folded cupcake liners, circles cut from old holiday cards, or strips of recycled wrapping paper. Layered pieces conceal the cone seam and create convincing depth.
Step 4: Decorate the Tree
Cut tiny circles from colored paper for ornaments, draw garland with a metallic marker, or glue on miniature pom-poms. Make a topper by cutting two matching stars, gluing them back-to-back around a toothpick, and inserting or attaching the toothpick at the top.
For elegant holiday decor, try cream cardstock with gold dots. For a child-friendly version, use green construction paper and sticker ornaments. For a gloriously loud tree that looks ready to host its own holiday parade, mix neon paper, metallic stars, and rainbow pom-poms.
Method 2: Make an Accordion-Fold Paper Christmas Tree
The accordion tree turns a flat triangle into a dimensional decoration using repeated folds. It is an excellent project for practicing careful measuring, folding, and fine-motor skills. It is also proof that repetition can occasionally be festive rather than merely something your email password demands.
Step 1: Cut a Large Triangle
Draw an isosceles triangle on green paper, making the base approximately 8 inches wide and the height 10 to 12 inches. Cut along the lines. A taller triangle creates a slender tree, while a wider triangle produces a fuller shape.
If you want several matching trees, make a reusable cardboard template. Trace the template onto different colors or patterns, then cut out each triangle.
Step 2: Fold the Paper Into Pleats
Beginning at the bottom edge, fold a strip approximately one-half inch wide toward the back. Turn the paper over and fold another strip of the same width. Continue flipping and folding until you reach the tip.
Try to keep the pleats even, but do not panic if one wanders slightly. Press each crease firmly with your fingertip, a ruler edge, or a bone folder. Consistent folds allow the finished tree to expand evenly.
Step 3: Make the Center Opening
Compress the folded triangle into a narrow stack. Mark its horizontal center and make a small hole through all the layers. An adult can use a sharp pencil, an awl, or a single-hole punch, depending on the paper and the width of the folds.
The opening should be only large enough for the chosen support. An oversized hole lets the paper slide sideways, giving the tree the posture of someone who stayed too long at the office holiday party.
Step 4: Add the Trunk and Base
Carefully slide a paper straw, skewer, or slim dowel through the center hole. Separate the folds until the triangle expands into a tree shape. Leave a short section of the support visible beneath the paper to represent the trunk.
Insert the bottom into a wine cork, wooden bead, small block of air-dry clay, or weighted paper cup. If children are participating, use a paper straw with a clay base instead of a pointed skewer. Secure the tree with a little glue if it slides down the support.
Step 5: Finish the Design
Attach a paper star to the top and place lightweight decorations along the pleats. Stickers and paper dots work better than heavy beads, which can pull the folds out of shape. A tiny accordion tree can become an ornament if you replace the stand with a loop of thread.
Method 3: Make an Interlocking 3D Paper Christmas Tree
This design uses two identical tree silhouettes that slide together at right angles. It requires no complicated origami and very little glue. When the holiday season ends, the pieces can be separated and stored flat.
Step 1: Create a Symmetrical Template
Fold a sheet of scrap paper in half vertically. Draw half of a Christmas tree against the folded edge, including half of the trunk. Cut through both layers and unfold the paper. You now have a symmetrical template without needing to negotiate with your artistic ability.
A simple silhouette with three or four tiers is easiest to cut. Avoid extremely narrow branches, particularly when using construction paper, because thin points bend and tear more easily.
Step 2: Cut Two Matching Trees
Trace the template twice onto cardstock and cut out both shapes. Place one piece on top of the other to check that the trunks, branches, and tops align. Trim any major differences.
You may use two shades of green, two coordinating patterns, or a solid color paired with metallic paper. If the paper has a decorative front and plain back, consider gluing two sheets back-to-back before tracing so every visible side looks finished.
Step 3: Cut the Interlocking Slots
Measure the full height of one tree and mark its midpoint. On the first piece, cut a straight slot from the top down to the midpoint. On the second, cut from the bottom of the trunk up to the midpoint.
Make each slot approximately as wide as the paper is thick. Start narrow and test the fit; you can always widen a slot, but paper has yet to develop an “undo cut” feature.
Step 4: Assemble and Balance the Tree
Hold the two pieces perpendicular to each other. Slide the top-cut piece over the bottom-cut piece until the ends of the slots meet. Viewed from above, the tree should form a plus sign.
Place it on a level surface and adjust the pieces until all four sections are evenly spaced. If the tree leans, check whether the trunk bottoms are level and whether the slots reach the exact midpoint. Add a tiny removable adhesive dot inside the joint if the pieces separate too easily.
Step 5: Customize the Finished Tree
Draw ornaments before assembly so the paper remains flat beneath your hand. Gel pens, paint markers, stamps, and small stickers are ideal. You can punch holes in the branches for a lacy look or write guests’ names on the trunks to create Christmas place cards.
Creative Ways to Display Your DIY Paper Trees
A single paper tree is charming; a group looks intentional. Vary the heights and paper patterns, then arrange the trees in odd-numbered clusters. A collection of three or five generally feels balanced without looking like a paper-product convention.
- Create a dining-table centerpiece with trees in several shades of green.
- Use miniature interlocking trees as place cards.
- Arrange white and silver trees on a mantel for a snowy woodland theme.
- Attach tiny tags and use cone trees as treat covers or gift decorations.
- Make one accordion tree for each day of an Advent countdown.
- Decorate a classroom shelf with trees made by different students.
- Place battery-operated LED tea lights nearby to create a warm glow.
Keep paper decorations away from fireplaces, stovetops, space heaters, incandescent bulbs, and open flames. If you want illuminated decor, use cool, battery-operated LED lights and follow the product instructions.
Common Paper Tree Problems and Easy Fixes
The Cone Keeps Unrolling
Use double-sided tape along the full seam instead of one small piece at the top. A paper clip can temporarily hold the overlap while liquid glue dries.
The Accordion Tree Looks Uneven
Mark half-inch intervals along both sides of the triangle before folding. These guides keep the pleats parallel. Press the completed stack under a book for several minutes to sharpen the creases.
The Interlocking Tree Will Not Stand Straight
Confirm that both slots end at the midpoint and that the trunk bottoms are level. If the cardstock is too lightweight, glue a second layer behind each tree and let it dry under a heavy book before cutting the slots again.
The Decorations Fall Off
Match the adhesive to the embellishment. Glue sticks work well for paper-on-paper details, while thicker craft glue holds pom-poms and sequins more reliably. Allow glue to dry completely before moving the tree.
Conclusion
Learning how to make a paper Christmas tree opens the door to inexpensive, customizable holiday decorating. The cone method offers a sturdy surface for layers and ornaments, the accordion method creates lively texture, and the interlocking method delivers a clean 3D shape that stores flat.
Start with paper you already own, make one sample, and adjust the size or decorations after seeing how it behaves. There is no requirement that every tree match. Real forests are not perfectly coordinated either, and they still receive excellent reviews.
What Experience Teaches You About Making Paper Christmas Trees
The first useful lesson from a paper Christmas tree session is that preparation matters more than expensive supplies. Clearing the table, placing scraps in a bowl, and setting out separate tools for cutting and gluing prevents the project from turning into a search party for the scissors. When children are involved, pre-drawing templates and cutting complicated pieces in advance keeps the activity moving while still leaving plenty of room for creative decisions.
Paper choice becomes easier after making a few test trees. Heavy cardstock looks polished and stands well, but it resists tight accordion folds. Thin origami paper folds beautifully, yet a large cone made from it may sag. Medium-weight scrapbook paper is often the most flexible compromise. A small test fold in one corner can reveal whether the sheet will crease cleanly, crack along printed areas, or spring open like it has other holiday plans.
Another common discovery is that precision matters in different places for different designs. A cone can hide an imperfect edge beneath fringe, ribbon, or paper circles. An accordion tree depends more heavily on regular pleats because inconsistent folds affect the final silhouette. The interlocking design is forgiving around the branches but demands accurate center slots. Knowing where accuracy counts saves time: measure the structural parts carefully and relax a little when decorating.
It also helps to decorate components before final assembly. Drawing ornaments on an assembled cone is manageable, but decorating a flat interlocking tree is much more comfortable. Accordion trees are easiest to embellish after folding but before mounting them on their supports. Planning this sequence reduces crushed pleats, glue smears, and that special expression people make after attaching a star to the wrong side.
Making several trees at once reveals the value of working in batches. Trace all templates first, cut all shapes next, and then move to folding or assembly. This approach is particularly efficient for classroom crafts, party activities, or handmade place settings. Place materials in small trays so embellishments stay contained. Sequins are festive on paper and considerably less festive when discovered inside a slipper.
Display conditions also influence the results. Paper trees placed in a humid kitchen or near a steamy window may soften and curl. Direct sunlight can fade construction paper. A flat, dry shelf away from heat produces the longest-lasting display. For storage, interlocking trees can be separated, while cones should be nested loosely rather than flattened. Accordion trees can be compressed between sheets of tissue paper and stored in a rigid box.
Most importantly, handmade Christmas decorations tend to become more meaningful when their small imperfections remain visible. A child’s oversized ornament, a handwritten date beneath the base, or an unconventional color choice turns an inexpensive paper craft into a seasonal keepsake. Photograph the completed forest or label the trees with their makers’ names and the year. The paper may be simple, but the memory attached to it can last far longer than the glitter hiding under the furniture.