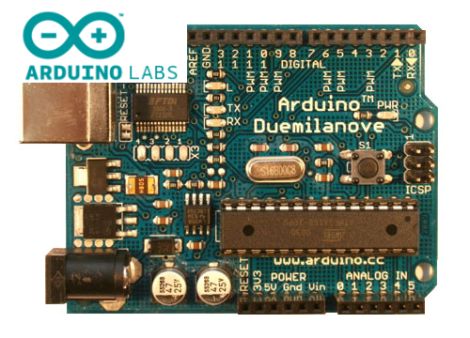
There are no copper pans hanging from the ceiling, nobody is reducing a sauce, and the chef appears to be holding a soldering iron. Welcome to the Arduino Kitchen, where the ingredients are sensors, source code, circuit boards, jumper wires, and the occasional LED that refuses to blink until someone notices a missing semicolon.
The phrase “Arduino Kitchen” originally described a behind-the-scenes space where the Arduino team could share ideas and development work with its community. It was less about cooking dinner and more about showing what was cooking inside the project itself. That distinction matters because Arduino has always been more than a collection of microcontroller boards. It is an open development ecosystem built around experimentation, documentation, reusable code, and people who enjoy asking, “What happens if I connect this to that?”
Today, the kitchen metaphor feels more appropriate than ever. Arduino developers combine familiar ingredients, adjust the recipe, test the result, burn a few metaphorical pancakes, and publish what they learn so someone else can make a better batch.
What Was the Original Arduino Kitchen?
In 2011, maker publications reported that the Arduino team had introduced a new online feature intended to bring the community closer to the platform’s development process. At first, it operated mainly as an information outlet from the team to users. The larger ambition, however, was a more open workshop where upcoming ideas could be discussed, examined, and improved collaboratively.
That was a natural extension of Arduino’s identity. The platform was already associated with accessible electronics, open-source software, shareable hardware designs, and a development environment friendly enough for artists, students, designers, and hobbyists. The Kitchen offered a glimpse behind the serving counter.
A Window Into Work in Progress
Traditional technology companies tend to reveal products after the rough edges have been sanded away. The Arduino Kitchen concept leaned toward showing the mixing bowl, the spilled flour, and the first prototype that looked suspiciously like a sandwich trapped in a nest of wires.
Opening the development process can expose incomplete ideas, uncertain decisions, and bugs. It can also produce better results. Experienced users identify compatibility problems. Beginners reveal confusing instructions. Educators explain what students struggle to understand. Hardware designers notice manufacturing concerns, while programmers find opportunities to simplify an application programming interface.
In other words, the community does not merely receive the finished meal. It helps refine the recipe.
Why the Arduino Kitchen Philosophy Still Matters
The original page belongs to an earlier chapter of maker culture, but its philosophy is visible throughout the modern Arduino ecosystem. Official software, board cores, libraries, command-line tools, and hardware-independent application programming interfaces are developed in public repositories. Users can inspect code, report issues, study changes, and contribute improvements.
The Open Source Hardware Association defines open-source hardware as hardware whose design is publicly available for people to study, modify, make, distribute, and sell under the applicable license. Arduino helped introduce that idea to a wide audience by making electronics feel less like a sealed appliance and more like a box of building blocks.
Transparency Turns Products Into Platforms
A closed gadget performs the tasks its manufacturer selected. An open development platform invites users to invent tasks nobody predicted.
A temperature sensor can become part of a greenhouse monitor, a fermentation station, a reptile enclosure, a home weather system, or a precision cooker. A load cell can weigh coffee, track pantry supplies, measure pet food, or warn that someone has taken the final cookie. The hardware may be identical; the purpose changes through software, mechanical design, and imagination.
This flexibility explains why Arduino projects appear in schools, research laboratories, art installations, workshops, farms, factories, and home kitchens. The platform does not insist on a single correct use. It supplies a practical starting point and politely gets out of the inventor’s way.
Public Mistakes Are Useful Ingredients
Open development also normalizes failure. A project log showing only the final success may look impressive, but it teaches less than one explaining why the first sensor produced nonsense, why the motor caused electrical noise, or why the enclosure melted after being placed too close to an oven.
The most valuable Arduino documentation often includes the awkward parts: calibration errors, incorrect pin assignments, timing problems, unstable power supplies, and code that worked perfectly until a second device joined the bus. These details save other makers hours of troubleshooting and several dramatic conversations with an innocent breadboard.
The Basic Recipe for an Arduino Project
Most Arduino builds can be understood as a simple recipe. The exact components change, but the underlying structure remains remarkably consistent.
1. Choose the Controller
The Arduino board is the project’s coordinator. It reads inputs, follows programmed rules, and controls outputs. A basic board may be enough for a timer or thermometer, while connected projects benefit from Wi-Fi or Bluetooth. More demanding builds may require additional memory, faster processing, advanced connectivity, or support for local machine-learning models.
2. Add Sensors
Sensors allow the project to observe the physical world. In a kitchen-related build, they might measure temperature, humidity, weight, distance, light, motion, air quality, or volatile compounds. Choosing the correct sensor is more important than choosing the fanciest sensor. A cheap component used within its proper range can outperform an expensive one installed badly.
3. Select the Outputs
Outputs communicate or act. They include displays, buzzers, indicator lights, motors, pumps, fans, valves, and relays. A smart pantry scale might update a screen. A cooking timer might flash an LED and sound a buzzer. A connected coffee station might operate an accessible physical control or send a notification.
4. Write the Sketch
Arduino programs are traditionally called sketches, a name that encourages experimentation rather than intimidation. A sketch commonly performs four jobs: initialize the hardware, read sensors, evaluate conditions, and update outputs.
The best first version should be almost embarrassingly simple. Read one sensor. Print the result to the Serial Monitor. Add one output. Confirm that it works. Then combine the pieces. Trying to build the entire smart kitchen in one upload is an excellent way to spend Saturday evening arguing with seventeen unrelated problems.
5. Test, Calibrate, and Document
Raw sensor values are not automatically trustworthy. Temperature probes should be compared with a reliable reference. Load cells need calibration using known weights. Timers should be checked for drift, and networked devices should be tested when the internet connection disappears at the least convenient moment.
Documentation completes the recipe. A useful project record includes a parts list, wiring diagram, source code, assembly instructions, calibration method, known limitations, and clear photographs. Publishing only a glamorous finished picture is the electronics equivalent of sharing a cake photo while refusing to reveal the ingredients.
What Can a Literal Arduino Kitchen Make?
The title may have started as a development metaphor, but actual kitchens are ideal environments for Arduino experiments. Cooking is filled with measurable variables, repeated tasks, alarms, timers, motors, and opportunities to prevent toast from becoming a carbon-based smoke signal.
Precision Temperature Control
One of the best-known maker cooking projects is the DIY sous-vide controller. The concept is straightforward: measure water temperature, compare it with a target, and switch a heating device according to a control algorithm. Maker publications and electronics distributors have documented Arduino-controlled systems using insulated containers, rice cookers, temperature probes, and relay-based control.
The educational value is substantial. Builders encounter feedback loops, thermal inertia, sensor placement, calibration, electrical isolation, and proportional-integral-derivative control. Dinner becomes a control-systems laboratory, although guests may become impatient when told the steak is waiting for a firmware update.
Smart Thermometers and Fermentation Monitors
A simpler project can track the temperature of bread dough, yogurt, kombucha, cheese, chocolate, or a refrigerator. Data can be shown locally, saved to a memory card, or transmitted to an Arduino Cloud dashboard.
Cloud-connected “Things” can associate device variables with dashboards and widgets, making it possible to view readings remotely. A fermentation monitor could display current temperature, chart changes over time, and issue an alert when conditions move outside a preferred range.
Remote monitoring is convenient, but it should not be confused with laboratory-grade food-safety certification. Hobby electronics can assist a cook; they should not become the sole authority on whether food is safe to serve.
Ingredient and Pantry Tracking
Load cells and amplifier modules make it possible to turn a container shelf into a digital scale. Place a flour bin, coffee container, or pet-food dispenser on the platform, record the weight, and estimate how much remains.
A practical system does not need to recognize every ingredient using artificial intelligence. It can simply watch one important item and send a reminder when the weight falls below a threshold. That may sound modest, but a reliable “buy more coffee” alert has prevented greater household crises than many allegedly revolutionary smart appliances.
Accessible Appliance Controls
Arduino projects can also improve accessibility. The official Arduino blog has highlighted work that adapted a coffee maker whose small buttons or touchscreen were difficult for some users to operate. A programmable controller can support larger switches, alternative input methods, clearer feedback, or customized sequences.
This is where open prototyping becomes especially meaningful. Mass-market appliances are designed for an average user who may not exist. Arduino allows controls to be adapted to the reach, strength, vision, mobility, or routine of an actual individual.
Smarter Toast and Odor Detection
Some experimental projects use gas sensors and embedded machine learning to estimate when bread is approaching the boundary between toasted and tragically archaeological. Instead of relying only on a fixed timer, the system analyzes compounds released during heating.
Such a project is partly useful and partly wonderfully excessive. That is not a criticism. Overengineering breakfast is a respected maker tradition, and it teaches sensor fusion, data collection, model training, and real-time inference in a memorable way.
Safety Rules Before Electronics Enter the Kitchen
Water, steam, heat, food, sharp tools, and household electricity make the kitchen an unforgiving electronics bench. A clever prototype should never create a new hazard while solving a minor inconvenience.
- Keep development boards, breadboards, and exposed wiring away from liquids, steam, grease, and hot surfaces.
- Use food-safe, waterproof probes when a sensor may touch food or cooking water.
- Place electronics in suitable enclosures with strain relief and ventilation where required.
- Do not switch household mains electricity with exposed hobby wiring.
- Use properly rated, isolated, enclosed control hardware and qualified assistance for mains-powered appliances.
- Never treat a hobby gas, flame, or smoke sensor as a replacement for a certified safety alarm.
- Design failures safely. A disconnected sensor should turn a heater off, not command maximum power forever.
The safest beginner projects use low-voltage power and provide information rather than directly controlling heating appliances. A refrigerator monitor, ingredient scale, visual timer, or cabinet-light controller can teach valuable skills without introducing high-current wiring beside the sink.
How Community Collaboration Improves the Recipe
An Arduino project becomes more useful when other people can reproduce it. That requires more than uploading a sketch with file names such as final_version_7_really_final.ino.
Good collaborative projects explain the problem before presenting the solution. They identify the exact board and component versions, clarify voltage requirements, list software libraries, and mention whether the design has been tested for hours, days, or merely long enough to record a heroic demonstration video.
Feedback Should Change the Design
Community participation works best when it is more than applause. One user may suggest a cheaper sensor. Another may test the code on a different board. Someone may identify a licensing issue, improve the enclosure, translate the instructions, or notice that the interface is inaccessible to color-blind users.
The maintainer’s role resembles that of a kitchen lead during a busy service: keep the goal clear, accept useful substitutions, prevent incompatible changes from landing in the same pot, and document why decisions were made.
Libraries Are Shared Kitchen Tools
Arduino libraries package common behavior so every project does not have to begin at the level of individual registers and timing cycles. Display drivers, sensor interfaces, network clients, motor-control tools, and data-processing functions can be installed and reused.
This modular structure allows a beginner to assemble sophisticated behavior from tested components. It also creates responsibilities. Libraries should be maintained, versioned, documented, and checked for compatibility. Adding five libraries without understanding their memory use is the programming equivalent of buying every kitchen gadget advertised after midnight and discovering there is no counter space left.
From the 2011 Kitchen to Connected Prototyping
The tools surrounding Arduino have expanded considerably since the original Kitchen announcement. Developers can work in the desktop Arduino IDE, use cloud-based editing tools, manage boards and libraries, inspect serial data, plot sensor values, collaborate through public repositories, and build web dashboards for connected devices.
Yet the underlying workflow remains recognizable:
- Start with a real problem or an entertaining question.
- Build the smallest prototype that can test the idea.
- Measure what happens instead of guessing.
- Share enough information for another person to reproduce it.
- Use feedback to improve the next version.
That process is the true Arduino Kitchen. It is not a particular webpage, board, or software release. It is a culture of making technology in public, learning through physical experiments, and treating documentation as part of the design rather than paperwork added after everyone has gone home.
Hands-On Experiences From the Arduino Kitchen
The first experience many builders have with Arduino is an LED blinking on command. It appears almost comically simple. Then the light flashes at exactly the interval specified in the sketch, and something important happens: software has crossed into the physical world. The computer is no longer rearranging pixels. It is controlling an object on the desk.
A kitchen-themed project makes that moment even more tangible. Consider building a basic refrigerator temperature monitor. The first version may consist of a board, a digital temperature sensor, and the Serial Monitor. The values appear, but they jump around. Moving the sensor near the cooling vent produces a different reading from placing it beside the door. The builder quickly learns that measurement is not merely about owning a sensor; placement, airflow, sampling intervals, and calibration all affect the result.
The next version adds a small display. Suddenly, the project must manage wiring, screen libraries, formatting, and update timing. Refresh too often and the display flickers. Refresh too slowly and it feels unresponsive. A buzzer is added for high-temperature warnings, only to announce every tiny fluctuation with the enthusiasm of a smoke detector auditioning for musical theater. Hysteresis is introduced so the alarm does not rapidly switch on and off near the threshold.
That one improvement teaches a fundamental engineering lesson: real systems live near boundaries, and clean textbook conditions are rare.
A pantry scale creates a different set of discoveries. The load cell produces small electrical changes that require amplification and calibration. The empty container has weight, so the system needs a tare function. The kitchen counter is not perfectly level. Someone leans on the shelf, and the flour supply appears to increase by four pounds. Filtering and stable-reading detection become necessary.
Connected features add another layer. Sending data to a dashboard sounds straightforward until Wi-Fi becomes unreliable. The device should continue measuring even when it cannot reach the network. It should reconnect without freezing, avoid flooding the server, and preserve reasonable behavior after a power interruption. A project that works only when the developer stands beside it with a laptop is a demonstration, not yet an appliance.
Enclosures often deliver the final humbling lesson. A circuit that behaved beautifully on a desk may fail inside a compact box because wires loosen, heat accumulates, buttons become hard to reach, or the USB connector ends up facing a wall. Building the enclosure early prevents the electronics from becoming a perfect solution to a shape that cannot physically exist.
The most rewarding experience comes when someone else follows the instructions. They may use a different board, substitute a sensor, or discover an unclear wiring diagram. Their questions reveal assumptions the original builder never noticed. Updating the documentation in response turns a personal experiment into a community resource.
That cycle captures what the Arduino Kitchen has always represented. An idea begins as a rough recipe. Prototyping exposes missing ingredients. Testing adjusts the quantities. Feedback improves the instructions. The final project may be a smart thermometer, an accessible coffee control, a fermentation monitor, or a toaster with an unreasonable amount of artificial intelligence. The specific dish matters less than the method: build openly, measure honestly, share clearly, and never trust a breadboard sitting beside a bowl of soup.
Conclusion: The Kitchen Is Still Open
“Come See What’s Cooking In The Arduino Kitchen” remains an inviting description of open hardware development. The original idea offered the community a closer look at Arduino work in progress. Its larger message continues through public source code, shared libraries, open hardware principles, project documentation, forums, tutorials, and thousands of experiments built on kitchen tables around the world.
Arduino succeeds because it makes technology editable. A board can read the temperature of a water bath, weigh a coffee container, improve an appliance interface, monitor fermentation, or become part of a project nobody has imagined yet. More importantly, the design can be examined, modified, documented, and passed along.
The Arduino Kitchen is therefore not a room behind a website. It is any place where curiosity meets components and someone is willing to publish the recipe afterward. Pull up a chair, clear a space between the mixing bowl and the multimeter, and see what the community cooks next.