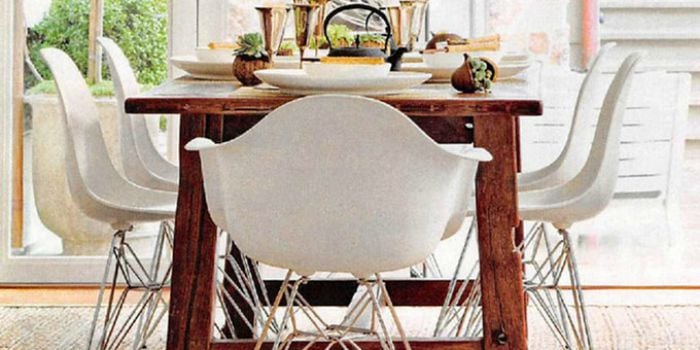
If your dining room is missing that one heroic piece of furniture that says, “Yes, we eat here, argue here, celebrate here, and occasionally dump three backpacks and a basket of laundry here,” a farmhouse dining table is the answer. It is sturdy, timeless, welcoming, and just rustic enough to make store-bought furniture feel a little overdressed. Better yet, building one yourself gives you something even better than bragging rights: a custom table that actually fits your room, your style, and your budget.
A farmhouse dining table is not complicated in the fussy, museum-curator sense. It is beautiful because it is honest. Thick boards. Strong legs. A top that looks better with grain, knots, and a little character. This is not the table for people who panic over a tiny dent. This is the table for real life. Homework. Holiday pies. Pasta night. An accidental splash of coffee that becomes part of family history.
In this guide, you will learn how to build a farmhouse dining table from planning to finish, including size ideas, wood choices, step-by-step construction, finishing tips, and the mistakes that love to sneak into DIY furniture projects wearing innocent faces.
Why a Farmhouse Dining Table Never Really Goes Out of Style
Farmhouse tables stick around because they do two jobs at once: they look warm and they work hard. The design is simple enough to fit traditional, rustic, modern farmhouse, cottage, and even industrial interiors. Change the stain, paint the base, soften the edges, or use a cleaner apron design, and suddenly the same build can look old-school charming or magazine-level polished.
That flexibility matters. A farmhouse table can have a chunky top with turned legs, a clean rectangular top with square posts, or a more architectural trestle base that makes it feel like it belongs in a renovated barn where everyone somehow owns linen napkins. The point is not perfection. The point is presence.
Start With the Right Size Before You Cut a Single Board
The most common mistake in table building happens before the saw comes out: building a table that is too big for the room or too small for the people using it. A comfortable dining table usually lands around 28 to 30 inches high. For rectangular tables, 36 to 40 inches wide is a sweet spot because it gives you enough room for plates, serving dishes, and elbow diplomacy. A practical six-person farmhouse table often measures about 72 inches long by 36 to 40 inches wide, while larger families may prefer 78 to 96 inches long.
Before finalizing your dimensions, leave walking space around the table. In many dining rooms, about 36 inches of clearance is the minimum that still feels civilized, while more generous spacing feels even better if your room allows it. Also remember the “personal bubble” factor: give each seated person enough width so Thanksgiving does not turn into accidental shoulder combat.
A Good Starting Size Guide
- 4 people: 48 to 60 inches long x 36 inches wide
- 6 people: 72 inches long x 36 to 40 inches wide
- 8 people: 78 to 96 inches long x 36 to 40 inches wide
- Standard height: 30 inches
For this article, we will use a classic example: a 72-inch-long farmhouse dining table that seats six comfortably. It is roomy without becoming a dining-room aircraft carrier.
Choose the Best Wood for a Farmhouse Table
The wood you choose determines not only the look of your farmhouse table, but also the price, weight, hardness, and how forgiving the build will be. This is where your budget and your patience have a little meeting.
Pine: Budget-Friendly and Full of Character
Pine is a classic farmhouse favorite because it is affordable, widely available, easy to work with, and naturally casual-looking. It dents more easily than hardwoods, but that is not always a flaw. On a farmhouse table, a few marks can make the piece feel lived-in rather than damaged. Pine is great for beginners who want the look without the premium lumber bill that makes your wallet file a complaint.
White Oak: Durable and Beautiful
White oak is a stronger, tougher upgrade with gorgeous grain and excellent long-term durability. If you want a farmhouse table that looks refined while still feeling substantial, white oak is a fantastic choice. It also takes texture and stain well, especially if you want a deeper, more dramatic finish.
Maple: Smooth and Strong
Maple gives you a cleaner, tighter grain and impressive durability. It is ideal if you want the farmhouse shape but prefer a less rustic, more polished result. It can be harder on tools and slightly less dramatic in grain than oak, but it is a hardworking furniture wood.
Walnut: Premium, Rich, and Gorgeous
Walnut is the “I know exactly what I’m doing and possibly own very nice clamps” option. It is beautiful, rich in color, and elegant. It can absolutely be used for a farmhouse-style table, especially in a modern farmhouse home, but it costs more. If you are building your first table, walnut may feel like wearing a tuxedo to learn roller skating.
If this is your first build, pine or a more affordable hardwood is a smart place to start. You can always build version two later once you realize furniture building is a slippery, sawdust-covered slope.
Materials and Tools You Will Likely Need
Typical Materials
- Lumber for tabletop boards
- 4 table legs or trestle-base components
- Apron boards and stretchers
- Wood glue
- Pocket-hole screws or wood screws
- Tabletop fasteners, Z-clips, or slotted attachment blocks
- Wood filler
- Sandpaper in several grits
- Stain or paint, if desired
- Protective topcoat such as polyurethane or varnish
Typical Tools
- Tape measure
- Speed square
- Miter saw or circular saw
- Drill/driver
- Pocket-hole jig, if using pocket-hole joinery
- Sander
- Clamps
- Orbital sander or sanding block
- Safety glasses and hearing protection
You do not need a professional cabinet shop to build a solid farmhouse dining table. Many successful DIY builders use a simple set of tools and smart planning. That said, clamps have a magical ability to make you think, “Maybe I need just one more.” This thought is normal. Slightly expensive, but normal.
How to Build a Farmhouse Dining Table Step by Step
Step 1: Build the Tabletop First
The tabletop is the star of the show. For a 72-inch table, you can glue up several boards side by side until you reach your target width. Many farmhouse builders use dimensional lumber for a chunkier, rustic look, while others mill hardwood boards for a flatter, more refined top.
Lay out your boards before attaching anything. Flip and rotate them until the grain looks balanced. If you can, avoid placing all knots or dramatic grain in one area. A tabletop should look intentional, not like all the loudest boards sat together at the same lunch table.
Join the boards using pocket holes, dowels, biscuits, or edge gluing with clamps, depending on your tools and comfort level. Whatever method you choose, dry-fit first. That simple step can save you from the deeply spiritual experience of realizing your tabletop is drifting out of square while the glue sets.
Step 2: Clamp, Check, and Flatten
Once glued, clamp the top evenly and check alignment across the seams. A little unevenness is common, especially with construction lumber. After the glue dries, scrape or sand off squeeze-out, then flatten the surface as much as possible. A farmhouse table can be rustic, but “rustic” should not mean “your dinner plate rocks like a seesaw.”
Start sanding with a coarser grit if needed, then work upward gradually. Spend time here. Good sanding is the difference between a table that feels custom and a table that feels like it was built in a hurry while someone yelled, “Eh, stain will hide it.” Stain will not hide it. Stain is a tattletale.
Step 3: Build the Base
You can choose from several farmhouse base styles:
- Four legs with aprons: classic, sturdy, and beginner-friendly
- Trestle base: dramatic farmhouse look with lots of legroom
- X-base or pedestal-inspired designs: more decorative and great for statement pieces
The easiest route for many DIYers is a four-leg base with aprons. Cut your legs to final height, remembering the tabletop thickness must be included in the overall table height. Then cut long aprons and short end aprons to fit your design. Attach the apron assembly carefully so everything stays square.
If you want a chunkier farmhouse look, use thicker legs or add lower stretchers. Wide aprons also help reduce wobble. This is not the place to be delicate. A farmhouse table should feel like it could survive family dinner and an enthusiastic board-game night.
Step 4: Dry-Fit the Base Before Final Assembly
Before glue and screws become emotionally committed, dry-fit the legs and aprons. Check for wobble on a flat surface. Small issues are much easier to fix now than after the table is assembled and you are trying to diagnose a mysterious shim-worthy lean.
If one leg is slightly off, trim or sand it before final assembly. Use clamps to keep everything aligned as you secure the joints.
Step 5: Attach the Top the Smart Way
This is where many first-time builders make a major mistake: screwing the tabletop rigidly to the base with no allowance for wood movement. Solid wood expands and contracts across the grain with seasonal humidity changes. If you lock it down too tightly, the top can crack, split, or warp. That is not farmhouse charm. That is preventable sadness.
Instead, use proper tabletop fasteners, Z-clips, or slotted attachment methods that allow the top to move naturally. If you are adding breadboard ends, remember that the center portion is typically fixed while the rest must still allow seasonal movement. In plain English: wood likes freedom. Not total chaos, but freedom.
Step 6: Shape the Edges and Soften the Feel
A farmhouse dining table should feel inviting, not sharp enough to punish your thighs. Ease the edges with sandpaper or a router profile that suits your style. A slightly softened edge is more comfortable and looks more finished, whether your table leans rustic or refined.
If you want a more traditional farmhouse look, you can leave subtle saw marks or wire-brushed texture. If you prefer a cleaner modern farmhouse design, sand everything smooth and keep the lines crisp.
Step 7: Stain, Paint, or Keep It Natural
This is where the table starts revealing its personality. There are three popular directions:
- Natural wood: best if your lumber has beautiful grain
- Stained top with painted base: classic farmhouse move
- Full stain or full paint: more unified and dramatic
Dark walnut stain on the top with a white or soft gray painted base is a familiar farmhouse combination, but it is not your only option. Medium oak tones, weathered brown, warm honey, and matte black bases can all look fantastic. Test stain on scrap wood first. The board you test on may save you from turning “warm brown” into “why is this orange?”
Step 8: Protect the Surface With a Durable Topcoat
A dining table is not wall art. It takes heat, moisture, spills, crumbs, and the occasional mysterious sticky ring nobody admits creating. A clear protective finish matters. Choose a durable topcoat appropriate for a tabletop, and apply it carefully according to product directions. Satin sheens are especially popular because they look warm and forgiving without screaming for attention.
Let the finish cure properly before heavy use. Dry is not the same as cured. A finish that feels dry can still be soft underneath, and your first dinner party should not leave permanent impressions from a casserole dish or a decorative bowl full of lemons you bought for “ambiance.”
Common Mistakes to Avoid
Ignoring Wood Movement
This is the big one. If you build with solid wood, plan for expansion and contraction. Do not trap the top in a rigid frame and then act surprised when nature acts like nature.
Rushing the Sanding
Poor sanding ruins good builds. Scratches, glue spots, and uneven surfaces become painfully obvious once finish goes on. Sand thoroughly and check the surface in raking light.
Building Too Heavy Without a Plan
Farmhouse style should feel substantial, not impossible to move. If you use especially thick lumber, think about whether the table needs to fit through doorways or move between homes one day. Future You deserves a little kindness.
Choosing Looks Over Legroom
Some decorative bases look amazing but create awkward seating. Make sure the apron depth, leg placement, and support structure still leave comfortable space for knees and chairs.
Skipping the Dry Fit
Dry fitting is boring in the way seat belts are boring: not exciting, incredibly useful, and deeply appreciated when things go sideways.
How Much Does It Cost to Build a Farmhouse Dining Table?
The final price depends on lumber species, size, finish, and whether you already own the tools. A basic pine farmhouse dining table can be built far more affordably than most store-bought solid-wood versions, while white oak or walnut can push the project into premium territory. Even so, custom size and real wood construction often make the DIY route worth it.
If your goal is value, choose a simple base, standard dimensions, and affordable lumber. If your goal is heirloom quality, invest in better wood, better fasteners, and a more durable finish. Both approaches can produce a beautiful result. One simply costs less than the chandelier hanging above it.
How to Make Your DIY Farmhouse Table Look Expensive
- Use boards with attractive grain variation, not random chaos
- Keep joints tight and the base square
- Ease edges consistently
- Apply stain evenly and wipe excess carefully
- Choose a durable, low-sheen topcoat
- Do not over-distress the wood unless your goal is “survived three barn fires”
A well-built farmhouse dining table feels intentional. That means the rustic character should look chosen, not accidental. There is a huge design difference between “beautifully weathered” and “I gave up halfway through sanding.”
What the Build Experience Really Feels Like
Building a farmhouse dining table is one of those projects that starts with confidence and a tape measure, then slowly turns into a relationship with wood movement, clamp strategy, and the phrase, “That looked straighter from the other angle.” The experience is deeply satisfying, but it is also delightfully humbling.
At first, the excitement is all aesthetic. You imagine the finished table in your dining room, maybe with six chairs around it, soft lighting above it, and a casually impressive bowl of fruit nobody actually eats. Then reality arrives. Suddenly you are standing in front of stacks of lumber, trying to choose boards that are straight enough, attractive enough, and not secretly plotting to twist the moment you get home. It is the furniture-building version of speed dating.
The tabletop stage is where emotion enters the chat. Laying out boards is surprisingly personal. One arrangement looks too busy, another too plain, and one board with a gorgeous knot becomes the obvious star of the show. You clamp everything together, step back proudly, and then notice one seam slightly proud of the others. This is when you learn that woodworking is not really about forcing perfection. It is about making dozens of smart little decisions before the glue dries.
Then comes sanding, the great equalizer. Sanding is where optimism becomes work. It is also where the table transforms from “pile of joined boards” into “oh wow, this is actually furniture.” Grain begins to pop. Edges soften. The top starts to feel good under your hand. It is repetitive, dusty, and weirdly therapeutic right up until you find a patch of dried glue you missed and say something dramatic to nobody in particular.
Building the base often feels easier because the table starts standing on its own legs, literally and emotionally. But this is also the point where every tiny measurement matters. A slight difference can cause wobble, and wobble is the enemy of confidence. Nothing makes a DIY builder question life choices faster than placing a proud new table on the floor and watching it rock.
Finishing the table is where the mood changes completely. The stain or clear coat suddenly pulls the whole project together. Imperfections do not disappear, but they begin to look like character instead of mistakes. The first coat always feels magical. The second coat feels responsible. By the final coat, you are hovering protectively like a museum guard warning invisible people not to touch the masterpiece.
And then the best part happens: the table moves into the room. It stops being a project and becomes part of the house. People sit at it. They run their hands over the top. They ask where you bought it. You get to say, as casually as possible, “I built it.” That sentence alone is worth a shocking amount of sawdust.
What many builders remember most is not the cut list or the stain color. It is the feeling of making something solid, useful, and lasting. A farmhouse dining table is not just another DIY project. It is a piece of daily life that keeps showing up for years. Meals happen there. Conversations happen there. The occasional science fair volcano happens there. It earns its keep. And every small mark it collects becomes proof that you did not just build furniture. You built a place people want to gather.
Final Thoughts
If you want a rewarding woodworking project with practical value and serious style, it is hard to beat a farmhouse dining table. It is approachable enough for ambitious beginners, customizable enough for experienced builders, and useful enough to justify every hour you spend on it. Keep the design simple, choose lumber wisely, allow for wood movement, and take your time with sanding and finishing.
The result is more than a table. It is a hardworking centerpiece with warmth, character, and just enough rustic confidence to make the whole room feel more inviting. Also, it gives you the deeply satisfying privilege of pointing at it during dinner and thinking, “Yes, that beauty is mine, and no, the store did not get the credit.”