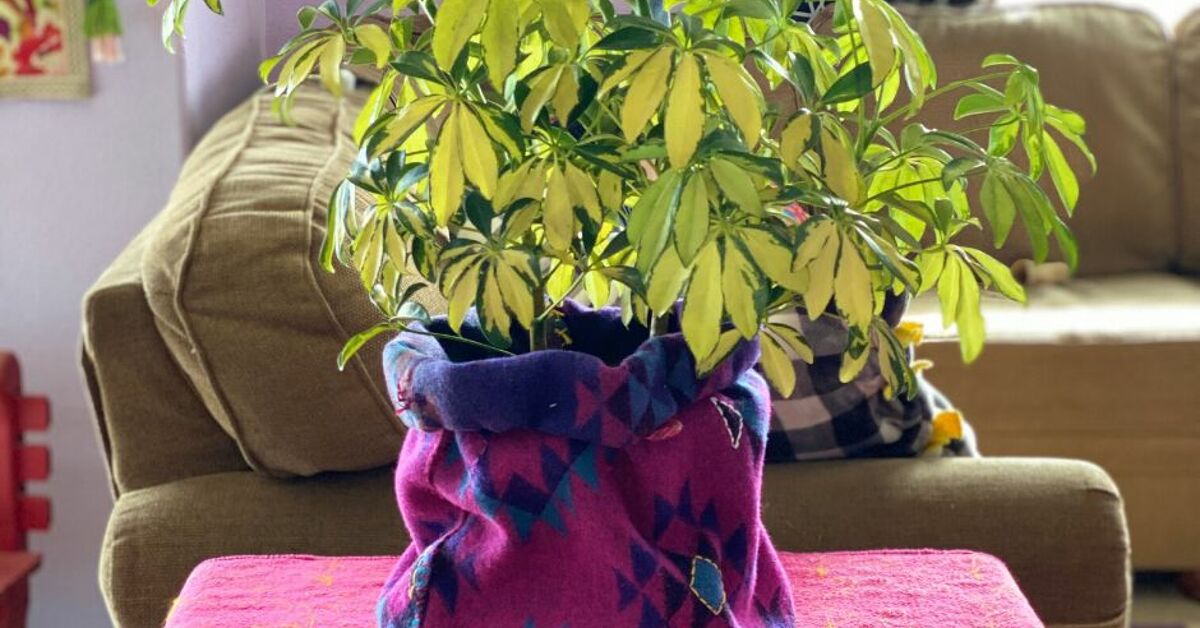
An embroidered basket planter is what happens when a houseplant, a woven basket, and a box of colorful thread decide to improve the living room together. The result combines natural texture, handmade detail, and greenery in one decorative piece that feels warmer than an ordinary plastic pot and more personal than mass-produced home decor.
Better still, this project does not demand expert embroidery skills. A few simple stitches, a flexible basket, and a properly protected nursery pot are enough to create something charming. You can decorate the basket with wildflowers, geometric lines, cheerful lettering, oversized leaves, or abstract patterns that look delightfully artisticeven when they began as an accidental knot.
This guide explains how to make an embroidered basket planter, choose suitable materials, protect the basket from moisture, select the right plant, and avoid the small mistakes that can turn an adorable DIY project into a damp, misshapen science experiment.
What Is an Embroidered Basket Planter?
An embroidered basket planter is a woven basket embellished with embroidery floss, yarn, cord, ribbon, or punch-needle stitches and used as a decorative outer container for a potted plant. In most cases, the plant remains inside a plastic nursery pot with drainage holes. The decorated basket functions as a cachepot, hiding the practical growing container while adding texture and color.
This two-container approach is especially useful because woven baskets are generally designed for storage, not direct contact with wet soil. Keeping the plant in its nursery pot protects the basket, makes watering easier, and allows the decorative cover to be changed without disturbing the roots.
Woven planters have become popular in bohemian, Scandinavian, farmhouse, coastal, and eclectic interiors. Embroidery takes the look one step further by turning a neutral basket into an original piece of fiber art. Several home-design projects have successfully used yarn, fringe, punch needlework, paint, and colorful fibers to transform simple baskets into decorative plant holders.
Why Make an Embroidered Basket Planter?
It Adds Personality Without Adding Clutter
A planter already occupies space, so decorating its outer basket adds visual interest without requiring another object on the shelf. Instead of placing a framed print, textile hanging, and plant in the same corner, the embroidered basket performs all three jobs rather efficiently. It is practically the multitasking employee of home decor.
It Is Easy to Customize
You can coordinate the thread with pillows, curtains, rugs, wall art, or seasonal decorations. A basket with black geometric stitches suits a modern room, while coral flowers and mustard-yellow leaves create a playful bohemian look. Names, dates, initials, and short phrases can also turn the planter into a thoughtful housewarming or Mother’s Day gift.
It Gives Old Baskets a Second Life
A thrift-store basket with a faded finish or slightly uneven weave may be perfect for embroidery. Colorful stitching distracts from cosmetic imperfections and makes the basket feel intentional rather than forgotten. Repurposing existing containers is also a widely recommended way to create inexpensive, distinctive garden displaysas long as drainage and moisture protection are handled properly.
Materials and Tools
- A woven basket that fits your plant pot
- Embroidery floss, cotton cord, thin yarn, raffia, or ribbon
- A tapestry needle, chenille needle, or large embroidery needle
- Small, sharp scissors
- Removable fabric marker, chalk pencil, or paper template
- Cardboard to place behind the stitching area
- A plastic nursery pot with drainage holes
- A waterproof saucer, plant tray, or fitted plastic liner
- Optional thimble, needle-nose pliers, beads, tassels, and fabric glue
Choose thread thickness according to the basket’s weave. Standard six-strand embroidery floss works well for fine wicker or tightly woven seagrass. Cotton cord or lightweight yarn is easier to see on chunky baskets. DMC’s instructional resources cover basic stitches, needle selection, threading, pattern transfer, and ways to begin and finish embroidery, while craft retailers commonly offer needles and fibers in several weights for different surfaces.
How to Make an Embroidered Basket Planter
1. Select a Suitable Basket
Look for a basket with a stable base, an open or moderately flexible weave, and enough interior space for a waterproof tray and nursery pot. Seagrass, jute, coiled cotton rope, rattan, and soft woven fiber baskets are usually easier to stitch than hard, brittle wicker.
The basket should be slightly wider than the plant pot. Leave enough room to lift the nursery pot out without wrestling with it. If the fit is so tight that removing the plant requires negotiation, snacks, and a crowbar, choose a larger basket.
Inspect the rim and handles before buying. Avoid baskets with broken fibers, mildew, or a base that collapses under light pressure. Do not place heavy embroidery along structural seams because repeated needle punctures may weaken them.
2. Plan the Embroidery Design
Begin with a design that matches the basket’s shape. Horizontal borders complement wide baskets, while vertical stems visually lengthen short, rounded containers. Large motifs are usually easier than tiny details because the basket weave determines where the needle can pass.
Sketch the design on paper first. You can then hold the paper against the basket, mark several reference points with chalk, or temporarily pin a lightweight paper template in place. Another beginner-friendly method is to let the weave act like a grid and count the spaces between stitches.
Simple patterns include:
- Rows of X-shaped cross-stitches
- Running-stitch rainbows
- Lazy-daisy flowers
- Leafy vines made with straight stitches
- Geometric diamonds and chevrons
- A short word such as “grow,” “bloom,” or “home”
3. Test the Needle and Thread
Before beginning the main design, test two or three stitches near the back of the basket. Make sure the needle passes between the woven fibers without splitting them. A blunt tapestry needle is helpful for open weaves because it slides through existing gaps. A sharper chenille needle may be needed for coiled cotton or fabric-covered baskets.
Cut a manageable length of thread, usually about 18 to 24 inches. Very long thread may appear efficient, but it tends to twist, fray, and form mysterious knots in dimensions unknown to modern physics.
4. Start Stitching
Insert the needle from inside the basket so the tail remains hidden. Leave a short tail and secure it beneath later stitches rather than making a bulky knot. Pull the thread until it lies flat against the weave, but do not tug so tightly that the basket puckers.
For outlines, use running stitch or backstitch. For petals and leaves, make detached chain stitches or simple straight stitches. French knots can form flower centers, berries, or small decorative dots, although thick yarn may create enough drama without them.
Rotate the basket as you work instead of twisting your wrist into uncomfortable positions. Place a piece of cardboard inside the basket behind the stitching area to protect your fingers. A thimble or small pair of needle-nose pliers can help pull a stubborn needle through dense sections.
5. Finish the Thread Securely
When a section is complete, bring the needle to the inside and weave the thread beneath several existing stitches. Trim the excess without cutting the basket fibers. Avoid large knots because they can catch on the nursery pot or create visible bumps.
If the design includes tassels or pom-poms, attach them near the end. These embellishments are charming, but placing them too close to the floor can make them irresistible to cats, robotic vacuums, and toddlers conducting unauthorized durability tests.
6. Protect the Basket From Water
The safest arrangement is to leave the plant in a nursery pot with drainage holes and place that pot on a waterproof saucer inside the basket. Remove the nursery pot for watering, allow it to drain completely in a sink, and return it only after water has stopped dripping.
Do not depend on a layer of rocks to solve drainage problems. Stones placed beneath potting mix do not replace drainage holes and may leave a saturated zone around the roots. University extension guidance and horticultural sources consistently recommend freely draining containers, avoiding standing water, and using a separate inner pot when the decorative outer container cannot drain.
A fitted plastic liner can provide extra protection, but it should not become a hidden reservoir. Check it regularly and empty any collected water. A clear tray is useful because leaks and standing water are easier to spot.
Best Embroidery Designs for Basket Planters
Botanical Motifs
Leaves, vines, daisies, mushrooms, and wildflowers naturally complement live plants. Use two or three shades of green for leaves and add a contrasting flower color. A loose botanical pattern is forgiving because irregular petals look handcrafted rather than incorrect.
Modern Geometric Patterns
Diamonds, stair-step lines, arches, and repeated crosses work well with structured woven baskets. Black, cream, rust, and muted blue create a modern Southwestern look. For a minimalist design, stitch one bold band around the center instead of covering the entire basket.
Seasonal Designs
Try pastel flowers for spring, coral and turquoise shapes for summer, burnt-orange leaves for fall, or white stitched stars for winter. Seasonal embroidery can be limited to a removable fabric band if you enjoy changing decorations frequently.
Words and Monograms
Short words are easier to read on curved surfaces than long quotations. “Grow,” “hello,” “bloom,” and family initials are practical choices. Use block letters when working on a coarse weave and outline each letter with backstitch.
Choosing the Right Plant
The best plant depends on the basket’s size, location, and visual style. Select the plant based on available light first and appearance second. Even the most beautiful combination will disappoint if a sun-loving plant is sentenced to a dim hallway.
Trailing Plants
Pothos, heartleaf philodendron, spider plants, tradescantia, and certain hoyas soften the rim and draw attention toward the embroidery. Their cascading stems work especially well in tall baskets placed on shelves or plant stands.
Architectural Plants
Snake plants, ZZ plants, small palms, rubber plants, and young monsteras provide strong vertical shapes. Pair a bold plant with a simpler stitched pattern so the design does not become visually crowded.
Compact Plants
Peperomias, African violets, small ferns, and fittonias fit tabletop baskets. These plants can be grouped as a collection, with each basket receiving a related embroidery pattern in different colors.
If repotting is necessary, choose a new growing container only slightly larger than the old one. Oversized pots hold more wet potting mix than the roots can use, increasing the risk of prolonged moisture and root problems. University of Minnesota and Penn State Extension guidance recommends moving houseplants into modestly larger containers rather than making an enormous size jump.
Styling an Embroidered Basket Planter
Place a large embroidered planter beside a sofa, console table, fireplace, or reading chair. Smaller baskets look attractive on open shelving, desks, kitchen counters, and bedside tables. Use odd-numbered groupingssuch as three planters at different heightsto create a relaxed, collected arrangement.
For an outdoor covered porch, combine upright, rounded, and trailing plants. This resembles the classic “thriller, filler, spiller” approach used in container gardening: one plant adds height, another fills the center, and a trailing plant softens the edge. Choose plants with similar light and watering needs so the arrangement remains manageable.
Repeat one thread color elsewhere in the room. A mustard stitch may echo a throw pillow, while a deep blue border may connect the planter to artwork or a rug. Repetition makes the project feel integrated instead of looking like the craft basket exploded near the ficus.
Care and Maintenance
- Remove the inner pot before watering whenever possible.
- Let excess water drain completely before replacing the plant.
- Check the saucer and liner after every watering.
- Keep the woven basket away from prolonged direct rain.
- Vacuum dust with a soft brush attachment.
- Spot-clean embroidery with a barely damp cloth.
- Trim loose thread ends instead of pulling them.
- Rotate the plant periodically for balanced growth.
Most container plants prefer evenly moist rather than waterlogged potting mix. Watering frequency changes with the plant species, container size, indoor temperature, season, and amount of light. Check the potting mix instead of watering only by calendar. Never leave the nursery pot standing in drained water, as consistently soggy conditions can damage roots and encourage fungus gnats.
Common Mistakes to Avoid
Planting Directly Into an Unprotected Basket
Wet potting mix can stain, weaken, or mold natural fibers. Unless the basket was manufactured as a lined planter, treat it as a decorative cover rather than a growing container.
Making the Stitches Too Tight
Overtightened thread distorts the basket and may snap brittle fibers. The stitches should rest against the surface without squeezing it.
Choosing an Extremely Dense Basket
If there are no gaps between fibers, pushing a needle through can damage the basket and your hands. Add embroidery to a removable canvas panel and sew or glue the finished panel onto the basket instead.
Ignoring the Plant’s Mature Size
A tiny plant can eventually outgrow the decorative basket. Select a basket with some clearance or choose a slow-growing plant. Avoid placing a top-heavy plant in a lightweight basket that can tip easily.
Letting Water Collect Out of Sight
A basket can hide a surprising amount of standing water. Inspect the liner and saucer after watering rather than assuming everything drained correctly.
Experiences and Practical Lessons From Embroidered Basket Planter Projects
One of the most consistent lessons reported across basket-planter makeovers is that simple designs usually look better than overly detailed ones. Makers often begin with ambitious plans involving tiny flowers, lettering, borders, beads, and perhaps the complete history of Western civilization stitched around a ten-inch basket. Once the needle meets the irregular weave, however, large shapes prove easier to control and more visible from across the room.
A border of oversized cross-stitches can create more impact than dozens of miniature motifs. Three large flowers placed asymmetrically may look more modern than a perfectly repeated floral band. The texture of the basket already contributes substantial visual detail, so embroidery does not need to fill every available inch.
Another practical discovery is that the weave often changes the original pattern. A paper sketch may show a perfectly round flower, but the available openings can turn it into an oval. Rather than forcing the fibers apart, experienced makers adapt the design to the material. Adding a leaf, extending one petal, or shifting a line by half an inch usually makes the finished pattern feel more organic.
Thread choice also changes the personality of the project. Standard embroidery floss creates neat, delicate lines but may disappear against a large seagrass basket. Soft cotton yarn produces bolder shapes and can complete a pattern more quickly. Raffia blends naturally with rustic baskets, while bright cord produces a playful, graphic effect. Testing a short section on the back saves considerable frustration.
Moisture management is the less glamorous lesson, but it is the one that determines whether the project remains attractive. Decorative plastic liners can protect the fiber, yet they may conceal spilled water. Makers who remove the plant for watering generally report fewer stains and odors than those who pour water directly into the basket. A second saucer beneath the basket is inexpensive insurance for wood floors and furniture.
Flexible baskets are usually the easiest to embroider, but they may lose shape when a heavy plant is inserted. A rigid nursery pot helps support the sides. For lightweight baskets, adding a flat waterproof tray at the bottom creates a more stable base without interfering with drainage.
Plant selection strongly affects the final appearance. Trailing pothos and philodendrons frame embroidered borders beautifully, but long vines can eventually hide a detailed pattern. Upright snake plants leave the basket visible, while compact peperomias work well with smaller tabletop projects. Planning the design around the plant’s growth habit prevents the embroidery from disappearing behind foliage after a few months.
Finally, handmade imperfections tend to improve these projects. Slightly uneven stitches echo the irregularities in natural basket fibers. A line that is not perfectly straight usually looks warm and intentional once the plant is added. The strongest embroidered basket planters do not resemble factory-made products; they look like useful objects that received time, imagination, and just enough colorful thread to become memorable.
Conclusion
An embroidered basket planter offers an approachable way to combine indoor gardening, textile art, and personalized home decor. Start with a sturdy woven basket, choose a design that respects the scale of the weave, and use uncomplicated stitches that remain visible beneath the foliage.
Most importantly, remember that the basket is decorative. Keep the plant in a properly draining inner pot, remove it when watering, and prevent moisture from collecting against the woven fibers. With those practical details handled, you can experiment freely with colors, flowers, lettering, geometric patterns, fringe, and seasonal motifs.
The finished planter will not merely hold a plant. It will frame it, personalize it, and give visitors something to admire before they politely ask whether you also embroidered the sofa.