Changing a shower head is one of those rare home projects that sounds plumbing-adjacent enough to feel intimidating, yet is usually simple enough to finish before your coffee gets cold. No wall demolition. No dramatic pipe music. No need to introduce yourself to the main water shutoff valve unless something has already gone very wrong.
Whether you want a cleaner spray, better water pressure, a handheld wand for rinsing kids and pets, or a dual shower head that makes your bathroom feel a little less “weekday survival station” and a little more “tiny spa with grout,” this guide walks you through the process step by step. You will learn how to change a fixed shower head, install a handheld shower head, and set up a dual shower head combo without leaks, scratched chrome, or unnecessary plumbing panic.
The good news: most standard shower heads in the United States connect to a common shower arm size, and many replacements are designed for quick DIY installation. The even better news: if you can turn something counterclockwise, clean threads, wrap plumber’s tape neatly, and resist the urge to overtighten like you are sealing a submarine hatch, you are already qualified for most of this job.
Before You Start: What Type of Shower Head Are You Installing?
Before grabbing a wrench, identify the kind of shower head you bought. The installation steps are similar, but the parts are not exactly the same.
Fixed Shower Head
A fixed shower head screws directly onto the shower arm coming out of the wall. It is the simplest option and usually the fastest to install. Fixed models can include rain shower heads, high-pressure shower heads, multi-spray heads, and low-flow WaterSense shower heads.
Handheld Shower Head
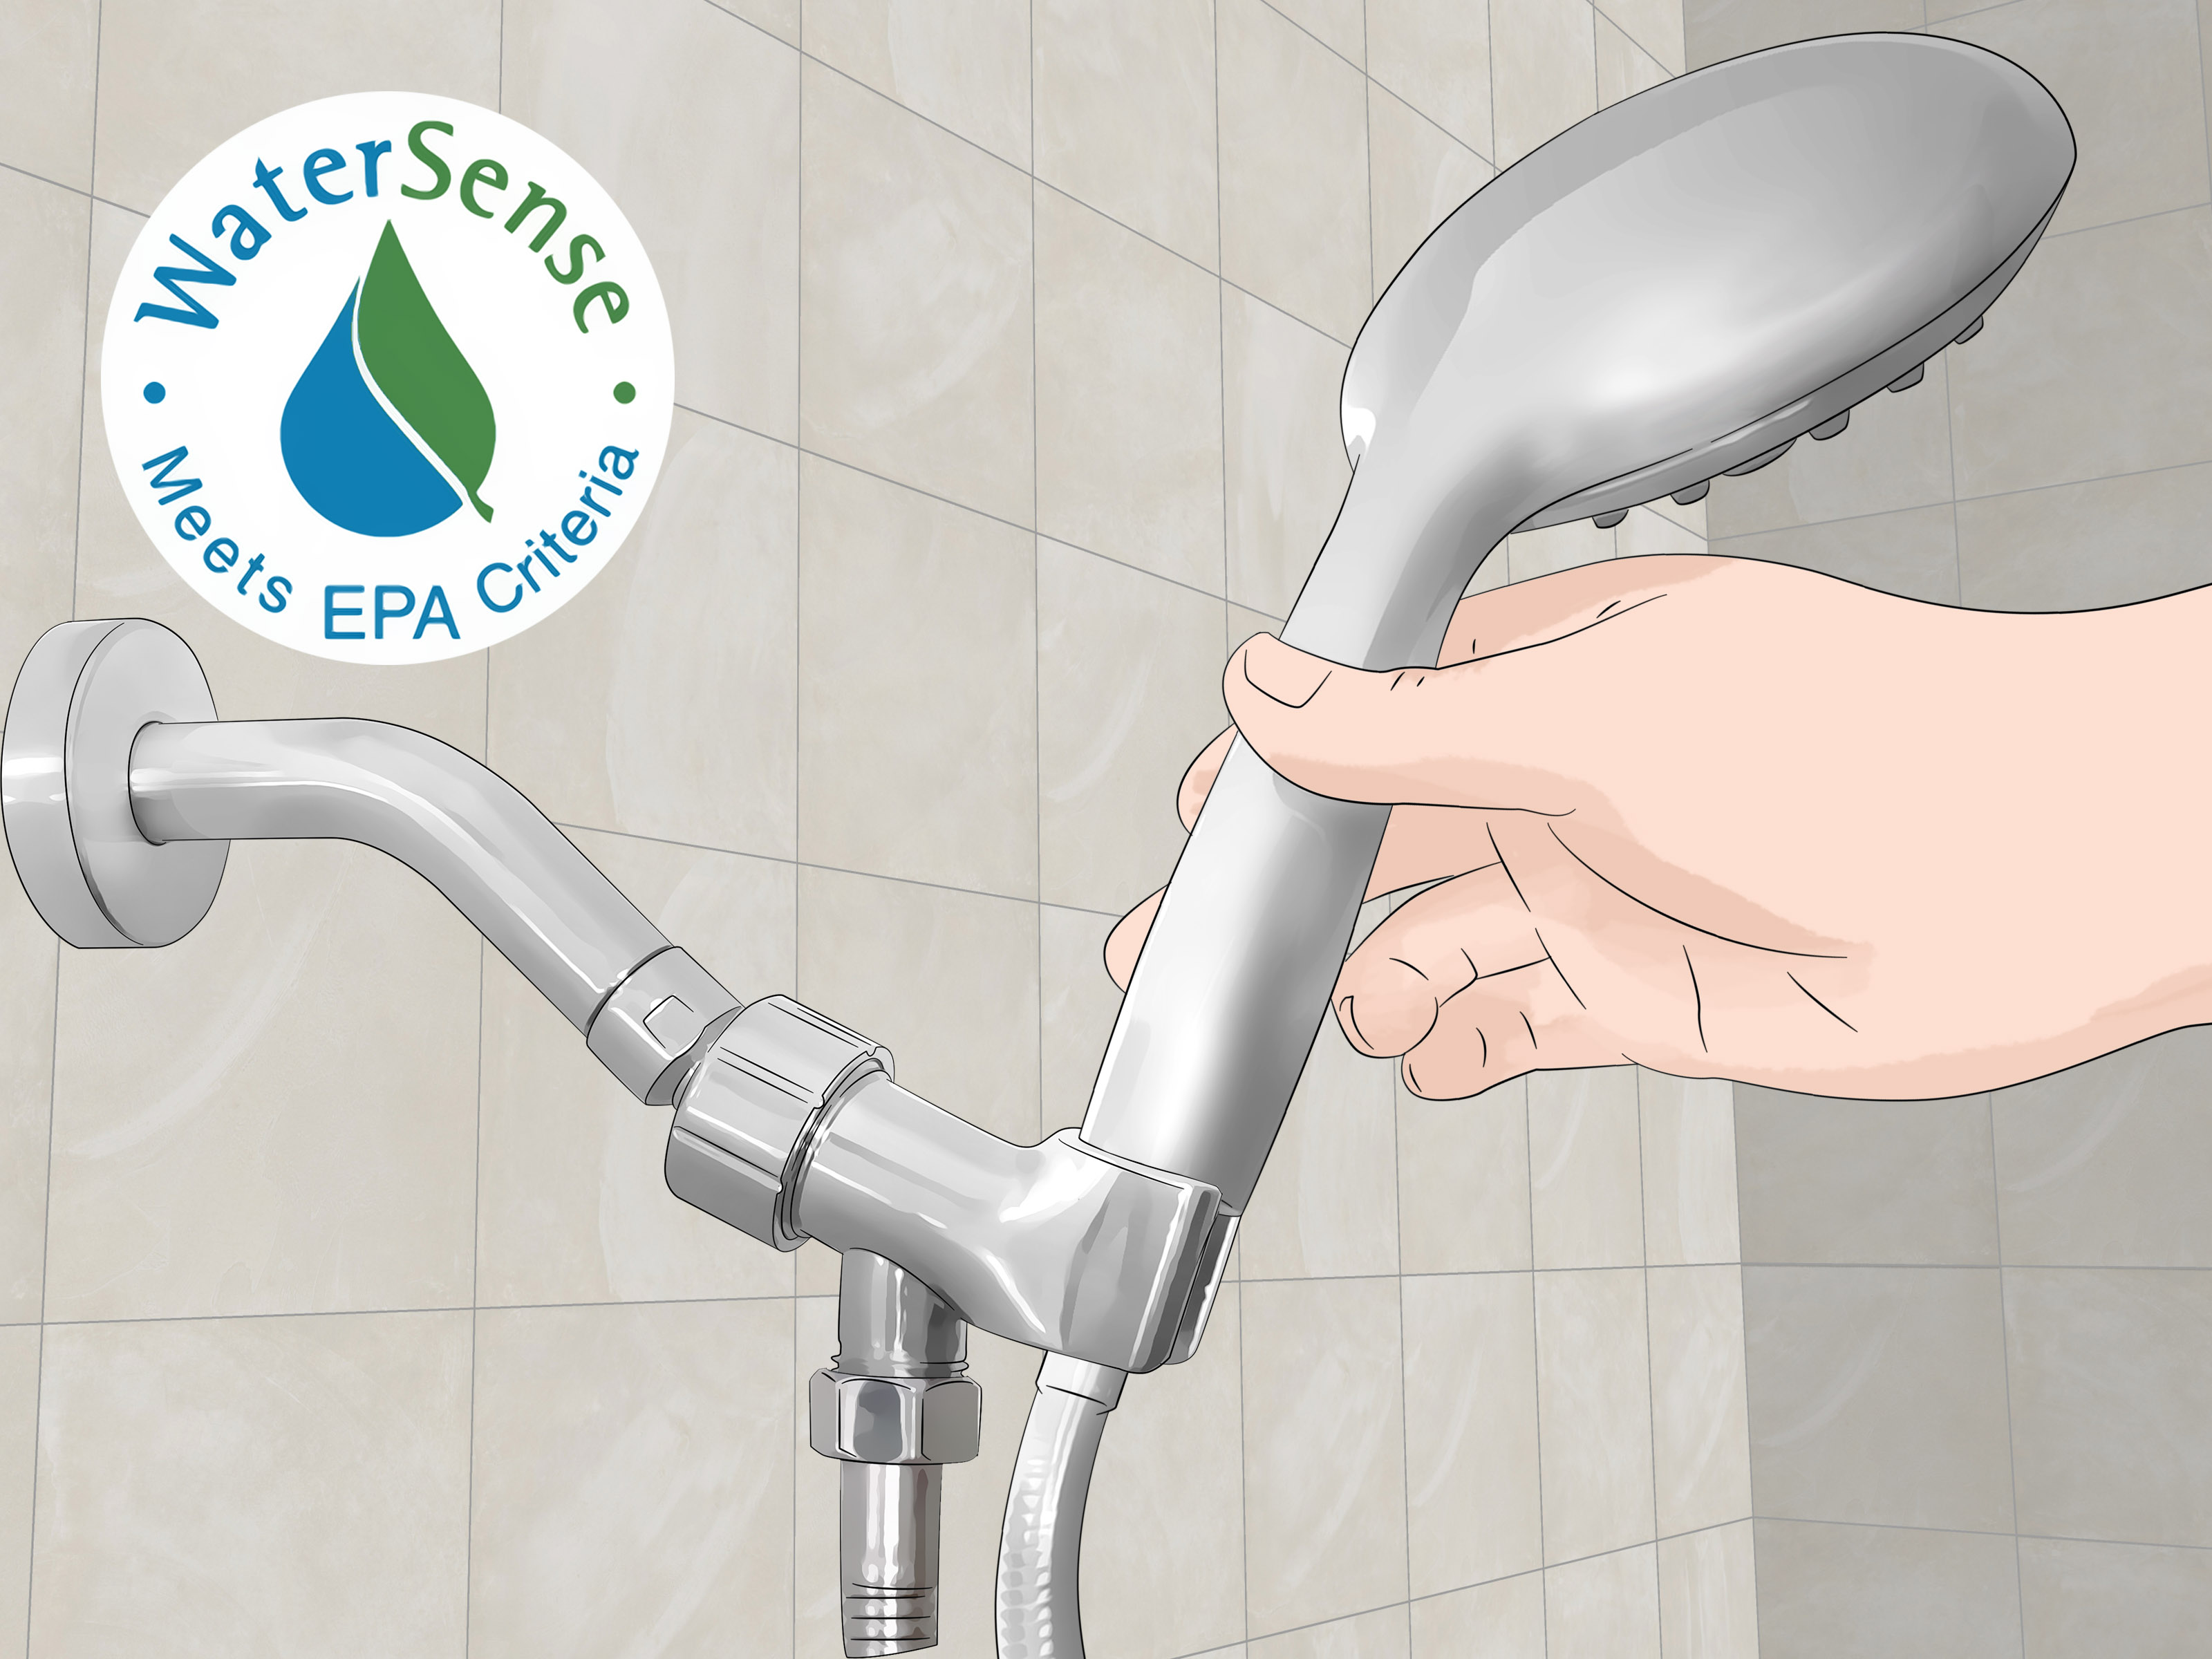
A handheld shower head includes a bracket, flexible hose, and detachable spray wand. The bracket connects to the shower arm, and the hose connects between the bracket and the wand. This style is especially useful for cleaning the shower, rinsing shampoo, bathing children, helping people with limited mobility, or washing a dog who has decided mud is a personality.
Dual Shower Head
A dual shower head combines a fixed shower head and handheld wand. Some models use a diverter to switch water between the fixed head, handheld head, or both at once. Dual shower heads are flexible and luxurious, but they have more connections, which means you should be extra careful with washers, thread alignment, and leak testing.
Tools and Materials You May Need
You probably do not need a full plumber’s toolbox. For most shower head replacement projects, gather these basics:
- New fixed, handheld, or dual shower head
- Adjustable wrench or slip-joint pliers
- Soft cloth, towel, or painter’s tape to protect finishes
- Plumber’s tape, also called PTFE tape or thread seal tape
- Old toothbrush or small brush
- Clean rag or paper towel
- White vinegar or mild descaler for mineral buildup
- Small bowl or cup for loose washers and parts
Many modern shower heads include rubber washers or gaskets. Those little rings may look unimpressive, but they are leak-prevention royalty. Do not throw them away with the packaging. That tiny washer is often the difference between “beautiful upgrade” and “why is the wall crying?”
Step 1: Turn Off the Shower and Protect the Drain
You usually do not need to shut off water to the entire house to replace a shower head. Simply make sure the shower valve is fully off. If your shower handle drips, leaks, or has a mind of its own, fix that issue separately before replacing the head.
Place a towel over the tub or shower drain. This protects the surface and prevents screws, washers, or tiny filter screens from disappearing into the plumbing underworld. If you are working in a fiberglass or acrylic shower, the towel also helps prevent dropped tools from leaving marks.
Step 2: Remove the Old Shower Head
Try removing the old shower head by hand first. Grip it near the connector nut and turn counterclockwise. If it moves easily, celebrate quietly. You have just entered the deluxe version of DIY plumbing.
If it will not budge, wrap the connector with a soft cloth to protect the finish. Then use an adjustable wrench or pliers to loosen it. Hold the shower arm steady with your other hand if possible. You want to turn the shower head, not twist the pipe inside the wall. If the shower arm starts moving, stop. A loose or damaged shower arm can lead to leaks behind the wall, and that is no longer a cute Saturday project.
For stubborn mineral buildup, apply a small amount of white vinegar around the connection and wait a few minutes. Hard water deposits can act like nature’s glue, except less charming and more crusty.
Step 3: Clean and Inspect the Shower Arm Threads
Once the old shower head is off, inspect the exposed threads on the shower arm. Remove old plumber’s tape, mineral deposits, rust flakes, or bits of old gasket. Use a rag, toothbrush, or mild descaler if needed.
The threads should look even and usable. A little discoloration is common, especially in older homes. However, if the shower arm is cracked, badly corroded, bent, or loose at the wall, do not force the installation. Replacing a shower arm is still manageable for some DIYers, but if the pipe connection inside the wall feels unstable, call a licensed plumber.
Step 4: Decide Whether to Use Plumber’s Tape
Plumber’s tape helps seal threaded connections, especially where metal threads meet. For a fixed shower head that screws directly onto the shower arm, wrapping the shower arm threads is usually a good idea. Use two to four wraps, moving clockwise around the threads so the tape tightens as you screw on the new head.
Do not cover the very opening of the pipe. Keep tape flat and smooth, not bunched like a sad little scarf. Press it into the threads with your fingers after wrapping.
Important: not every connection needs tape. Many handheld shower hoses seal with rubber washers inside the hose nuts. If a hose connection has a washer, the washernot the tapeis usually doing the sealing. Adding tape where it is not needed can sometimes prevent the washer from seating properly. When in doubt, follow the manufacturer’s instructions included with your shower head.
How to Install a Fixed Shower Head
A fixed shower head is the easiest style to replace. Once the shower arm is clean and taped, line up the new shower head connector with the threads.
Fixed Shower Head Installation Steps
- Check that the rubber washer or screen is seated inside the new shower head connector, if included.
- Thread the shower head onto the shower arm clockwise by hand.
- Make sure it turns smoothly. If it feels crooked or catches immediately, back it off and start again.
- Hand-tighten until snug.
- If the manufacturer allows tool tightening, use a protected wrench for a small additional turn.
- Turn on the shower and check for leaks at the connection.
The biggest mistake is overtightening. More muscle does not mean more waterproof. It often means cracked plastic, damaged threads, crushed washers, or a new personal relationship with regret. A snug connection is usually enough.
How to Install a Handheld Shower Head
A handheld shower head gives you more flexibility, but it adds two hose connections. That means washers matter even more.
Handheld Shower Head Installation Steps
- Attach the handheld shower bracket or mount to the shower arm. Turn clockwise by hand.
- Make sure any included washer or debris screen is inside the mount before tightening.
- Connect one end of the hose to the bracket or water outlet.
- Connect the other end of the hose to the handheld wand.
- Confirm washers are inside both hose ends.
- Hand-tighten both hose nuts. Use a wrench only if the instructions permit it.
- Place the wand in the holder and test the spray settings.
Many hoses have two different ends. One may be shaped to connect to the bracket, while the other is designed for the hand shower. If the hose seems awkward, do not force it. Check the instructions and look for markings, tapered shapes, or different nut designs.
How to Install a Dual Shower Head
A dual shower head installation is basically a fixed shower head and handheld shower head installation sharing the same shower arm. The key part is the diverter or combo mount, which directs water to the fixed head, handheld wand, or both.
Dual Shower Head Installation Steps
- Clean the shower arm threads and apply plumber’s tape if recommended.
- Attach the dual shower head base or diverter to the shower arm.
- Hand-tighten the base until secure and properly aligned.
- Attach the fixed shower head to the appropriate outlet.
- Insert washers into the hose ends.
- Connect the hose to the diverter or base.
- Connect the other end of the hose to the handheld wand.
- Place the handheld wand in its cradle.
- Turn on the shower and test each diverter setting.
Because dual shower heads have multiple connection points, check each one carefully. Run water through the fixed head only, handheld only, and both together if the model allows it. A leak may appear only under one setting.
Leak Testing: What to Look For
After installation, turn the shower on slowly. Watch the connection at the shower arm, the hose ends, the diverter, and the handheld wand. A few drops from the spray face after turning the shower off may simply be leftover water draining out. A steady drip at a threaded connection means something needs adjustment.
If It Leaks at the Shower Arm
Remove the shower head or diverter, clean the threads again, apply fresh plumber’s tape clockwise, and reinstall carefully. Make sure the connector is not cross-threaded.
If It Leaks at the Hose
Check for a missing, twisted, cracked, or poorly seated washer. Hose connections usually depend on washers more than tape. Replace damaged washers before tightening harder.
If Water Pressure Seems Low
Check the debris screen. Small particles can loosen during installation and block flow. Also confirm that the shower head’s spray setting is fully selected and not stuck between modes.
Choosing the Right Replacement Shower Head
Changing a shower head is also a chance to choose one that fits your household better. A fixed model is simple and clean-looking. A handheld shower head is practical for families, pets, accessibility, and cleaning. A dual shower head offers the most flexibility but may reduce pressure when both heads run at once, depending on the model and your home’s water pressure.
Look at flow rate, spray patterns, finish, hose length, material quality, and ease of cleaning. In the United States, many shower heads are sold with flow rates up to 2.5 gallons per minute, while WaterSense-labeled shower heads use no more than 2.0 gallons per minute and are tested for performance. A lower-flow shower head can help reduce water and energy use because less hot water needs to be heated.
If you live in an area with hard water, choose a shower head with easy-clean nozzles. Rubber spray tips can often be wiped with a finger to remove mineral deposits. If your current shower head looks like it has been dusted with powdered donuts, hard water is probably part of the story.
Common Mistakes to Avoid
Cross-Threading the Connection
If the shower head does not spin on smoothly by hand, stop and restart. Cross-threading damages the connector and can cause leaks. A properly aligned shower head should turn easily for the first few rotations.
Using Too Much Plumber’s Tape
Two to four wraps are usually enough for shower arm threads. Too much tape can bunch up, prevent proper seating, or create a bulky connection that feels tight before it is actually sealed.
Forgetting the Washers
Handheld and dual shower heads often rely on rubber washers. Missing washers cause leaks that no amount of dramatic wrenching will solve.
Overtightening Plastic Parts
Many modern shower heads include plastic components with chrome, brushed nickel, matte black, or bronze finishes. They may look like metal, but overtightening can crack them. Hand-tight plus a careful small turn is usually safer than going full superhero.
Ignoring a Loose Shower Arm
If the pipe coming out of the wall moves, squeaks, or turns when you remove the old head, pause the project. The connection inside the wall may need attention. Installing a heavier dual shower head on a loose arm can make the problem worse.
Maintenance Tips After Installation
Once your new shower head is installed, keep it working well with simple maintenance. Wipe the spray face regularly to prevent mineral buildup. If spray holes clog, remove the shower head and soak only the appropriate parts according to the finish and manufacturer’s care instructions. Vinegar can help dissolve limescale, but it may damage some finishes if used too long or used on sensitive coatings.
Check hose connections every few months on handheld and dual models. A loose hose can create a small leak that wastes water and leaves mineral stains. Also clean the screen or filter if your model has one, especially after plumbing work in the house.
When to Call a Plumber
Most shower head replacements are safe DIY projects, but not every situation deserves stubborn optimism. Call a plumber if the shower arm is badly corroded, the pipe moves inside the wall, water leaks behind the escutcheon plate, threads are stripped, or the shower valve itself is leaking. Also get professional help if you are installing a slide bar that requires drilling into tile and you are not comfortable locating studs, avoiding plumbing lines, or sealing penetrations properly.
Renters should check with the landlord or property manager before changing fixtures. Many shower heads are easy to swap back later, but lease rules can be surprisingly passionate about plumbing.
Real-World Experience: What I’ve Learned from Changing Shower Heads
After changing different types of shower headsfixed, handheld, and dualthe biggest lesson is that the job is not hard, but patience matters more than power. The shower head that leaks is not always the one that needed more tightening. Often, it needed the washer to sit flat, the threads to be cleaned better, or the connector to be started again because it was slightly crooked.
One common experience is removing an old shower head and discovering the shower arm threads covered in old tape, mineral crust, and mystery residue from a previous owner’s “close enough” era. Cleaning that connection feels like a small step, but it makes the new installation much easier. A toothbrush and rag can save you from leaks that would otherwise send you into a spiral of adding more tape, more torque, and more muttering.
Fixed shower heads are usually the smoothest upgrade. The best example is replacing a basic builder-grade head with a multi-spray model. The difference can feel dramatic, especially if the old head was partially clogged. The trick is not to judge the new shower head until you test all spray settings. Some settings are designed for coverage, some for rinsing, and some for “wake me up, I have become a towel-shaped person.”
Handheld shower heads are the most practical upgrade. The hose makes cleaning the shower walls easier, and it helps rinse shampoo without performing awkward neck yoga. However, hose washers are easy to overlook. A handheld shower installation that leaks at both ends usually does not need heroic wrench work. It needs the washers checked. Make sure they are present, flat, and not pinched.
Dual shower heads feel like the fanciest DIY reward, but they require the most careful testing. Because water can flow through different paths, you should test every diverter setting. I have seen a dual shower head look perfectly sealed when using the fixed head, then drip from the hose connection only when the handheld wand is selected. That is not a disaster. It is just the shower politely asking you to reseat the washer.
Another practical lesson: protect the finish before using tools. Chrome and matte black finishes scratch easily when gripped with bare pliers. A towel, cloth, or painter’s tape around the nut takes five seconds and prevents a brand-new fixture from looking like it lost a fight in a toolbox.
Finally, do not ignore comfort. A shower head can technically fit and still be wrong for your bathroom. A giant rain head may look beautiful but feel weak if your water pressure is modest. A short handheld hose may be annoying in a tall shower. A dual head may be wonderful for one person and too bulky for a tiny stall. The best shower head is not just the one that installs correctly. It is the one that makes daily use easier, cleaner, and more enjoyable.
Conclusion
Learning how to change a shower head is a small DIY skill with a surprisingly big payoff. A fixed shower head can refresh your bathroom in minutes. A handheld shower head adds flexibility for cleaning, bathing, and accessibility. A dual shower head gives you the best of both worlds, as long as you pay attention to washers, diverter connections, and leak testing.
The basic formula is simple: remove the old shower head, clean the shower arm threads, apply plumber’s tape where appropriate, install the new fixture by hand, avoid overtightening, and test carefully. Most leaks come from cross-threading, missing washers, old tape, or connections that are either too loose or too aggressively tightened.
A new shower head can improve spray quality, conserve water, update the look of your bathroom, and make your morning routine feel less like a plumbing compromise. Best of all, it is a DIY project that does not require tearing open walls, buying strange specialty tools, or pretending you understand every pipe in the house. Respect the threads, save the washers, and keep the wrench humble.
Note: Always follow the instructions included with your specific shower head. If the shower arm is loose, cracked, severely corroded, or leaking inside the wall, stop the installation and contact a licensed plumber.