Note: This publication-ready article synthesizes appliance-care guidance from U.S. government agencies, independent consumer organizations, appliance manufacturers, and established home-care publications, including ENERGY STAR, the U.S. Department of Energy, USDA, the U.S. Fire Administration, Consumer Reports, Whirlpool, Maytag, GE Appliances, LG, Samsung, Good Housekeeping, Better Homes & Gardens, and Bob Vila.
Your appliances work harder than some people on a Monday morning. The refrigerator runs around the clock, the dishwasher battles baked-on cheese, and the washing machine regularly confronts socks that have made questionable life choices. Yet most of these household workhorses receive attention only when they begin leaking, rattling, smelling strange, or flashing an error code that looks like a robot’s cry for help.
Regular appliance maintenance does not require an engineering degree, a garage full of tools, or an entire Saturday sacrificed to the gods of homeownership. A few small habits can reduce unnecessary strain, improve energy efficiency, prevent avoidable breakdowns, and help expensive equipment remain useful for years.
The following appliance maintenance tips cover refrigerators, dishwashers, washers, dryers, ovens, microwaves, air conditioners, and other commonly used machines. Always consult the owner’s manual before removing panels, disconnecting hoses, using cleaning products, or attempting repairs. When electricity, gas, refrigerant, or internal wiring is involved, call a qualified technician rather than auditioning for an emergency-room reality show.
Why Preventive Appliance Maintenance Matters
Dirt, lint, food residue, mineral deposits, blocked airflow, deteriorated seals, and overloaded motors force appliances to work harder than necessary. That additional workload can increase energy consumption, reduce cleaning or cooling performance, and accelerate wear on mechanical components.
Preventive appliance maintenance also gives you an opportunity to notice small warning signs before they become expensive failures. A loose washer hose is easier to replace before it floods the laundry room. A refrigerator gasket is cheaper than spoiled groceries and an overworked compressor. A clean dryer vent is not merely an efficiency upgrade; it is an important fire-safety measure.
14 Appliance Maintenance Tips for a Longer Service Life
1. Read the Owner’s Manual and Build a Simple Maintenance Schedule
The owner’s manual is not decorative packing material. It explains model-specific cleaning methods, filter locations, recommended products, maintenance intervals, troubleshooting steps, and safety precautions. Advice that works for one appliance may damage another, especially when acids, abrasive cleaners, steam, bleach, or high-temperature cleaning cycles are involved.
Create a recurring schedule in your phone or calendar. Monthly tasks might include cleaning washer gaskets and dishwasher filters. Quarterly tasks can include inspecting refrigerator seals and vacuuming beneath appliances. Annual jobs may include checking water hoses, cleaning dryer ductwork, and arranging professional HVAC service.
Keep the model number, serial number, purchase receipt, warranty information, and service history in one digital folder. Future you will be grateful when a replacement part is needed and the label containing the model number is hiding behind a 300-pound refrigerator.
2. Clean Refrigerator Coils Without Damaging Them
Refrigerator condenser coils release heat removed from the food compartment. Depending on the model, they may be located behind the refrigerator, beneath it, or inside an enclosed compartment that should not be opened by the owner. When accessible coils become coated with dust, pet hair, and kitchen debris, heat cannot dissipate as effectively.
Unplug the refrigerator, confirm the coil location in the manual, and use a soft coil brush or vacuum attachment. Avoid bending tubing or forcing tools into sealed areas. Homes with shedding pets, nearby construction, or unusually dusty conditions may require more frequent inspection than low-dust households.
Leave the manufacturer-recommended clearance around the refrigerator so heat can escape. Pushing the appliance tightly against the wall may hide an awkward gap, but it can also restrict ventilation and pinch the power cord or water line.
Refrigerator coil and ventilation guidance.
3. Protect Refrigerator Door Seals and Verify the Temperature
A damaged or dirty door gasket allows cold air to escape and warm, humid air to enter. This can create condensation, frost, temperature instability, and longer compressor run times. Clean gaskets with warm water and mild soap, dry them thoroughly, and inspect for cracks, hardened sections, loose corners, or visible gaps.
Try the paper test: close the door on a strip of paper and pull gently. Some resistance usually indicates that the seal is making contact. If the paper slides out easily in several locations, check whether the refrigerator is level and whether the gasket needs adjustment or replacement.
Use an appliance thermometer rather than trusting a control dial with mysterious numbers such as “3” and “colder.” The USDA recommends keeping the refrigerator at 40°F or below and the freezer at 0°F. Avoid repeatedly opening the doors while deciding what to eat; the refrigerator cannot cool efficiently while hosting a family conference.
Refrigerator temperature and gasket guidance.
4. Replace Filters and Keep Refrigerator Drains Clear
Refrigerator water and air filters should be replaced according to the manufacturer’s instructions, not according to how long you can tolerate the warning light. An old water filter may reduce dispenser flow and affect ice production or taste. Use a filter approved for the specific model, install it correctly, and flush it as directed.
Check beneath drawers for standing water or ice, which may indicate a blocked defrost drain. Do not stab frozen drain openings with knives, screwdrivers, or other objects capable of converting a minor clog into a punctured component. Follow the manual’s thawing procedure or arrange professional service.
Clean spills promptly, especially sugary liquids that can migrate into drawer tracks, vents, and seals. Remove glass shelves carefully and allow cold components to warm before washing them with warm water, since sudden temperature changes can cause cracking.
5. Clean the Dishwasher Filter and Spray Arms
Many modern dishwashers have a removable manual filter at the bottom of the tub. When that filter fills with food particles, labels, seeds, and fragments of whatever happened during taco night, water circulation and drainage can suffer.
Remove the lower rack, unlock the filter according to the manual, and rinse it under warm running water. Use a soft brush for stubborn residue. Avoid wire brushes and rough scouring pads, which may damage the filter. Depending on usage and the amount of food left on dishes, cleaning may be needed weekly or monthly.
Inspect the spray-arm holes for mineral buildup or trapped debris. Remove obstructions using a nonmetallic tool if the manufacturer permits it, and confirm that each arm can rotate without striking tall plates, utensils, or pan handles.
Dishwasher filter and maintenance guidance.
6. Load the Dishwasher Correctly and Use the Right Detergent
Overloading a dishwasher blocks spray patterns and encourages owners to rerun the cycle, creating unnecessary wear. Face heavily soiled surfaces toward the spray, keep lightweight items secure, and place utensils where they will not prevent the detergent dispenser from opening.
Scrape off bones, large food pieces, paper labels, and toothpicks. Unless the manufacturer says otherwise, there is usually no need to wash dishes completely before loading them. The machine would like to participate.
Use automatic dishwasher detergent in the amount recommended for your water conditions and machine. Regular hand-washing liquid can generate a foam party that escapes onto the floor. Excess detergent may leave residue, while too little can reduce cleaning performance. Refill rinse aid when appropriate, particularly in hard-water areas.
7. Stop Overloading the Washing Machine
A washer needs room to move clothing through water and detergent. Stuffing the drum until the door closes only after a wrestling match can strain suspension components, bearings, belts, and the drive system. It may also produce poorly cleaned laundry and severe imbalance during the spin cycle.
Distribute heavy items evenly, and avoid washing a single absorbent objectsuch as a large bath matwithout compatible items to balance the load. If the washer repeatedly bangs, walks, or shakes, confirm that it is level and that all shipping hardware was removed during installation.
Use high-efficiency detergent in an HE machine and measure it carefully. More detergent does not create more cleanliness. Excess suds can interfere with rinsing, trap residue, encourage odors, and make sensors behave as though they have been given confusing instructions.
Washer loading, detergent, and energy guidance.
8. Clean the Washer and Let It Dry Between Loads
Run the manufacturer’s tub-clean or clean-washer cycle at the recommended interval, often about once a month for frequently used machines. Use only an approved washer cleaner or another product specifically permitted in the manual. Vinegar is frequently promoted as a universal miracle liquid, but repeated acid exposure may harm certain rubber components.
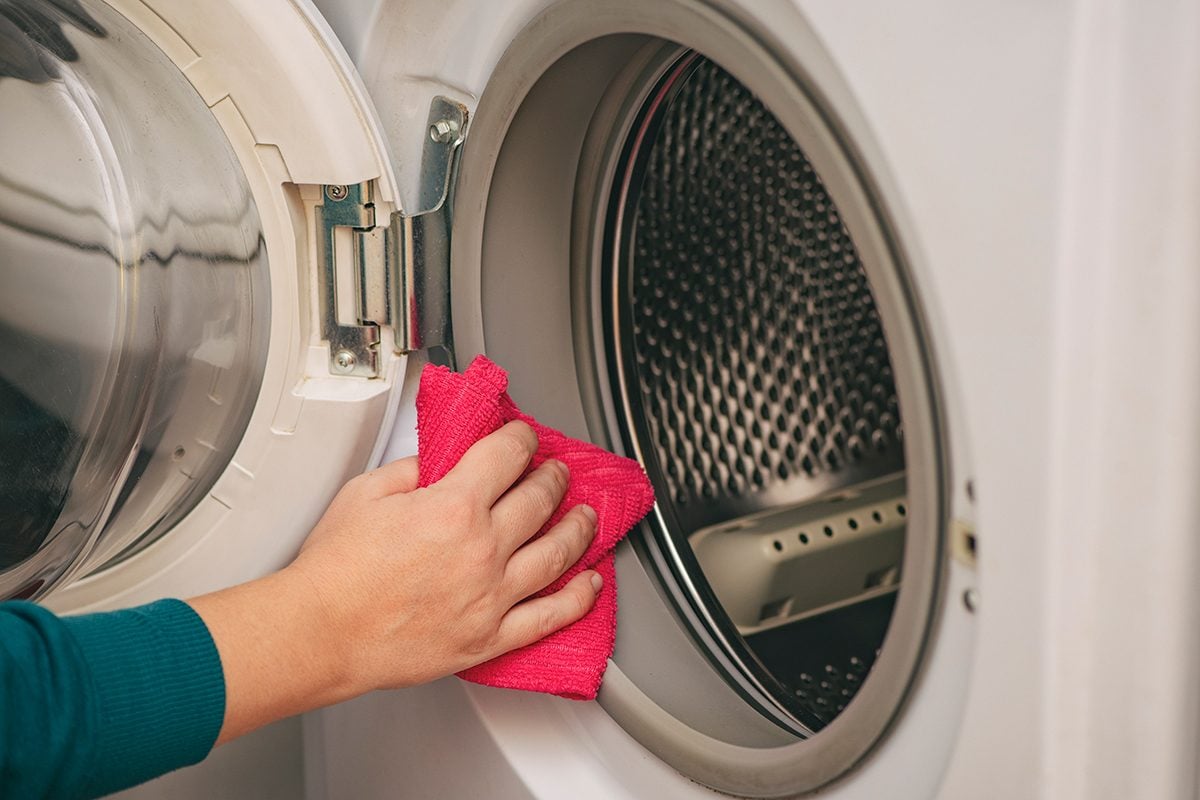
After the final load, wipe moisture and residue from the door glass, detergent dispenser, and rubber gasket. Check gasket folds for coins, hair, lint, and tiny socks attempting an escape. Leave the door or lid slightly open when safe to do so, allowing the interior to dry and reducing musty odors.
Inspect fill hoses for bulges, rust, cracking, abrasion, or seepage. Make sure connections remain secure without overtightening them. Consider manufacturer-approved braided hoses for additional durability, and know where the water shutoff valves are located.
Washer cleaning and hose-care guidance.
9. Clean the Dryer Lint Screen After Every Load
Remove lint from the screen before or after every drying cycle. A blocked screen restricts airflow, extends drying time, and makes the dryer work harder. If dryer sheets or fabric products leave an invisible film on the mesh, wash the screen according to the manufacturer’s instructions and let it dry completely before reinstalling it.
Vacuum lint from the screen housing periodically without dropping tools into the duct. Clean moisture-sensor bars with mild soap and a soft cloth if automatic cycles begin stopping too soon or running longer than expected. Avoid abrasive cleaners that might scratch or coat the sensors.
Never operate the dryer without its lint screen. Also, do not dry materials contaminated with gasoline, paint thinner, cooking oil, or other flammable substances unless the appliance manual explicitly provides a safe procedure.
Dryer lint-screen and sensor guidance.
10. Inspect the Entire Dryer Vent System
The lint screen catches plenty of lint, but not all of it. Material can accumulate inside the transition hose, wall duct, and exterior vent hood. Warning signs include longer drying times, unusually hot clothing, a hot laundry room, burning odors, or weak airflow outside.
Inspect and clean the vent system regularly, following the dryer’s manual and local fire-safety recommendations. The duct should be as short and straight as practical, with an exterior flap that opens freely. Replace crushed, torn, plastic, or foil-style transition ducts when they do not meet the appliance manufacturer’s installation requirements.
Stop using the dryer if you smell burning, see scorch marks, hear unusual scraping, or notice that the machine is overheating. This is not the moment to squeeze in one more load of towels.
Dryer vent and fire-safety guidance.
11. Clean Oven Spills Before They Become Geological Formations
Food spills and grease can smoke, smell, stain surfaces, and interfere with oven performance. Once the oven is cool, wipe fresh spills using the cleaning method approved for its interior finish. Avoid spraying cleaner directly onto heating elements, fans, sensors, igniters, or control openings.
Do not scrub, soak, or remove the oven-door gasket unless the manual specifically instructs you to do so. A damaged seal can allow heat to escape and may affect cooking results. Never line the oven floor with foil unless the manufacturer explicitly permits it; foil can trap heat, damage finishes, block airflow, or interfere with heating elements.
Use the self-cleaning cycle sparingly and exactly as directed. Remove excessive grease and large food deposits first, ventilate the room, and never force the door open while it is locked.
Oven cleaning and gasket guidance.
12. Keep Microwave Vents, Interior Surfaces, and Door Parts Clean
Cover food to prevent splatters, and wipe spills before they harden into microwave archaeology. Steam from a microwave-safe bowl of water can help soften residue, but avoid harsh chemicals, abrasive pads, and excessive water around control panels or vents.
Wash the turntable and support ring according to the manual. Keep intake and exhaust openings clear, especially on countertop models placed near walls or cabinets. Restricted airflow can contribute to overheating.
Close the door normally rather than slamming it. The latches and safety-interlock switches are essential components, not stress-relief toys. Stop using the appliance if the door is bent, will not close securely, arcs repeatedly, or has damaged seals. Internal microwave repairs should be handled by trained professionals because dangerous electrical charges may remain even after unplugging.
13. Maintain Air-Conditioning Filters, Coils, and Drainage
A dirty air filter reduces airflow and can make an air conditioner work harder. Inspect reusable or disposable filters at the interval recommended by the manufacturer, with more frequent checks during heavy use, dusty weather, renovations, or shedding-pet season.
Keep the outdoor condenser area free of leaves, weeds, and debris while maintaining the required clearance. Check that condensate drains are flowing and that window-unit seals remain intact. Bent fins, refrigerant problems, electrical issues, and deep internal cleaning should be handled by a qualified HVAC technician.
The U.S. Department of Energy reports that routinely replacing or cleaning air-conditioning filters can reduce cooling energy consumption by approximately 5% to 15%, depending on system conditions. That makes filter care one of the rare chores capable of benefiting comfort, equipment performance, and the utility bill at the same time.
Air-conditioner maintenance and efficiency guidance.
14. Respond Quickly to Leaks, Noises, Odors, and Error Codes
Appliances usually provide warnings before a complete failure. New grinding, buzzing, squealing, clicking, or knocking sounds deserve investigation. So do water beneath a machine, scorched plugs, repeated breaker trips, burning smells, excessive vibration, unstable temperatures, and steadily increasing cycle times.
Start with safe basics: stop the appliance, consult the manual, confirm that filters and vents are clean, and check for visible obstructions. Do not repeatedly reset breakers, bypass safety devices, dismantle sealed systems, or continue operating equipment that smells hot.
Major appliances should generally be connected as directed by the manufacturer, typically to an appropriate grounded wall outlet rather than an ordinary extension cord. Electrical alterations, gas repairs, refrigerant work, and internal wiring problems belong to licensed professionals.
A prompt service call can sometimes replace one worn component before it damages neighboring parts. Ignoring the problem because the machine “still technically works” is how a $60 issue grows ambition.
Electrical and appliance fire-safety guidance.
A Practical Appliance Maintenance Routine
The easiest system is one that does not depend on memory. Divide preventive appliance maintenance into manageable intervals:
- After every use: Clean the dryer lint screen, wipe major spills, remove wet laundry promptly, and check that appliance doors close completely.
- Weekly: Inspect the dishwasher filter when heavily used, wipe refrigerator handles and gaskets, and check beneath water-using appliances for moisture.
- Monthly: Run the washer-cleaning cycle, clean dispensers and gaskets, inspect air filters, and wash coated dryer lint screens.
- Quarterly: Deep-clean appliance interiors, vacuum accessible ventilation areas, inspect hoses, and verify refrigerator temperatures.
- Annually: Inspect dryer ductwork, clean accessible refrigerator coils when required, service HVAC equipment, and review appliance cords and connections.
These intervals are starting points, not universal rules. A household doing twelve loads of laundry each week will need a different schedule from a vacation cabin whose washer spends most of the year meditating.
Real-World Experiences That Make Appliance Care Easier
The following composite examples reflect common patterns reported by homeowners, cleaning professionals, manufacturers, and appliance technicians. They demonstrate why small maintenance habits are often more effective than waiting for a dramatic failure.
The Refrigerator That Seemed to Run Constantly
A homeowner notices that the refrigerator rarely becomes quiet. Milk remains cold, so the situation does not feel urgent. During a seasonal cleaning, the refrigerator is pulled forward and a thick layer of pet hair is discovered around the accessible condenser area. The door gasket is also sticky near the bottom, preventing consistent contact.
After the coils are cleaned according to the manual and the gasket is washed, the refrigerator cycles more normally. The lesson is not that every constantly running refrigerator has dirty coils; modern refrigerators may operate for long periods for several legitimate reasons. The useful experience is that airflow and seals are inexpensive items to check before assuming the compressor is dying.
The Dishwasher That “Stopped Cleaning”
Another household begins finding grit on glasses. The family responds by adding more detergent and selecting longer cycles, but the results worsen. Eventually, someone removes the lower rack and discovers a filter that appears to have been collecting evidence since the previous presidential administration.
Cleaning the filter and checking the spray arms restores much of the machine’s performance. The excessive detergent had also contributed to residue. This is a classic maintenance pattern: poor results lead people to use more chemicals or longer cycles when the real problem is restricted water movement.
The Washer With a Mysterious Musty Smell
A front-load washer begins making freshly washed towels smell less than fresh. The owner cleans the drum but ignores the gasket folds, detergent drawer, and damp door that remains tightly closed between loads. Residue continues accumulating in hidden areas.
A better routine includes using the correct detergent amount, running the approved cleaning cycle, wiping the gasket, removing laundry promptly, and allowing safe ventilation between uses. The improvement comes from changing several small habits rather than launching one heroic cleaning campaign every two years.
The Dryer That Needed Two Cycles
Clothing that once dried in 45 minutes gradually requires 90. Because the dryer still produces heat, the owner assumes it is simply getting old. Inspection reveals a clean lint screen but restricted ductwork and an exterior flap that barely opens.
Once the vent is professionally cleaned and the damaged transition duct is corrected, drying performance improves. More importantly, an airflow and fire hazard is removed. Longer drying time is not merely inconvenient; it is a useful diagnostic clue that should not be ignored.
The Repair That Started With a Photograph
One of the most effective maintenance tricks is surprisingly low-tech: take photographs. Before disconnecting a filter, hose, shelf, spray arm, or removable panel authorized by the manual, photograph its original position. Store pictures of model labels, replacement-part numbers, error messages, and developing leaks.
These records make reassembly easier, help technicians understand intermittent problems, and prevent the familiar home-repair moment when three screws remain on the counter and everyone agrees they are “probably optional.”
The Most Valuable Experience: Knowing When to Stop
Successful appliance care does not mean repairing everything yourself. Cleaning a filter, leveling a washer, or replacing an owner-serviceable component may be reasonable. Opening a sealed refrigeration system, working on a gas valve, bypassing an interlock, or diagnosing energized high-voltage components is not routine maintenance.
The best long-term habit is recognizing the boundary between safe upkeep and specialized repair. Turning off the appliance early, documenting the symptoms, and calling a qualified professional can protect the machine, the home, and the person holding the screwdriver.