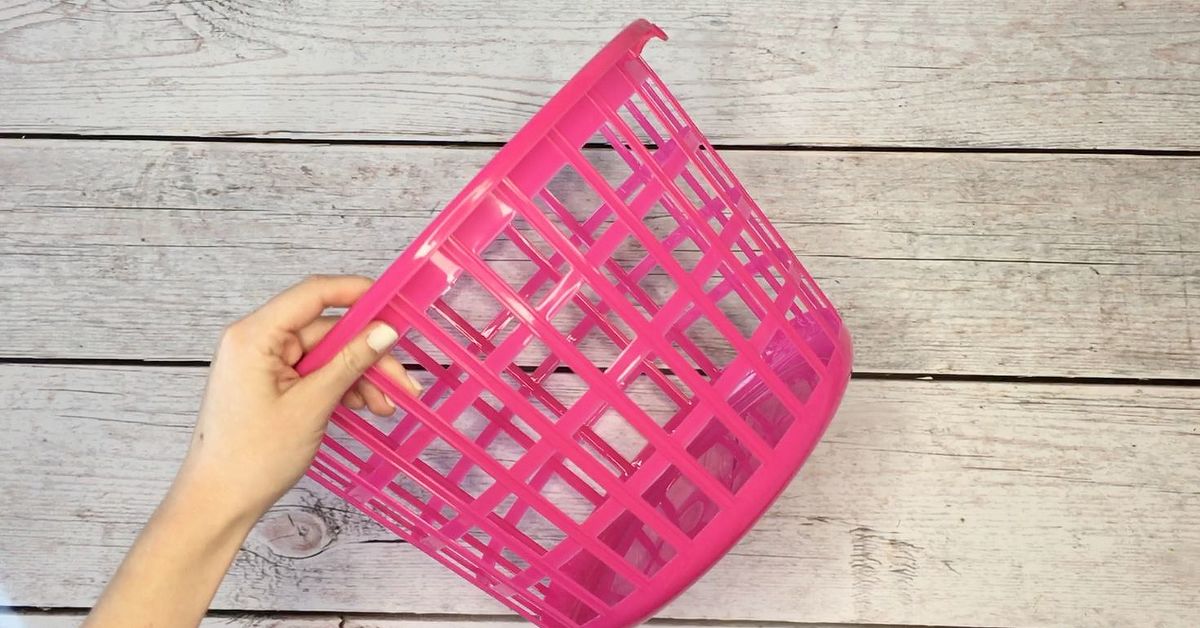
A cheap plastic basket can become a surprisingly sturdy wreath form, a seasonal door hanger, or the beginning of a craft project that looks far more expensive than its receipt suggests.
Traditional wreath forms are useful, but they can also be a little predictable. Round wire frame? Lovely. Grapevine base? Classic. Foam ring? Dependable, assuming you do not accidentally decorate your fingers with hot glue before decorating the wreath.
A dollar store basket offers something different: shape, structure, texture, and enough plastic latticework to hold floral wire, zip ties, ribbon, faux greenery, and almost any decorative idea your imagination has been storing in the craft aisle. With a few strategic cuts, an inexpensive basket can become an oversized oval wreath form, a half-wreath base, a crescent swag, or a seasonal front-door statement.
This project uses familiar wreath-making techniques: prepared faux stems, floral wire, wire cutters, hot glue for lightweight accents, and a layered arrangement that starts with greenery before adding flowers and focal pieces.
Why Turn a Dollar Store Basket Into a Wreath Form?
The beauty of this DIY basket wreath form is not just the price. It is the flexibility. A plastic basket already has an open design, which means you can thread wire through it instead of depending entirely on glue. That matters when you are attaching heavier items such as bundled faux florals, wooden signs, ornaments, ribbon bows, berry sprays, or tiny decorative pumpkins that somehow multiply in every seasonal decor bin.
Unlike a flat wire wreath frame, a basket form has dimension. It naturally pushes greenery forward, gives ribbons more volume, and makes your finished piece look fuller from the sidewalk. Even a modest amount of faux foliage can look generous when it is built over a deep, curved basket structure.
Another advantage is versatility. One basket can become a full oval wreath, while half of a basket can become an asymmetrical wreath form. That makes this project especially useful for people who prefer modern front-door decor, rustic farmhouse arrangements, seasonal swags, or wreaths that are a little less “perfect circle” and a little more “I made this on purpose.”
Supplies for a DIY Dollar Store Basket Wreath Form
- One flexible plastic laundry basket or decorative plastic basket
- Heavy-duty scissors, pruning shears, or wire cutters
- Permanent marker or painter’s tape for marking cut lines
- Zip ties, floral wire, or twist ties
- Hot glue gun and glue sticks
- Faux greenery, floral stems, berry picks, leaves, or garland
- Ribbon, burlap, jute rope, or decorative mesh
- Optional embellishments: wooden cutouts, ornaments, mini signs, faux fruit, pinecones, or seasonal figurines
- A wreath hanger, over-the-door hook, or outdoor-rated removable hook
For outdoor doors, choose hanging hardware that is appropriate for the surface and follow the manufacturer’s weight and installation instructions. Outdoor removable hooks are designed for certain smooth outdoor surfaces and can be used for seasonal decor when applied correctly.
Choose the Right Basket Before You Start Cutting
Not every dollar store basket is destined for wreath greatness. The best candidates are lightweight plastic baskets with a flexible lattice pattern, a sturdy top rim, and open spaces large enough to thread floral wire through. Oval laundry baskets work especially well because their shape already resembles an oversized wreath form.
Look for These Features
- A thick plastic rim that will not bend too easily
- Open lattice sides for wiring greenery and ribbon
- A shape that is round, oval, or gently curved
- Plastic that bends slightly instead of cracking
- A size that fits your door without swallowing the entire entryway
Avoid These Basket Problems
Skip baskets that feel brittle, cracked, heavily warped, or made from stiff plastic that may snap when cut. Avoid baskets with sharp broken edges, flimsy handles, or solid sides with no openings for wire. A wreath should greet guests, not threaten them with a surprise plastic splinter.
If your basket is bright neon green, purple, or “mystery clearance-bin orange,” do not panic. Most of it will disappear beneath greenery, ribbon, or decorative mesh. You can also wrap exposed areas with jute rope, burlap strips, floral tape, ribbon, or fabric scraps.
How to Turn a Dollar Store Basket Into a Wreath Form
Step 1: Clean the Basket and Remove Extras
Start by wiping the basket clean and removing price stickers, loose labels, and any removable handles. If the basket has handles that are firmly molded into the plastic, keep them. They may become built-in hanging loops or convenient anchor points for ribbon.
Set the basket on a flat surface and decide whether you want a full wreath form or a half-wreath design. A full wreath gives you an oversized oval shape. A half basket creates a dramatic crescent or swag form that works beautifully with asymmetrical greenery.
Step 2: Mark Your Cut Line
For a half-wreath form, use a marker or painter’s tape to draw a line from one side of the basket rim, down through the base, and up to the opposite side. The goal is to divide the basket into two matching curved halves.
For a full wreath form, cut the basket into two curved halves and use both pieces. Once the two halves are flipped and secured together, they form a large oval wreath base with plenty of open spaces for attaching decorations.
Step 3: Cut Slowly and Keep the Shape Even
Use heavy-duty scissors or cutting shears to make the first opening near the rim. Continue cutting through the basket walls and base along your marked line. Work slowly. Rushing is how a peaceful craft afternoon turns into a plastic confetti event.
Trim away any jagged pieces. If an edge feels sharp, cover it later with ribbon, jute, greenery, or decorative mesh. You do not need a perfectly smooth factory finish because the basket will become the hidden skeleton of the wreath.
Step 4: Build the Full Oval Form
Place the two basket halves so their curved rims form a large oval. Overlap the ends slightly, then secure each connection point with zip ties or floral wire. Use at least two ties at each joint: one near the outer rim and one closer to the inner edge.
Pull the ties tight, trim the excess, and flip the form over to check for wobbling. Your goal is a sturdy structure that stays flat against the door. If it flexes too much, add another zip tie or wrap floral wire around the joint several times.
Step 5: Create a Hanger Before Decorating
Before adding florals, make a hanging loop. Thread floral wire through the top lattice openings, twist it into a secure loop, and cover the wire later with greenery or ribbon. You can also use the original basket handle if it is strong enough and placed at the top center.
This step is easy to forget until the wreath is fully decorated, heavy, fabulous, and suddenly impossible to hang without performing a small engineering project on your front porch.
How to Decorate Your Basket Wreath Form
Start With Greenery
Attach faux greenery first. Use individual stems, garland pieces, eucalyptus sprays, fern leaves, magnolia leaves, or seasonal branches. Point the stems in the same direction, overlapping them slightly so the attachment points are hidden.
For a full wreath, work around the form in one continuous direction. For an asymmetrical wreath, concentrate greenery along the lower left and upper right sections, leaving some basket structure visible for a modern look.
Secure thick stems with floral wire or zip ties. Use hot glue only for lightweight leaves and smaller accents. Hot glue is helpful, but it should not be expected to carry the emotional weight of an entire wreath.
Add Filler and Texture
Once the greenery is in place, add filler pieces. This can include berry sprays, faux grass, small flowers, seed pods, pinecones, mini pumpkins, eucalyptus picks, dried-looking leaves, or lightweight ornaments.
Mix textures for a more professional result. Pair soft leaves with spiky grass, rounded berries with long branches, or smooth ribbon with rough jute. The contrast keeps the design from looking flat.
Create One Main Focal Point
Choose one area for the largest decorative cluster. This is usually placed at the bottom, lower left, lower right, or side of an asymmetrical wreath. Use larger flowers, a bow, a wooden sign, a cluster of pumpkins, or a bunch of faux lemons.
Do not place a large focal piece in every section. A wreath is not a scavenger hunt. Give the eye one place to land, then let the surrounding textures support it.
Finish With Ribbon
A ribbon bow can soften plastic edges, cover wire joints, and make the entire wreath feel intentional. Wired ribbon works best because you can shape the loops and tails. Burlap adds rustic texture, while velvet creates a more polished seasonal look.
Attach the bow with floral wire whenever possible. That way, you can remove it later and reuse the same basket wreath form for another season.
Three Easy Basket Wreath Design Ideas
1. Spring Garden Basket Wreath
Wrap the basket form with faux eucalyptus and soft greenery. Add pastel tulips, daisies, lavender picks, and a pale yellow bow. Tuck in a tiny wooden “Hello Spring” sign or a small bird’s nest. Keep the flowers clustered rather than spreading them evenly around the whole form.
2. Summer Lemon and Greenery Wreath
Use faux lemon stems, olive leaves, boxwood, and a blue-and-white striped ribbon. Add a small wooden spoon, a mini cutting-board sign, or a simple “Fresh Squeezed” tag. The bright yellow accents make the project feel cheerful without requiring an entire citrus orchard on the door.
3. Cozy Fall Basket Wreath
Build a base with brown leaves, wheat stems, faux eucalyptus, and orange berry picks. Add mini pumpkins, acorns, pinecones, and rust-colored ribbon. Leave a little basket texture visible to keep the design from becoming too heavy or overly crowded.
Can You Use Real Flowers?
Yes, but real flowers turn this project into more of a temporary arrangement than a reusable wreath. For fresh blooms, line a basket section with kraft paper or plastic, place damp floral foam inside a sealed bag or liner, and arrange stems into the foam. This helps contain moisture and protects the basket and door surface.
For the longest-lasting door decor, faux florals are usually easier. They do not wilt, drip, attract curious insects, or require you to explain to neighbors why you are watering your front door.
Common DIY Basket Wreath Mistakes to Avoid
Using Too Much Hot Glue
Glue is useful for finishing touches, but heavy floral clusters need wire or zip ties. A hot glue bond may loosen in heat, humidity, or cold weather. Use wire for structure and glue for details.
Skipping the Layout Stage
Lay everything on the wreath before attaching it. Move florals, leaves, bows, and signs around until the arrangement looks balanced. It is much easier to change your mind before the glue gun turns every decision into a permanent life choice.
Making the Wreath Too Heavy
Plastic basket forms are lightweight, which is wonderful until the decorations become too heavy. Avoid loading the wreath with ceramic pieces, large metal signs, thick wood blocks, or anything that makes your door hanger look like it needs its own insurance policy.
Ignoring Door Clearance
Before hanging your finished wreath, test whether your door opens freely. Thick basket wreaths may bump into storm doors, railings, or narrow entryways. A flatter design may work better for doors with limited clearance.
How to Store and Reuse Your DIY Wreath Form
The best part of a basket wreath form is that you can reuse it. Make the base once, then change the bow, florals, and seasonal accents throughout the year. Use floral wire or removable zip ties for the largest pieces so decorations can be switched without destroying the entire design.
Before storage, remove dust, let the wreath dry completely, and avoid squeezing it into a container that bends the decorations. Structured wreath boxes or roomy bags help protect the shape and keep embellishments from flattening between seasons.
Conclusion: A Basket Is More Than a Basket
A dollar store basket may begin life holding laundry, toys, random pantry snacks, or that mysterious pile of items nobody wants to put away. With a few cuts and a little creativity, it can become the foundation for a custom wreath that looks layered, seasonal, and genuinely personal.
The secret is simple: use the basket as structure, not decoration. Let the open lattice hold your wire. Let the curved rim create shape. Let greenery hide the plastic. Then add enough ribbon, texture, and personality to make your front door feel welcoming without making your budget quietly leave the room.
Practical Experience Notes: What This DIY Teaches You at the Craft Table
The first lesson of a DIY dollar store basket wreath form is that shopping is part of the project. Two baskets that look nearly identical on the shelf can behave very differently once you start cutting. One may bend smoothly and cooperate like it has been waiting for its wreath destiny. Another may crack dramatically, launch a tiny plastic shard across the table, and remind you that crafting sometimes includes a light amount of suspense.
It helps to gently test the basket before buying it. Press the rim, flex the sides, and look at the lattice pattern. A basket with open spaces and a rounded upper rim gives you more places to attach wire. A basket with very narrow openings can still work, but it may turn every floral stem into a miniature threading challenge.
Another useful lesson is that the base does not need to look beautiful at first. In fact, it may look a little strange after cutting. That is normal. A half-cut basket can resemble a futuristic garden helmet before it is wrapped in greenery. Trust the process. Once the form is covered with leaves, ribbon, and florals, the plastic structure becomes almost invisible.
Most crafters also discover that wreaths look better when they are not perfectly symmetrical. It is tempting to place one flower on the left, one flower on the right, one berry pick on the left, and another berry pick on the right until the project becomes a decorative mirror image. But asymmetrical clusters usually create more movement and interest. A large floral arrangement at the lower corner with a trailing branch on the opposite side often looks more natural than a wreath with every inch filled equally.
Budget is another practical lesson. The basket itself may cost very little, but the decorative extras can multiply quickly. Faux flowers, ribbon, berry picks, wooden signs, and miniature seasonal objects are tiny financial ninjas. Set a simple color palette before shopping. For example, choose greenery, cream flowers, and one accent color. Limiting the palette makes the wreath look more polished and keeps the shopping cart from becoming an emotional support craft supply bin.
Working in layers also makes the process easier. Start with greenery. Add filler. Add focal flowers or decorations. Finish with ribbon. Trying to attach everything at once usually creates visual chaos and a work surface that looks like a seasonal aisle exploded.
Hanging the wreath is another moment worth planning. Test the hanging loop before you decorate. Hold the empty form up against the door and make sure it hangs straight. A heavy floral cluster can pull the wreath sideways, so you may need to shift the hanger slightly to keep the finished piece balanced.
Finally, this project teaches the joy of making something reusable. Once you have a solid basket wreath form, you can refresh it for spring, summer, fall, Halloween, Thanksgiving, winter, Christmas, Valentine’s Day, or any occasion that deserves a bow and a few strategically placed leaves. The original basket may be humble, but its second career can be surprisingly stylish.
Note: Dollar store inventory, basket shapes, and plastic thickness vary by location. Test-fit the basket form, greenery, and hanging method before permanently gluing decorations in place.